
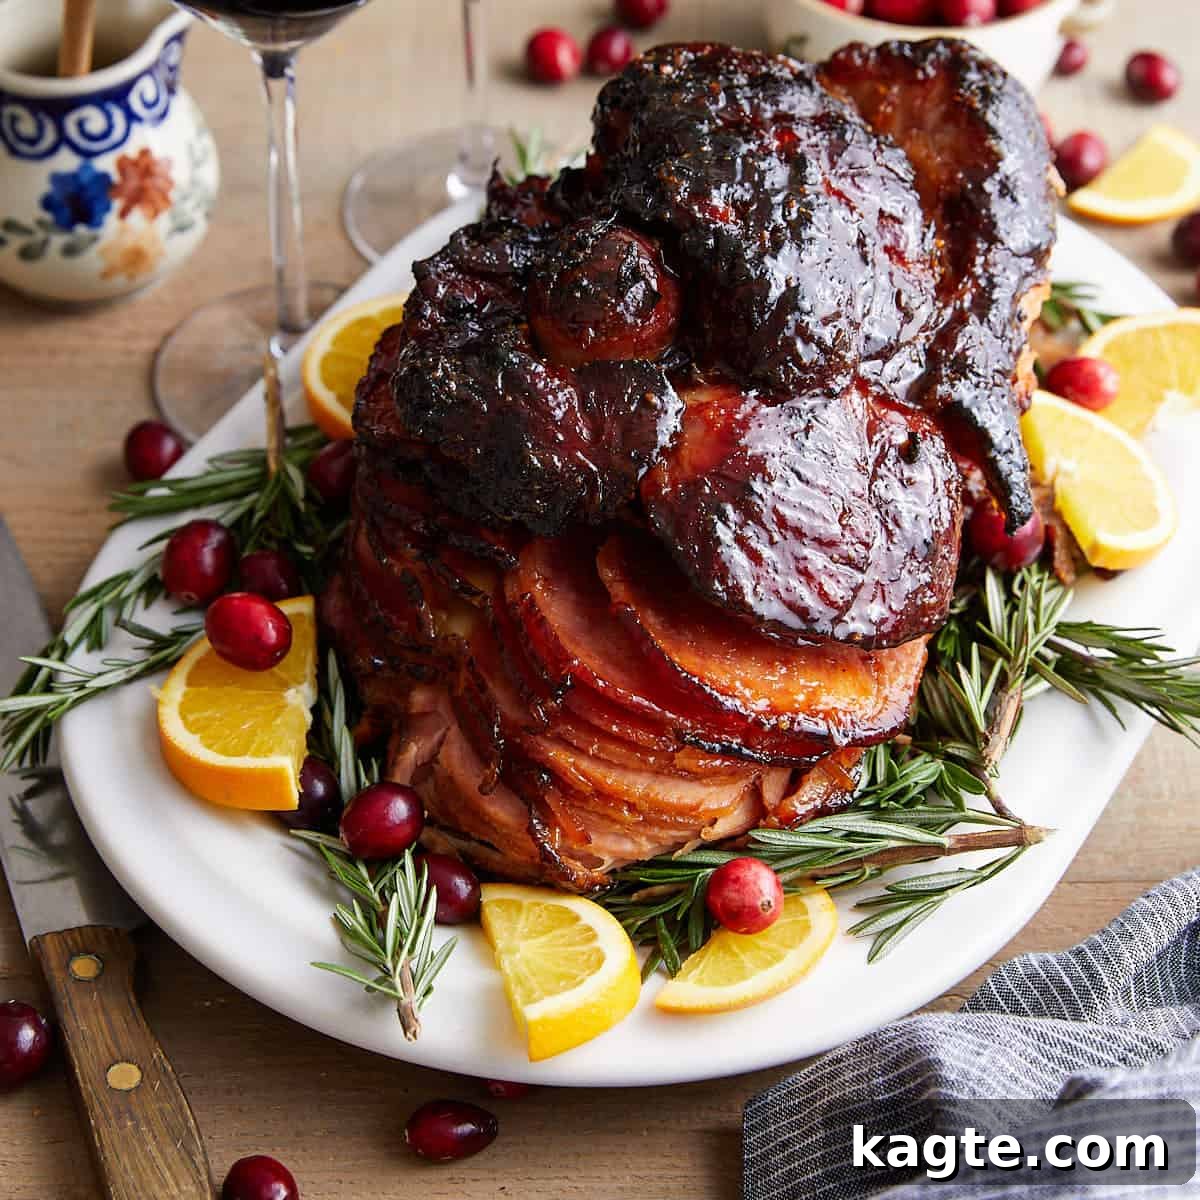
Welcome to the ultimate guide on how to cook a spiral ham perfectly every single time! Whether you’re preparing for a festive holiday feast like Easter, Thanksgiving, or Christmas, or simply looking for an effortless and delicious meal any time of the year, a spiral-sliced ham is a fantastic choice. This comprehensive post will walk you through all the essential steps, from selecting the right ham to glazing and serving it, ensuring a moist, flavorful, and unforgettable centerpiece for your table. Since most spiral hams are already pre-cooked, our primary goal is to heat it thoroughly without drying it out, while also infusing it with an irresistible glaze.
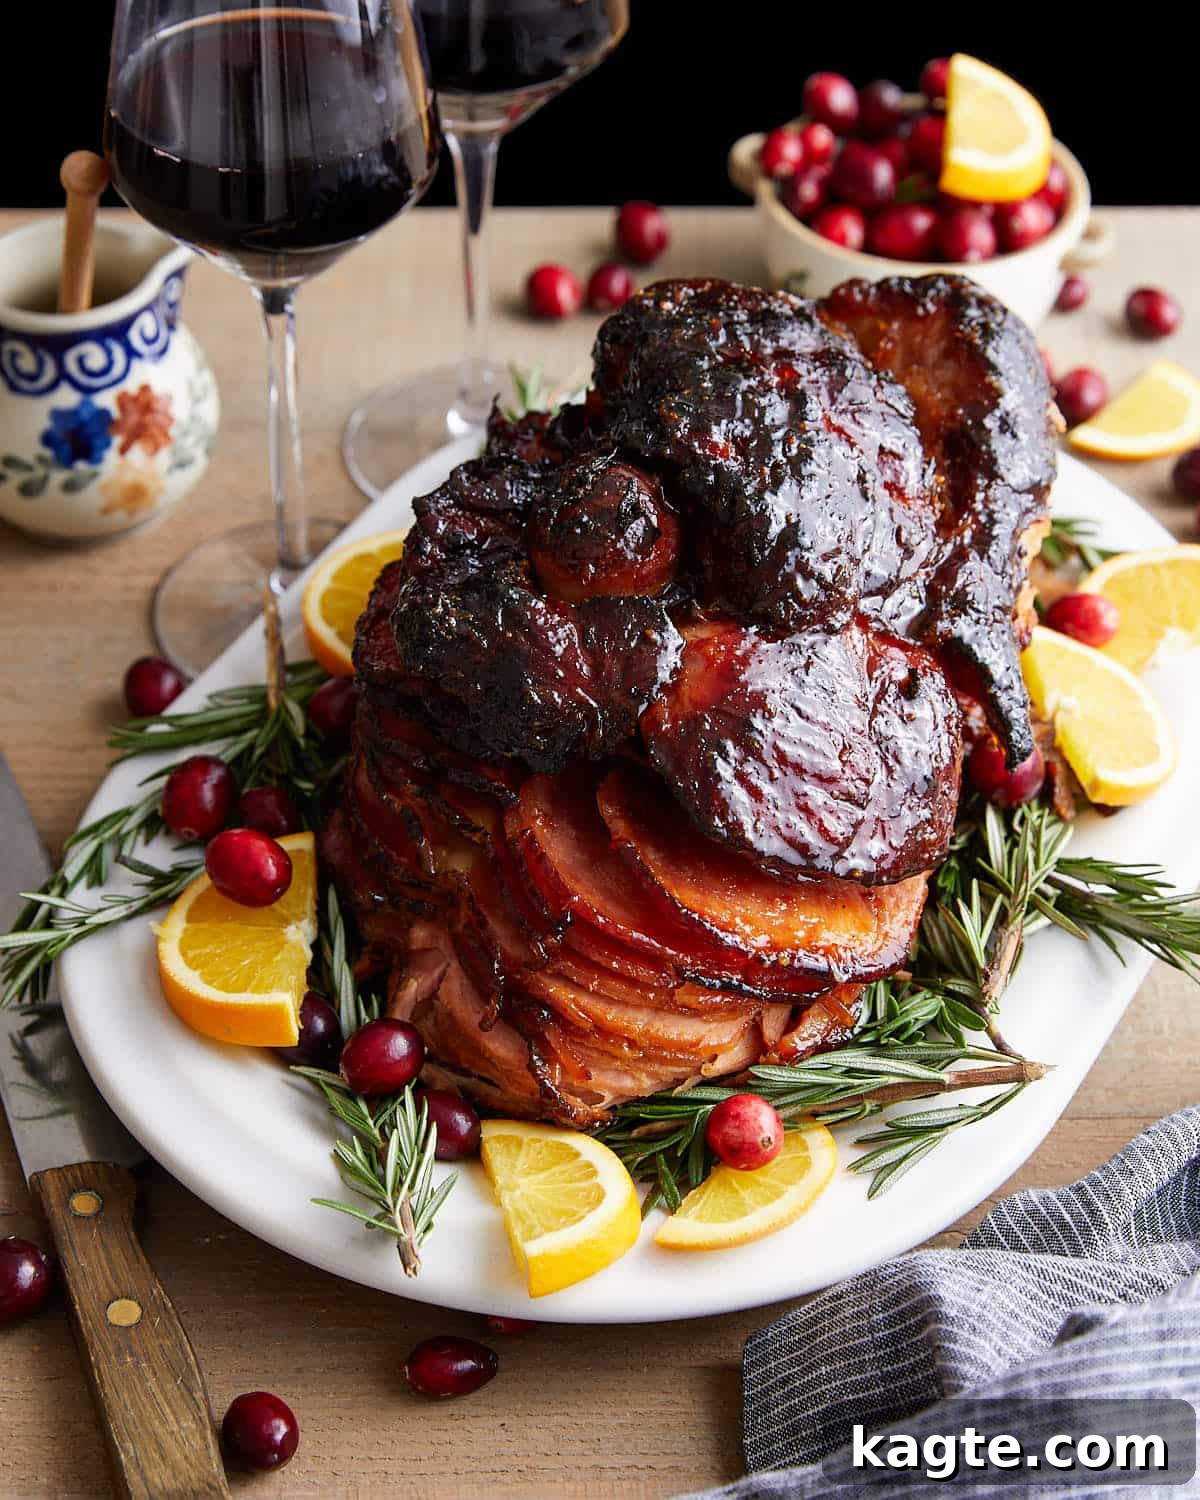
Spiral sliced ham isn’t just for holidays; its convenience and impressive presentation make it a popular option for Sunday dinners, potlucks, and special gatherings year-round. Pair it with classic sides like Fresh Green Bean Casserole with Bacon for a complete and satisfying meal.
Table of Contents
- Why This Recipe Shines
- Understanding Your Ingredients
- How Much Ham to Serve Per Person?
- The Best Way to Cook a Spiral Ham in the Oven
- Carving Your Spiral Ham
- Perfect Pairings: Recipe Serving Suggestions
- Pro Tips and Creative Variations
- How To Cook a Spiral Ham in the Slow Cooker
- How To Cook a Spiral Ham in a Roaster Oven
- Frequently Asked Questions
- More Delicious Main Dish Recipes
- Printable Recipe Card
Why This Recipe Shines
Cooking a spiral ham might seem daunting, but it’s remarkably straightforward, especially with this foolproof method. Here’s why you’ll love this recipe and the techniques you’re about to learn:
- Effortless Preparation: The beauty of a spiral-sliced ham lies in its convenience. It comes pre-sliced and fully cooked, significantly cutting down on prep time. All you need to do is gently heat it to the right temperature and apply a delicious glaze, making it perfect for busy hosts or anyone seeking a stress-free main course.
- Customizable Glaze Options: This recipe offers flexibility to suit your taste. You can create a rich, homemade glaze from scratch, such as my recommended Homemade Honey Glaze, or opt for the convenience of a store-bought packet often included with the ham. For a simpler approach, you can even enjoy the ham without any glaze, letting its natural flavors shine.
- Ideal for Feeding a Crowd: Spiral hams are naturally impressive and serve a large number of people with minimal effort. This makes them an incredibly popular and practical choice for major holidays and any event where you need to feed many guests without spending hours in the kitchen.
- Consistently Moist Results: Our techniques focus on retaining moisture, ensuring your ham is tender and juicy, never dry or overcooked. You’ll learn the secrets to achieving that perfect balance of crispy, caramelized exterior and succulent interior.
Understanding Your Ingredients
The star of this recipe is, of course, the ham. Knowing what to look for will set you up for success.
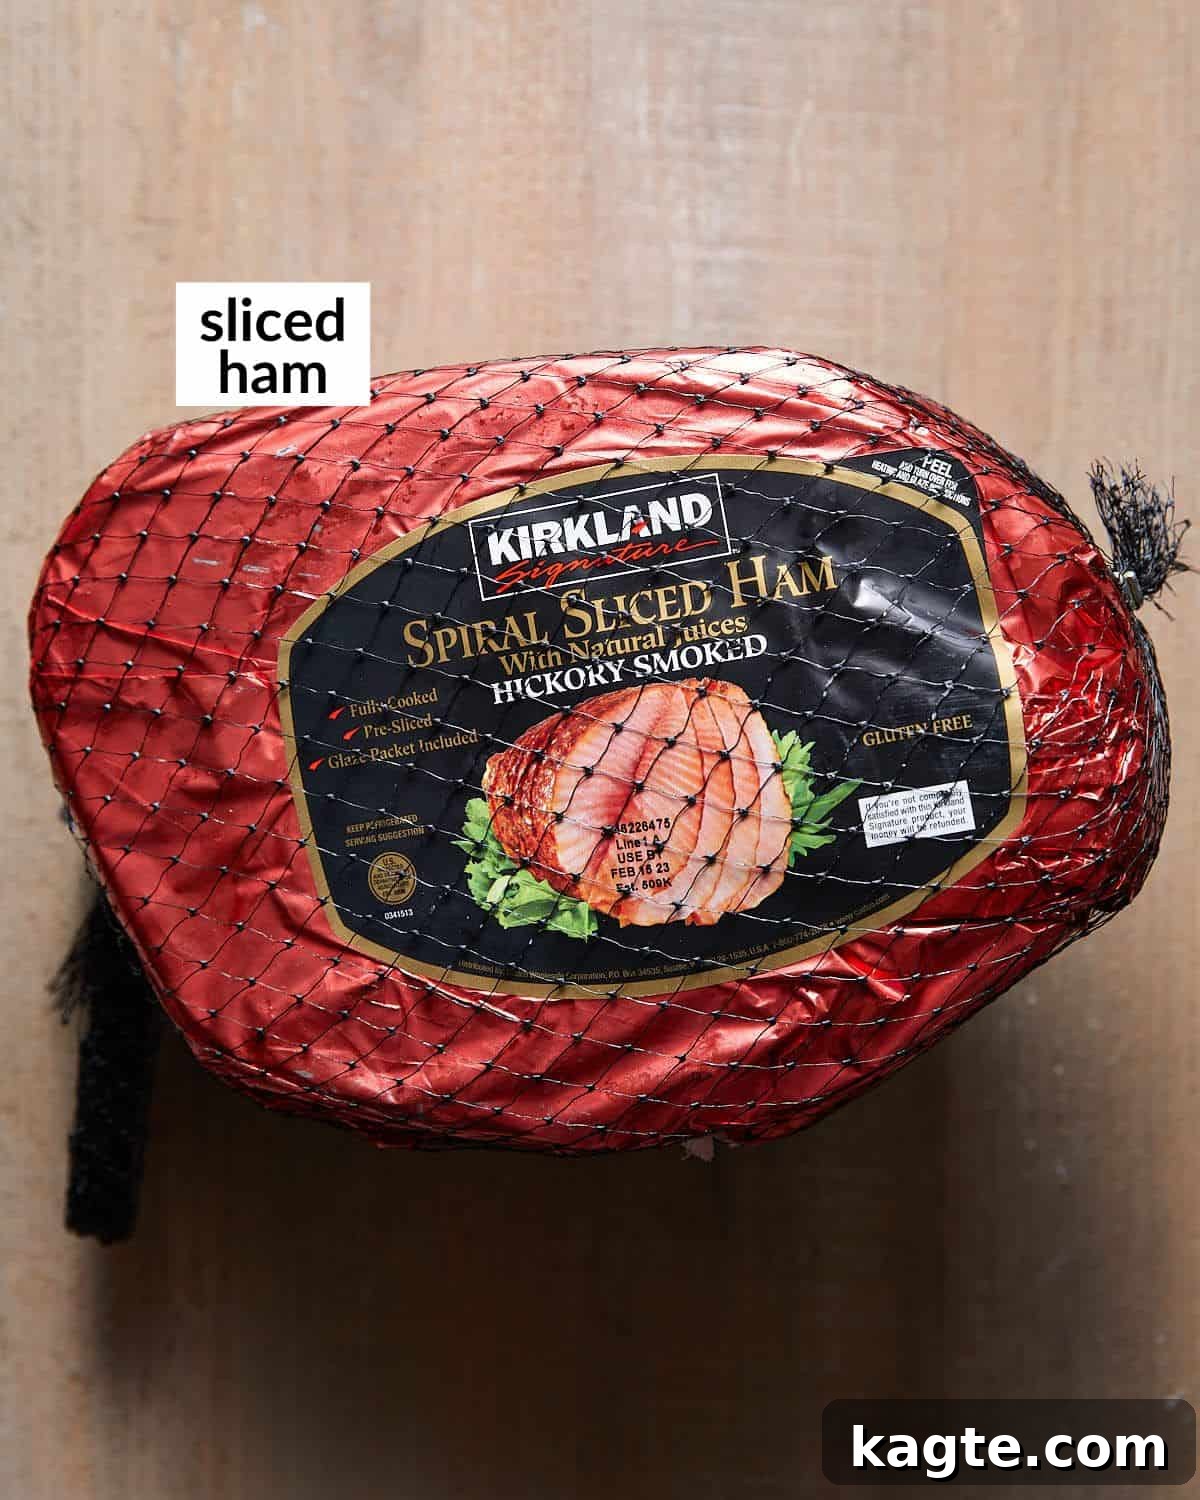
- Spiral Sliced Ham: Most spiral hams available in stores are bone-in and pre-cooked. Always double-check the label to ensure it’s fully cooked, as this will dictate your cooking method (primarily reheating). I highly recommend choosing a bone-in ham. The bone helps to conduct heat evenly and adds flavor, contributing to a much moister end product. While boneless hams are available and can be used, they tend to dry out more easily and may not offer the same depth of flavor. Look for a ham that feels dense and has a good amount of marbling.
- Chicken Broth or Water: This seemingly small addition plays a crucial role in keeping your ham moist. A small amount of liquid in the bottom of the roasting pan creates steam, preventing the ham from drying out during the initial baking phase. Chicken broth adds an extra layer of savory flavor, but water works perfectly fine.
- Glaze (Homemade or Store-Bought): This is where you can truly customize your ham.
- Homemade Honey Glaze: A simple homemade glaze, often made with honey, brown sugar, Dijon mustard, and spices, offers unparalleled flavor and a beautiful caramelized crust. My Homemade Honey Glaze recipe is designed to complement the ham perfectly.
- Store-Bought Glaze Packet: Many spiral hams come with a glaze packet. These are convenient and usually decent, though often less vibrant in flavor than a homemade version. If using, follow the packet instructions.
- No Glaze: For those who prefer a more savory profile, skipping the glaze is an option. The ham will still be delicious and moist when cooked correctly.
A complete list of ingredients and precise amounts can be found on the recipe card below.
How Much Ham to Serve Per Person?
Estimating the right amount of ham is key to ensuring everyone gets enough and minimizing waste (unless you love leftovers, which we definitely do!).
- For a bone-in ham, plan to serve approximately 1/2 to 2/3 pound per person. The bone accounts for some of the weight, so you need a bit more raw weight per serving.
- For a boneless ham, aim for about 1/3 to 1/2 pound per person. With no bone, more of the weight is edible meat.
When deciding on the exact portion, consider your guests’ appetites and the number of side dishes you’re offering. If you’re hosting a large number of children or lighter eaters, or if you have a huge spread of sides, you can opt for the smaller end of the range. If your guests are hearty eaters or if ham is the primary focus of the meal, lean towards the larger end. And if you’re like us and love delicious ham leftovers for sandwiches or future meals, always err on the side of making a little extra!
The Best Way to Cook a Spiral Ham in the Oven
Cooking a spiral ham in the oven is the most common and often preferred method, allowing for a beautiful, caramelized crust and consistent heating. Follow these steps for a perfectly cooked ham that’s tender and juicy.
Quick Overview of Oven Method:
- Unwrap and prepare the ham.
- Set up your baking pan with liquid.
- Bake covered at a low temperature to retain moisture.
- Uncover, increase heat, and apply the glaze generously.
- Rest the ham before carving and garnishing.
Step-by-Step Instructions for Oven Cooking:
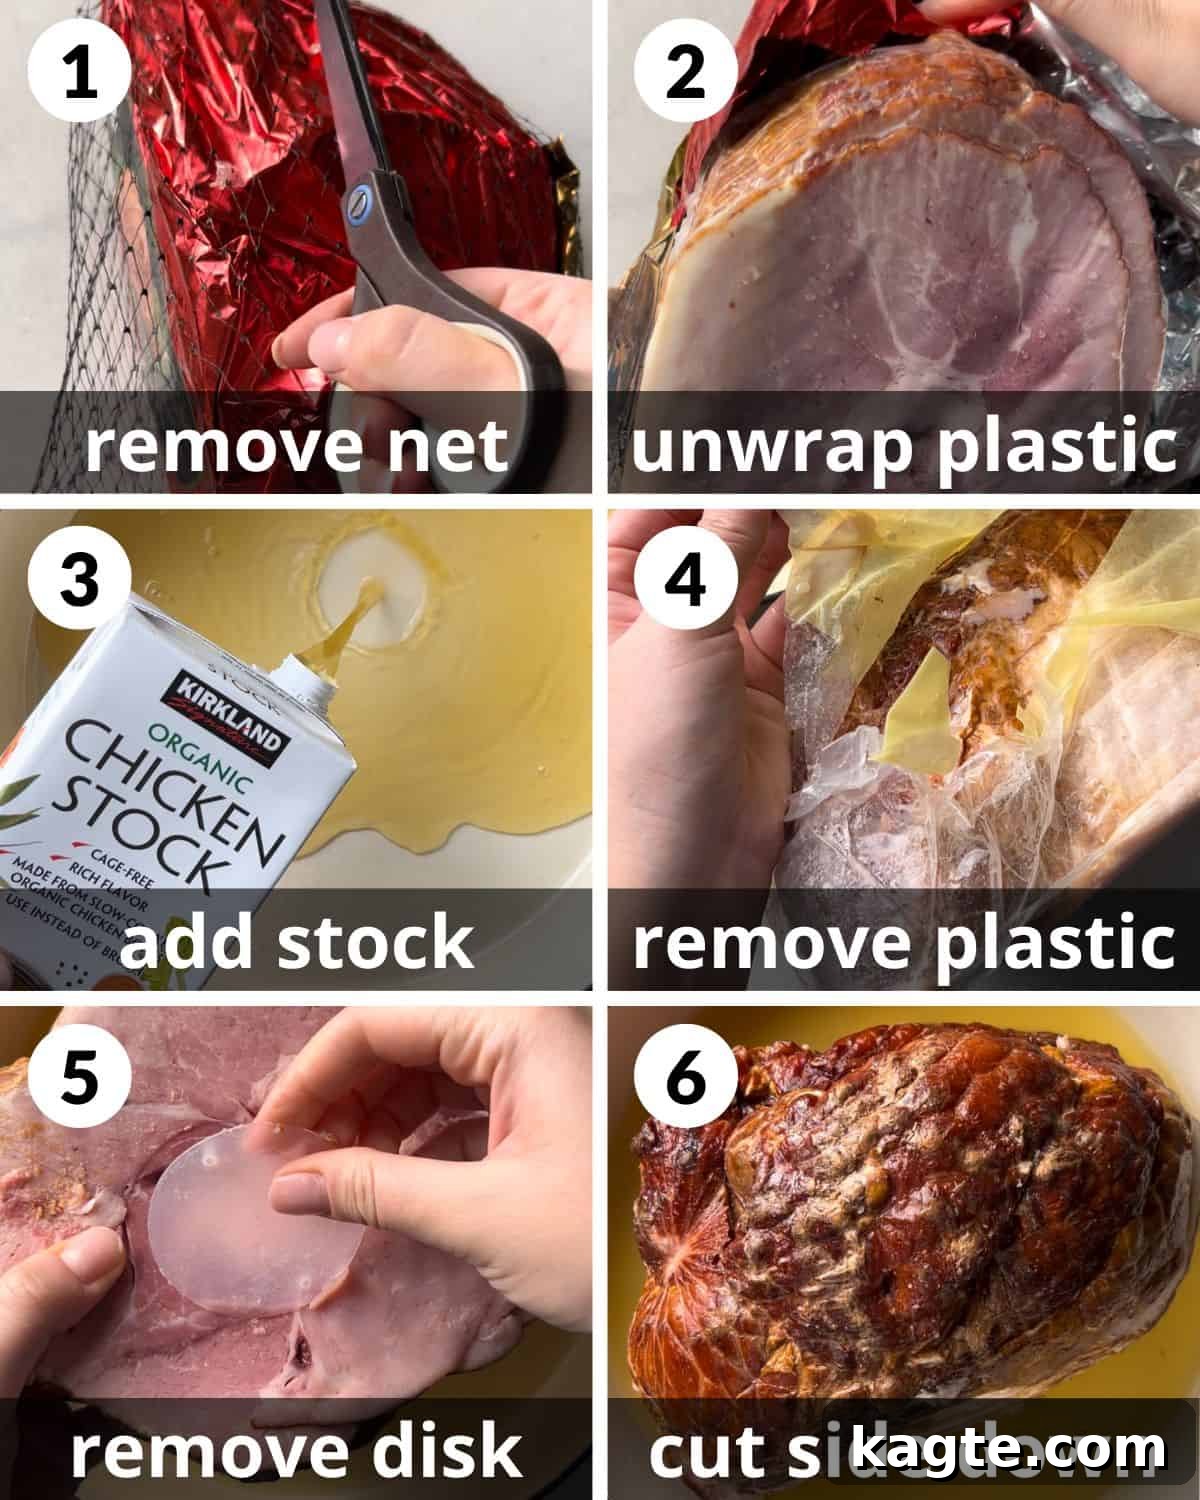
Essential Tip: Don’t forget to remove the plastic disk often found covering the bone!
Step 1: Prepare the Oven and Ham. Preheat your oven to a gentle 300°F (150°C). Remove the spiral ham from the refrigerator, allowing it to come closer to room temperature while you prepare the baking setup. Carefully cut away any outer netting or plastic wrap that might be holding the ham together.
Step 2: Unwrap the Inner Layers. Unpeel the initial layer of plastic wrap that encases the ham. This is usually a loose layer. Set it aside for disposal.
Step 3: Prepare the Roasting Pan. Pour 1/2 cup of chicken broth or water into a large baking dish or roasting pan. If your pan has a rack, place the rack in the pan. The liquid will create steam, which is crucial for keeping the ham moist during the reheating process.
Step 4: Remove Vacuum Seal. Locate and remove the final vacuum-sealed plastic layer that directly surrounds the ham. This layer keeps the ham fresh but must be removed before cooking.
Step 5: Check for Plastic Disk. Many bone-in spiral hams have a small plastic disk covering the bone on the cut side. This is easily overlooked but must be removed before baking to prevent melting or potential off-flavors. Gently pry it off.
Step 6: Position the Ham. Place the ham into your prepared roasting pan, cut-side down. Positioning it this way helps to keep the pre-cut slices from drying out and allows the moisture to seep down into the ham.
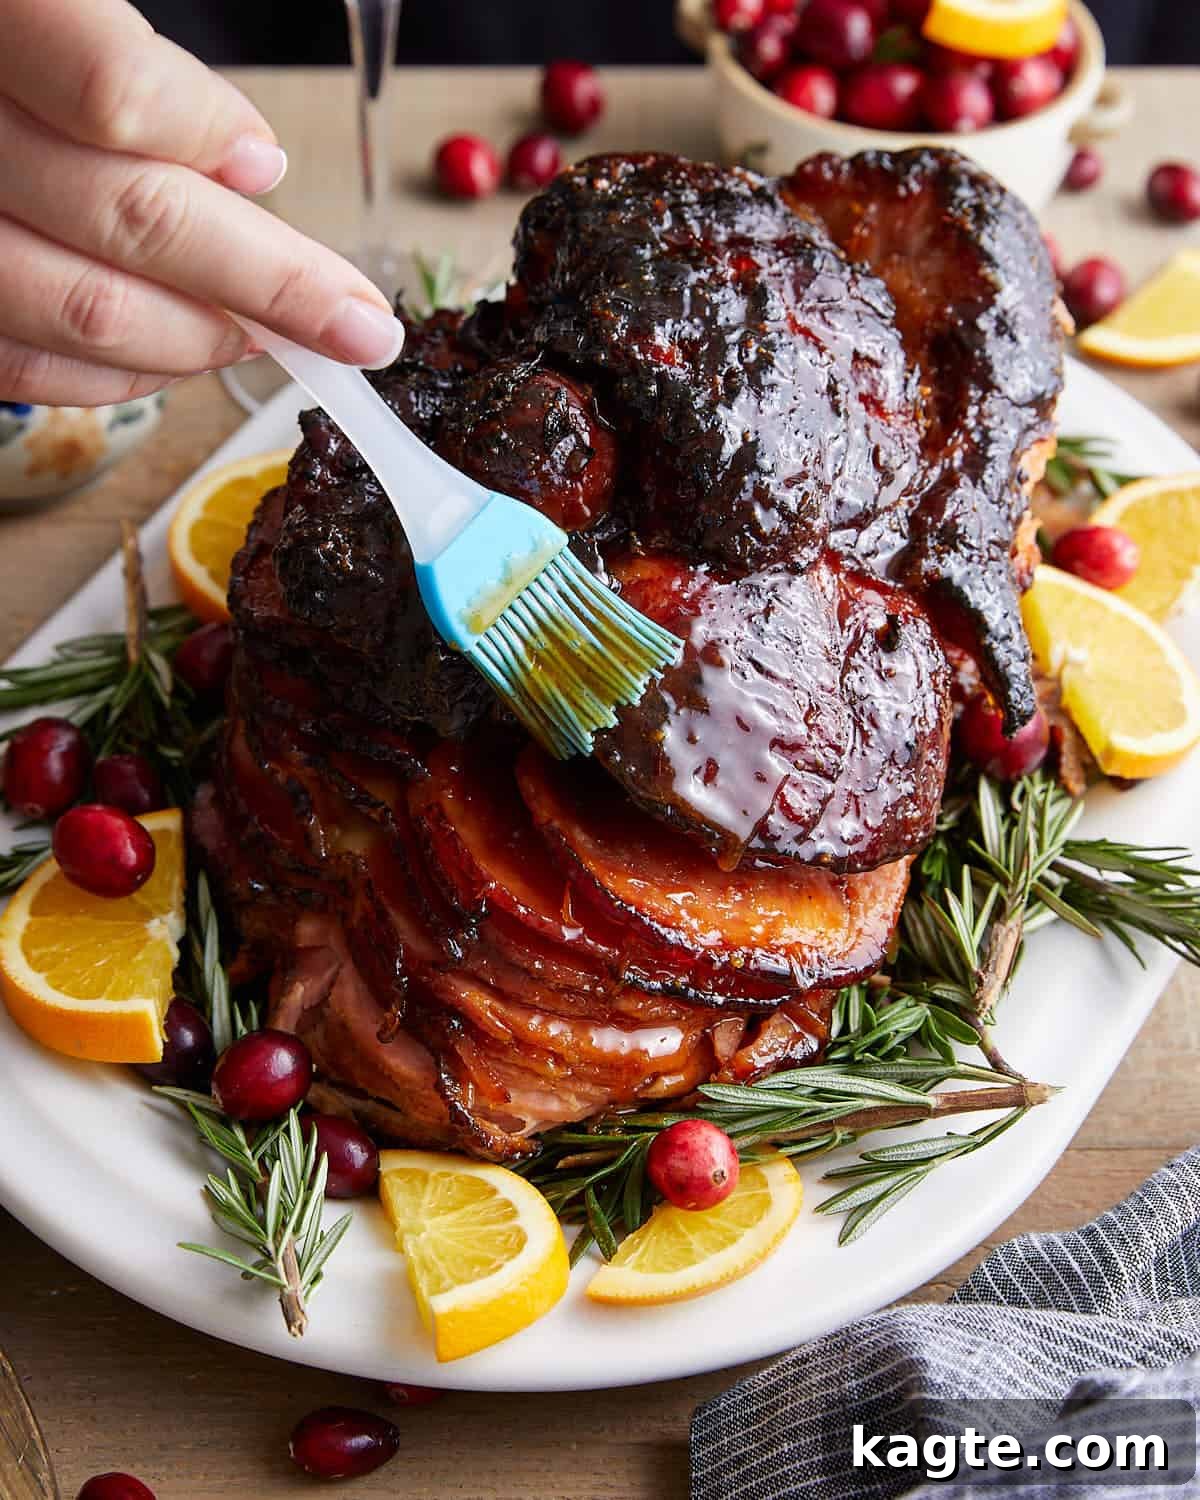
For Maximum Flavor: Baste the ham 3-4 times during the final glazing stage to build a rich, caramelized crust.
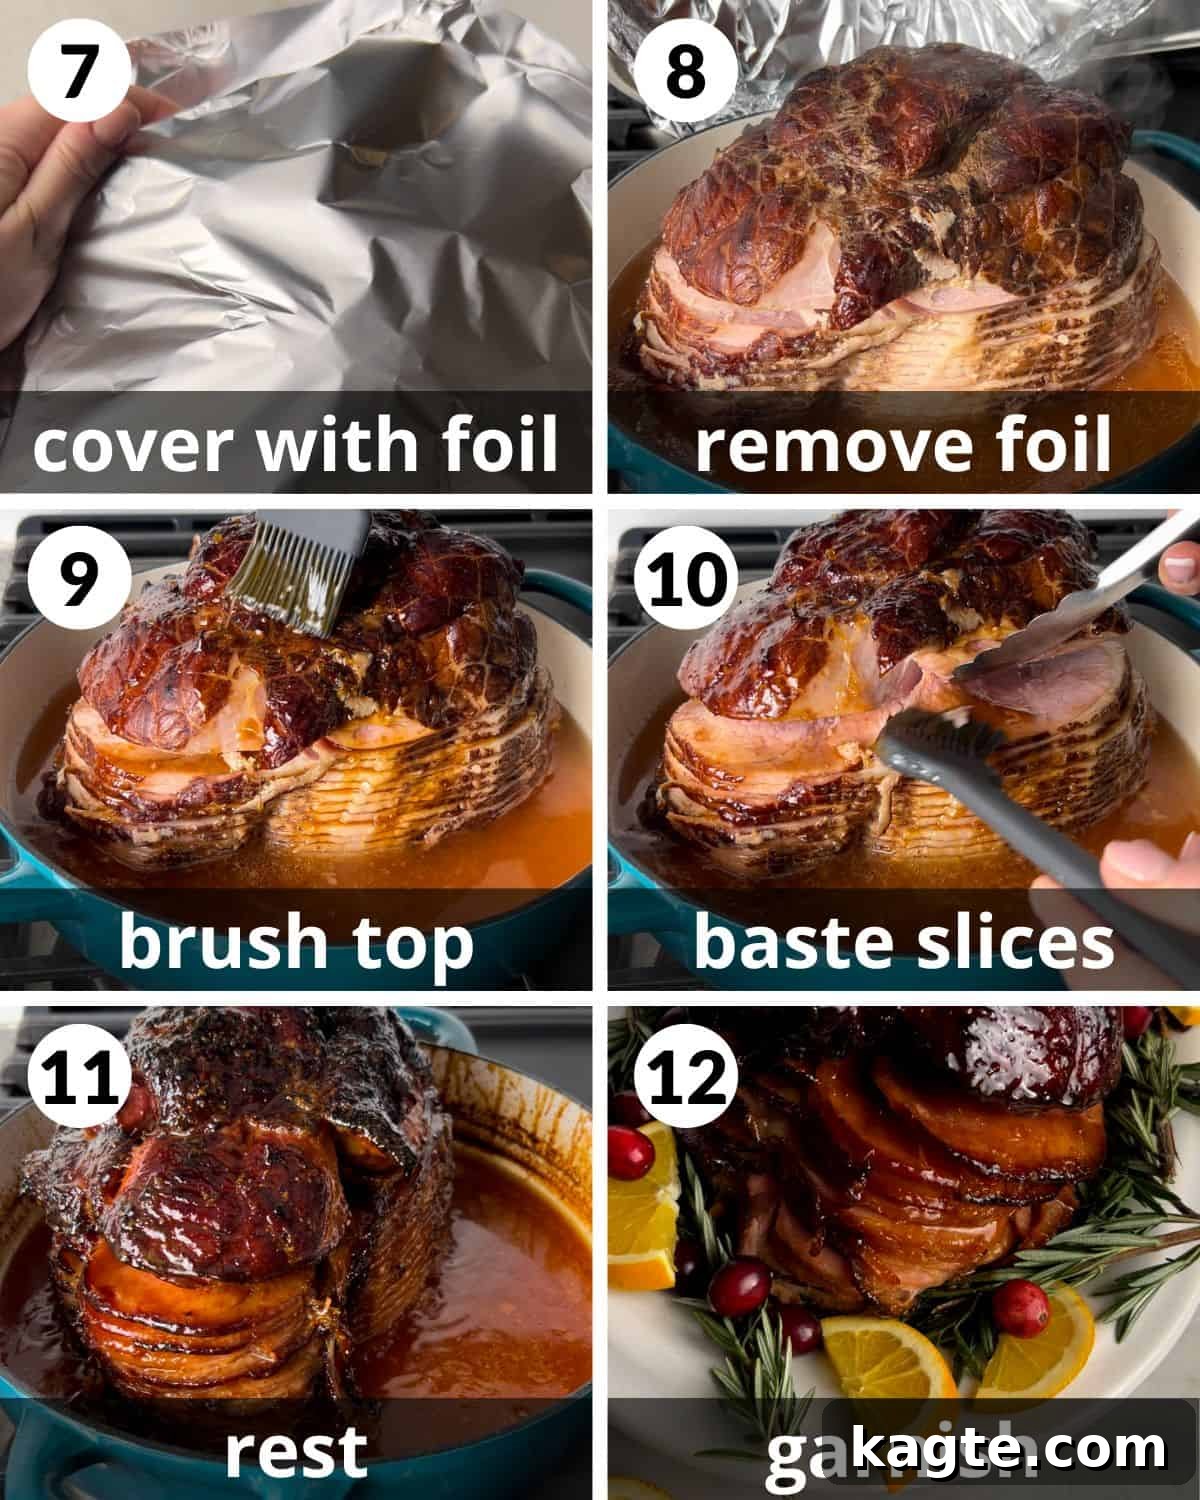
Step 7: Cover Tightly with Foil. Cover the roasting pan tightly with aluminum foil. This seal is critical to trap all the steam and moisture, ensuring the ham reheats evenly and remains incredibly juicy. Make sure there are no gaps for steam to escape.
Step 8: Initial Baking Phase. Bake the covered ham in the preheated 300°F (150°C) oven for approximately 10 minutes per pound. For an 8-pound ham, this would be around 80 minutes (1 hour and 20 minutes). For a 10-pound ham, it would be about 100 minutes (1 hour and 40 minutes). The goal here is to gently bring the internal temperature up to around 130-135°F (54-57°C) before glazing. Use a meat thermometer inserted into the thickest part of the ham, avoiding the bone, to monitor the temperature.
Step 9: Prepare for Glazing. Once the initial baking time is complete and the ham is nearly heated through, remove the ham from the oven. Carefully remove the aluminum foil (be mindful of the hot steam). Increase the oven temperature to 425°F (220°C). This higher heat is essential for caramelizing the glaze and creating that beautiful, slightly crispy exterior.
Step 10: Apply the First Layer of Glaze. Using a basting brush, generously brush your chosen glaze (homemade or store-bought) all over the top and sides of the ham. Ensure an even coating.
Step 11: Glaze Between the Slices. For an even more flavorful ham, gently pry open some of the spiral slices and brush glaze in between them. This allows the sweet and savory glaze to penetrate deeper into the ham, enhancing every bite.
Step 12: Final Bake and Basting. Return the uncovered ham to the 425°F (220°C) oven. Bake for an additional 30-45 minutes. During this final baking period, make sure to baste the ham with more glaze or the pan juices (if they’ve mixed with the glaze) every 10-15 minutes. This frequent basting will help build up multiple layers of caramelized glaze, creating a rich, sticky, and flavorful crust. The ham is done when its internal temperature reaches 140°F (60°C) and the glaze is beautifully browned and slightly sticky.
Step 13: Rest and Garnish. Once cooked, remove the ham from the oven. It’s crucial to let it rest for 10-15 minutes before carving. This resting period allows the juices to redistribute throughout the meat, ensuring maximum tenderness and moisture. While resting, you can optionally garnish the ham with fresh rosemary sprigs, vibrant orange slices, or a sprinkle of tart cranberries for an extra festive touch and appealing presentation.
Carving Your Spiral Ham
One of the best features of a spiral-sliced ham is how incredibly easy it is to carve. The work is mostly done for you!
To carve, simply place the ham on a large cutting board. Using a sharp carving knife, locate the bone running down the center of the ham. Carefully cut around the bone, following its natural curve. As you cut, the pre-sliced pieces will naturally fall away. Use a pair of tongs to gently pull the slices from the bone, arranging them neatly on a serving platter. This method ensures clean, even slices with minimal effort, making serving a breeze.
Perfect Pairings: Recipe Serving Suggestions
A perfectly cooked spiral ham deserves an equally delightful array of side dishes. Here are some classic holiday sides that complement the rich, sweet, and savory flavors of ham beautifully:
- Cheesy Air Fryer Scalloped Potatoes: Creamy, cheesy, and perfectly tender potatoes are an absolute dream with ham.
- Goat Cheese Salad with Arugula: A fresh, peppery salad with tangy goat cheese provides a wonderful counterpoint to the richness of the ham.
- Creamy Homemade Mac and Cheese: The ultimate comfort food that pairs flawlessly with any holiday meal, especially ham.
- Balsamic Glazed Brussels Sprouts with Bacon: Roasted Brussels sprouts with a sweet and tangy glaze and crispy bacon add a fantastic textural and flavor contrast.
- Savory Make-Ahead Stuffing: A traditional and hearty side that always satisfies alongside ham.
Don’t forget the incredible versatility of leftover ham! Be sure to save any remaining slices to make the BEST King’s Hawaiian Ham & Cheese Sliders. Using thick-cut slices of your perfectly cooked ham will make these sliders even more irresistible.
Pro Tips and Creative Variations
- Start Covered for Moisture: The initial baking stage is crucial. Always bake your spiral ham covered tightly with aluminum foil. This creates a steamy environment that traps moisture, preventing the ham from drying out during the reheating process. This simple step is key to a succulent result.
- Utilize a Meat Thermometer: Since spiral hams are already fully cooked, you’re essentially reheating them. The target internal temperature is 140°F (60°C). Overcooking will lead to dry, tough ham. Insert a reliable meat thermometer into the thickest part of the ham, being careful to avoid touching the bone, for an accurate reading. This ensures you pull the ham out at precisely the right moment.
- Glaze Generously and Baste Frequently: Whether you choose a homemade brown sugar Honey Glaze for Ham or a store-bought packet, the glaze is vital for flavor and texture. The sugars in the glaze will caramelize on the outside, creating a deliciously sticky, slightly crispy crust that adds incredible depth to each slice. For the best flavor and a beautiful finish, be sure to baste the ham at least 3-4 times during the final uncovered baking stage. While convenient, I highly recommend making your own glaze from scratch for a truly superior taste.
- Finish Uncovered for Caramelization: After the ham has heated through and been glazed, remove the foil and increase the oven temperature. Baking uncovered at a higher temperature allows the glaze to properly caramelize and develop a rich, appealing color and sticky texture. This step creates that iconic ham crust.
- Allow for Adequate Resting Time: Once removed from the oven, let the ham rest for 10-15 minutes before carving. This critical step allows the juices to redistribute throughout the meat, ensuring every slice is as moist and flavorful as possible. Cutting too soon will cause the juices to run out, resulting in a drier ham.
- Experiment with Glaze Flavors: Don’t limit yourself to just honey or brown sugar. Consider glazes with apricot, cherry, pineapple, maple, or even a spicy mustard blend to create unique flavor profiles. Citrus zest (orange or lemon) can also brighten up any glaze.
- Save the Ham Bone: If you’re using a bone-in ham, don’t discard the bone! It’s packed with flavor and perfect for making delicious ham stock, bean soup, or split pea soup.
- Store Leftovers Properly: To maximize the freshness and flavor of any leftover ham, place the slices in an airtight container or wrap them tightly in foil or plastic wrap. Store them in the refrigerator for 2-3 days, or freeze for longer storage.
How To Cook a Spiral Ham in the Slow Cooker
If your oven is dedicated to other dishes, the slow cooker is an excellent alternative for reheating your spiral ham, ensuring it stays wonderfully moist.
To cook in a slow cooker, follow steps 1 through 3 from the oven instructions: remove packaging, unwrap layers, and add 1/2 cup of chicken broth or water to the bottom of your slow cooker. Place the ham cut-side down into the liquid. Cook on LOW for 4-5 hours, or until the internal temperature reaches 140°F (60°C). The exact time will depend on the size of your ham and your slow cooker. If you plan to use a glaze, begin basting the ham with the glaze around the 2 to 2.5-hour mark. This method locks in moisture beautifully, making it almost impossible to dry out your ham.
How To Cook a Spiral Ham in a Roaster Oven
A large roaster oven is another fantastic option, especially for bigger hams or when you need to free up conventional oven space. It provides an enclosed, moist environment similar to covering with foil.
Start by placing the ham on the rack inside your roaster oven. Add 1/2 cup of water to the bottom of the roaster pan to create a steamy environment. Wrap the ham loosely but completely with aluminum foil. Set the roaster oven to 300°F (150°C) and follow the same temperature and timing guidelines as the conventional oven method (approximately 10 minutes per pound). Once the ham reaches about 130-135°F (54-57°C) internally, remove the foil, increase the roaster temperature to 400-425°F (200-220°C) (most roasters can reach this heat), and apply your glaze. Continue to bake, basting frequently, until the ham reaches 140°F (60°C) and the glaze is caramelized.
Frequently Asked Questions
The key to preventing a dry spiral ham is careful temperature control and moisture retention. Since most spiral hams are pre-cooked, you’re primarily reheating them to an internal temperature of 140°F (60°C). Cook the ham covered tightly with foil during the initial heating phase to trap steam and moisture. Using a small amount of liquid (like chicken broth or water) in the bottom of the pan also helps. Additionally, bone-in hams tend to stay more moist than boneless varieties due to the bone’s insulation and flavor contribution.
For a fully cooked spiral ham, you typically heat it at 300°F (150°C) covered with foil for about 10 minutes per pound. After this initial heating, remove the foil, increase the oven temperature to 425°F (220°C), and bake for an additional 30-45 minutes, basting with glaze 3-4 times. This final stage is for caramelizing the glaze and bringing the ham to its final internal temperature of 140°F (60°C).
Yes, it’s highly recommended to cover your spiral ham when baking, at least for the majority of the cooking time. Covering the ham tightly with aluminum foil creates a moist, steamy environment that prevents the ham from drying out as it reheats. You only remove the cover and increase the temperature towards the end of the cooking process to allow the glaze to caramelize and form a beautiful crust.
Yes, adding some water or chicken broth to the bottom of the roasting pan is a crucial step. This small amount of liquid serves multiple purposes: it prevents the ham from sticking to the pan, creates steam to keep the ham moist, and can even contribute to a more flavorful pan drippings if you’re making gravy. About 1/2 cup is usually sufficient for most hams.
Since spiral hams are already fully cooked, the goal is to reheat them to a safe and palatable serving temperature. The USDA recommends reheating pre-cooked hams to an internal temperature of 140°F (60°C). This ensures it’s warm throughout without being overcooked and dry. Always use a reliable meat thermometer to verify the temperature.
Shop my Amazon Storefront for recommended kitchen tools!
More Delicious Main Dish Recipes
Explore More Main Dishes
Chicken
Garlic Butter Chicken Thighs (Baked & Crispy)
Pasta
Baked Stuffed Shells with Meat Sauce
Fall
Dutch Oven Pot Roast
Soup & Chili
Ground Chicken Chili with Beans
If you try this easy spiral ham recipe, please leave a star rating in the recipe card below and/or a comment! Your feedback is invaluable. Follow me on Pinterest, Facebook & Instagram for more delicious recipes.
Print Recipe
Save to Favorites
How To Cook a Spiral Ham
Equipment
-
Meat Thermometer
-
9 x 13 Baking Dish or Large Roasting Pan with Rack
-
Basting Brush
Ingredients
- 1 (8-10 pound) pre-cooked spiral sliced ham*
- 1/2 cup chicken broth or water
- 1 recipe Homemade Honey Glaze or store-bought packet, optional
Instructions
-
Preheat the oven to 300°F (150°C). Remove the ham from the refrigerator and carefully cut any netting or outer plastic wrap off.
-
Unwrap any additional loose plastic wrap layers and set aside.
-
Pour 1/2 cup of chicken stock or water into a large baking dish or roasting pan equipped with a rack. This liquid will help create steam and keep the ham moist.
-
Remove the final vacuum-sealed plastic layer that directly encases the ham.
-
Inspect the ham for a plastic disk covering the bone on the cut side. Be sure to carefully remove this disk before proceeding.
-
Place the ham cut side down into the prepared pan, ensuring it rests securely on the rack (if using).
-
Cover the roasting pan tightly with aluminum foil, crimping the edges to create a good seal to trap moisture.
-
Bake in the preheated 300°F (150°C) oven for approximately 10 minutes per pound. For an 8-pound ham, this is about 80 minutes; for a 10-pound ham, about 100 minutes. The ham’s internal temperature should reach about 130-135°F (54-57°C).
-
Remove the ham from the oven and carefully remove the foil (watch out for steam). Increase the oven temperature to 425°F (220°C).
-
Using a basting brush, generously apply the prepared glaze all over the top and sides of the ham.
-
For maximum flavor penetration, gently brush some glaze in between the spiral slices as well.
-
Return the uncovered ham to the 425°F (220°C) oven and bake for an additional 30-45 minutes. During this time, baste the ham with more glaze or pan juices 3-4 times to build a rich, caramelized crust. The ham is ready when its internal temperature reaches 140°F (60°C) and the glaze is golden and sticky.
-
Remove the ham from the oven and allow it to rest for 10-15 minutes before carving. Garnish with fresh rosemary, orange slices, and cranberries if desired for a festive presentation.
Notes
- Ham Selection: Most spiral sliced hams are bone-in and pre-cooked. Always ensure your ham is fully cooked. Bone-in hams are generally recommended as they tend to remain more moist and flavorful than boneless options.
- Moisture Control: The critical element to avoid a dry ham is to not overheat it. Since it’s already cooked, simply warm it to an internal temperature of 140°F (60°C). Always bake the ham covered initially to trap all the crucial moisture.
- Glaze Application: Whether using a homemade brown sugar Honey Glaze for Ham or a store-bought packet, the sugars in the glaze will caramelize beautifully, adding significant flavor and an appealing crust. Baste the ham frequently (3-4 times) during the final baking stage for a rich, even coating. A homemade glaze often yields superior flavor.
- Caramelization Finish: After applying the glaze, remove the foil and increase the oven temperature. This allows the glaze to properly caramelize, creating a wonderful color and sticky texture on the ham’s exterior.
- Leftover Storage: Store any leftover ham slices in an airtight container in the refrigerator for 2-3 days. For longer storage, slices can be frozen.
Want more delicious recipes? Sign up for our weekly newsletter to get new recipes delivered straight to your inbox!
Nutrition
Nutrition information is automatically calculated, so should only be used as an approximation.