

Welcome to your new favorite way to enjoy a classic comfort food! This Seasoned Tater Tots recipe transforms a humble bag of frozen tots into an extraordinary side dish that’s bursting with flavor and boasts irresistible crispiness. Say goodbye to soggy, bland, and boring tater tots forever. These perfectly seasoned gems are the ultimate companion for juicy burgers, savory hot dogs, hearty sandwiches, or even as a standalone snack that will delight kids and adults alike.

As much as I adore cooking from scratch, life often calls for quick and convenient meal solutions. That’s why I keep dependable recipes like this one, along with my Air Fryer Frozen Egg Rolls and Frozen Burgers, ready for those busy weeknights. These seasoned tater tots fit perfectly into that category, offering a homemade taste with minimal effort. They’re a testament to how a few simple pantry staples can elevate an ordinary frozen item into something truly spectacular.
Table of Contents
- Why You’ll Love This Recipe
- Ingredients & Substitutions for Perfect Tots
- How to Make Perfectly Seasoned Tater Tots
- Expert Tips & Delicious Variations
- Serving Suggestions
- Storage and Reheating
- Recipe FAQs
- More Irresistible Side Dish Recipes
- Seasoned Tater Tots Recipe Card
Why You’ll Love This Crispy Seasoned Tater Tots Recipe
- Effortlessly Simple with Pantry Staples: You probably already have most of these ingredients in your kitchen! This recipe relies on common spices and a bag of frozen tater tots, making it an excellent go-to side dish that requires no special grocery run. These are shelf-stable items you can keep on hand for whenever the craving strikes, ensuring a delicious meal is always within reach.
- Explosion of Flavor: Forget the one-dimensional taste of plain tater tots. Our carefully selected blend of spices, combined with a touch of oil, elevates these potato bites to an entirely new level of deliciousness. Each tot is coated in a savory, aromatic mixture that creates an irresistible flavor profile that will have everyone asking for more.
- Unbelievably Crispy Texture: The secret to truly amazing tater tots is their crispness, and this recipe delivers! We go beyond the package instructions to ensure every single tot achieves a golden-brown, satisfyingly crunchy exterior while remaining wonderfully fluffy on the inside. No more soft, mealy, or undercooked tater tots here – just pure crispy perfection.
- Minimal Hands-On Time: While these seasoned tots bake to crispy perfection in the oven, the preparation is incredibly simple and quick. It’s a largely hands-off process, freeing you up to focus on your main course or simply relax. This makes it ideal for busy weeknights when you want a flavorful side without the fuss.
- Highly Versatile and Customizable: Whether you’re serving a picky eater or a gourmet enthusiast, these tater tots can be adapted to suit any taste. Adjust the spice level, experiment with different herbs, or load them up with your favorite toppings. They’re a fantastic blank canvas for culinary creativity.
- A Guaranteed Crowd-Pleaser: Tater tots are a universally loved snack, and when they’re seasoned and crispy like these, they become an instant hit. Perfect for family dinners, game day gatherings, or casual get-togethers, these tots will disappear faster than you can make them.
Ingredients & Substitutions for Perfect Tots
Crafting these perfectly seasoned tater tots requires just a few basic ingredients that pack a powerful punch. Here’s a closer look at what you’ll need and some helpful substitution tips:
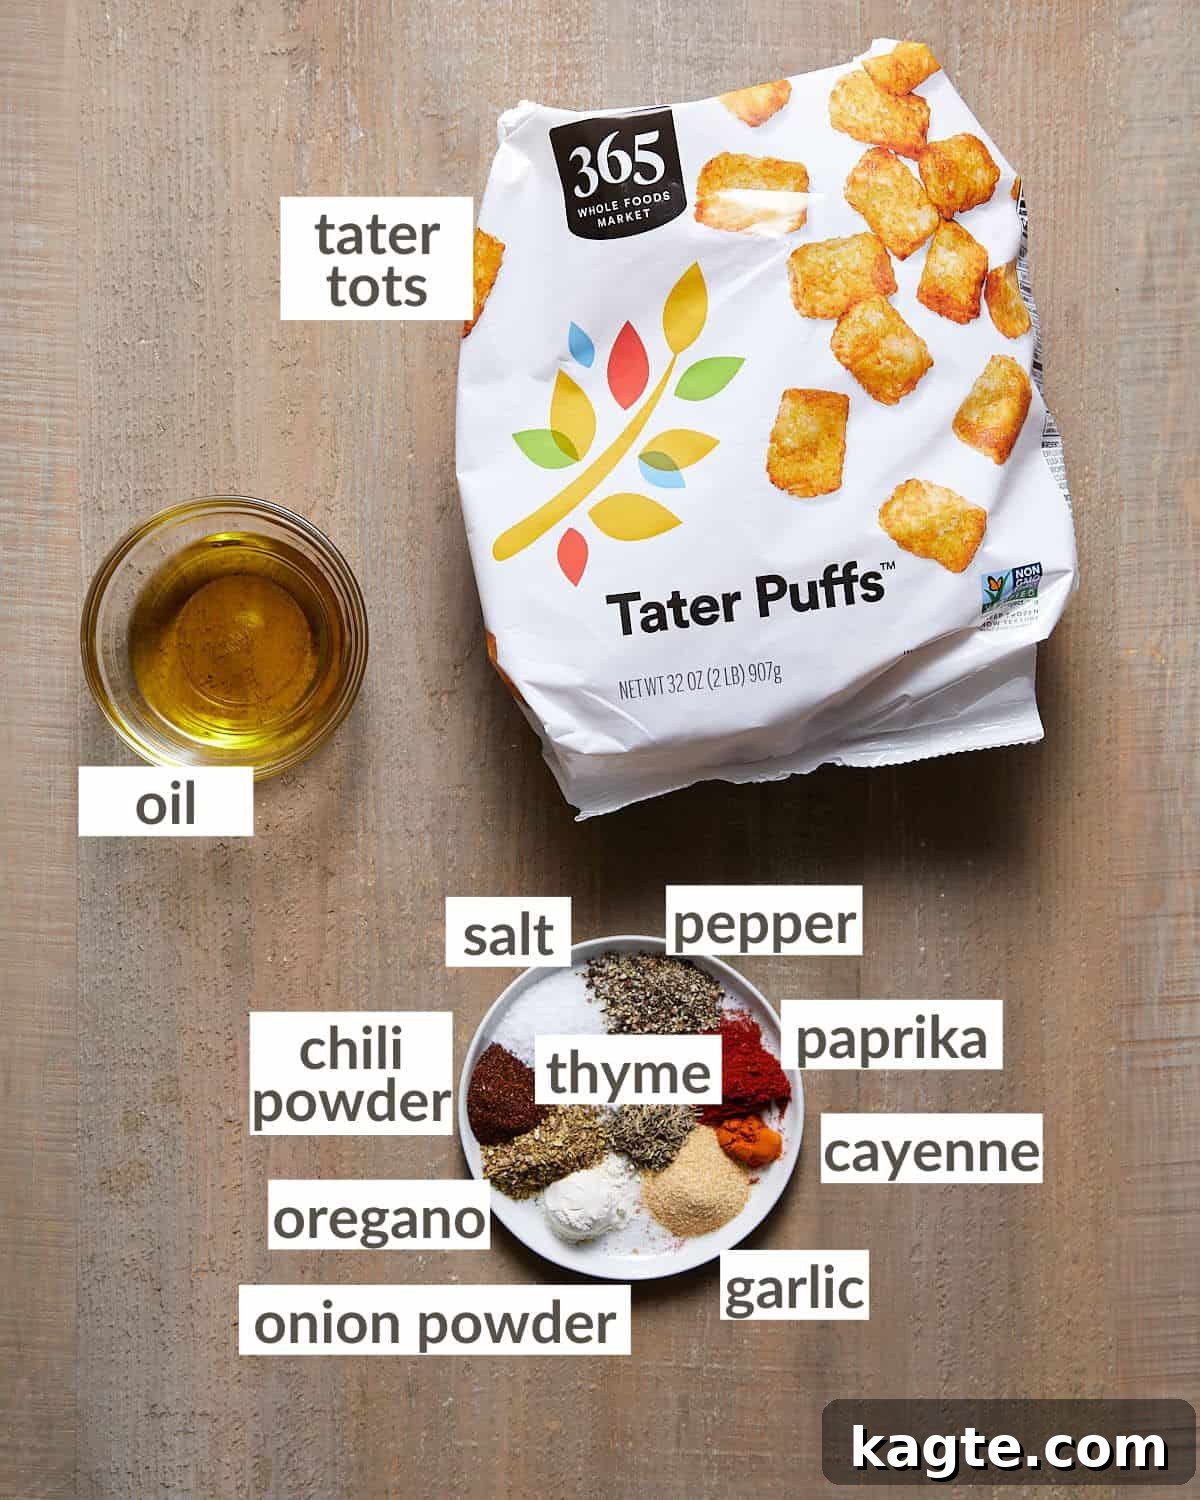
- Frozen Tater Tots: The star of our show! Any brand of plain frozen tater tots will work beautifully. Choose your favorite, whether classic potato or sweet potato tots for a different twist. Ensure they are plain, unseasoned tots so you can control the flavor profile entirely.
- Olive Oil: Essential for helping the spices adhere to the tots and achieving that desirable crispy exterior. Extra virgin olive oil adds a nice depth of flavor, but you can easily substitute it with any neutral-flavored oil like avocado oil, vegetable oil, canola oil, or even melted coconut oil for a subtle tropical hint. The key is to provide enough fat for even cooking and crisping.
- Granulated Garlic & Onion Powder: These two are the dynamic duo of savory flavor. They provide a foundational aromatic base that’s robust and comforting. If you only have garlic salt or onion salt, remember to reduce the amount of added salt in the recipe. Fresh minced garlic or onion could be used, but dry powders typically adhere better and don’t risk burning as easily during the long bake time.
- Smoked Paprika: This spice adds a beautiful reddish hue and a deep, smoky undertone that elevates the flavor beyond simple potato. It’s a fantastic way to mimic that grilled or roasted taste. Regular sweet paprika can be used as a substitute, but you’ll miss out on the smoky complexity. For a spicier kick, try hot smoked paprika.
- Chili Powder: A blend of spices including chili, cumin, and oregano, chili powder contributes a warm, earthy, and slightly spicy note. It’s crucial for the “seasoned” aspect of these tots. If you prefer less heat, you can reduce the amount or opt for a mild chili powder blend.
- Dried Thyme & Oregano: These classic dried herbs bring a fragrant, earthy, and slightly peppery Mediterranean essence to the tots. They pair wonderfully with potatoes and the other spices. Feel free to experiment with other dried herbs like rosemary, sage, or even an Italian seasoning blend.
- Salt: Essential for enhancing all the other flavors. If your frozen tater tots are already pre-salted, you might want to omit or significantly reduce the amount of salt initially. Taste the tots after baking and add more if needed. Fine sea salt or kosher salt works best for even distribution.
- Black Pepper: A universal flavor enhancer, freshly ground black pepper adds a subtle kick and complements the other spices beautifully. Adjust to your preference.
- Cayenne Pepper: This is where you control the heat! A quarter teaspoon provides a mild warmth that’s noticeable but not overwhelming. If you like things spicy, feel free to increase the cayenne to 1/2 or even 3/4 teaspoon for a more fiery experience. If you prefer no heat, you can omit it entirely.
A complete list of ingredients and their precise amounts can be found on the recipe card below.
How to Make Perfectly Seasoned Tater Tots
Making these crispy, seasoned tater tots is incredibly straightforward. With just a few simple steps, you’ll transform a plain bag of frozen potatoes into an unforgettable side dish.
Quick Overview
- Preheat oven and baking sheets.
- Toss frozen tots generously in oil and spice blend.
- Spread in a single layer on hot baking sheets.
- Bake until deeply golden brown and irresistibly crispy.
- Serve piping hot with your favorite dipping sauce.
Step by Step Instructions for Crispy Seasoned Tater Tots
Pro Tip: Don’t fear the long bake! Keep those tots in the oven until they are truly crispy and beautifully browned. That extra time is the key to perfection!
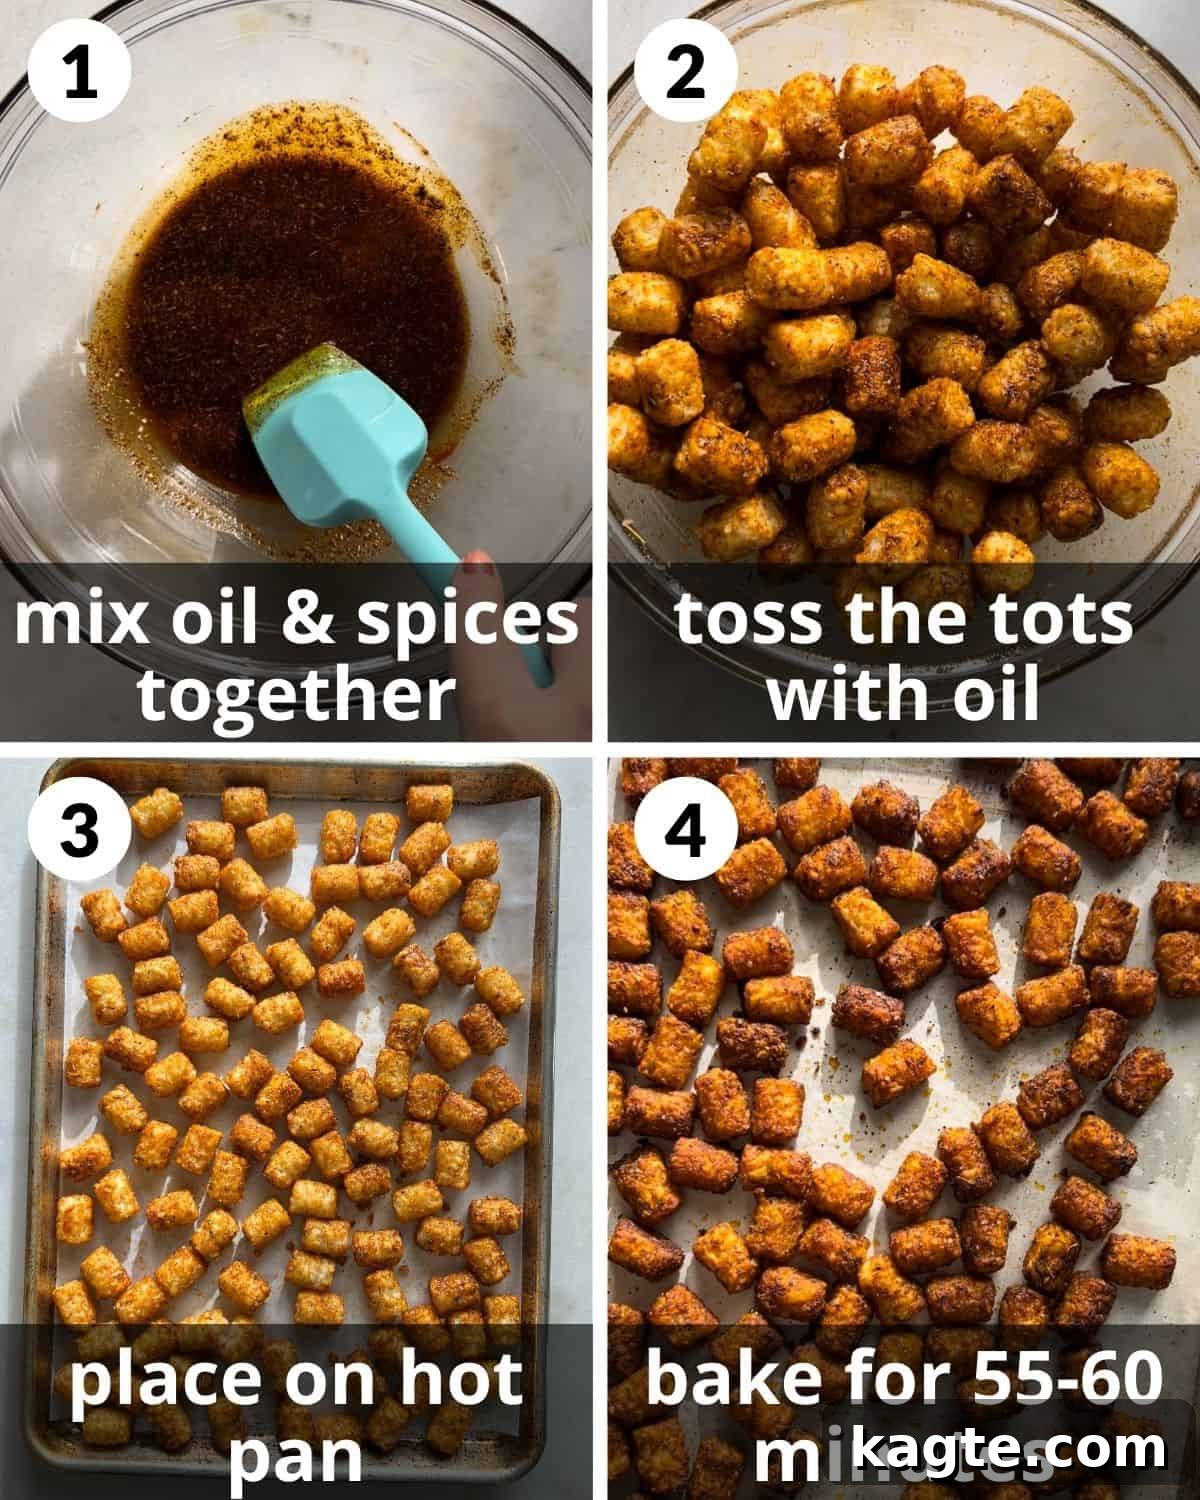
Step 1: Begin by preheating your oven to a robust 425°F (220°C). Crucially, place one or two large baking sheets into the oven as it preheats. This step, often overlooked, is vital for achieving maximum crispness, as the hot pan will immediately start searing the tots. In a spacious mixing bowl, combine the olive oil with all your chosen spices: granulated garlic, onion powder, smoked paprika, chili powder, thyme, oregano, salt, black pepper, and cayenne pepper. Whisk these ingredients together thoroughly until a fragrant, uniform spice paste forms.
Step 2: Carefully add the entire bag of frozen tater tots to the bowl with the spiced oil mixture. Using a large spoon or spatula, gently toss the tots. Ensure every single tater tot is thoroughly and evenly coated in the oil and spice blend. This step ensures that each bite will be bursting with flavor and will crisp up beautifully.
Step 3: Once your oven and baking sheets are piping hot, carefully remove the baking sheets. Immediately arrange the seasoned tater tots on the preheated pans in a single layer. The key here is not to overcrowd the pan. If necessary, use two baking sheets to give the tots ample space. More space means better air circulation, which is essential for uniform crisping. Crowding the pan will lead to steamed tots rather than crispy ones.
Step 4: Place the baking sheets back into the preheated oven. Bake the tater tots according to the package instructions as a starting point, but be prepared to go longer. I typically find that an additional 5-10 minutes (or even more, depending on your oven and desired crispness) beyond the recommended time is necessary to achieve that irresistible extra-crispy texture. During cooking, check the tots periodically and give them a good toss or stir a couple of times to ensure even browning. If you’re using two baking sheets, rotate them halfway through the baking time for consistent results. Continue baking until the tots are deeply golden brown and shatteringly crisp.
Expert Tips & Delicious Variations for Seasoned Tater Tots
Mastering the art of crispy, flavorful tater tots is easier than you think with these expert tips and exciting variations.
- Always Preheat the Pan: This is arguably the most critical step for achieving truly crispy tater tots. Placing frozen tots directly onto a hot baking sheet creates an immediate sizzle, allowing the exterior to crisp up much faster and preventing them from becoming soggy. Think of it like searing meat – that initial high heat is essential.
- Don’t Skimp on the Oil: The additional oil serves multiple purposes. It acts as a binder for your spices, ensuring they cling to every tot. More importantly, it helps prevent the tots from drying out in the intense oven heat and is crucial for creating that beautiful golden-brown, crispy crust. It also helps conduct heat more efficiently, leading to faster and more even crisping.
- Avoid Overcrowding the Sheet Pan: This tip cannot be stressed enough! If you pile the tater tots too high on a single pan, they will steam instead of roast. For optimal crispness, ensure the tots are spread in a single layer with a little space between each one. This allows hot air to circulate freely around every tot, encouraging even cooking and maximum crunch. If your baking sheet is small or you’re cooking a large batch, use two pans.
- Bake Until Truly Crispy: The baking times suggested on most frozen tater tot packages are often too short to achieve ideal crispness. Don’t be afraid to extend the baking time by 5-15 minutes (or even longer) past the package instructions. Watch for a deep golden-brown color and a visibly crispy texture. A truly crispy tot will feel firm and light when picked up.
- Shake or Toss Periodically: Throughout the baking process, especially if using two pans, give your tater tots a good shake or toss every 15-20 minutes. This helps ensure even browning on all sides and prevents any tots from sticking to the pan. If using two pans, rotate their positions in the oven to ensure consistent heat exposure.
- Finishing Touch: A Sprinkle of Fresh Herbs: For an added burst of freshness and color, consider sprinkling your hot, crispy tots with freshly chopped parsley, chives, or cilantro just before serving.
Delicious Variations to Explore
Once you’ve mastered the basic seasoned tater tots, the possibilities for customization are endless!
- Cheesy Garlic Parmesan Tots: After tossing with oil, mix in 2 tablespoons of grated Parmesan cheese and an extra 1/2 teaspoon of garlic powder. A minute or two before they finish baking, sprinkle another 1/4 cup of shredded mozzarella or cheddar cheese over the top and let it melt.
- Spicy Sriracha Lime Tots: Increase the cayenne pepper to 1/2 or 3/4 teaspoon. Once baked, drizzle with a little sriracha or hot sauce and a squeeze of fresh lime juice for a vibrant, zesty kick.
- Herbal Mediterranean Tots: Swap out the chili powder and smoked paprika for an extra teaspoon of dried oregano, a half teaspoon of dried rosemary (crushed), and a pinch of dried mint. Serve with a side of tzatziki sauce.
- BBQ Ranch Tots: Omit the cayenne and add 1 teaspoon of brown sugar to the spice mix. After baking, toss lightly with your favorite BBQ seasoning blend. Serve with ranch dressing for dipping.
- Everything Bagel Tots: After coating in oil, sprinkle generously with everything bagel seasoning before baking. This adds a fantastic savory, garlicky, and oniony crunch.
- Taco Fiesta Tots: Replace the spice blend with 1-2 tablespoons of your favorite taco seasoning. Serve with salsa, sour cream, and a sprinkle of fresh cilantro.

Serving Suggestions for Seasoned Tater Tots
These crispy seasoned tater tots are incredibly versatile and can accompany a wide variety of meals or stand alone as a delightful snack. Here are some ideas to inspire your next meal:
- Classic Comfort: They are a match made in heaven with homemade burgers, hot dogs, chicken nuggets, or grilled cheese sandwiches. The familiar flavors are a guaranteed hit.
- Breakfast or Brunch Side: Replace traditional hash browns with these seasoned tots for a flavorful addition to scrambled eggs, bacon, or breakfast burritos.
- Loaded Tot Bar: Set up a fun “tot bar” with various toppings: chili, cheese sauce, shredded cheddar, crumbled bacon, sour cream, chopped green onions, jalapeños, and salsa. Perfect for parties!
- Dipping Delights: Don’t forget the sauces! Ranch dressing, ketchup, BBQ sauce, fry sauce (a blend of mayo and ketchup), honey mustard, or even a simple garlic aioli all make fantastic accompaniments.
- Underneath Everything: Use them as a base for a hearty dinner. Layer them with pulled pork or chicken, then top with coleslaw and a drizzle of BBQ sauce for a deconstructed BBQ plate. Or use them instead of fries for a loaded poutine-style dish.
Storage and Reheating
While these seasoned tater tots are best enjoyed fresh out of the oven, sometimes you might have leftovers. Here’s how to store and reheat them to maintain as much crispness as possible:
- Storing Leftovers: Allow any leftover tater tots to cool completely to room temperature. This prevents condensation which can make them soggy. Transfer them to an airtight container and store them in the refrigerator for up to 3-4 days.
- Reheating for Crispness: The best way to revive leftover tater tots and bring back their crispness is to reheat them in the oven or an air fryer.
- Oven Method: Preheat your oven to 400°F (200°C). Spread the cold tots in a single layer on a baking sheet. Bake for 10-15 minutes, or until they are heated through and have regained their desired crispiness.
- Air Fryer Method: Place the cooled tots in a single layer in your air fryer basket. Air fry at 375°F (190°C) for 5-8 minutes, shaking the basket halfway through, until hot and crispy.
Avoid reheating in the microwave, as this will almost certainly result in soggy tots.
Recipe FAQs: Your Top Tater Tot Questions Answered
Tater tots are wonderfully versatile! Beyond the seasoning in this recipe, you can load them up with a variety of flavors. Dry spices like extra chili powder, cumin, smoked paprika, dried oregano, and granulated garlic are fantastic. For a more indulgent treat, consider classic toppings like shredded cheddar cheese, crumbled bacon, chopped chives, a dollop of sour cream, or even a drizzle of warm cheese sauce. Think of them as mini baked potatoes, ready for your favorite toppings!
The ultimate secret to crispy tater tots lies in three key factors:
- Preheat your baking sheet: Place the empty baking sheet in the oven while it preheats. This provides immediate high heat contact for searing.
- Don’t overcrowd the pan: Give the tots plenty of space to breathe. Use two baking sheets if necessary to ensure a single layer.
- Bake them longer: The cooking times on the package are often too short. Bake them for an extra 5-15 minutes (or more) until they are deeply golden brown and firm to the touch. Tossing them occasionally also helps with even browning.
Most frozen tater tot packages recommend baking them in a preheated oven at 400-425°F (200-220°C) for 20-40 minutes, depending on the brand and the amount being cooked. However, for truly exceptional results, we highly recommend following our recipe’s guidance: preheat the pan, toss with oil and spices, spread in a single layer, and extend the baking time until they reach your desired level of crispness and golden-brown perfection.
Absolutely! While this recipe focuses on oven baking, seasoned tater tots can be made in an air fryer for an even quicker and often crispier result. Follow step 1 to toss the tots with oil and spices. Then, place them in a single layer in your air fryer basket (you’ll likely need to work in batches). Air fry at 375°F (190°C) for 12-18 minutes, shaking the basket frequently, until they are golden brown and crispy.
For this recipe, it’s best to use plain, unseasoned frozen tater tots. This gives you full control over the flavor profile and ensures that the spices you add truly shine. While there are seasoned varieties available, they might clash with our custom blend. Look for standard potato tater tots, or for a different twist, you could even try sweet potato tots and adjust the spice blend to complement them.
Shop my Amazon Storefront for kitchen essentials!
More Irresistible Side Dish Recipes
Side Dish
What To Serve with Chicken and Dumplings for Dinner (15 Best Sides)
Side Dish
What To Serve With Mashed Potatoes (25 Dinner Ideas)
Side Dish
What To Serve With Taco Soup For Dinner (Toppings & Sides)
Side Dish
Broccoli Mac and Cheese (Easy & Creamy)
If you try this recipe, please leave a star rating in the recipe card below and/or comment! I always appreciate your feedback. Follow me on Pinterest, Facebook & Instagram.

Save Recipe
Seasoned Tater Tots
Equipment
-
Baking Sheets
Ingredients
- 1 32-ounce bag plain frozen tater tots
- 3 Tablespoons olive oil*
- 1 teaspoon EACH granulated garlic & onion powder
- 1/2 teaspoon EACH smoked paprika, chili powder, thyme, & oregano
- 1/2 teaspoon salt*
- 1/2 teaspoon black pepper
- 1/4 teaspoon cayenne*
Instructions
-
Preheat the oven and 1-2 large baking sheets to 425 degrees. In a large bowl, combine the oil and all of the spices.
-
Add the tots and toss until evenly coated in the oil mixture.
-
Place the tots on the preheated pan. (For crispier tots, use two baking sheets.)
-
Bake according to the package instructions. I usually add about 5-10 minutes because I like them extra crispy. Check the tots as they cook and toss a couple of times. Rotate the pan 1-2 times if using two baking sheets.
Notes
- Olive Oil: Substitute for a neutral oil, like avocado or vegetable oil.
- Salt: Omit if the tots have salt added already. You can always salt them when they come out of the oven if needed.
- Preheat the pan. Placing the frozen tots on a hot pan helps the exterior to begin crisping faster.
- Add oil. The additional oil adds flavor, prevents them from drying out, and aids in crisping. It also prevents the spices from burning.
- Do not overcrowd the sheet pan. Depending on the size of your baking sheet you may want to use two. The more air that can circulate between them, the crisper they will get.
- Bake until crispy. Continue baking the tots until they are crispy. I find the instructions on the package are not long enough. Using two baking sheets can speed up the crisping process.
Nutrition
Nutrition information is automatically calculated, so should only be used as an approximation.