
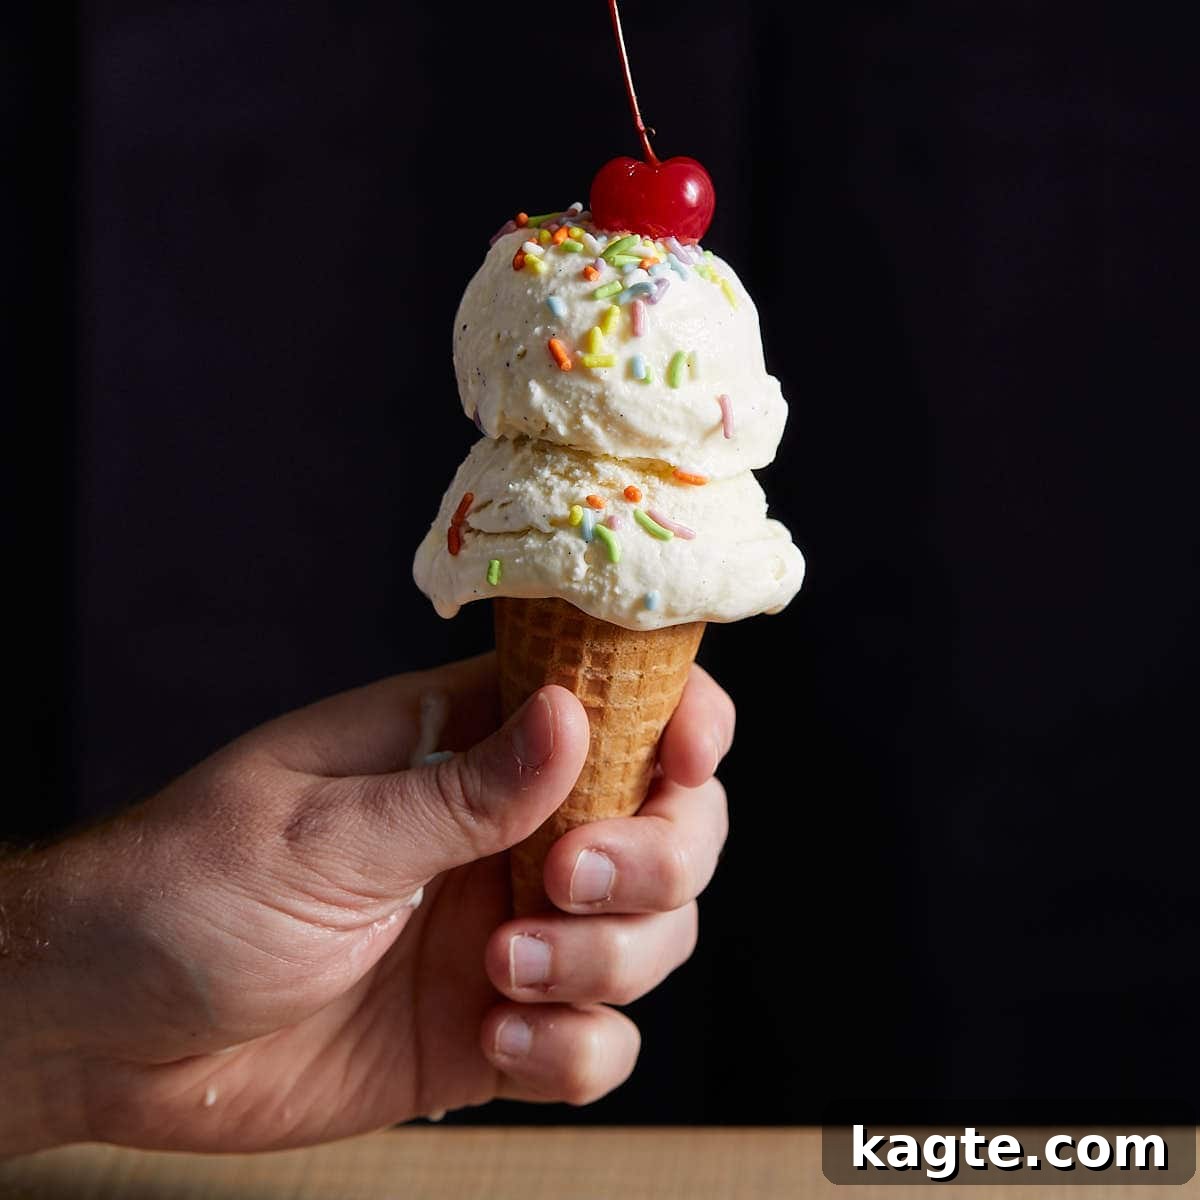
Welcome to your new favorite dessert: an incredibly smooth and luscious No-Egg Vanilla Ice Cream recipe! This delightful treat is perfect for anyone seeking a rich, creamy, and intensely flavorful vanilla experience without the fuss of eggs. Crafted to work seamlessly with your Cuisinart ice cream maker, this recipe simplifies the traditional ice cream-making process by eliminating the need to cook a custard base. The result is a vibrant, pure vanilla flavor enhanced by real vanilla beans, yielding a texture so luxurious you’ll wonder how you ever settled for store-bought. Prepare to be utterly captivated by every spoonful!
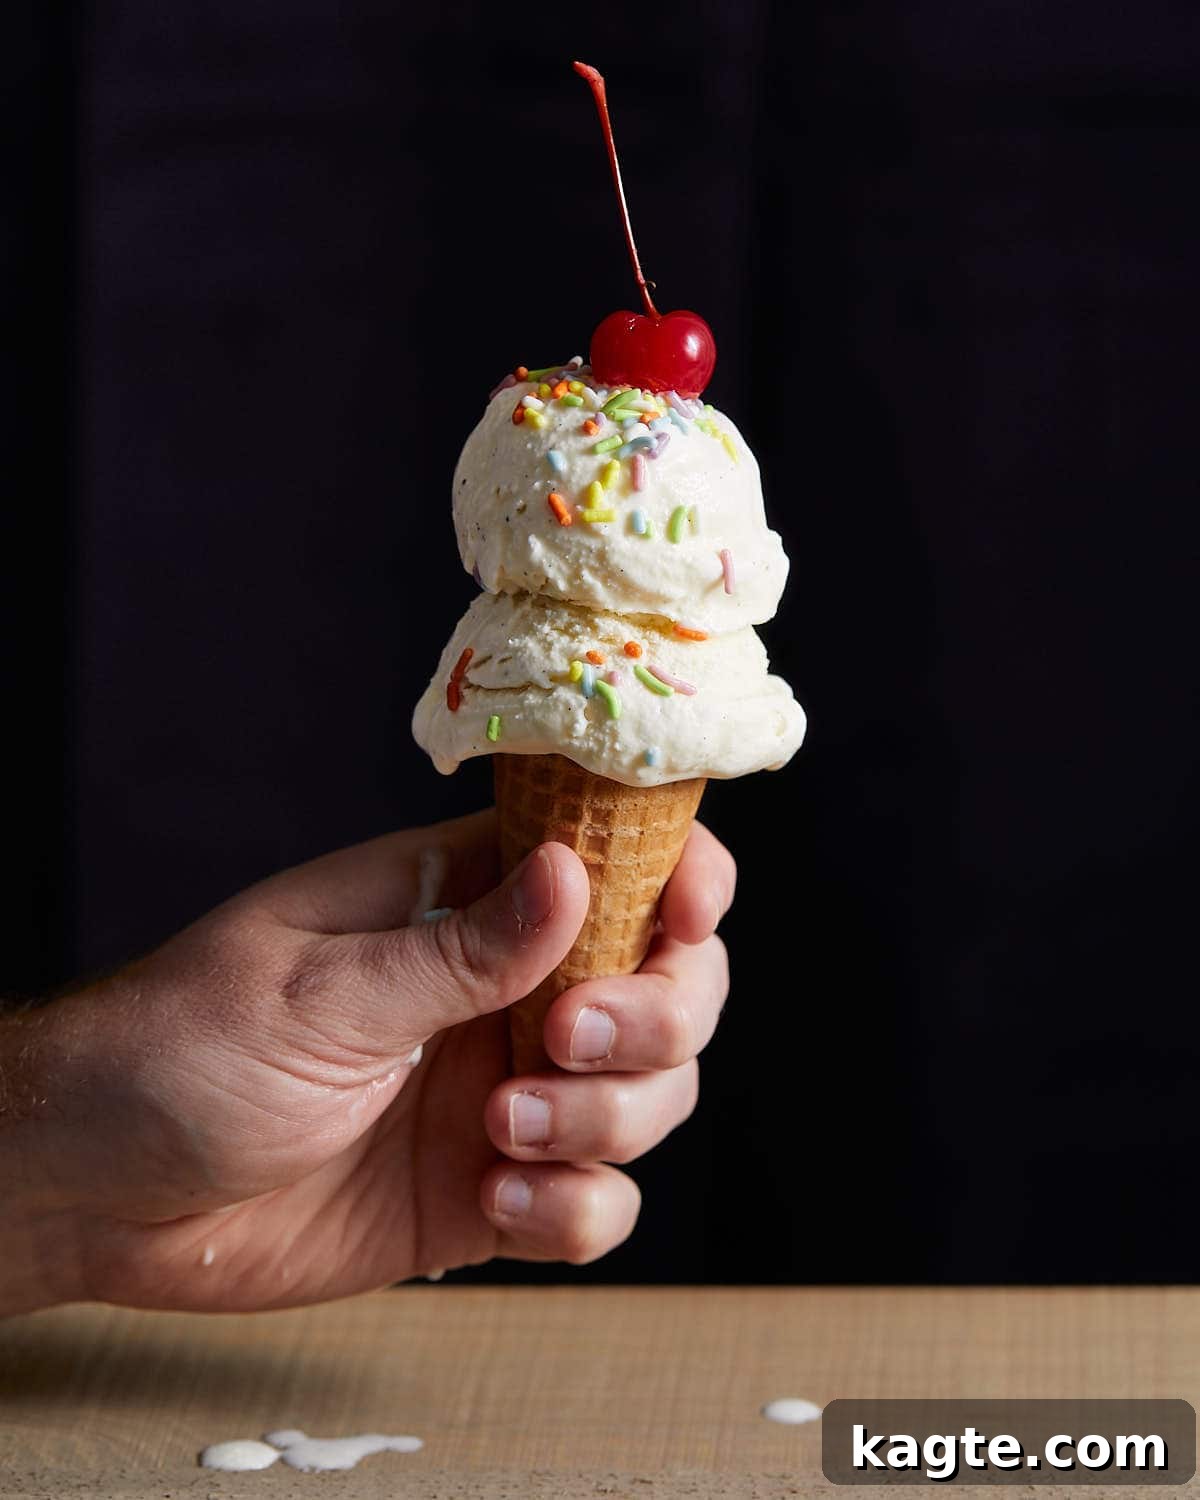
There’s nothing quite like the indulgence of homemade ice cream, and this eggless vanilla ice cream recipe has quickly become a beloved obsession. It transcends the quality of any store-bought alternative, offering a fresh, pure taste that’s simply unparalleled. Much like my Homemade Strawberry Jam Recipe – another excellent creation that doubles as a fantastic topping – this ice cream showcases how simple ingredients can yield extraordinary results.
For an elevated dessert experience, I often find myself adding a generous dollop of my Easy Apple Curd on top of this creamy vanilla masterpiece. The tartness of the apple beautifully complements the sweet vanilla. Alternatively, if you’re seeking a comforting warm dessert to serve alongside or beneath this ice cream, my Apple Bread Pudding or Air Fried Apples, fresh out of the oven, are phenomenal choices. The contrast of hot and cold, soft and creamy, is simply divine.
If you’re a fan of creating frozen delights with your ice cream maker, you’ll be pleased to know that many other eggless options exist. For more inspiration, explore The Best 30 Cuisinart Ice Cream Maker Recipes, which features a variety of flavors, including my Homemade Pistachio Ice Cream. There’s a whole world of creamy possibilities waiting to be churned!
Table of Contents
- Why You’ll Love This Recipe
- The Secret to Eggless Creaminess
- Ingredients & Substitutions for Perfect Vanilla Ice Cream
- How to Make Vanilla Ice Cream without Eggs
- Expert Tips & Delicious Variations
- Recipe FAQs
- More Irresistible Dessert Recipes
- No Egg Vanilla Ice Cream Recipe Card
Why You’ll Love This Recipe: A Delightfully Simple Indulgence
This isn’t just another ice cream recipe; it’s a gateway to effortless dessert perfection. Here’s why this no-egg vanilla ice cream will become a staple in your kitchen:
- Unbelievably Smooth and Creamy Texture: Forget grainy or icy homemade ice cream. This recipe delivers a consistently smooth, rich, and velvety texture that rivals premium gelato, thanks to the perfect balance of dairy.
- Intense Vanilla Flavor: We don’t just use vanilla extract here; we celebrate the glorious depth of real vanilla beans. By combining both vanilla extract and the luscious vanilla bean caviar, you get an incredibly aromatic and profound vanilla flavor that truly shines through.
- Minimal Ingredients, Maximum Impact: You’ll be surprised at how much flavor and richness can be achieved with just 6 simple ingredients, including a pinch of salt. No need for complicated additions like condensed milk, allowing the natural goodness of vanilla and dairy to take center stage.
- No Cooking Required: This is arguably one of the biggest benefits! Since there are no eggs, there’s no need to temper eggs or meticulously cook a custard base. This saves you significant time and effort, making the entire process quicker and more enjoyable.
- Classic Versatility: The pure, classic vanilla flavor makes this ice cream incredibly versatile. It’s utterly delicious on its own, a perfect canvas for your favorite toppings, or an ideal companion for warm pies, cobblers, and puddings.
- A Fun Family Activity: Making homemade ice cream, especially a no-cook version like this, is a fantastic activity to share with kids. They’ll love watching the mixture transform in the ice cream maker and, of course, helping with the tasting!
- Perfect for Egg-Free Diets: For those with egg allergies or dietary preferences, this recipe offers a delicious and safe way to enjoy homemade vanilla ice cream without compromise.
The Secret to Eggless Creaminess: Understanding Your Ingredients
While eggs often contribute to the richness and smooth texture of traditional ice cream custards, this recipe achieves remarkable creaminess through a careful selection and balance of high-fat dairy. The key lies in understanding how each ingredient plays a vital role:
- High-Fat Dairy is Your Friend: In eggless ice cream, fats from dairy products become paramount. They interfere with the formation of large ice crystals during freezing, which is what gives ice cream its smooth, rather than icy, texture. The higher the fat content, the creamier your result will be.
- The Power of an Ice Cream Maker: While not a direct ingredient, an ice cream maker is crucial for this recipe. It constantly churns the mixture as it freezes, introducing air and breaking up ice crystals as they form. This mechanical action is indispensable for achieving that silky, store-bought consistency in homemade ice cream, especially without the emulsifying properties of egg yolks.
- Sugar’s Dual Role: Beyond sweetness, sugar also acts as an anti-freeze. It lowers the freezing point of the mixture, preventing it from becoming rock-hard and helping maintain a softer, scoopable texture even when fully frozen.
- A Touch of Salt: Don’t skip the salt! A small amount of salt doesn’t make the ice cream savory; instead, it enhances the sweetness of the sugar and brightens the delicate vanilla flavors, creating a more balanced and nuanced taste profile.
Ingredients & Substitutions for Perfect Vanilla Ice Cream
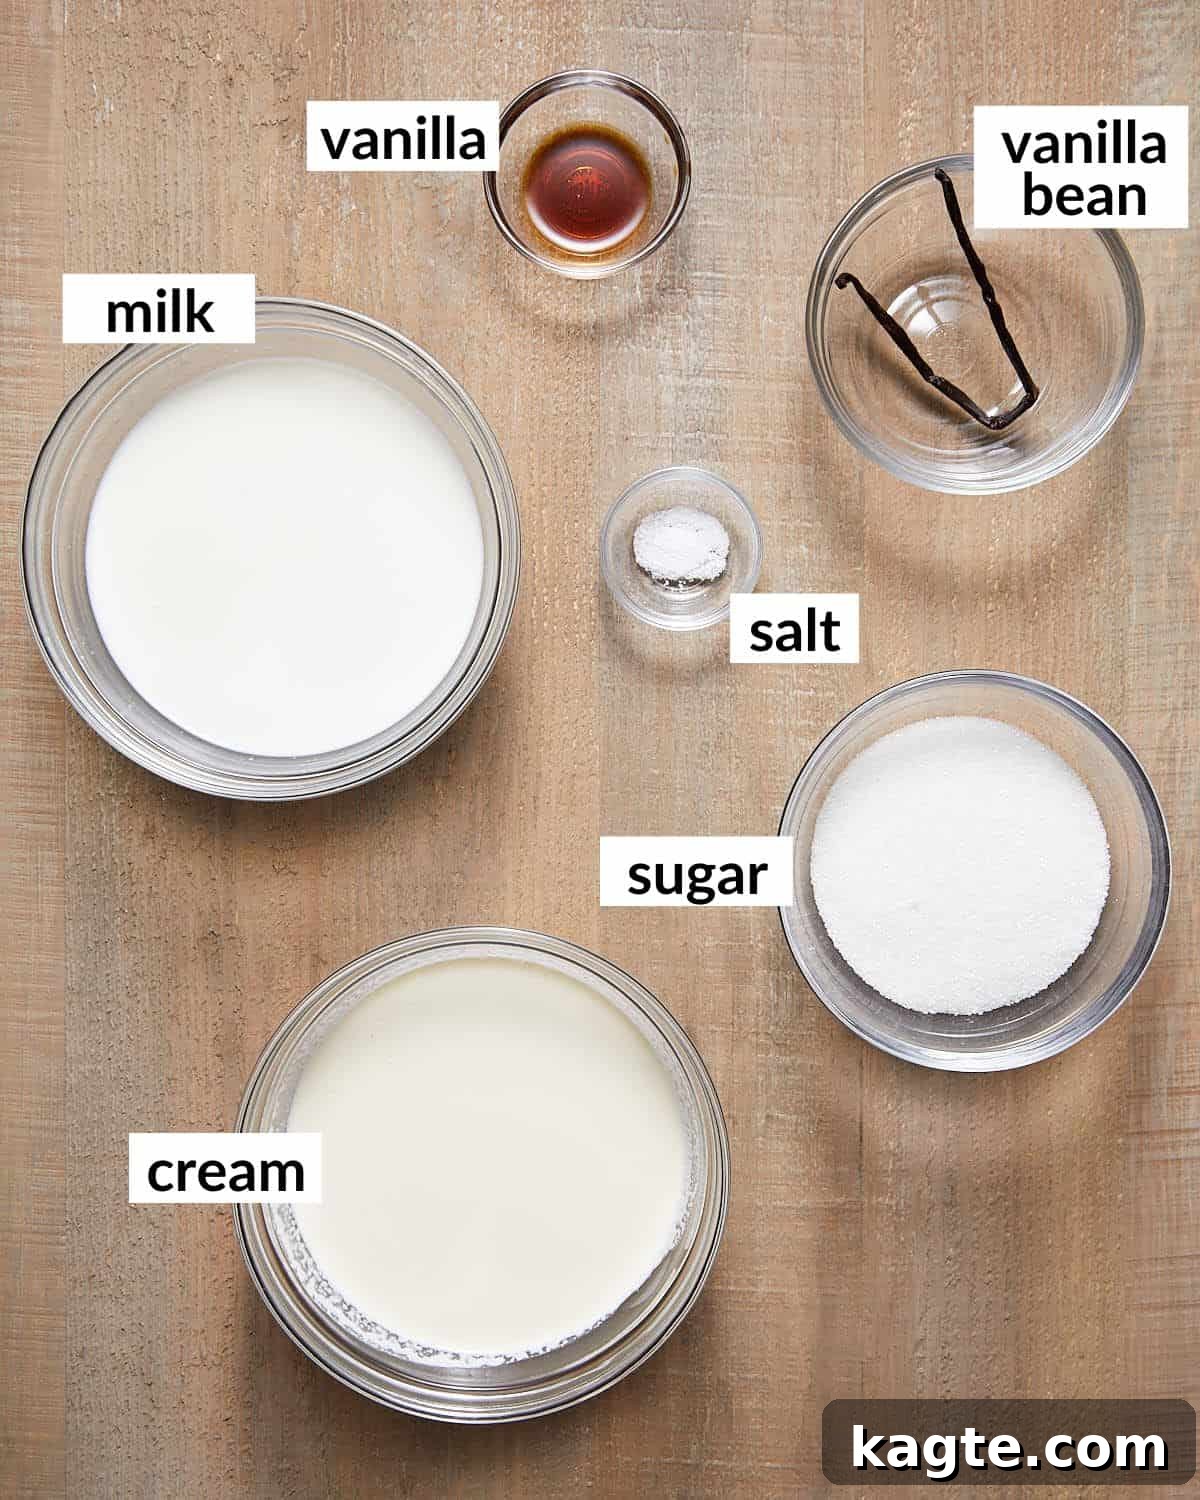
Simple yet essential, each ingredient in this recipe is chosen to contribute to the ultimate creamy vanilla ice cream experience:
- Vanilla Bean: This is where the magic happens! Vanilla beans, typically found in the spice aisle of well-stocked supermarkets, impart an unparalleled depth and complexity of flavor that vanilla extract alone cannot achieve. While they are a more expensive ingredient, the difference in flavor is truly profound and worth the splurge for a special treat. If a vanilla bean is inaccessible or out of budget, you can substitute it with an additional 2 teaspoons of good quality vanilla extract (for a total of 3 teaspoons in the recipe). For a visual appeal and flavor similar to a bean, you could also use 1-2 teaspoons of vanilla bean paste.
- Heavy Cream: This is the backbone of our creamy, eggless ice cream. Heavy cream, with its high-fat content, is crucial for preventing the formation of large ice crystals, resulting in that silky-smooth texture. For an even richer, more decadent ice cream, you can adjust the ratio slightly to 2 cups of heavy cream and 1 cup of whole milk.
- Whole Milk: Complementing the heavy cream, whole milk also contributes to the fat content, enhancing the overall creaminess and mouthfeel. It’s essential to use whole milk as its higher fat percentage is vital for the texture of this eggless recipe. I strongly advise against using skim, 1%, or 2% milk, as their lower fat content will lead to an icier, less satisfying ice cream.
- Granulated Sugar: Provides the perfect sweetness and also plays a critical role in the texture by helping to keep the ice cream soft and scoopable.
- Vanilla Extract: Used in conjunction with the vanilla bean, the extract boosts the vanilla flavor, adding another layer of aromatic richness. Opt for a pure vanilla extract for the best results.
- Salt: A tiny pinch of salt might seem counterintuitive in a sweet dessert, but it’s a flavor enhancer that balances the sweetness and brings out the subtle complexities of the vanilla.
A complete list of ingredients and their precise amounts can be found on the recipe card below.
How to Make Vanilla Ice Cream without Eggs: A Simple & Satisfying Process
Making this delightful eggless vanilla ice cream is surprisingly straightforward. There are no complicated cooking steps, just a bit of mixing, chilling, and churning to achieve dessert perfection.
Quick Overview
- Prepare the intense vanilla cream mixture.
- Chill the mixture thoroughly in the refrigerator.
- Churn in your ice cream maker until thick and creamy, then serve or freeze for a firmer texture!
Step by Step Instructions for Irresistible Homemade Ice Cream
Follow these detailed steps to create your own batch of luscious, no-egg vanilla ice cream:
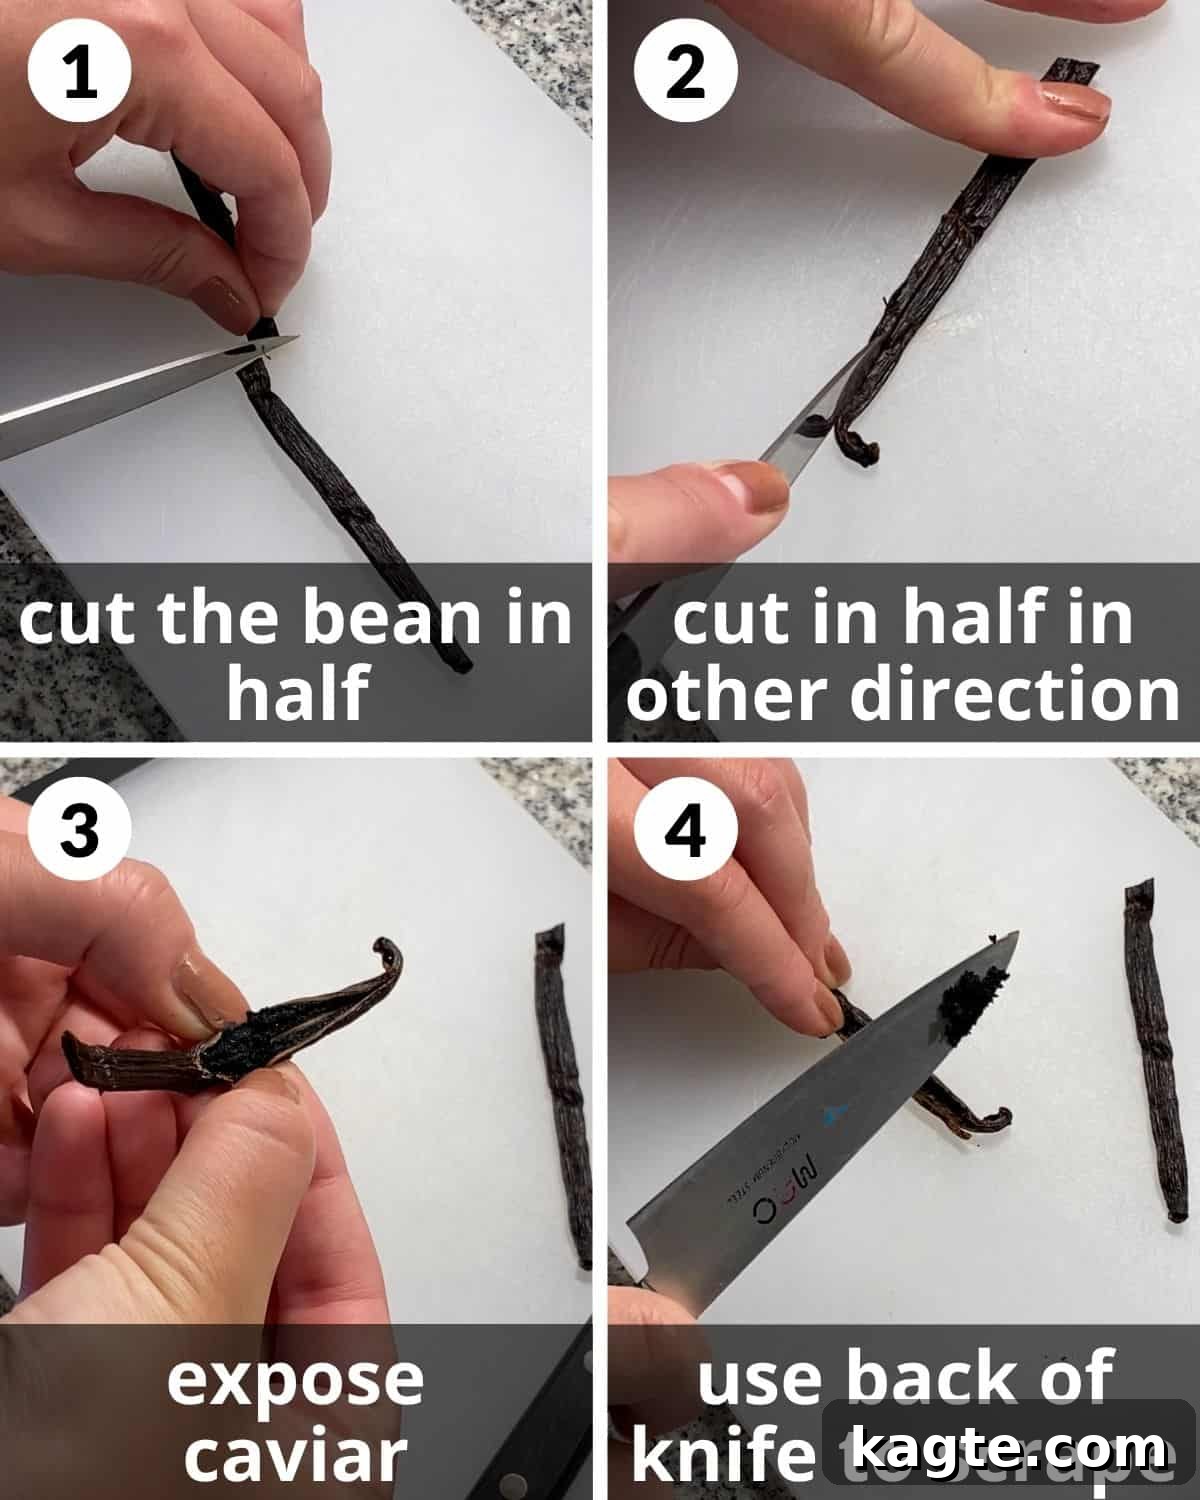
Step 1: Begin by preparing your vanilla bean. Lay the bean on a cutting board and carefully cut it in half crosswise, creating two shorter pieces. This makes it easier to handle and extract the caviar.
Step 2: Next, take each half and slice it lengthwise down the middle. Be gentle but firm enough to cut through the skin of the bean, exposing the inner seeds.
Step 3: Use your fingers to gently pry open each sliced vanilla bean, revealing the moist, dark, and aromatic vanilla bean caviar nestled inside.
Step 4: With the back of your knife or a small spoon, carefully scrape along the inside of each vanilla bean half. Collect all the tiny, flavorful caviar into a bowl. This concentrated vanilla goodness is what will give your ice cream its incredible flavor and characteristic speckled appearance.
Critical Tip: Ensure the sugar is completely dissolved for a smooth texture!
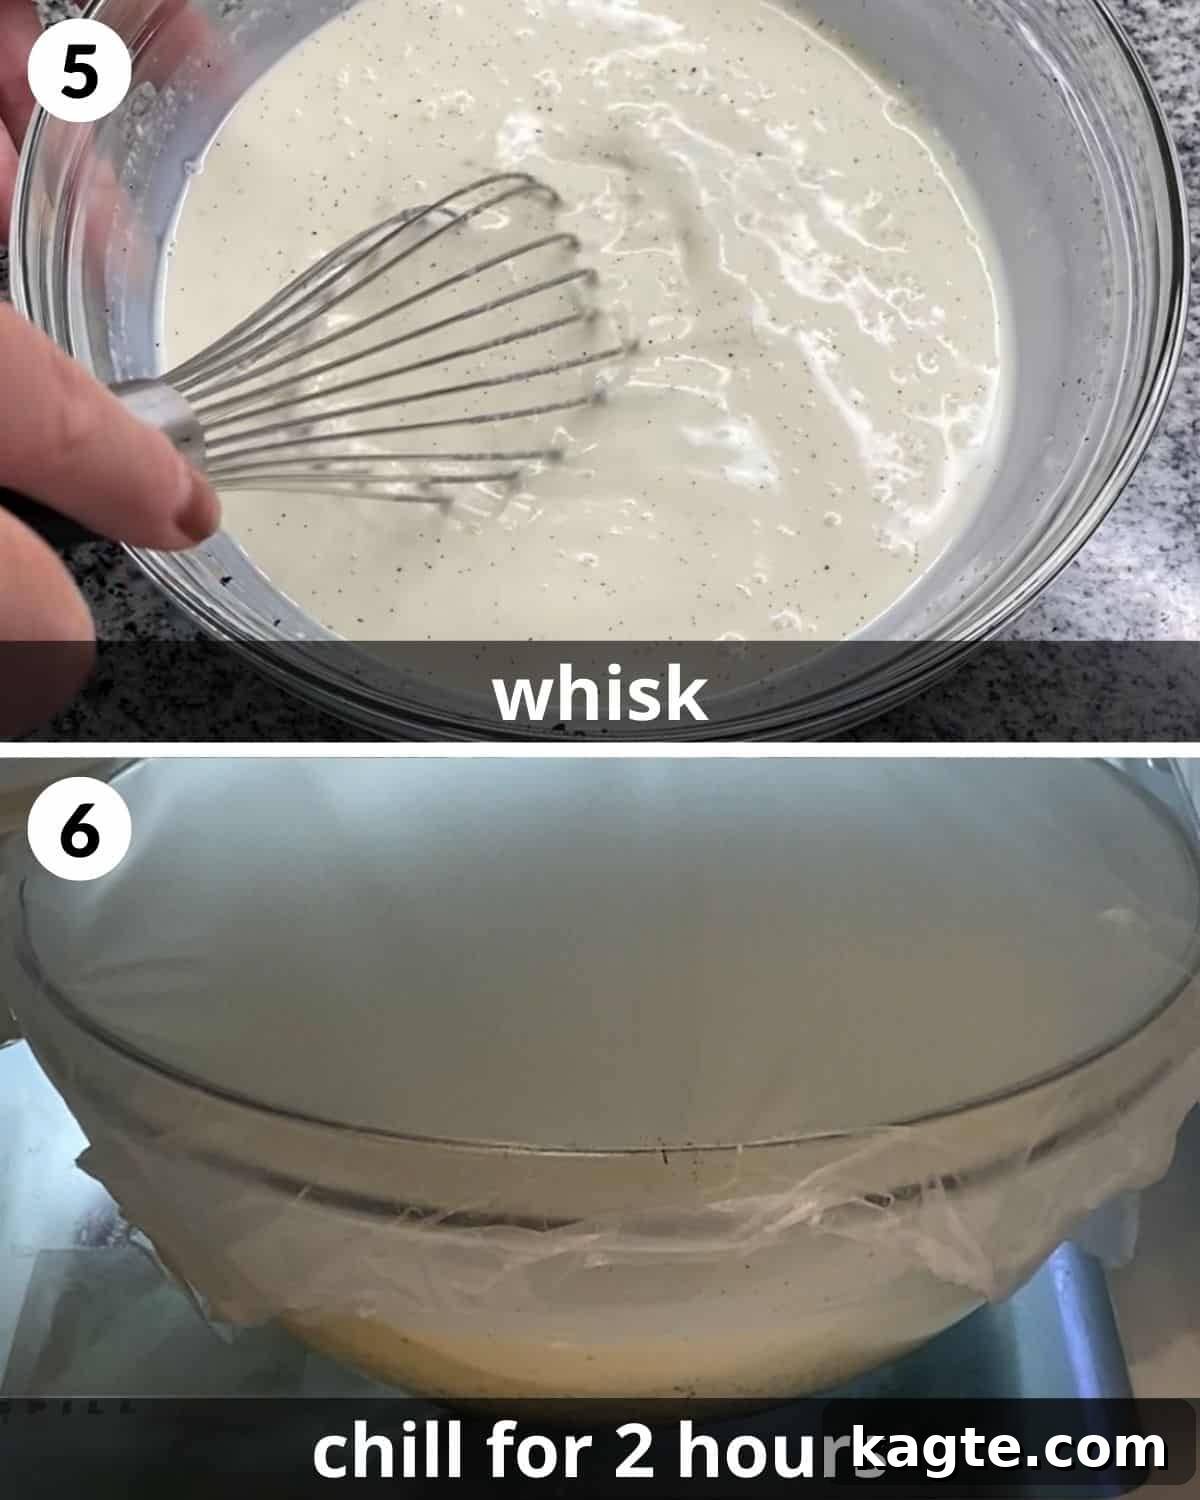
Step 5: In a large mixing bowl, combine the scraped vanilla bean caviar, heavy cream, whole milk, granulated sugar, vanilla extract, and salt. Whisk these ingredients together vigorously until the sugar is completely dissolved. It’s crucial that no sugar granules remain, as undissolved sugar can lead to a gritty texture in your finished ice cream. Taste a tiny bit to ensure it’s smooth and sweet.
Step 6: Once the mixture is perfectly smooth, cover the bowl tightly with plastic wrap and transfer it to the refrigerator. Allow it to chill for a minimum of 2 hours, or ideally, overnight. This chilling step is vital, as a very cold base will churn more efficiently and result in a creamier ice cream with fewer ice crystals.
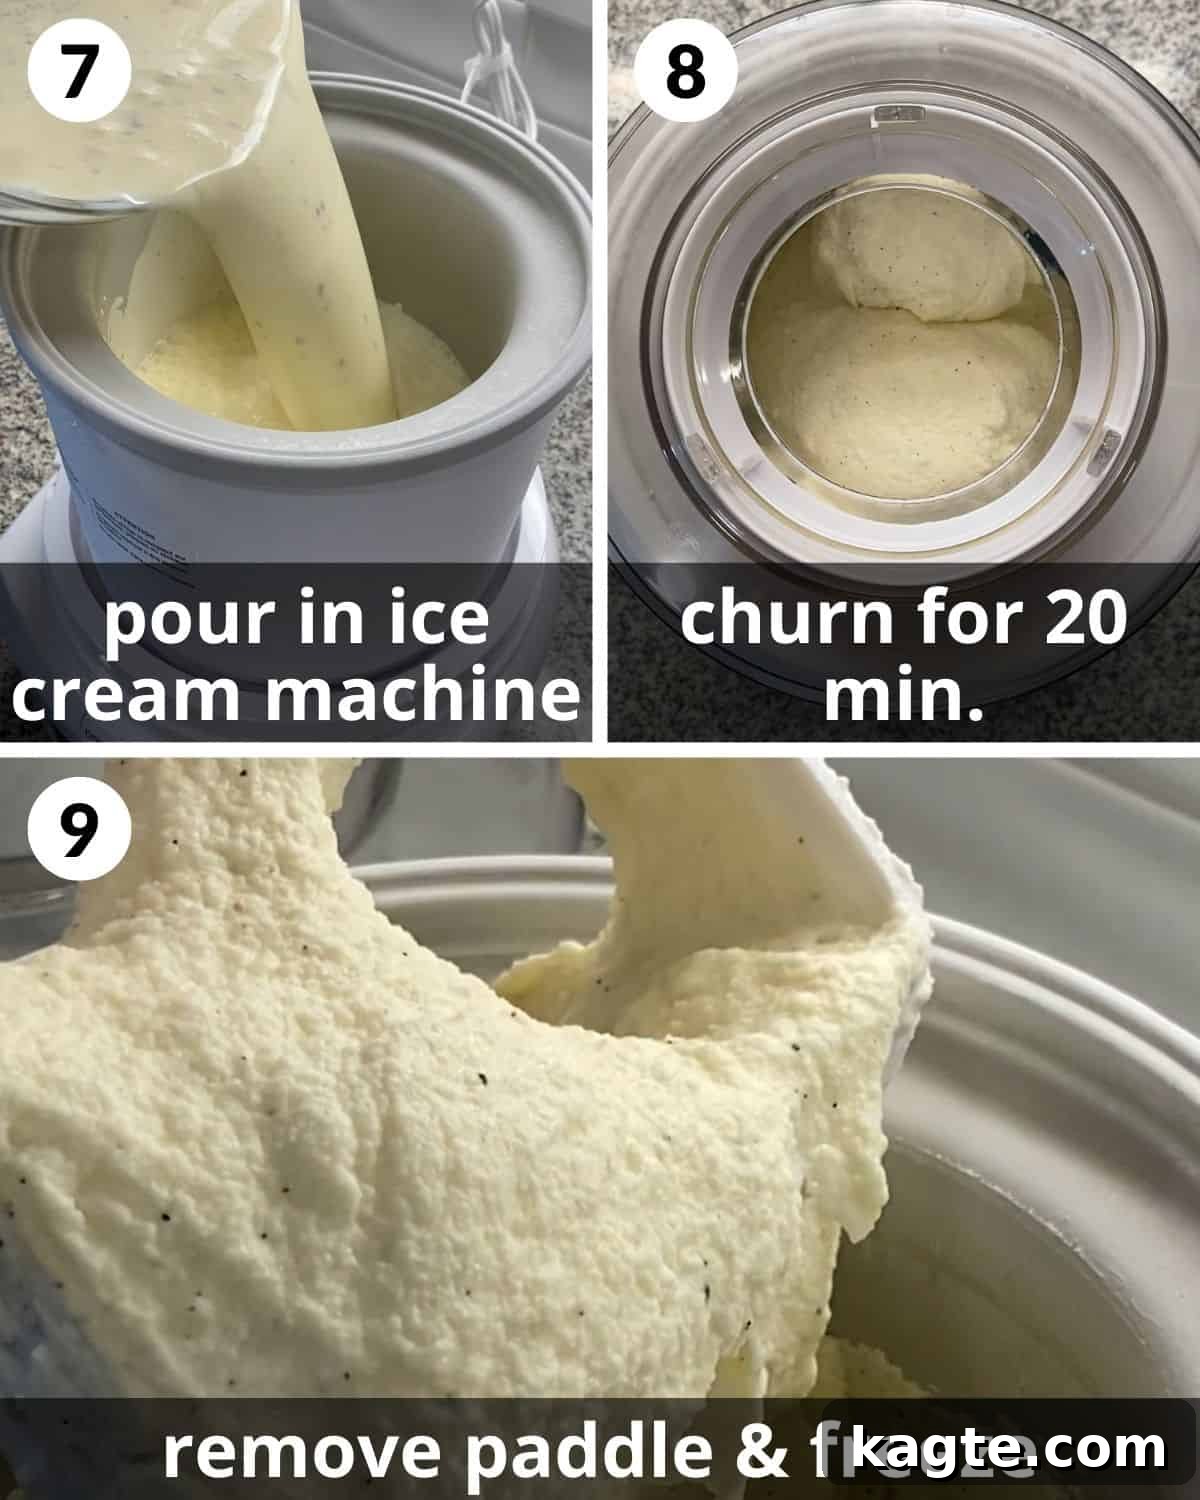
Step 7: After the mixture is thoroughly chilled, pour it into the frozen bowl of your ice cream maker. Ensure your ice cream maker bowl has been frozen for at least 12-24 hours prior, according to manufacturer instructions.
Step 8: Secure the lid onto your ice cream maker and begin churning. Churn the ice cream for approximately 20 minutes, or until it reaches a thick, soft-serve consistency. The exact churning time may vary depending on your machine and the initial temperature of your mixture. It should look noticeably thicker and have increased in volume.
Step 9: Once churned, remove the paddle from the ice cream maker. At this stage, the ice cream has a wonderful soft, fresh consistency, perfect for immediate serving. For a firmer, more traditional scoopable texture, transfer the ice cream to an airtight container. Press a piece of parchment paper directly onto the surface of the ice cream to prevent ice crystals, then cover tightly. Freeze for an additional 3-4 hours, or until it has firmed up to your desired consistency. Enjoy your homemade delight!
Expert Tips & Delicious Variations for Your Homemade Ice Cream
Achieving the perfect homemade ice cream is an art, and these tips will help you master it and even explore exciting variations:
- The Essential Role of an Ice Cream Maker: While some no-churn recipes exist, for the silkiest, most professional-quality ice cream, an ice cream maker is highly recommended. I haven’t tested this specific recipe without one. These machines are designed to continuously agitate the mixture as it freezes, drastically reducing the size of ice crystals and resulting in a much smoother, more luxurious texture. My personal favorite and recommendation is the Cuisinart 1.5 Quart Frozen Yogurt Ice Cream Maker for its efficiency and consistent results.
- Prioritize Whole Milk and Heavy Cream: The fat content in your dairy is non-negotiable for this eggless recipe. Since eggs aren’t present to add richness and emulsify the mixture, the higher fat in whole milk and heavy cream is crucial for achieving that desirable smooth and creamy consistency. Avoid using lower-fat milk varieties as they will yield an icier, less satisfying ice cream.
- Embrace the Vanilla Bean: Yes, vanilla beans can be a bit more expensive and harder to find than extract, but their flavor contribution is simply incomparable. They provide a complex, floral, and deeply aromatic vanilla profile that transforms simple ice cream into an extraordinary indulgence. If you can, use a fresh, plump vanilla bean for the best results.
- Thoroughly Whisk for Perfection: Before chilling, ensure your cream mixture is whisked thoroughly until all the sugar is completely dissolved. Any undissolved sugar crystals can lead to a grainy texture in your final product. Take your time with this step to guarantee a perfectly smooth base.
- Experiment with Toppings and Mix-Ins: This classic vanilla ice cream is a perfect canvas for creativity! After churning, during the last few minutes in the ice cream maker or when transferring to a container, fold in 1-2 cups of your favorite mix-ins. Some fantastic options include crushed Oreos, chocolate chips (milk, dark, or white), chunks of edible cookie dough, colorful M&Ms, mini peanut butter cups, or crunchy toffee chips. For a fresher twist, diced fresh fruits like strawberries or raspberries can also be delicious additions.
- Optimal Storage for Freshness: Homemade ice cream, unlike its store-bought counterparts, typically doesn’t contain the same preservatives and stabilizers. While incredibly fresh and flavorful, it’s best enjoyed within 1-2 weeks when stored in an airtight container in the freezer. Beyond this period, you might start to notice small ice crystals forming, which can slightly alter the texture. To minimize crystal formation, press a piece of plastic wrap or parchment paper directly onto the surface of the ice cream before sealing the container.
- Flavor Variations: Beyond mix-ins, consider other flavor enhancements. A teaspoon of almond extract can add a subtle nutty note, or a splash of bourbon can introduce a sophisticated warmth. You can also infuse the milk and cream with other flavors before chilling, such as a cinnamon stick or a few strips of orange peel, just remember to strain them out before churning.
Recipe FAQs: Your Questions Answered
When making ice cream without eggs, recipes often rely on other ingredients to achieve a rich, creamy texture. This recipe, for example, heavily leverages the high-fat content of heavy cream and whole milk. Some other egg-free recipes might incorporate ingredients like cream cheese for tanginess and body, cornstarch or tapioca starch as thickeners, or even condensed milk for a no-cook, rich base. It’s important to note that ice cream made with an egg-based cooked custard is technically called “French-style” or “custard ice cream.” Recipes like this one are often referred to as “Philadelphia-style” or simply “American-style” ice cream.
No, eggs are not strictly necessary to make delicious ice cream. While eggs, specifically egg yolks, add a luxurious richness, a smooth texture, and help stabilize the emulsion in traditional custard-based ice creams, you can achieve a wonderfully creamy and flavorful result without them. As demonstrated in this recipe, the combination of high-fat dairy (heavy cream and whole milk) provides ample richness and helps prevent ice crystal formation, delivering a fantastic texture that can rival its egg-inclusive counterparts. Many prefer eggless recipes for their simplicity and lighter mouthfeel.
Whether homemade ice cream is “better” with or without eggs is largely a matter of personal preference and the specific qualities you’re looking for. Both styles offer unique characteristics. Egg-based ice creams (custard ice creams) tend to be incredibly rich, dense, and have a distinct custard-like flavor and mouthfeel due to the egg yolks. They are often very smooth. Eggless ice creams (Philadelphia-style), like this recipe, are typically lighter in texture, allowing the pure flavor of the main ingredient (in this case, vanilla) to shine through more prominently. They are also significantly easier and quicker to prepare, as they eliminate the cooking step. Many people prefer eggless recipes for their refreshing quality and simpler preparation. Both can be absolutely delicious when done well!
More Irresistible Dessert Recipes to Explore
Dessert
No-Chill Chocolate Chip Cookies (Easy)
Christmas
20 Sweet Peppermint Recipes for Christmas
Fall
20 Sweet Pumpkin Recipes for Fall (From Breakfast to Dessert)
Breakfast
Blueberry Coffee Cake with Greek Yogurt & Streusel
If you create this wonderfully creamy No-Egg Vanilla Ice Cream, I would absolutely love to hear about it! Please take a moment to leave a star rating in the recipe card below and/or drop a comment to share your experience and feedback. Your insights are always appreciated! For more delicious recipes and kitchen inspiration, be sure to follow me on Pinterest, Facebook & Instagram. Happy churning!
Print Recipe
Save Recipe
No Egg Vanilla Ice Cream
Equipment
-
Cuisinart 1.5 Quart Ice Cream Maker
-
Mixing Bowls
-
Whisk
Ingredients
- 1 vanilla bean*
- 1 1/2 cups heavy cream*
- 1 1/2 cup whole milk*
- 2/3 cup granulated sugar
- 1 teaspoon vanilla extract
- 1/8 teaspoon salt
Instructions
-
Cut the vanilla bean in half crosswise.
-
Next cut in half lengthwise.
-
Use your fingers to open it up and expose the vanilla bean caviar.
-
Use the back of the knife to scrape out all of the caviar.
-
Whisk together the caviar, cream, milk, sugar, vanilla extract, and salt, until the sugar dissolves.
-
Cover and chill in the fridge for at least 2 hours or overnight.
-
Pour the mixture in the ice cream maker.
-
Put the lid on and churn the ice cream for about 20 minutes, or until it has thickened.
-
Remove the paddle. Serve immediately for a softer consistency or transfer the ice cream to an airtight container. Freeze for 3-4 hours or until the ice cream has firmed up.
Notes
- Vanilla Bean: Vanilla beans can be found in the spice section at the supermarket. These are expensive, but the flavor is incredible. You can replace the vanilla bean for an additional 2 teaspoons of vanilla extract (3 total).
- Heavy Cream: For a richer ice cream, use 2 cups of cream and 1 cup of milk.
- Whole Milk: Whole milk has the highest fat content, which makes the texture smoother. I do not recommend using skim, 1%, or 2% milk.
- Make it in an ice cream maker. I have not tested this recipe without one. Ice cream makers reduce the amount of ice crystals that form while the cream freezes. This makes the texture much silkier. I use & recommend the Cuisinart 1.5 Quart Frozen Yogurt Ice Cream Maker.
- Add in 1-2 cups your favorite toppings. My favorites are crushed Oreos, chocolate chips, edible cookie dough, M&Ms, mini peanut butter cups, and toffee chips. You could also add in diced fresh fruit.
- Store for 1-2 weeks in the freezer in an airtight container. This recipe usually doesn’t last long in my house, but after a couple weeks in the freezer ice crystals will begin to form. This is because the ice cream does not have the same preservatives and stabilizers that store-bought does.
Nutrition
Nutrition information is automatically calculated, so should only be used as an approximation.