

Welcome to the ultimate recipe for a rich, flavorful, and incredibly satisfying **Instant Pot Chili (No Beans)** that’s perfect for anyone following a low-carb or keto lifestyle, or simply those who prefer their chili hearty and bean-free. This isn’t just another quick dinner; it’s a culinary experience that brings deep, slow-simmered flavors to your table in under 30 minutes of active cooking. Imagine a chili so robust, so packed with savory goodness, it tastes like it’s been bubbling on the stove all day, even though your Instant Pot worked its magic in a fraction of the time. Get ready to embrace the colder months with a warm, comforting bowl that will quickly become a family favorite.

There’s something truly special about a well-made chili, and for many, that means no beans. This recipe holds a special place in my heart, as bean-free chili was one of the first meals I ever cooked for my husband that truly won him over. It quickly climbed the ranks to become one of his absolute favorites, right alongside our beloved No Bean White Chicken Chili Recipe and the ever-popular Queso Chicken & Rice Skillet. The rich, meaty broth and complex spice profile in this Instant Pot version offer unparalleled comfort, making it a staple in our home, especially when the temperatures drop.
While this particular recipe focuses on a robust, beef-based chili without beans, it’s incredibly versatile. If you’re looking to incorporate more vegetables into your diet without compromising on flavor, my No Bean Turkey Chili Recipe offers a lighter yet equally satisfying option. And for those who appreciate the classic texture and heartiness that beans bring to the bowl, don’t hesitate to explore my traditional Dutch Oven Chili recipe. If you’re a bean lover specifically, my Instant Pot Charro Beans are also a must-try for a flavorful side or meal component.
Table of Contents
- Why You’ll Love This Recipe
- Ingredients & Substitutions for the Perfect No-Bean Chili
- How To Make Instant Pot Chili Without Beans: A Step-by-Step Guide
- Recipe Serving Suggestions: Elevate Your Chili Experience
- Expert Tips for Instant Pot Chili Success
- Variations to Customize Your Chili
- Recipe FAQs: Your Questions Answered
- More Instant Pot Recipes to Explore
- Instant Pot Chili (No Beans) Recipe Card
Why You’ll Love This Recipe
- Effortless & Healthy Instant Pot Chili Recipe Without Beans: This recipe streamlines the chili-making process, allowing you to achieve complex flavors with minimal fuss, all while being a naturally healthier option without the added starches of beans. It’s truly a set-it-and-forget-it meal once the initial sauté is done.
- Perfectly Balanced Spice Level: We’ve carefully crafted this chili to be rich in flavor without being overwhelmingly spicy. It offers a gentle warmth that appeals to most palates, making it a crowd-pleaser for families and guests alike. You can easily adjust the heat to your preference, as we’ll discuss later.
- Uses Simple, Accessible Ingredients: You won’t find any exotic or hard-to-find items here. This recipe relies on common pantry staples and fresh produce, ensuring that a delicious, homemade chili is always within reach, even on busy weeknights.
- Delivers Bold, Unforgettable Flavor: Thanks to a thoughtfully chosen blend of spices, premium ground beef, and key aromatic ingredients, this chili boasts an incredibly deep and satisfying flavor profile that will have everyone asking for seconds.
- Infused with Irresistible Smokiness: The secret to this chili’s exceptional depth lies in the combination of rich adobo sauce and crispy bacon. These ingredients contribute an unparalleled smoky undertone that elevates the entire dish, setting it apart from typical chili recipes.
- The Epitome of Cozy Fall or Winter Dinner: As the weather turns cooler, there’s nothing quite like a steaming bowl of homemade chili. This Instant Pot version is the quintessential comfort food, perfect for warming you from the inside out after a long day or for a cozy weekend meal.
- Naturally Gluten-Free, Low Carb, & Keto Friendly: Designed with dietary needs in mind, this chili is naturally gluten-free. By simply omitting the optional corn, it easily fits into a low-carb and ketogenic diet, allowing you to enjoy a hearty meal without derailing your health goals.
Ingredients & Substitutions for the Perfect No-Bean Chili
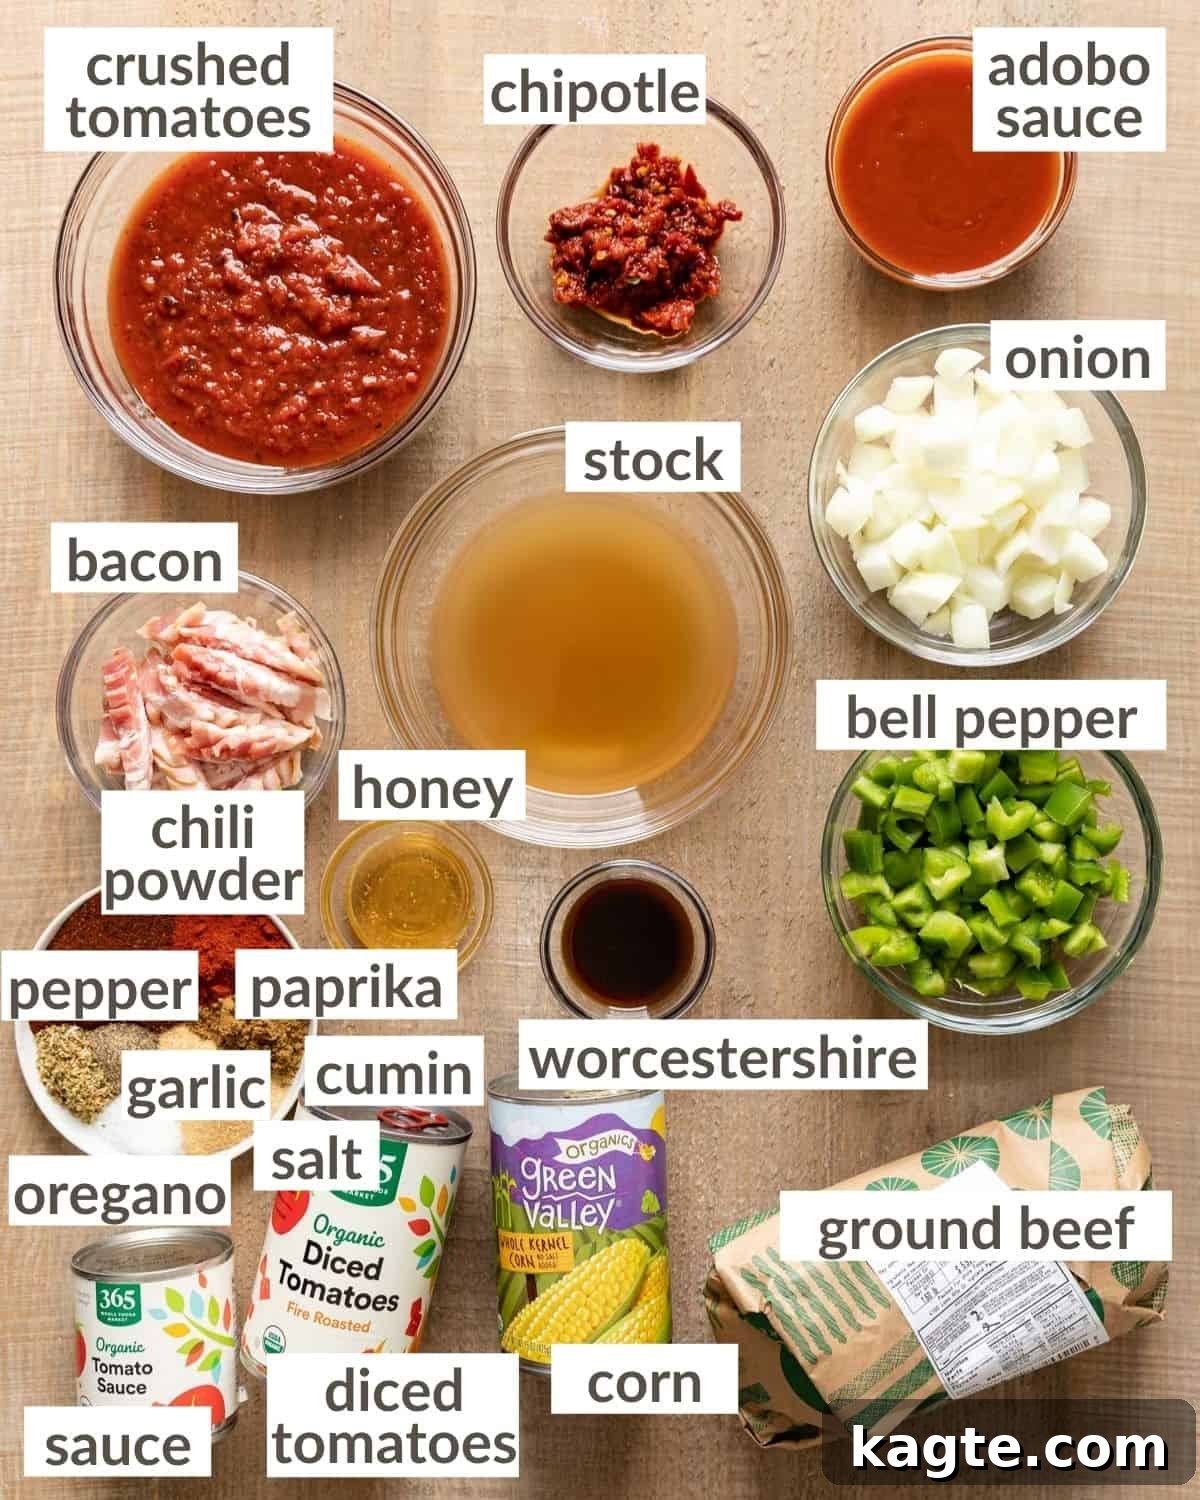
- Ground Beef: We recommend using 80/20 ground beef for its perfect balance of flavor and fat, which renders beautifully during sautéing and adds richness to the chili. However, you can certainly swap it for ground turkey or a leaner ground beef (like 90/10) if you prefer a lighter option. Just be aware that leaner meats may require a touch more oil for browning and might slightly alter the chili’s texture.
- Smoked Paprika: This ingredient is a game-changer. **It is crucial to use smoked paprika, not regular paprika.** Smoked paprika offers a deep, earthy, and distinctly smoky flavor that is central to this chili’s character. Regular paprika, while colorful, lacks this essential depth and will result in a completely different, less complex taste profile.
- Corn: While entirely optional, adding a can of yellow corn introduces a lovely touch of natural sweetness and a pleasant textural contrast to the savory chili. If you are strictly adhering to a low-carb or keto diet, simply omit the corn, and the chili will still be wonderfully flavorful and compliant.
- Honey: A small amount of honey helps to balance the acidity of the tomatoes and rounds out the overall flavor profile, adding a subtle sweetness without making the chili overtly sweet. If you don’t have honey on hand, you can easily swap it for 1 Tablespoon of white or brown sugar for a similar effect. For keto alternatives, consider a sugar substitute like erythritol or stevia, adjusted to taste.
- Adobo Sauce: This incredible ingredient, found in a can with chipotle peppers, is vital for the chili’s signature rich and smoky depth. The peppers themselves are often quite hot, so for this recipe, we typically remove the chipotle peppers from the can and either discard them or store them separately in the refrigerator for other spicy dishes. We then measure out 2 Tablespoons of the adobo sauce to incorporate into the chili. If you have a low tolerance for spice, start with just 1 Tablespoon of adobo sauce, or omit it entirely if you’re very sensitive. Conversely, if you crave a fiery kick, feel free to finely chop one of the chipotle peppers and add it to the chili during the sautéing stage. Be cautious, as these peppers can be intensely hot and a little goes a long way!
A complete list of ingredients with precise measurements is conveniently located on the recipe card below, ensuring you have everything you need at a glance.
How To Make Instant Pot Chili Without Beans: A Step-by-Step Guide
Quick Overview: Unlocking Deep Flavor Fast
- Begin by sautéing the ground meat and bacon with a rich blend of spices and fresh vegetables directly in your Instant Pot. This crucial step builds the foundation of flavor.
- Next, stir in all the liquid ingredients and canned tomatoes, ensuring everything is well combined and ready for pressure cooking.
- Finally, pressure cook to perfection, then quickly release the pressure, and serve your delicious chili generously topped with your favorite garnishes like sour cream, shredded cheese, or crispy corn chips.
Step by Step Instructions: Detailed Execution for Best Results
Step 1: Begin by preparing your Instant Pot. Select the “Sauté” mode, which will allow the pot to heat up. Once hot, add your ground beef and diced thick-cut bacon to the pot. Using a sturdy spoon or spatula, break up the meat as it cooks. Continue to sauté until the beef is mostly browned and the bacon is crispy, rendering out its fat. This initial browning is key for developing deep, savory flavors.
Step 2: Once the meat is browned, carefully drain any excess fat from the pot, leaving just a thin layer for flavor. Now, it’s time to infuse the chili with its aromatic spices. Add the chili powder, smoked paprika, cumin, granulated garlic, kosher salt, black pepper, and oregano to the browned meat. Stir continuously for 1-2 minutes. This brief sautéing period “blooms” the spices, intensifying their fragrance and flavor before liquids are added. You’ll notice a rich, fragrant aroma filling your kitchen.
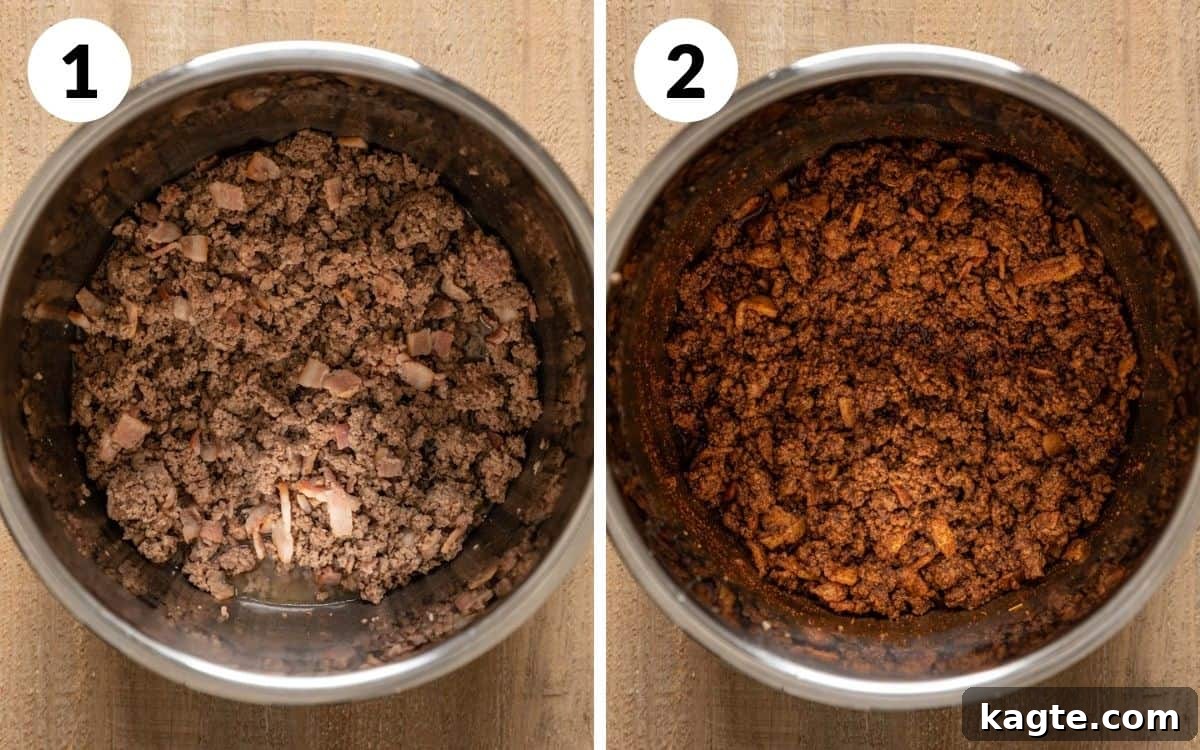
PRO TIP: The crucial step of browning the ground beef and bacon, along with sautéing the spices, before pressure cooking is paramount to achieving a deep, complex flavor in your chili. This process creates a rich fond at the bottom of the pot, which will deglaze and meld into the chili, adding layers of savory deliciousness that would otherwise be missing.
Step 3: Add the diced yellow onion and green bell pepper to the pot with the seasoned meat. Continue to sauté for another 1-2 minutes, stirring occasionally. This brief sauté softens the vegetables slightly and allows them to absorb some of the wonderful flavors from the meat and spices, enhancing their contribution to the chili’s overall taste and texture.
Step 4: Now, it’s time to build the liquid base of your chili. Carefully stir in the beef broth or stock, crushed tomatoes, fire-roasted diced tomatoes, optional yellow corn (if using), plain tomato sauce, honey, Worcestershire sauce, and adobo sauce. Make sure to scrape the bottom of the pot with your spoon to loosen any browned bits (the “fond”) that may have formed during sautéing. This deglazing step is important not only for flavor but also to prevent the Instant Pot from displaying a “Burn” error during pressure cooking. Ensure all ingredients are well combined before proceeding.
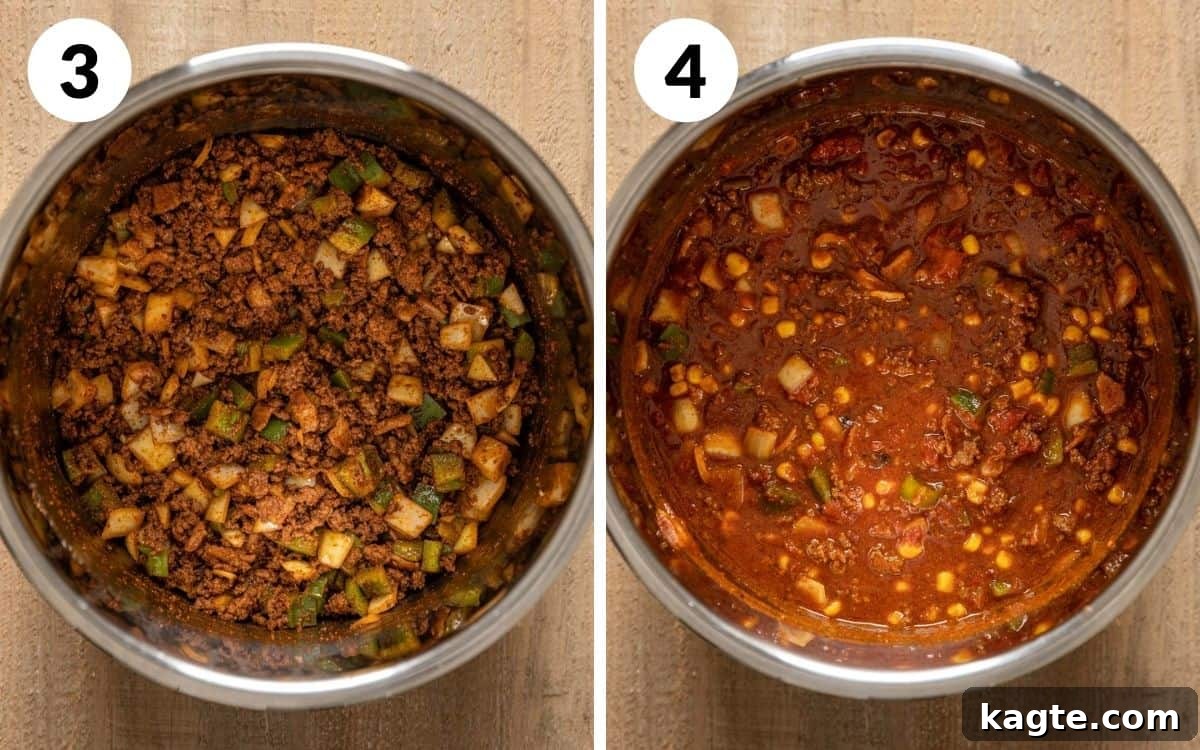
Step 5: Secure the lid on your Instant Pot, making sure the sealing ring is properly in place and the vent is set to “Sealing.” Select the “Pressure Cook” or “Manual” setting, ensuring it’s on “High” pressure. Set the cooking time to 25 minutes. Once the cooking cycle is complete, the Instant Pot will beep. Immediately perform a quick release of the pressure by carefully switching the valve to the “Venting” position. Stand clear of the steam as it escapes. Once the floating valve drops, it’s safe to open the lid and reveal your perfectly cooked, rich no-bean chili.
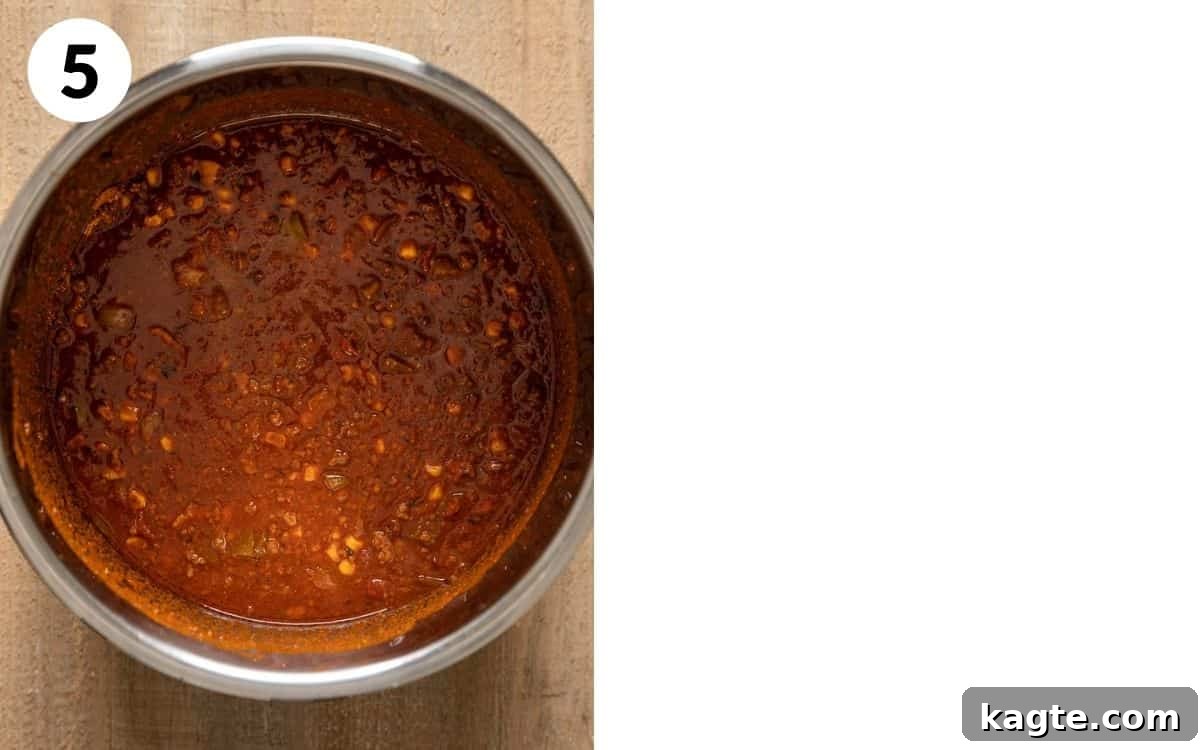
After carefully removing the lid, give the chili a good stir. If you prefer a thicker consistency, you can select the “Sauté” mode again and simmer the chili, uncovered, for an additional 5-10 minutes, stirring occasionally, until it reaches your desired thickness. This step allows some of the liquid to evaporate, concentrating the flavors even further.
Recipe Serving Suggestions: Elevate Your Chili Experience
This Instant Pot no-bean chili is incredibly flavorful on its own, but it truly shines when paired with the right toppings and a delicious bread for dipping. Here are some fantastic ideas to enhance your chili experience and make it a complete, satisfying meal:
- Classic Toppings Galore: Load up your bowl with generous dollops of cooling sour cream or Greek yogurt, a sprinkle of sharp shredded cheddar or Monterey Jack cheese, fresh cilantro for a burst of herbaceousness, bright lime wedges for a zesty finish, and creamy, sliced avocado. For an extra crunch, a handful of corn chips or tortilla strips is always a welcome addition.
- Homemade Drop Biscuits: Light, fluffy, and incredibly easy to make, these biscuits are perfect for soaking up every last drop of rich chili broth. Their tender crumb provides a wonderful contrast to the hearty texture of the chili.
- Homemade Yeast Rolls: For a slightly sweeter and more substantial bread, warm, buttery yeast rolls are an exceptional choice. They add a comforting homemade touch to any meal.
- Texas Toast Garlic Bread: If you love a garlicky, crispy complement, thick slices of Texas toast garlic bread are phenomenal. The robust garlic flavor and crunchy texture provide a satisfying counterpoint to the chili’s savory depth.
- Cornbread without Buttermilk: A quintessential chili pairing, warm cornbread offers a subtly sweet and grainy texture that perfectly balances the spice and richness of the chili. This version is simple to make without buttermilk, ensuring accessibility.
For even more creative ideas to customize your chili bowl, be sure to check out our comprehensive guide: 33 Best Toppings for Chili. You’re sure to find something new and exciting to try!
Expert Tips for Instant Pot Chili Success
- Embrace a Robust Spice Blend: The carefully curated spice blend in this recipe is designed to deliver maximum flavor and complexity. We strongly recommend using the specified amounts and types of spices rather than relying on a pre-made store-bought chili kit or mix. Freshly ground spices, if available, will also significantly enhance the aroma and taste of your chili. Don’t be afraid to smell your spices before adding them – their fragrance is a preview of the flavor they’ll bring!
- Do Not Skip the Bacon or Adobo Sauce: These two ingredients are not merely optional additions; they are fundamental to achieving the distinct rich and smoky character of this chili. The bacon provides rendered fat for sautéing and imparts a savory, umami depth, while the adobo sauce brings an irreplaceable layer of smoky heat and complexity. Their omission would significantly alter the chili’s signature flavor profile.
- Leverage the Power of Pressure Cooking: The Instant Pot is a marvel for developing deep flavors quickly. Pressure cooking dramatically reduces the time it takes for all the ingredients to meld together, resulting in a chili that tastes like it has slow-simmered for hours. This method forces flavors into the meat and vegetables, creating an incredibly rich and integrated taste that simply can’t be achieved as rapidly with conventional cooking methods.
- Master the Quick Release: After pressure cooking, a quick release of pressure is specified for this recipe. This prevents overcooking and helps to maintain the texture of the meat and vegetables. Always ensure you stand clear of the steam vent during release, as the steam is very hot. If you prefer a thicker chili, you can always sauté for a few extra minutes after the quick release to reduce the liquid.
- Freeze Leftovers for Future Meals: Chili is an excellent candidate for meal prepping and freezing! To store, allow any leftover chili to cool completely in the refrigerator overnight. Once chilled, portion the chili into airtight, freezer-safe containers or heavy-duty freezer bags. Lay bags flat to save space. It can be safely stored in the freezer for 2-3 months. When ready to enjoy, simply thaw overnight in the refrigerator and reheat gently on the stove or in the microwave until warmed through. This makes for a convenient and delicious meal on a busy day.

Variations to Customize Your Chili
- Amplify the Heat (Spicy Version): If you crave a chili with a serious kick, simply add 1-2 finely chopped chipotle peppers directly from the can of adobo sauce into the Instant Pot during Step 2, along with the other spices. Remember that chipotle peppers are quite potent, so start with one and add more to taste if you dare! You can also add a pinch of cayenne pepper for a more direct heat.
- Classic Stovetop Method: Don’t have an Instant Pot? No problem! You can easily adapt this recipe for the stovetop. Follow Steps 1 through 4 exactly as stated, performing the sautéing in a large, heavy-bottomed pot or Dutch oven over medium-high heat. Once all ingredients are combined, bring the mixture to a gentle boil, then reduce the heat to low, cover the pot, and simmer for at least 3 hours. Stir occasionally to prevent sticking and ensure even cooking. The longer it simmers, the deeper the flavor will be.
- Convenient Slow Cooker (Crock-Pot) Adaptation: For a truly hands-off approach, convert this recipe for your slow cooker. Perform Steps 1 through 3 (browning the meat, bacon, and spices, then sautéing the onion and bell pepper) in a separate large skillet on your stove. Once complete, transfer the meat mixture and all the remaining ingredients (from Step 4) into your slow cooker. Cook on low for 5-6 hours, or on high for 3-4 hours, until the flavors are fully developed and the chili is heated through.
- Boost the Veggies (Nutrient-Rich Option): To incorporate extra fiber and nutrients, consider wilting in some fresh spinach or finely chopped kale at the very end of the cooking process, after the pressure has been released and the lid removed. Simply stir the greens into the hot chili until they are just wilted. Be aware that adding a significant amount of greens may slightly dilute the chili’s intense flavor profile, but it’s a great way to sneak in extra vegetables.
- Different Ground Meats: While ground beef is traditional, feel free to experiment with other ground meats like ground chicken or even venison for a gamey twist. Adjust cooking times slightly if needed, and consider adding a little extra oil if using very lean meats.
Recipe FAQs: Your Questions Answered
When making chili without beans, you can simply omit them for a hearty, meat-focused, low-carb, and keto-friendly option. If you still want to add a component that provides a slight sweetness and textural contrast similar to beans, a can of yellow corn is a popular choice (though it will add carbohydrates). Other alternatives include adding more vegetables like diced zucchini, bell peppers, or mushrooms, which can add bulk and texture without increasing carb count significantly. Some people also enjoy adding small pieces of cooked sweet potato, though this would not be keto-friendly.
The “Chili/Bean” setting on many Instant Pot models is a pre-programmed function designed to cook chili or beans on high pressure for a duration typically ranging from 25-30 minutes, sometimes with an optional natural pressure release. While convenient, there is no inherent reason to exclusively use this specific setting. You can achieve the exact same results, with more control over the cooking time, by simply using the “Pressure Cook” or “Manual” setting and manually selecting “High” pressure and setting your desired cooking time, as instructed in this recipe. This allows for greater flexibility and customization.
Yes, chili can indeed burn in an Instant Pot if certain precautions are not taken. The most common reasons for a “Burn” error are insufficient liquid at the bottom of the pot, or the addition of thickening agents (like cornstarch or flour) *before* pressure cooking. Thickening agents can settle at the bottom and prevent proper heat distribution, leading to scorching. To avoid burning, always ensure there is adequate liquid (as specified in the recipe), and always add any desired thickening agents (mixed with a little cold water to form a slurry) *after* the pressure cooking cycle is complete and the lid has been removed. Also, make sure to deglaze the pot thoroughly after sautéing to remove any stuck-on bits.
Chili recipes without beans are often referred to as “Texas Chili” or “Chili Con Carne.” Traditional Texas chili, in particular, famously excludes beans, focusing instead on tender chunks of beef (or ground beef), a rich, spicy sauce made from rehydrated dried chilies, and various other seasonings. This style emphasizes the deep, savory flavors of the meat and chili peppers, without the textural or starchy contribution of beans. Our Instant Pot no-bean chili aligns with this tradition, offering a robust and intensely flavorful experience.
More Instant Pot Recipes to Explore
If you love the convenience and incredible results of cooking with your Instant Pot, you’re in for a treat! We have a wide array of delicious and easy recipes designed to make the most of this versatile appliance. Expand your culinary repertoire with these other fantastic Instant Pot creations:
Pork
Instant Pot Bacon
Air Fryer
20 Easy Instant Pot Air Fryer Recipes
Thanksgiving
Apple Curd
Main
Instant Pot Chicken Spaghetti

Save Recipe
Instant Pot Chili (No Beans)
Equipment
-
Instant Pot
-
Vegetable Chopper
-
Stirring Spoon
Ingredients
- 1 1/2 pounds 80/20 ground beef*
- 4 slices thick cut bacon diced
Chili Seasoning
- 3 Tablespoons chili powder
- 1 Tablespoon smoked paprika*
- 1 Tablespoon cumin
- 1 Tablespoon granulated garlic
- 3/4 teaspoon kosher salt
- 1 teaspoon black pepper
- 1 teaspoon oregano
Vegetables & Liquid
- 1 yellow onion diced
- 1 green bell pepper diced
- 1 cup beef broth or stock
- 1 (15 ounce) can crushed tomatoes
- 1 (15 ounce) can fire roasted diced tomatoes
- 1 (15 ounce) can yellow corn, optional*
- 1 (8 ounce) can plain tomato sauce
- 1 Tablespoon honey*
- 1 Tablespoon Worcestershire sauce
- 2 Tablespoons adobo sauce*
Instructions
-
Review all recipe notes and instructions thoroughly before beginning to ensure a smooth cooking process.
-
Select “Sauté” mode on your Instant Pot. Add the ground beef and diced bacon. Sauté, breaking up the meat, until it is mostly browned and the bacon is crispy. Drain any excess fat.
-
Add the chili powder, smoked paprika, cumin, granulated garlic, salt, pepper, and oregano to the pot. Sauté for 1-2 minutes, stirring constantly, until the spices become fragrant.
-
Stir in the diced yellow onion and green bell pepper. Continue to sauté for another 1-2 minutes until they begin to soften.
-
Pour in the beef broth or stock, crushed tomatoes, fire-roasted diced tomatoes, optional corn, plain tomato sauce, honey, Worcestershire sauce, and adobo sauce. Stir well, making sure to scrape up any browned bits from the bottom of the pot.
-
Secure the Instant Pot lid, ensuring the sealing valve is set to “Sealing.” Select “Pressure Cook” or “Manual” on “High” pressure and set the time for 25 minutes. Once cooking is complete, perform a quick release of the pressure by carefully switching the valve to “Venting.”
-
Serve your hearty no-bean chili hot, garnished with desired toppings such as sour cream, shredded cheese, and crispy corn chips.
Notes
Smoked Paprika: Ensure you use smoked paprika for its distinct flavor; regular paprika will yield a different result.
Corn: The corn is optional and adds sweetness and texture. Omit for a strict low-carb/keto version.
Honey: You can swap honey for 1 Tablespoon of white or brown sugar, or a keto-friendly sweetener.
Adobo Sauce: This comes with chipotle peppers in a 7-ounce can. Remove and discard/store peppers. Use 2 Tablespoons of sauce for balanced flavor. Use 1 Tablespoon for less spice, or add a chopped pepper for extra heat.
Refrigerator Storage: Store leftover no-bean chili in an airtight container in the fridge for up to 3 days.
Freezer Storage: Allow chili to cool completely overnight in the fridge. Portion into airtight containers or bags and freeze for 2-3 months. Reheat on the stove.
Stovetop Method: Follow steps 1-4 in a large pot on the stove. Instead of pressure cooking, simmer covered for 3 hours on low heat.
Slow Cooker/Crock-Pot Method: Complete steps 1-3 in a large pot or skillet. Transfer meat mixture and remaining ingredients to the slow cooker. Cook on low for 5-6 hours.
Nutrition
Nutrition information is automatically calculated, so should only be used as an approximation.