
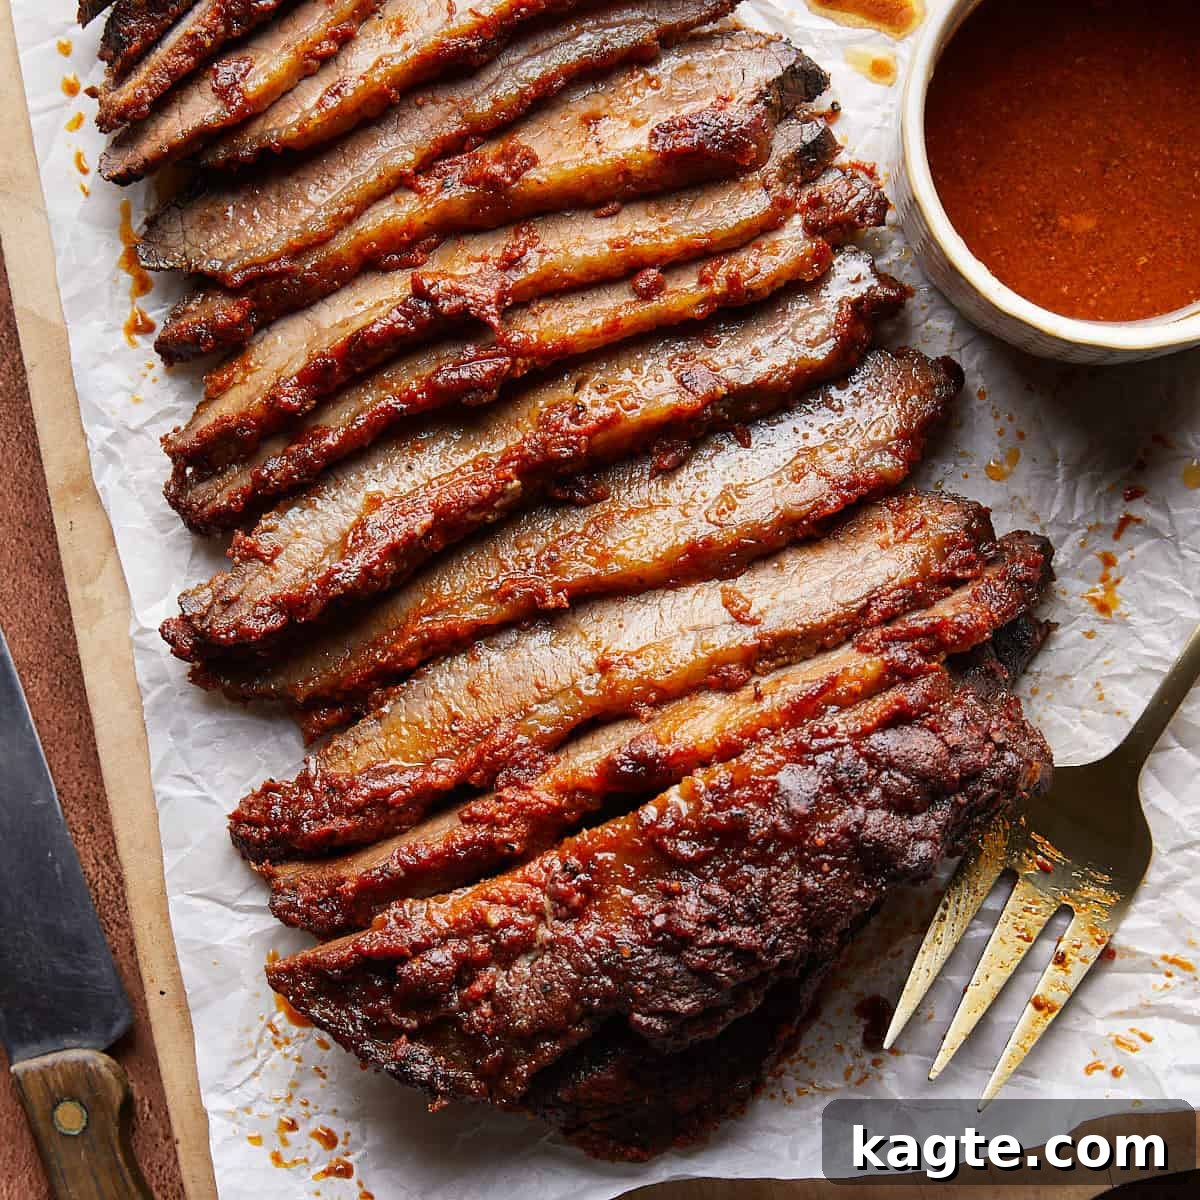
Mastering How to Cook a Brisket in the Oven unlocks the secret to enjoying mouth-watering BBQ any time of year, no smoker required! This comprehensive guide will walk you through the process of creating a perfectly tender, incredibly flavorful brisket using basic kitchen tools. With a savory dry rub and a rich, tangy marinade, you’ll want to make extra to savor for future meals or impress guests at your next gathering.
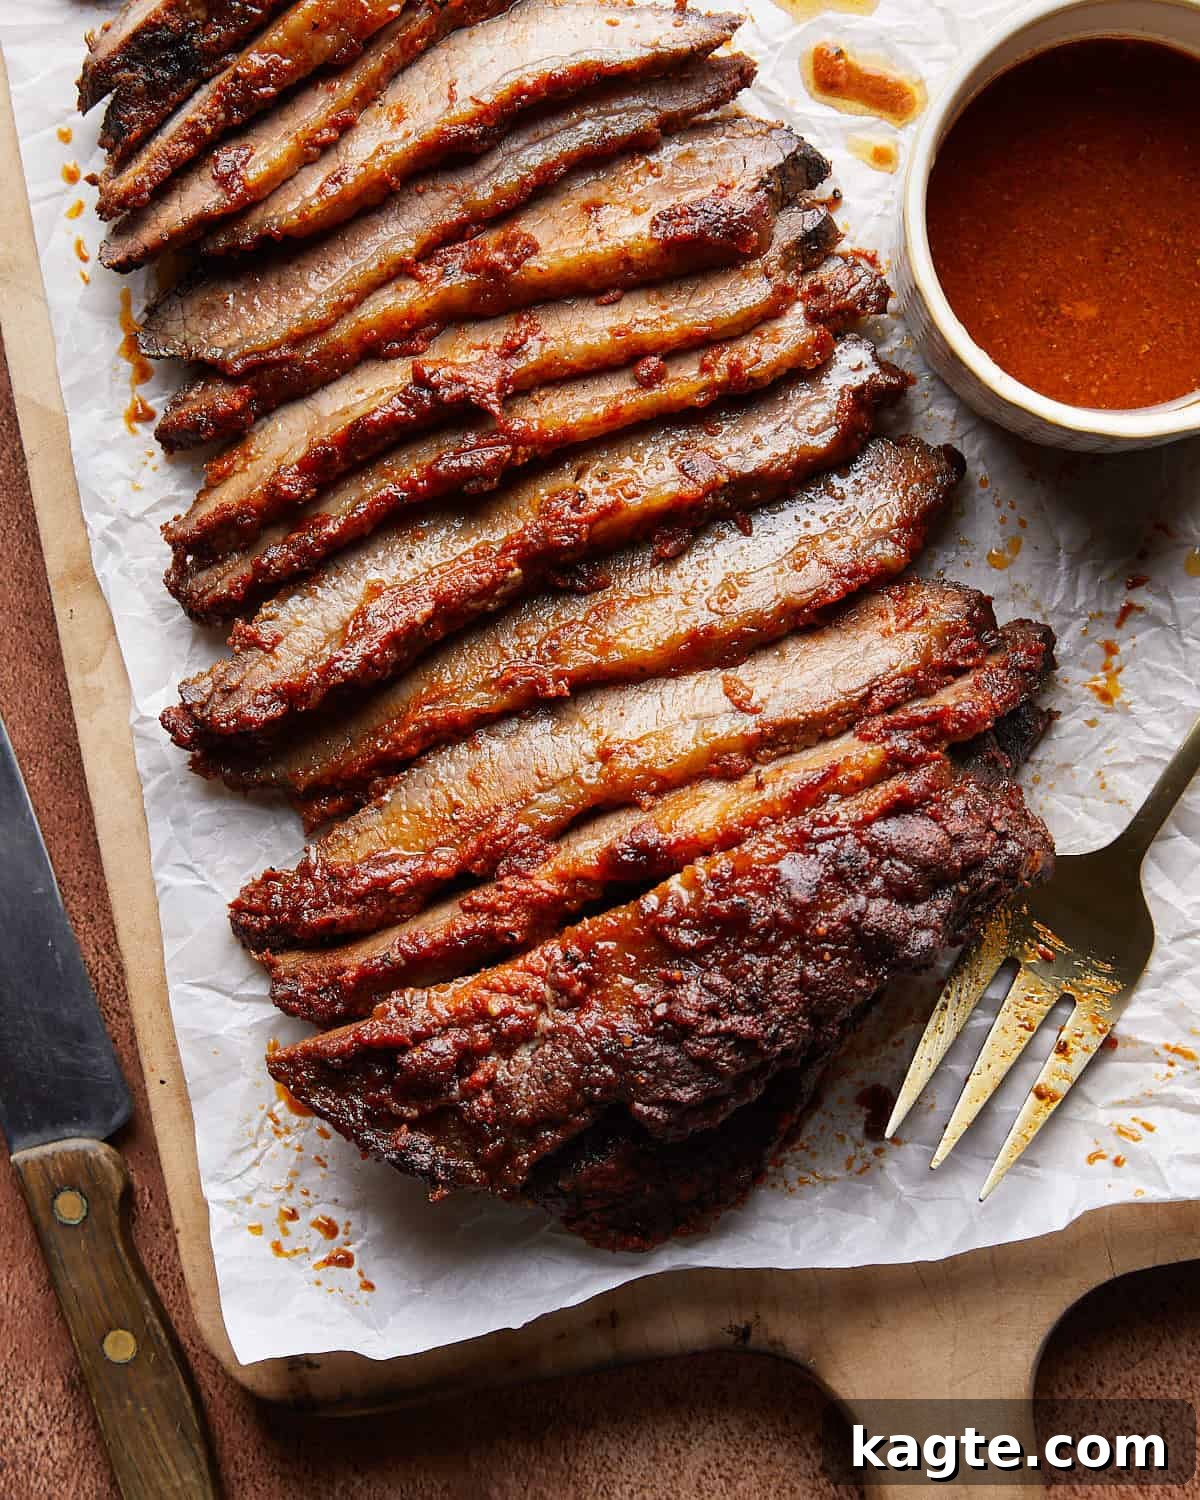
This in-depth guide to cooking brisket in the oven will equip you with the knowledge and techniques needed to achieve consistently juicy, fall-apart tender brisket every single time. By employing a “low and slow” cooking method in your conventional oven, you can beautifully replicate the succulent results typically achieved with a traditional smoker, eliminating the need for expensive or specialized outdoor equipment. Prepare to serve this delectable beef brisket with your favorite barbecue sauce and relish in the rich, smoky flavors that make it a true BBQ staple!
If this amazing brisket leaves you craving more BBQ goodness, be sure to explore some of my other popular main dishes, such as Boneless Pork Ribs in the Oven, Instant Pot Pulled BBQ Chicken, or Easy Dutch Oven BBQ Chicken.
Table of Contents
- Why You’ll Love This Oven Brisket Recipe
- Understanding Brisket: Flat vs. Point
- How Much Brisket Do You Need Per Person?
- Essential Ingredients & Smart Substitutions
- How to Make Perfect Beef Brisket in the Oven
- The Art of Slicing Brisket Against the Grain
- Delicious Recipe Serving Suggestions
- Expert Tips for Oven Brisket Perfection
- Creative Additions & Flavor Variations
- Frequently Asked Questions About Oven Brisket
- More Mouthwatering Beef Recipes
- How To Cook a Beef Brisket in the Oven Recipe Card
Why You’ll Love This Oven Brisket Recipe
This oven-baked brisket recipe isn’t just a meal; it’s a culinary experience designed for convenience and exceptional flavor. Here’s why it’s destined to become a household favorite:
- Effortlessly Made in the Oven: Forget about constantly tending to a smoker. This slow-cooked brisket recipe requires minimal hands-on time, allowing you to relax while your oven works its magic. The entire cooking process takes approximately 4-5 hours, with most of that time being passive baking.
- Incredibly Juicy and Tender: The secret to this brisket’s succulence lies in its low-temperature, long-duration bake. This method gently breaks down tough connective tissues within the beef, resulting in slices that are moist, tender, and practically melt in your mouth with every bite.
- No Smoker, No Problem: You don’t need a fancy, expensive smoker to achieve authentic BBQ flavor. This recipe skillfully mimics the moist, smoky environment of a smoker right in your kitchen, ensuring a delicious brisket without the extra equipment or outdoor setup.
- Perfect for Gatherings and Special Occasions: Brisket is a show-stopping centerpiece, and this recipe is incredibly easy to scale up. Whether you’re hosting a small family dinner or a large backyard barbecue (even in winter!), you can easily double or triple the ingredients to accommodate any crowd, making it ideal for holiday meals, family reunions, and celebrations.
- Freezer-Friendly for Future Feasts: Don’t let leftovers go to waste! This oven brisket freezes beautifully. When properly stored in an airtight container or freezer bag, cooked brisket can remain fresh in the freezer for 6-12 months, making it perfect for meal prepping or quick weeknight dinners down the line.
- Rich, Deep BBQ Flavor: Our carefully crafted dry rub and tangy marinade infuse the brisket with layers of savory, sweet, and smoky notes, ensuring a depth of flavor that will have everyone asking for seconds.
Understanding Brisket: Flat vs. Point
When embarking on your journey of cooking brisket in the oven, understanding the different cuts of brisket is crucial for achieving your desired outcome. A whole beef brisket is traditionally divided into two primary sections: the flat and the point.
The brisket flat, also known as the “first cut,” is the leaner of the two sections. It consists primarily of muscle fibers and connective tissue, with a relatively thin, even layer of fat on one side (the fat cap). The flat is the preferred choice for recipes like this one, where you aim for neatly sliced pieces of brisket. Its consistent shape and lower fat content make it ideal for serving in uniform slices that are both flavorful and easy to manage.
The brisket point, or “second cut,” is characterized by its higher fat content and significant marbling throughout the meat. This section is known for its irregular shape and abundance of intramuscular fat, which renders down beautifully during long cooking times, making it incredibly tender. The point is typically recommended for applications where the meat will be pulled or chopped, such as for pulled beef sandwiches, burnt ends, or deeply smoked brisket that will be shredded rather than sliced.
You’ll typically find these two sections sold separately at most grocery stores or butcher shops. However, occasionally, a “full packer” brisket, which includes both the flat and the point still attached, might be available. For this particular oven brisket recipe, we strongly recommend using the brisket flat. Its structure is perfect for slicing, ensuring each serving is uniformly tender and appealing.
How Much Brisket Do You Need Per Person?
Estimating the right amount of brisket per person is key to successful meal planning, especially when cooking for a crowd. The quantity needed will largely depend on whether you are serving adults or children, and if the brisket is the sole main course or part of a larger spread with multiple side dishes.
- For children, a good rule of thumb is to allocate approximately 1/4 pound (about 115 grams) of cooked brisket per child.
- For adults, especially when brisket is the main protein, plan for around 1/2 pound (about 225 grams) of cooked brisket per person.
Keep in mind that these are general guidelines. If you anticipate particularly hearty eaters or want to ensure there are plenty of leftovers, you might consider slightly increasing these amounts. Conversely, if you have many rich side dishes, you could slightly reduce the per-person portion. Use this information to accurately estimate how much raw brisket you’ll need to purchase for your meal.
Essential Ingredients & Smart Substitutions
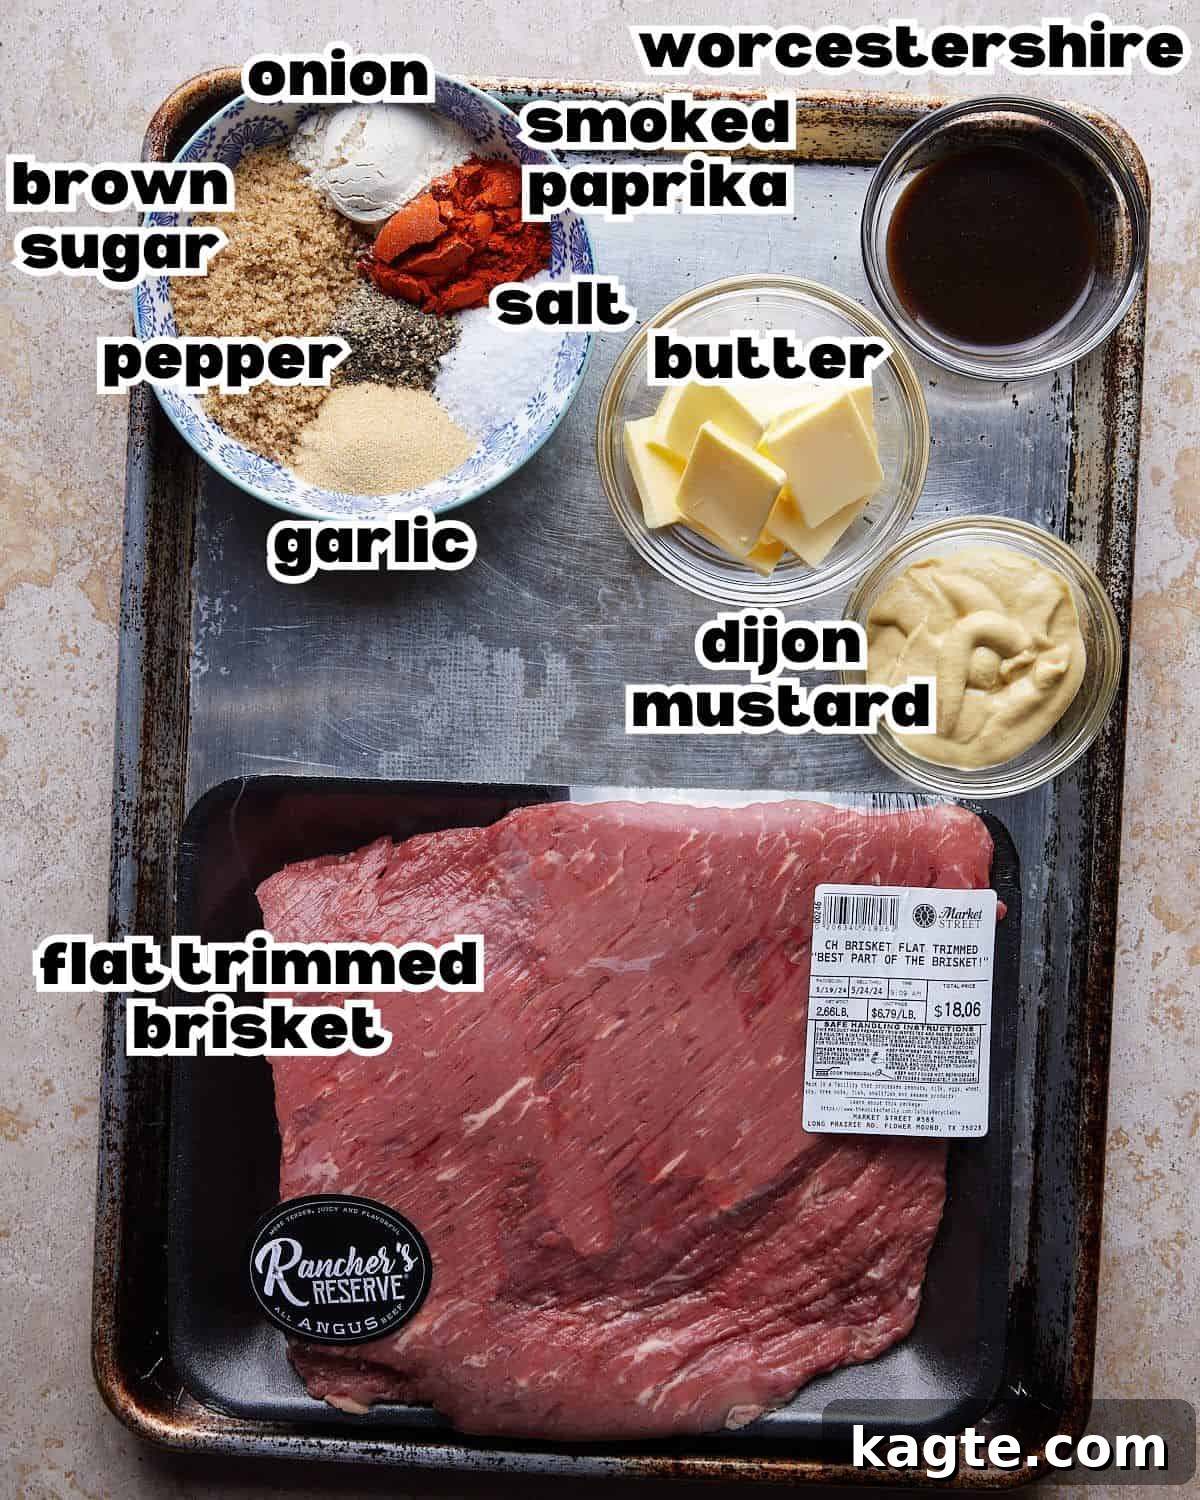
Crafting the perfect oven brisket starts with selecting quality ingredients and understanding how each contributes to the final flavor profile. Here’s a breakdown of what you’ll need and some helpful notes:
- Flat Brisket: For convenience and consistent results, I highly recommend purchasing an already trimmed flat brisket from your grocery store or butcher. This will significantly cut down on your prep time. A typical brisket for this recipe is around 3-4 pounds. If your brisket is larger, for instance, 5-6 pounds, you can easily double the dry rub and marinade ingredients to ensure full flavor coverage. While the general cook time is approximately 1.5 hours per pound, always remember that doneness is best determined by internal temperature, not time. Your brisket is perfectly done when its internal temperature reaches 195°F (90°C).
- Kosher Salt: In all my recipes, unless explicitly stated otherwise, I develop and test with Morton kosher salt. Its coarse texture and pure flavor make it superior for everyday cooking, providing a better coating and more balanced seasoning than finer salts. If you only have table salt available, you’ll need to reduce the amount by about 25-30% as it’s much denser and saltier by volume. I strongly encourage you to pick up a box of kosher salt on your next grocery trip; it truly elevates your cooking!
- Dijon Mustard: This acts as an excellent binding agent for the dry rub, helping it adhere to the brisket’s surface. It also adds a subtle tangy depth to the overall flavor. Yellow mustard can be used as a substitute if Dijon isn’t available, though the flavor profile will be slightly different.
- Worcestershire Sauce: A classic in BBQ, Worcestershire sauce contributes a complex, savory, umami flavor that complements beef beautifully. It’s a key ingredient in the marinade that helps tenderize and enhance the meat.
- Brown Sugar: Adds a touch of sweetness that balances the savory and smoky notes, and also helps create a delicious caramelized crust during baking. Light or dark brown sugar will work equally well.
- Smoked Paprika: Crucial for imparting that signature smoky flavor, especially since we’re not using a traditional smoker. Do not substitute with regular paprika, as it lacks the distinctive smoky essence needed for this recipe.
- Granulated Garlic & Onion Powder: These pantry staples provide foundational aromatic flavors, ensuring your brisket is seasoned from the inside out. Use granulated forms for even distribution.
- Fresh Cracked Black Pepper: Freshly cracked pepper offers a much more vibrant and pungent flavor compared to pre-ground pepper. Adjust the amount to your personal preference for spice.
- Unsalted Butter: Slices of unsalted butter placed on top of the brisket during the final cooking stage add richness and help keep the meat incredibly moist.
- Barbecue Sauce: While the brisket is flavorful enough on its own, a good quality barbecue sauce served alongside adds a perfect tangy and sweet counterpoint. Feel free to use your favorite store-bought brand or explore homemade options.
For a comprehensive list of all ingredients and their exact quantities, please refer to the recipe card below.
How to Make Perfect Beef Brisket in the Oven
Creating a magnificent oven-baked brisket is simpler than you might think. Follow these straightforward steps for a truly memorable meal:
Quick Overview
- Apply the flavorful dry rub.
- Wrap tightly in foil.
- Allow to marinate for depth of flavor.
- Bake low and slow to perfection.
Step by Step Instructions
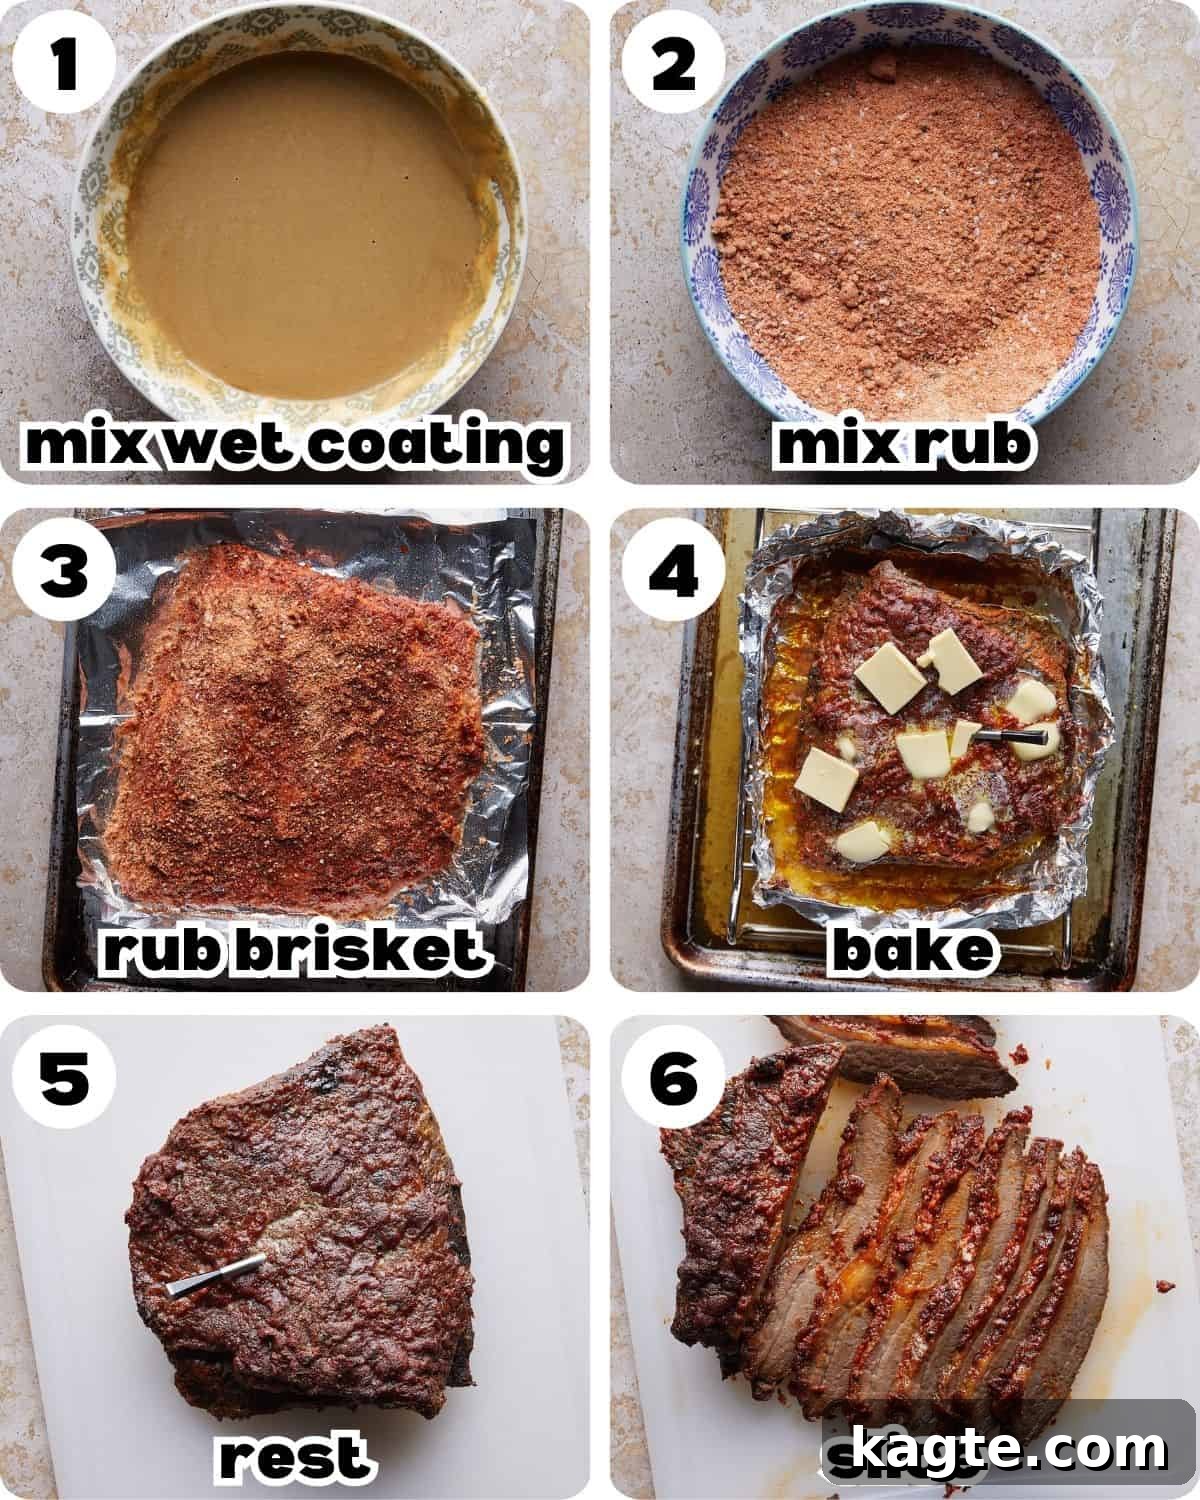
Pro Tip: The longer you allow the brisket to marinate, the more deeply infused and flavorful it will become. Aim for overnight if time permits!
Crucial Step: Always allow the brisket to rest sufficiently after baking and before slicing for the juiciest, most tender results.
Step 1: Prepare the Wet Marinade. In a small bowl, thoroughly whisk together the Dijon mustard and Worcestershire sauce until well combined. This mixture will serve as a flavorful base and help the dry rub adhere to the meat. Set this bowl aside for now.
Step 2: Mix the Dry Rub. In a separate small bowl, combine the brown sugar, smoked paprika, kosher salt, garlic powder, onion powder, and fresh black pepper. Whisk these ingredients vigorously to ensure they are evenly distributed, creating a balanced and aromatic dry rub. Set this mixture aside.
Step 3: Apply Marinade and Rub. Line a sturdy baking sheet with a large sheet of heavy-duty aluminum foil, ensuring you have enough to completely wrap the brisket later. Place your trimmed brisket flat onto the foil. Before applying anything, take a moment to observe and note the direction of the meat’s grain; this is crucial for proper slicing later. Generously rub the mustard and Worcestershire mixture all over the entire surface of the brisket. Then, pat the dry rub mixture firmly into the wet marinade on all sides, ensuring the brisket is completely and evenly coated. Finally, orient the brisket with its fat cap side facing upwards.
Step 4: Marinate and Initial Bake. Tightly wrap the brisket with the aluminum foil, creating a sealed packet. Transfer the wrapped brisket to the refrigerator to marinate for a minimum of 2 hours, or ideally, overnight for maximum flavor penetration. When you’re ready to cook, remove the brisket from the refrigerator and place it, still securely wrapped in foil, onto a wire rack set inside a large roasting pan. Preheat your oven to a low 250°F (120°C). Allow the brisket to rest at room temperature for about 30 minutes while the oven preheats. Insert a reliable meat probe into the thickest part of the brisket, making sure it doesn’t touch any bone. Fill the bottom of the roasting pan with approximately 1 inch of hot water (ensure the water does not come into direct contact with the brisket itself). Carefully transfer the pan to the preheated oven and bake for approximately 4 hours, or until the internal temperature of the brisket reaches about 185°F (85°C). As a general guideline, this typically takes about 1 hour and 15 minutes per pound, but always defer to the internal temperature. At this point, carefully unwrap the foil slightly and place the pats of unsalted butter evenly across the top of the brisket.
Step 5: Final Baking Phase. Re-wrap the brisket loosely with the foil and continue baking for another 30 minutes to 1 hour, or until the internal temperature reaches the target of 195°F (90°C). This final stage ensures the connective tissues are fully broken down, resulting in ultimate tenderness. It’s important not to rush this step.
Step 6: Rest, Slice, and Serve. Once the brisket reaches its target temperature, remove the roasting pan from the oven. Transfer the foil-wrapped brisket to a large cutting board and loosely tent it with another piece of foil. Allow the brisket to rest undisturbed for at least 30 minutes, or even up to an hour. This crucial resting period allows the juices to redistribute throughout the meat, preventing them from escaping when sliced, which results in a much juicier brisket. After resting, carefully unwrap and slice the brisket against the grain using a sharp serrated knife. Serve immediately with your favorite barbecue sauce on the side.
The Art of Slicing Brisket Against the Grain
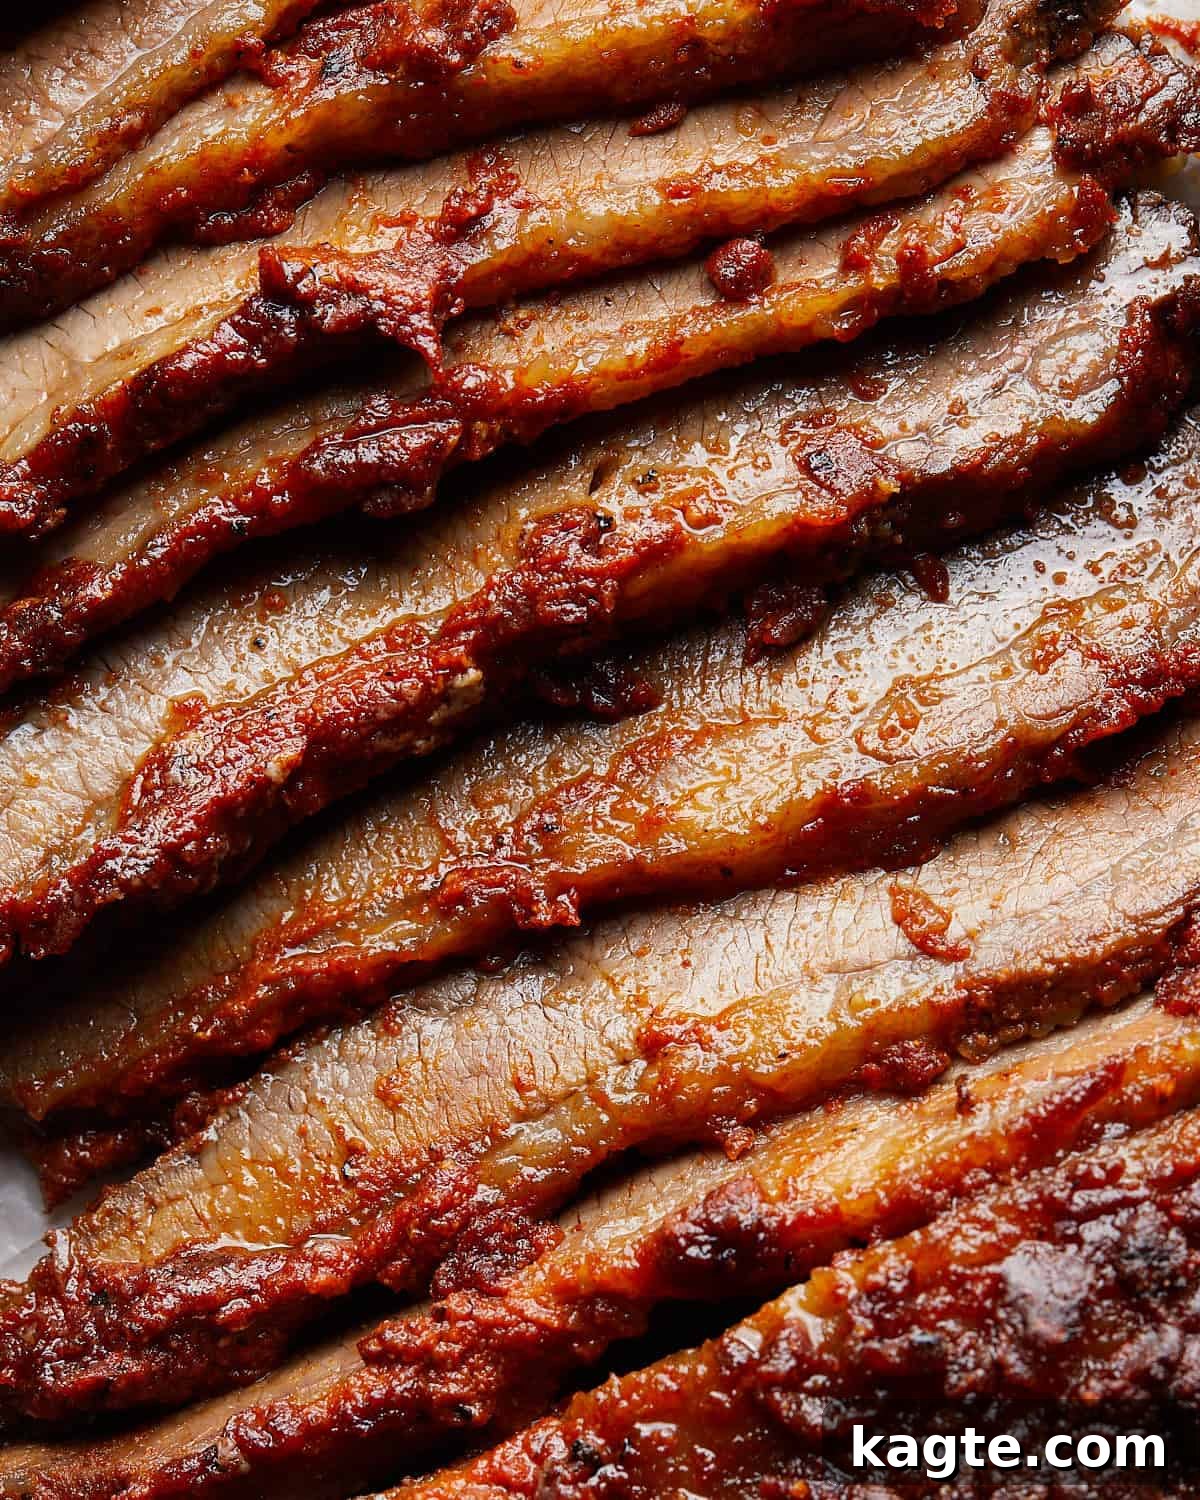
Once you’ve mastered the technique of cooking a brisket to perfection in the oven, the next critical step is knowing how to slice it correctly. Proper slicing can dramatically enhance the tenderness and eating experience of your brisket. For the absolute best results, it is imperative to cut against the grain of the meat.
The “grain” refers to the long, parallel muscle fibers that run through the brisket. If you slice the brisket with the grain (parallel to these fibers), you’ll end up with chewy, tough pieces of meat, even if the brisket was cooked perfectly. Cutting against the grain, however, effectively shortens these muscle fibers, making them much easier to chew and resulting in slices that are incredibly tender and succulent. This simple technique transforms a good brisket into an exceptional one.
Here’s how to slice your beautifully cooked brisket against the grain:
- Locate the Grain: Before you even start cutting, clearly identify the direction in which the muscle fibers run. This step should ideally be noted even before marinating the brisket, as mentioned in the instructions, but it’s essential to re-confirm after cooking. The fibers often become more apparent once the brisket is cooked.
- Position for Slicing: Place your rested brisket on a large, stable cutting board. Ensure you have ample space to work safely and efficiently. A large board will also catch any delicious juices that escape during slicing.
- Begin Slicing: Using a long, sharp serrated knife (a carving knife also works well), begin to slice the brisket into ¼-inch thick pieces. Angle your knife at a 90-degree angle to the direction of the grain. Consistent slice thickness is key for uniform texture.
- Maintain “Against the Grain”: Continue cutting perpendicular to the muscle fibers. If you notice the grain changes direction in a particular section (which can happen, especially if you have a full packer), adjust your cutting angle accordingly to always cut across the shortest part of the muscle fibers.
Delicious Recipe Serving Suggestions
A perfectly cooked oven brisket deserves equally delicious accompaniments. Garnish your sliced brisket with a fresh sprinkle of chopped parsley or chives for a pop of color and herbaceous freshness. A final drizzle of extra BBQ sauce is always welcome!
I find this recipe for how to cook a brisket in the oven pairs wonderfully with classic barbecue side dishes. Here are some fantastic ideas to complete your meal:
- Creamy Yukon Gold Mashed Potatoes: A comforting and rich side that perfectly soaks up all the brisket juices and sauce.
- Tangy Lebanese Potato Salad: A refreshing, herb-packed potato salad that offers a delightful contrast to the rich meat.
- Crispy Cast Iron Corn: Sweet and slightly charred corn adds a lovely texture and flavor to the plate.
- Creamy Coleslaw: The crisp, cool crunch and tangy dressing of coleslaw cut through the richness of the brisket beautifully.
- Baked Macaroni and Cheese: An ultimate comfort food pairing, classic mac and cheese is always a crowd-pleaser with BBQ.
- Roasted Asparagus or Green Beans: For a lighter, healthier green vegetable option.
- Cornbread or Dinner Rolls: Perfect for soaking up any remaining sauce and juices.
Expert Tips for Oven Brisket Perfection
Elevate your oven brisket from good to extraordinary with these invaluable expert tips, covering everything from flavor enhancement to perfect tenderness:
- Embrace Smoked Paprika: Since this recipe ingeniously eliminates the need for a smoker, the inclusion of smoked paprika in your dry rub is paramount. It’s the secret ingredient that infuses your brisket with that coveted, authentic smoky flavor. Don’t underestimate its power to mimic the complexities of traditional smoking.
- The Power of Marinating: Marinating the brisket is a non-negotiable step for several reasons. Firstly, it deeply infuses the meat with the delicious flavors of your wet marinade and dry rub, ensuring every bite is rich and seasoned. Secondly, the acidic components in the marinade (like Worcestershire sauce and mustard) work to tenderize the meat, breaking down some of the tougher muscle fibers. Lastly, it adds crucial moisture, guaranteeing a more succulent and enjoyable brisket once cooked.
- Create a Moist Environment with Water: Adding about an inch of hot water to the bottom of your roasting pan is a simple yet highly effective technique for ensuring a super juicy brisket. As the oven heats, this water transforms into steam, circulating within the enclosed foil packet. This steamy environment consistently bastes the brisket flat, preventing it from drying out and contributing significantly to its overall moisture content and tenderness.
- Master the “Low and Slow” Method: The fundamental principle behind truly tender brisket, whether smoked or oven-baked, is cooking it “low and slow.” This extended period at a lower temperature (250°F / 120°C) is essential for breaking down the tough collagen and connective tissues found in a brisket flat. Rushing the process with higher temperatures or shorter cooking times will result in a chewy, tough brisket that lacks the desired fall-apart tenderness. Patience is key here.
- Prioritize Internal Temperature Over Time: While the cooking time per pound (approx. 1 hour 15 minutes per pound) offers a useful estimate, the ultimate indicator of doneness is the brisket’s internal temperature. Ovens can vary wildly, and brisket sizes and fat content differ. Always rely on an accurate meat thermometer or probe. Your brisket is perfectly cooked when it consistently reaches an internal temperature of 195°F (90°C) in its thickest part.
- Resting is Non-Negotiable: After reaching the target temperature, resist the urge to slice immediately. Allowing the brisket to rest, loosely tented with foil, for at least 30 minutes is crucial. During cooking, the meat fibers contract, pushing juices to the center. Resting allows these juices to redistribute throughout the entire brisket, resulting in a significantly juicier and more flavorful product when sliced. Without resting, the juices will simply run out onto your cutting board.
- Always Slice Against the Grain: As detailed in a dedicated section, slicing against the grain is not merely a suggestion but a critical technique. It shortens the muscle fibers, making the brisket easier to chew and more tender. Slicing with the grain will counteract all your hard work in cooking, leading to a much tougher eating experience.
Creative Additions & Flavor Variations
Once you’ve mastered the foundational oven brisket recipe, feel free to experiment with these exciting additions and variations to customize the flavors to your preference:
- Amplify Smokiness with Liquid Smoke: For those who truly crave an even more prominent smoky flavor, a few drops of liquid smoke can be added to the water in your roasting pan. This simple addition helps to intensify the “smoked” essence, further mimicking the taste profile of a brisket cooked in a traditional smoker. Start with a small amount, as liquid smoke is very potent, usually around ½ to 1 teaspoon for a 3-pound brisket.
- Craft Your Own Homemade BBQ Sauce: While a quality store-bought barbecue sauce is perfectly acceptable, making your own offers unparalleled control over the flavor. You can tailor the sweetness, tang, and spice level precisely to your liking. Want it sweeter? Add more brown sugar or molasses. Prefer a bolder tang? Experiment with different vinegars like apple cider or white vinegar. Craving some heat? Introduce a pinch of cayenne pepper or a dash of your favorite hot sauce. Keep in mind that preparing homemade barbecue sauce typically adds an additional 10-30 minutes to your total dish preparation time, depending on the complexity of your chosen recipe.
- Experiment with Spice Rubs: Don’t limit yourself to the included dry rub. Explore different spice blends! Try a Tex-Mex inspired rub with cumin and chili powder, or a spicier rub with smoked chipotle powder for a kick.
- Add Aromatics to the Pan: For an extra layer of flavor, consider adding chopped onions, garlic cloves, or even some beef broth to the water in the roasting pan. These aromatics will gently infuse the steam and contribute subtle nuances to the brisket’s overall taste.
- Finish with a Glaze: During the last 30-60 minutes of cooking, you can brush the brisket with a thin layer of your favorite BBQ sauce or a mix of brown sugar and apple cider vinegar. This will create a beautiful, caramelized glaze on the fat cap.
Frequently Asked Questions About Oven Brisket
Here are answers to some common questions about cooking brisket in the oven, providing clarity and confidence for your cooking journey:
The total cooking time for brisket in the oven can vary significantly due to several factors. The primary factors include the size of your brisket, whether it’s a flat or a point cut, and the calibration of your specific oven. Generally, you can estimate approximately 1.5 hours of cooking time per pound of raw brisket at a low oven temperature (around 250°F / 120°C). For instance, a 3-pound brisket might take around 4 to 4.5 hours. However, it is always recommended to use a meat thermometer and cook until the internal temperature reaches 195°F (90°C) for optimal tenderness, rather than strictly adhering to a time frame.
Absolutely, wrapping your brisket tightly in aluminum foil is a crucial step when cooking it in the oven. This method helps to trap heat and moisture around the meat, creating a self-braising environment that significantly speeds up cooking and prevents the brisket from drying out. The foil also helps to tenderize the meat by keeping the internal temperature consistent and allowing the tough connective tissues to break down more effectively.
Keeping brisket moist in the oven involves a combination of techniques. Firstly, cooking it “low and slow” helps retain natural juices. Secondly, wrapping the brisket in aluminum foil creates a steamy, enclosed environment. Thirdly, adding about 1 inch of hot water to the bottom of your roasting pan (ensuring it doesn’t touch the brisket) generates steam within the oven, which continuously moistens the meat throughout the long cooking process. Finally, allowing the brisket to rest sufficiently after cooking allows juices to redistribute, leading to a much juicier final product.
For the most tender and flavorful oven-baked brisket, a low and slow cooking temperature is essential. I highly recommend preheating your oven to 250°F (120°C). This gentle heat allows the collagen and connective tissues in the brisket to slowly melt and convert into gelatin, resulting in that desirable fall-apart texture without drying out the meat.
More Mouthwatering Beef Recipes
Discover More Beef Delights
Fall
Hearty Dutch Oven Pot Roast
Side Dish
25 Delicious Dinner Ideas to Serve With Mashed Potatoes
Main
Authentic Lebanese Green Bean Stew with Beef (Loubieh Bi Zeit)
Side Dish
15 Easy Side Dishes to Serve With Steak Bites
Explore my curated Amazon Storefront for recommended kitchen tools!
If you prepare this delicious oven brisket, I’d love to hear your feedback! Please consider leaving a star rating in the recipe card below and/or sharing your thoughts in the comments section. Your insights are always appreciated. Follow me on Pinterest, Facebook & Instagram for more culinary inspiration!
How To Cook a Beef Brisket in the Oven
★★★★★ (5 from 15 votes)
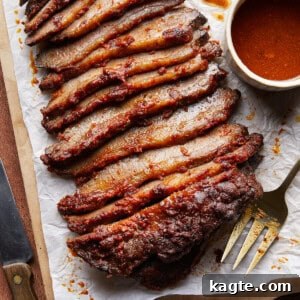
Learning How to Cook a Brisket in the Oven means you can create a delicious BBQ meal even during wintertime! This guide will help you create a flavorful brisket with minimal tools and appliances. With a delicious dry rub and a tangy marinade, you’ll want to make extra for future meals!
Equipment
- Wireless Meat Thermometer (e.g., Meater)
- Large Baking Sheets
- Sharp Serrated Knife or Carving Knife
- Large Roasting Pan with Wire Rack
- Heavy Duty Aluminum Foil
- Small mixing bowls
Ingredients
For the Brisket and Marinade:
- 3 pound brisket flat, trimmed (with 1/4 inch fat cap)*
- 1/4 cup dijon mustard
- 2 Tablespoons worcestershire sauce
For the Dry Rub:
- 1/4 cup brown sugar
- 2 Tablespoons smoked paprika
- 1 Tablespoon Morton kosher salt*
- 1 Tablespoon EACH granulated garlic & onion powder
- 1-2 teaspoons fresh cracked black pepper
For Finishing:
- 4 Tablespoons unsalted butter, sliced
- Barbecue sauce, for serving
- 1 inch hot water for roasting pan
Instructions
- In a small bowl, whisk together the mustard and Worcestershire sauce until well combined. Set aside.
- In another small bowl, whisk together the brown sugar, smoked paprika, kosher salt, granulated garlic powder, onion powder, and fresh cracked black pepper. Set aside.
- Line a large baking sheet with heavy-duty aluminum foil, leaving enough excess to wrap the brisket. Place the trimmed brisket flat on the foil, making a mental note of the direction of the grain for future slicing. Rub the mustard mixture evenly all over the brisket. Then, thoroughly pat the dry rub mixture into the mustard coating on all sides of the brisket, ensuring it is completely coated. Position the brisket fat cap side up.
- Tightly wrap the brisket with the aluminum foil, creating a sealed packet. Transfer the wrapped brisket to the refrigerator to marinate for a minimum of 2 hours, or ideally, overnight for deeper flavor. When ready to cook, remove the brisket from the refrigerator and place it, still wrapped, on a wire rack in a sturdy roasting pan. Preheat your oven to 250°F (120°C). Allow the brisket to rest at room temperature for about 30 minutes while the oven preheats. Insert a meat probe into the thickest part of the brisket, avoiding any bone. Fill the bottom of the roasting pan with about 1 inch of hot water (ensure the water does not touch the brisket itself). Carefully transfer the pan to the preheated oven and bake for approximately 4 hours, or until the internal temperature reaches about 185°F (85°C). This typically averages about 1 hour and 15 minutes per pound. Carefully unwrap the foil slightly and arrange the pats of unsalted butter across the top of the brisket.
- Re-wrap the brisket loosely with the foil. Continue baking for an additional 30 minutes to 1 hour, or until the internal temperature of the brisket reaches 195°F (90°C).
- Once the brisket reaches the target temperature, remove it from the oven and transfer the foil-wrapped brisket to a cutting board. Loosely tent it with another piece of foil and allow it to rest for at least 30 minutes. This crucial step allows the juices to redistribute, ensuring a tender and moist result. After resting, slice the brisket against the grain using a sharp serrated knife. Serve immediately with your favorite barbecue sauce.
Notes
- Flat Brisket: I recommend buying an already trimmed flat brisket from the grocery store, as it will save you prep time. If your brisket is larger (around 5-6 pounds), you can double the recipe to create a tasty brisket. The general cook time is 1.5 hours per pound, but be sure to use a meat thermometer. The brisket is done when its internal temperature is 195°F (90°C).
- Kosher Salt: All of my recipes are tested with Morton kosher salt unless noted otherwise. It is the best salt for everyday cooking because of its size and flavor. If using table salt, the amount should be reduced. I highly recommend picking up some kosher next time you are at the store!
- Use smoked paprika. Since this recipe does not use a smoker, I recommend including smoked paprika to create that yummy, smokey flavor.
- Marinate. There are a few reasons why it’s important to marinate the meat when following this recipe for how to cook a brisket in the oven. For one, it adds a ton of flavor to the meat. A marinade also helps tenderize the brisket and add moisture, so it’s even more delicious once cooked.
- Add water to the roasting pan to create moisture. This method creates juicier brisket. As the water in the pan heats up, it turns into steam keeping the brisket flat moist.
- Bake low and slow. The best brisket is cooked low and slow, as this method helps the brisket become uber-tender. This method helps break down the tough connective tissue that makes a brisket flat chewy/tough to eat. If you cook the brisket for too short of a time or at too high a temperature, you won’t get the same fall-apart tenderness.
- Cook based on internal temperature, not time. You’ll want to check for doneness based on the brisket’s internal temperature, as the time frame is only an estimate and will vary based on each brisket you purchase. Be sure the internal temperature is 195°F (90°C) before removing it from the oven.
- Slice against the grain. Slicing against the grain helps create even more tender pieces of brisket. If you slice with the grain, you’ll end up with chewier slices.
- Add liquid smoke to the water for a more prominent smokey flavor. Once you know how to make a fall-apart brisket in the oven, you can experiment with the flavors, like using liquid smoke in the water. This ingredient will help mimic the taste of smoked brisket even more.
- Use homemade BBQ sauce. Instead of storebought, you can create a homemade BBQ sauce. That way, you can adjust the flavors to your liking. You can add more brown sugar for sweetness, opt for a different vinegar to change the flavor, etc. As a note, making your own barbecue sauce will add about 10-30 minutes to the dish, depending on the recipe you use.
Nutrition
Carbohydrates: 16g |
Protein: 58g |
Fat: 30g |
Saturated Fat: 13g |
Polyunsaturated Fat: 1g |
Monounsaturated Fat: 12g |
Trans Fat: 0.4g |
Cholesterol: 193mg |
Sodium: 1843mg |
Fiber: 2g |
Sugar: 12g
Nutrition information is automatically calculated, so should only be used as an approximation.