
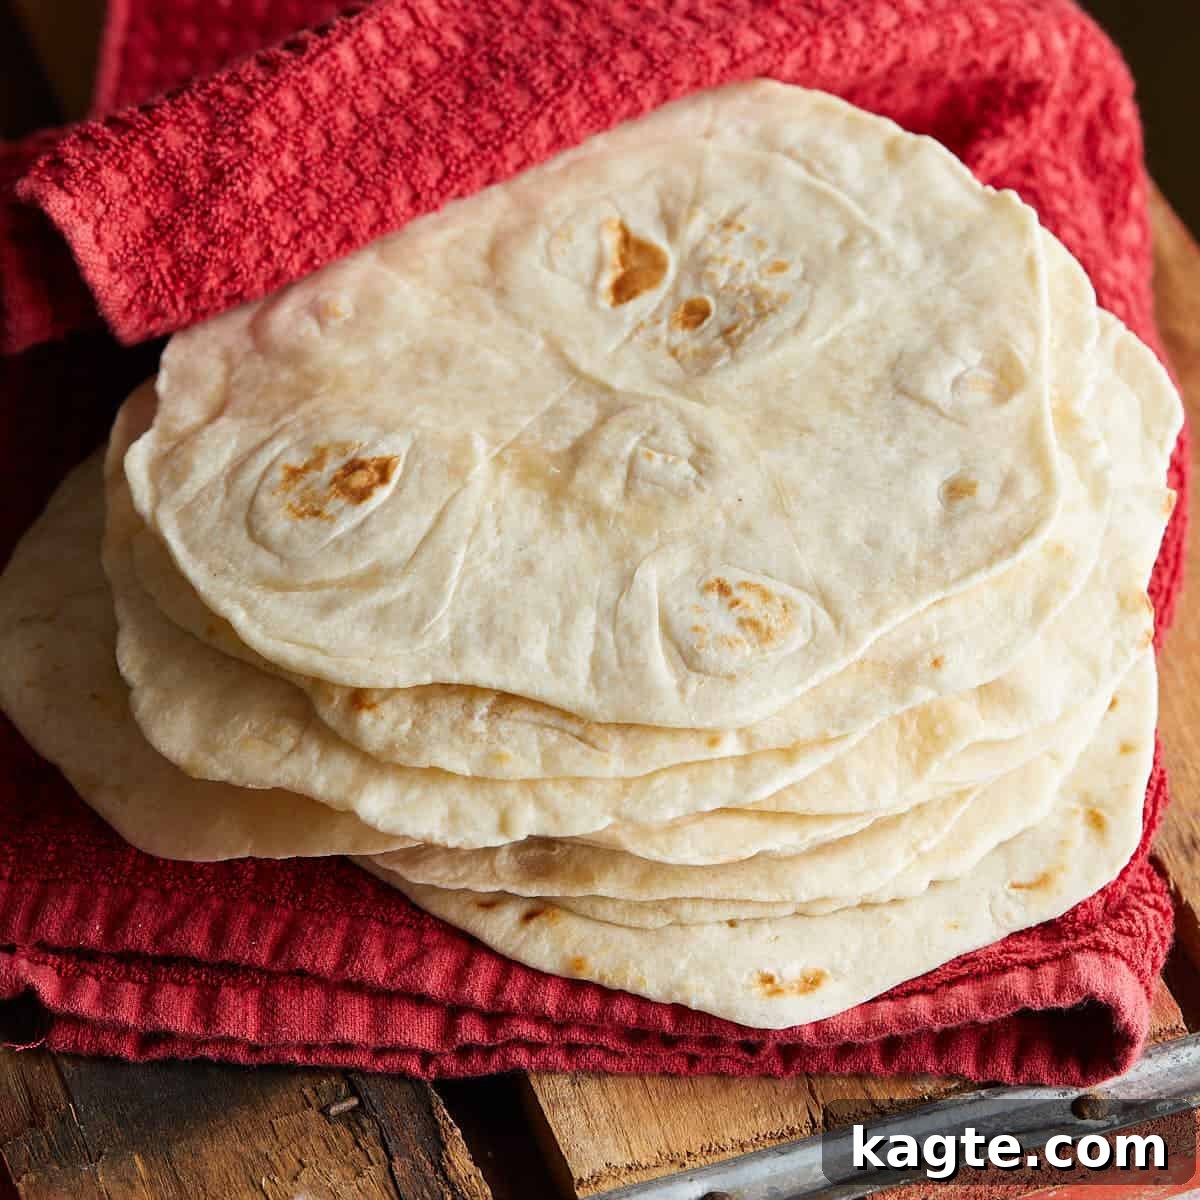
Prepare yourself for a culinary revelation! Once you experience the unparalleled taste and texture of these
Homemade Flour Tortillas, you’ll find it impossible to revert to their store-bought counterparts.
These tortillas are remarkably soft, wonderfully pliable, and boast just the right amount of delightful chewiness.
Crafted from simple pantry staples—all-purpose flour, baking powder, salt, and your choice of traditional lard or rich unsalted butter—this recipe is surprisingly straightforward, delivering
a homemade delight that’s absolutely worth every minute spent in the kitchen. They are the perfect canvas for your favorite
tacos, robust burritos, cheesy quesadillas, fresh wraps, or simply enjoyed warm with a generous slather of butter.
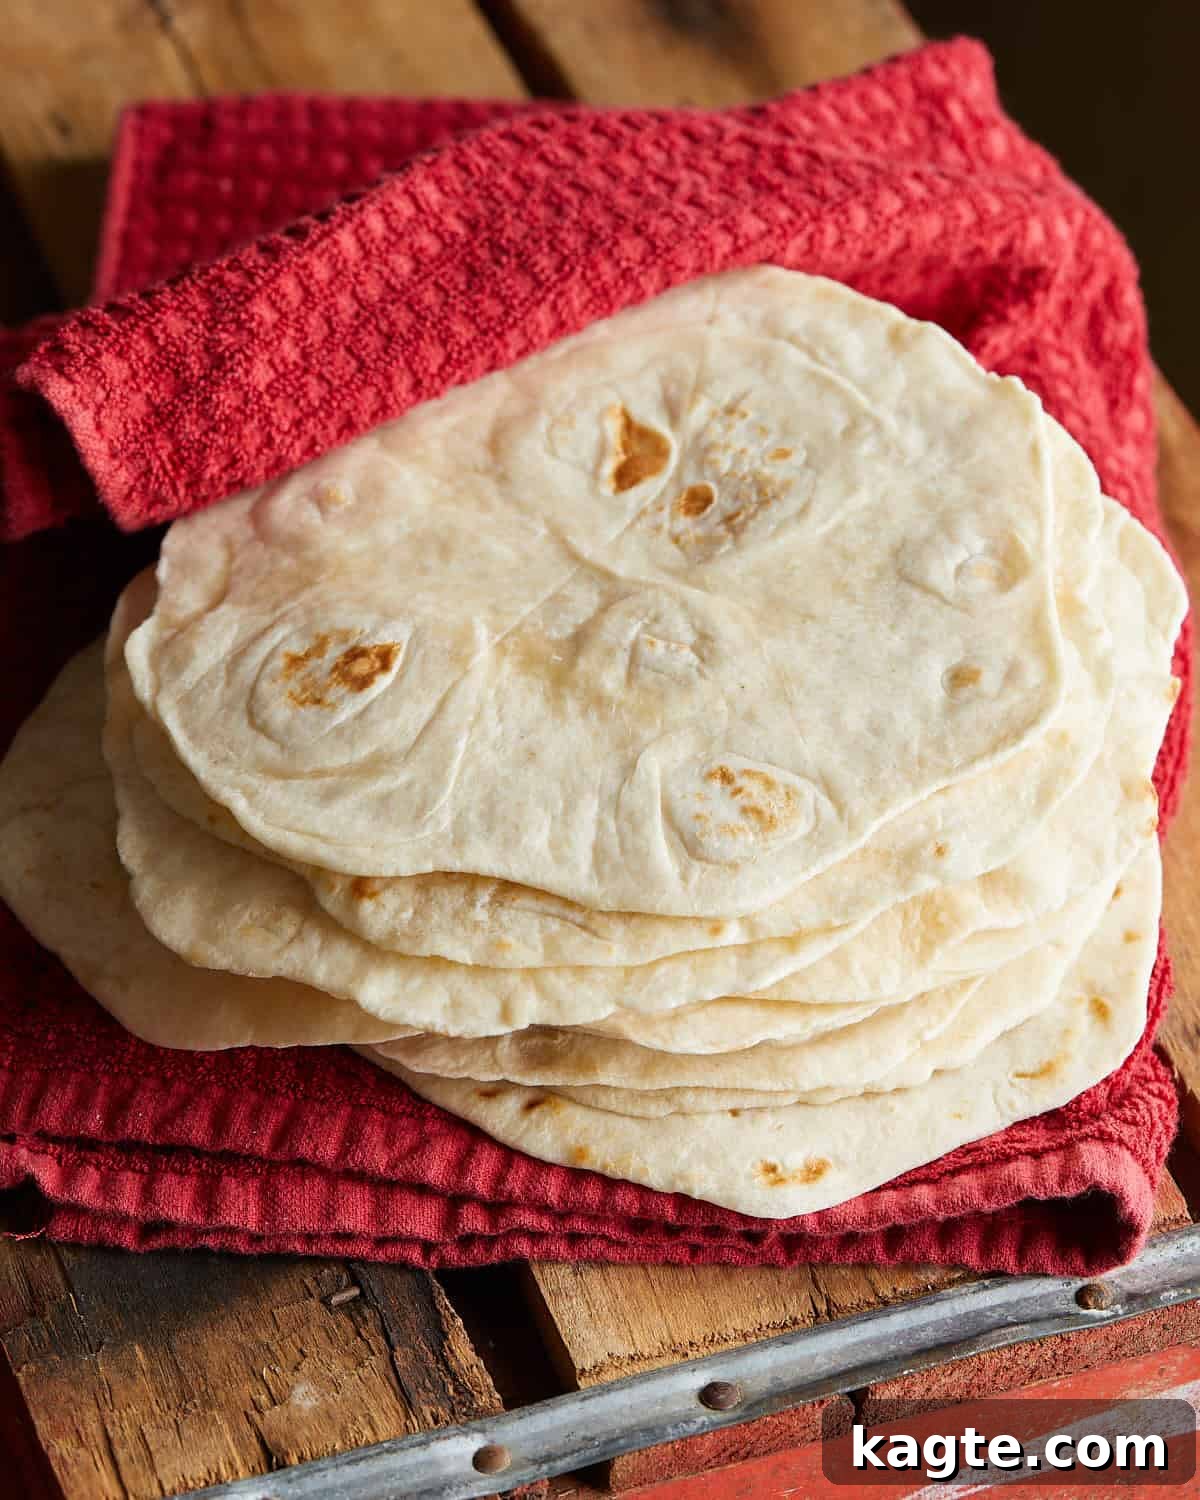
There’s an undeniable magic in homemade flour tortillas. The comforting warmth, the satisfying chew, the way they
elegantly puff on a hot skillet—each element contributes to an experience that elevates any meal. This recipe is my
trusted method for achieving that perfect balance of simplicity and profound satisfaction. I promise you, once you
savor a fresh, warm tortilla made from scratch, the pre-packaged versions will forever pale in comparison. They
offer a depth of flavor and a tender texture that simply cannot be replicated.
If you’re a fan of crafting your own culinary staples, you’ll also adore my
Homemade Lime Tortilla Chips!
They are incredibly easy to prepare, likely using ingredients you already have on hand. The subtle zest of lime
and a sprinkle of flaky sea salt make them an utterly irresistible snack or accompaniment to your favorite dips.
Table of Contents
- Why Homemade Tortillas Are a Must-Try
- Essential Ingredients & Clever Substitutions
- Step-by-Step Guide to Perfect Flour Tortillas
- Quick Overview
- Detailed Instructions for Success
- Expert Tips for Mastering Your Tortillas
- Common Mistakes and How to Avoid Them
- Delicious Additions & Flavorful Variations
- Serving Suggestions: What to Pair with Your Tortillas
- Storage and Reheating Tips
- Homemade Flour Tortillas Recipe Card
- Frequently Asked Questions
- More Delicious Side Dish Recipes
Why Homemade Tortillas Are a Must-Try
Ditching store-bought tortillas for homemade isn’t just a preference; it’s a revelation. Here’s why this recipe will
become your new kitchen favorite:
-
Unbelievably Soft & Stretchy: Say goodbye to brittle, cracking tortillas. These homemade beauties are
exceptionally tender and flexible, making them ideal for wrapping even the most generously filled tacos or burritos
without a single tear. Their elasticity is unmatched, providing that perfect give with every bite. -
Simple Pantry Ingredients: You’ll be amazed at how such an exquisite result can come from just five
basic ingredients. Flour, baking powder, salt, water, and your chosen fat—that’s it! You likely have everything
you need in your kitchen right now, eliminating the need for any special grocery runs. -
No Special Equipment Needed: Forget about expensive tortilla presses. All you truly need is a rolling
pin (or even a wine bottle in a pinch!), a clean surface, parchment paper, and a hot skillet. This accessibility
makes the recipe perfect for any home cook, regardless of their gadget collection. -
Superior Taste & Texture: Freshly made tortillas possess a rich, nuanced flavor and a wonderfully
chewy texture that simply cannot be matched by anything found in a package. The subtle hints of fat, the slight
puffiness from the baking powder, and the warmth straight from the griddle create a sensory experience that elevates
any meal. -
Cost-Effective & Healthier: Making tortillas at home is significantly more economical than buying
them regularly. Plus, you control every ingredient, avoiding preservatives, artificial flavors, and excessive sodium
often found in commercial products. It’s a fresher, cleaner option for your family. -
A Rewarding Culinary Experience: There’s immense satisfaction in creating something so delicious
and fundamental from scratch. The process itself is therapeutic, and the compliments you’ll receive from friends and
family will be priceless.
Essential Ingredients & Clever Substitutions
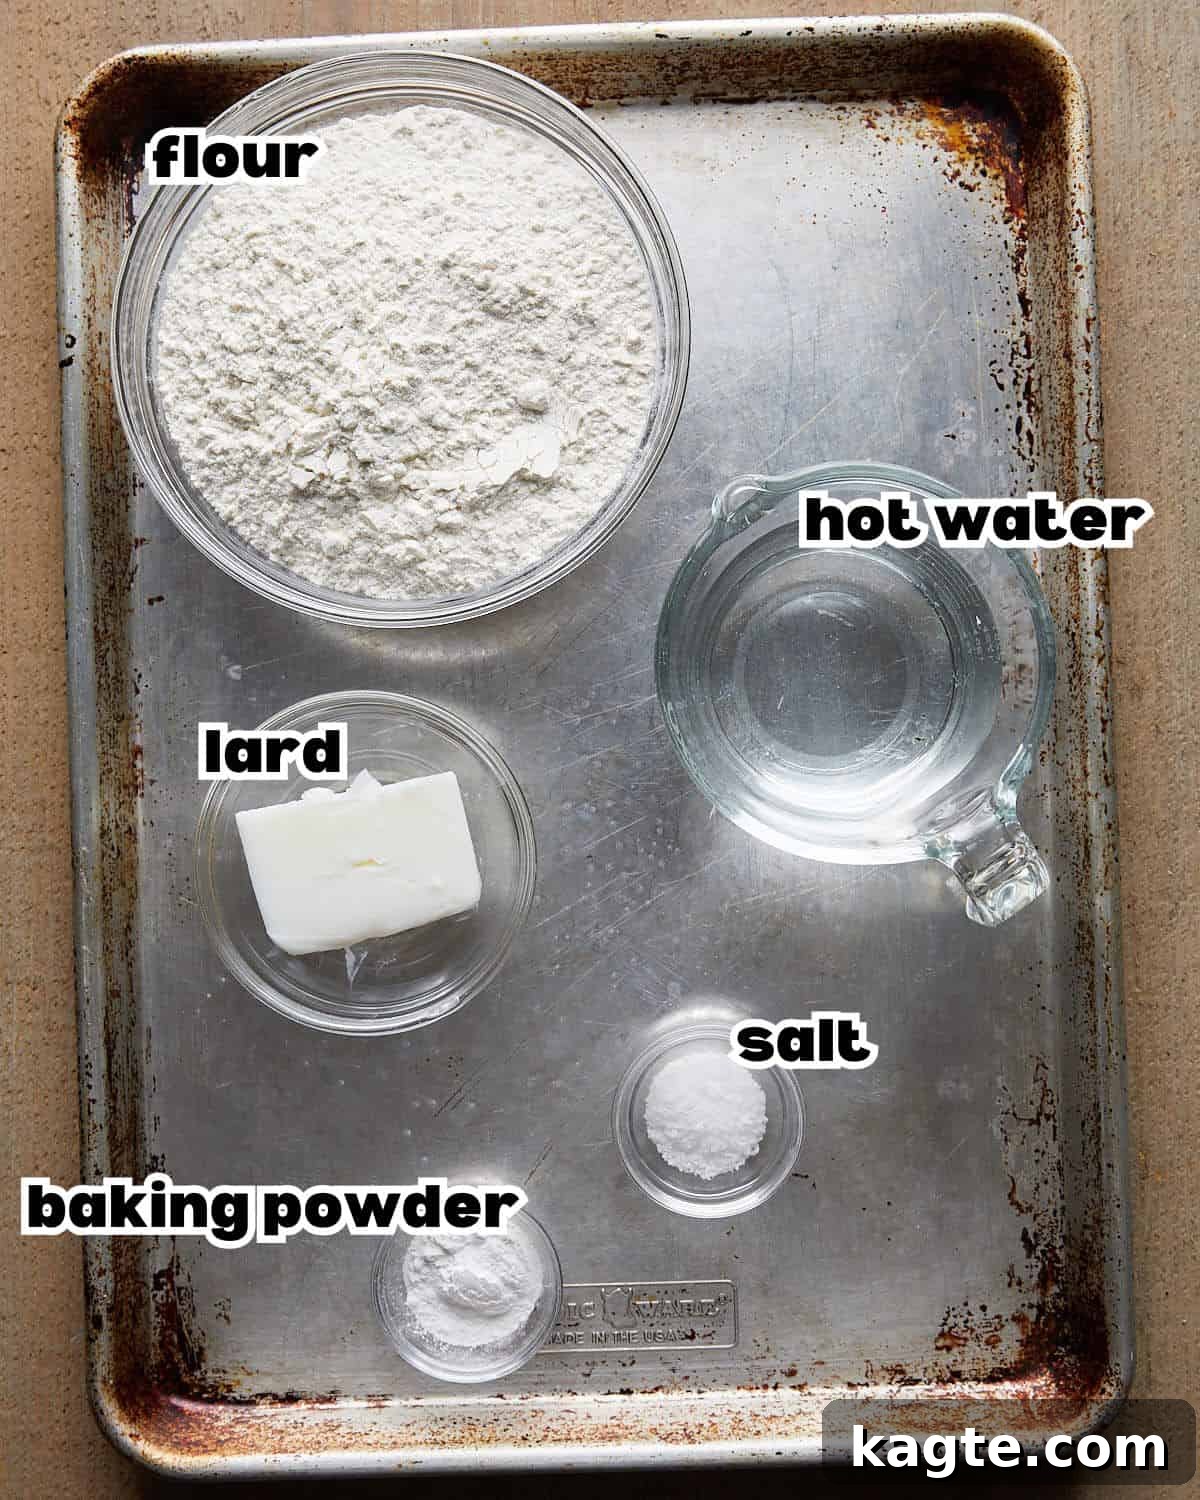
Getting these five core ingredients right is key to achieving perfect, pillowy tortillas. Here’s what you’ll need and
some useful notes on each:
-
All-Purpose Flour: The foundation of our tortillas. Use high-quality all-purpose white flour for
the softest, most tender, and delightfully fluffy results. While other flours can be used, all-purpose provides
the ideal gluten structure for pliability. -
Baking Powder: This leavening agent is crucial! It helps the tortillas puff up beautifully on the
skillet, creating those characteristic air pockets and contributing significantly to their tender texture. Do not
omit it, as it prevents dense, flat tortillas. -
Kosher Salt: All my recipes are meticulously tested with Morton kosher salt, unless explicitly
stated otherwise. Its flake size and balanced flavor make it superior for everyday cooking. If you’re using table
salt, remember to reduce the quantity by about half, as it’s much denser and saltier. I highly recommend investing
in kosher salt for consistently delicious results. -
Hot Water: The temperature of the water is more important than you might think! Using hot water
(not boiling, but hot to the touch) helps melt the fat (lard or butter) into the flour more effectively, creating
a smoother, more cohesive dough. It also aids in hydrating the flour faster and makes the dough easier to knead,
resulting in a more pliable and extensible dough. While warm water can work in a pinch, cold water should be
avoided as it stiffens the fat and makes the dough considerably harder to work with. -
Lard or Unsalted Butter: This is where much of the flavor and tender texture comes from.
-
Lard: Traditionally, lard is the fat of choice for authentic Mexican flour tortillas. It
imparts an incredibly rich flavor and contributes to an exceptionally soft and pliable texture. If you can
find good quality lard, it’s highly recommended for the most authentic experience. -
Unsalted Butter: A fantastic alternative that delivers a beautiful, buttery flavor and
still produces wonderfully soft tortillas. Ensure it’s at room temperature for easy incorporation. -
Substitutions: Solid vegetable shortening is a common and effective substitute, yielding
a very tender tortilla. For a dairy-free or vegan option, refined coconut oil (solid at room temperature)
can also be used, though it may impart a very subtle coconut flavor.
-
Lard: Traditionally, lard is the fat of choice for authentic Mexican flour tortillas. It
A complete list of exact ingredients and precise amounts can be found on the
recipe card below.
How to Make Homemade Flour Tortillas
Quick Overview
Mastering homemade flour tortillas is easier than you think. Here’s a glance at the straightforward process:
- Combine dry ingredients.
- Incorporate the fat.
- Add water and knead the dough.
- Portion the dough.
- Shape into disks and allow to rest.
- Roll out the tortillas.
- Cook on a hot skillet.
Detailed Instructions for Success
Follow these steps closely for consistently perfect, soft, and delicious flour tortillas every time.
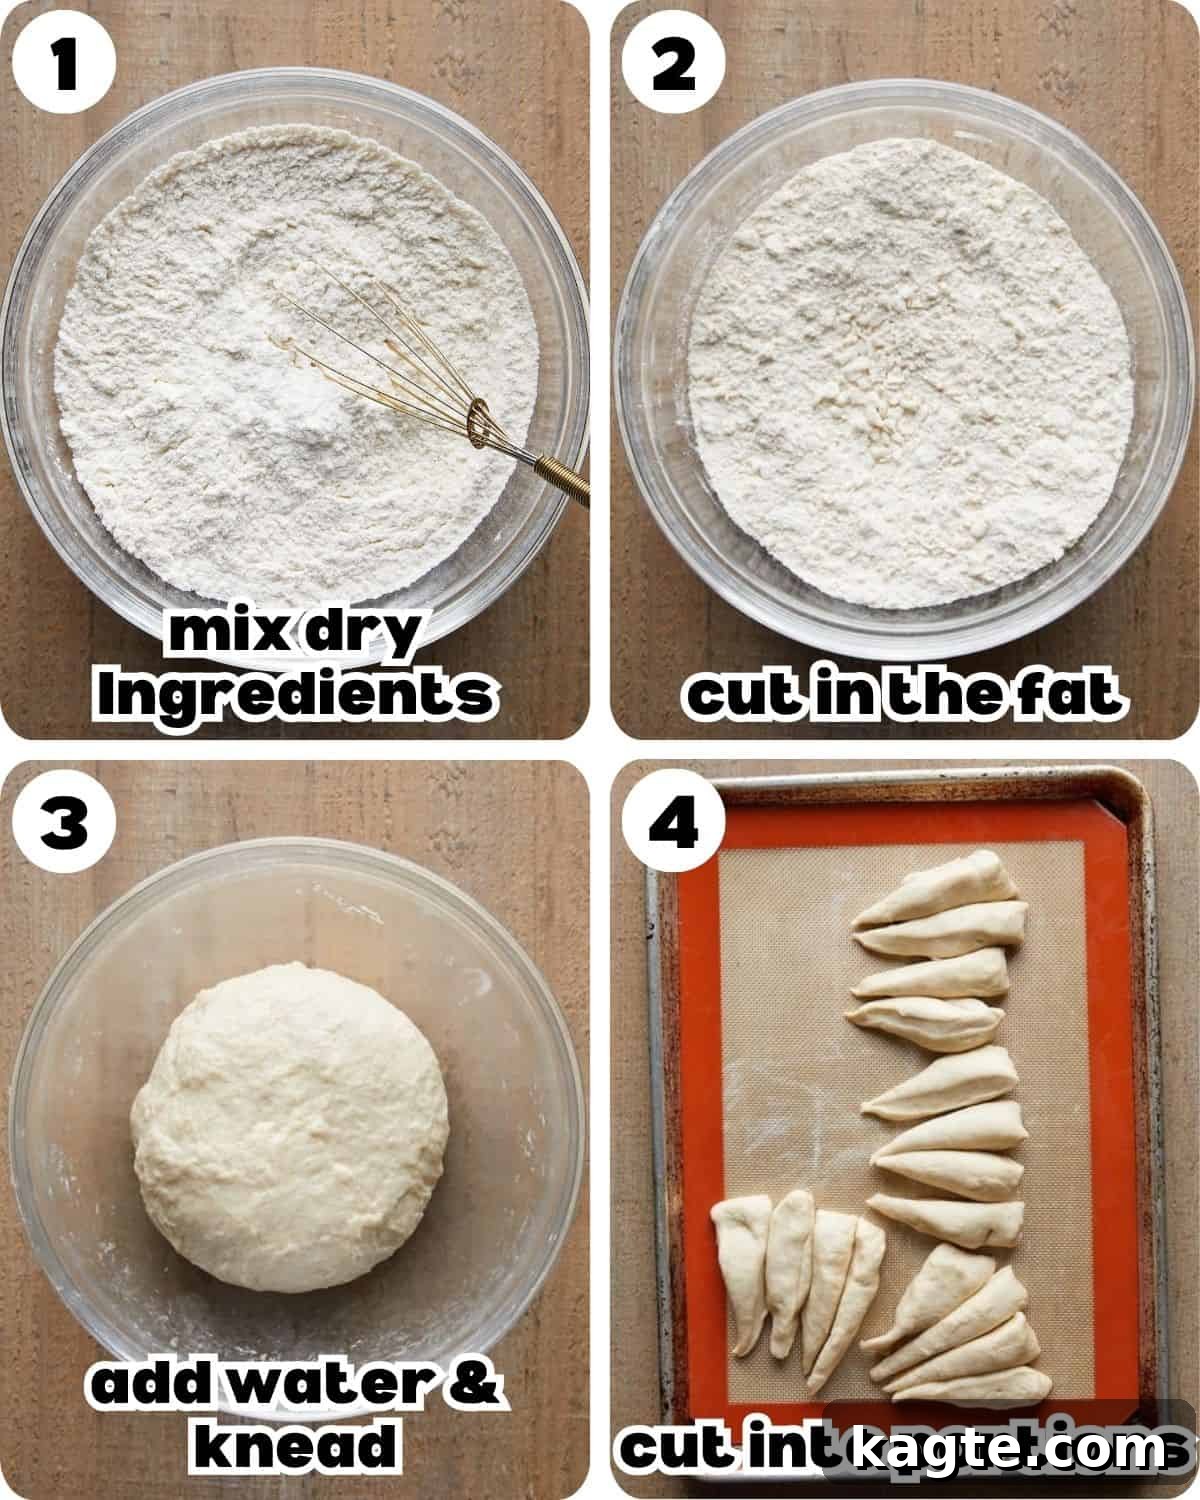
-
Mix Dry Ingredients: In a large mixing bowl, combine the all-purpose flour, baking powder, and
kosher salt. Use a whisk to thoroughly mix these ingredients until they are evenly distributed. This ensures the
leavening agent and salt are spread throughout the dough for consistent results. -
Cut in the Fat: Add the room temperature lard or unsalted butter directly into the dry ingredients.
Using a fork or your fingertips, work the fat into the flour mixture. Continue until the mixture transforms into a
crumbly texture resembling coarse sand, with some small, pea-sized bits of fat still visible. This process is
crucial for creating layers of tenderness in the final tortilla. -
Add Water & Knead: Pour the hot water into the flour and fat mixture. Use a fork to stir initially
until a shaggy, somewhat sticky dough begins to form. Once it’s too difficult to stir with a fork, switch to your
hands. Knead the dough either directly in the bowl or transfer it to a lightly floured work surface. Knead for
approximately 3-4 minutes. The goal is to achieve a dough that is smooth, elastic, and slightly tacky to the touch,
but not overly sticky.-
Troubleshooting Stickiness: If your dough feels too sticky, add a very small amount of
extra flour, about 1 tablespoon at a time, and continue kneading until the desired texture is reached. -
Troubleshooting Dryness: If the dough is too dry or crumbly, add a splash (about 1 teaspoon)
of warm water and knead again until it becomes smooth and pliable. Avoid adding too much water at once.
-
Troubleshooting Stickiness: If your dough feels too sticky, add a very small amount of
-
Cut into Portions: Transfer the kneaded dough to a clean work surface. Gently shape it into a rough
log or a flattened disk. Use a bench scraper or a sharp knife to cut the dough in half. Then, cut each half into
quarters. Finally, divide each quarter into 4 equal pieces, resulting in 16 total portions. Aim for consistent
sizing to ensure even cooking.
-
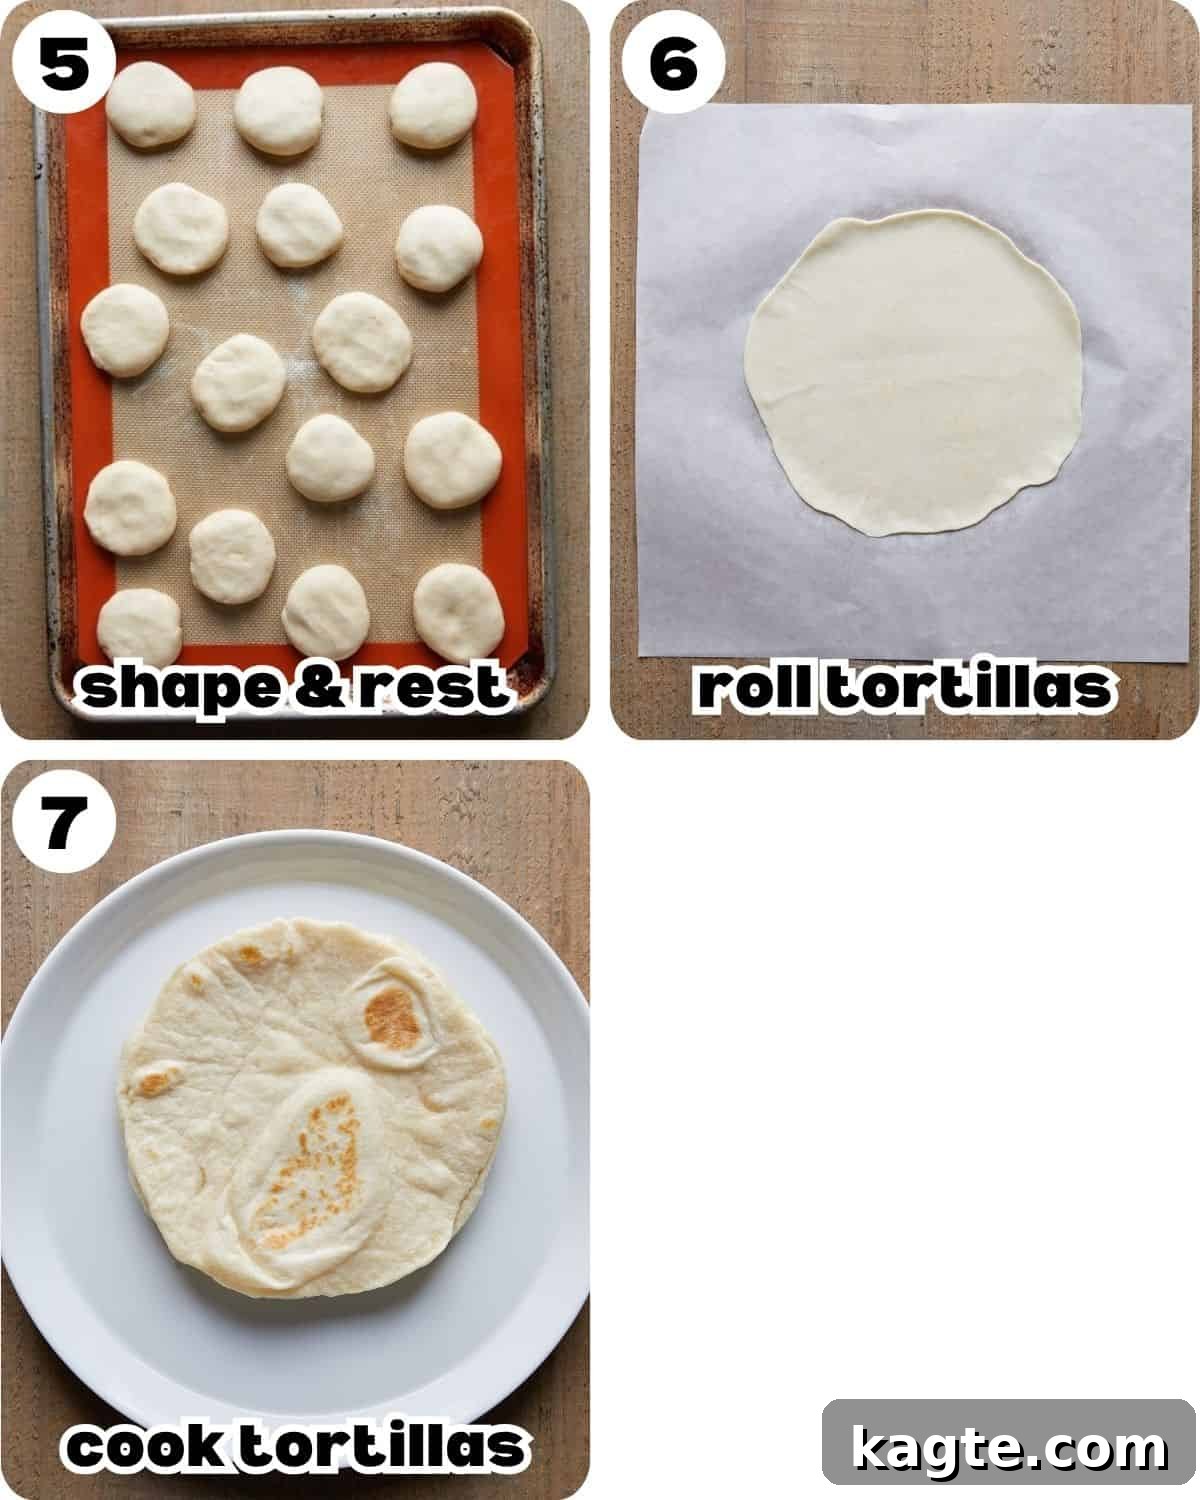
Shape & Rest: Take each individual dough portion and roll it into a smooth, tight ball. Once rolled,
gently press each ball into a small, thick disk, about 1 inch in thickness. Arrange these dough disks on a plate or
tray. Crucially, cover them with a clean kitchen towel or plastic wrap and allow them to rest at room temperature for
30-45 minutes. This resting period is vital, as it allows the gluten in the flour to relax, making the dough much
easier to roll out thinly without it constantly springing back. -
Roll the Tortillas: Place one of your rested dough disks onto a square piece of parchment paper.
Using a rolling pin, begin to gently press down on the dough and roll outward from the center, applying even pressure
to gradually flatten it. To maintain a round shape, rotate the parchment paper and dough approximately 45 to 90
degrees every couple of rolls. For even thickness and to prevent sticking, carefully peel the dough off the parchment
paper and flip it over a couple of times during the rolling process. Your goal is to roll each tortilla as thin as
possible, aiming for a diameter of about 6-8 inches. You should ideally not need extra flour if the dough has rested
properly and the parchment paper is assisting. However, if the dough feels slightly sticky or starts to cling to the
rolling pin, sprinkle a very minimal amount of flour—just enough to prevent sticking—to avoid drying out the dough. -
Cook the Tortillas: Heat a large skillet or griddle over medium heat until it is hot but not smoking.
Using the parchment paper as a “sling,” carefully transfer the rolled tortilla onto the hot skillet. This technique
prevents the delicate dough from tearing and keeps your hands clean. Cook each tortilla for a swift 30-60 seconds per
side. Look for telltale signs of doneness: bubbles forming on the surface and golden brown spots appearing on the
underside. Flip the tortilla only once during cooking. Adjust the heat as necessary; if they are browning too quickly,
lower the heat slightly; if they’re taking too long, increase it. As each tortilla finishes cooking, immediately stack
them in a clean kitchen towel to keep them warm, steamy, and wonderfully soft until you’re ready to serve.
Expert Tips for Mastering Your Tortillas
Achieving consistently perfect homemade tortillas is about understanding a few key techniques:
-
Water Temperature is Key: Always use hot (not boiling!) water for your dough. Aim for water
that’s hot to the touch, around 120–130°F (49-54°C). This temperature effectively hydrates the flour and helps
to evenly incorporate the fat, resulting in a smooth, pliable dough. -
Embrace Parchment Paper for Rolling: This is a game-changer! Placing your dough disk on a square
of parchment paper makes rolling incredibly easy. The parchment allows you to effortlessly rotate the dough directly
on your counter, ensuring a perfectly round tortilla. More importantly, it acts as a non-stick surface, preventing
the dough from clinging and making it simple to transfer the delicate, rolled tortilla to the hot pan without
tearing or excessive shrinkage. -
Do Not Skip the Dough Rest: This step is non-negotiable for tender, easy-to-roll tortillas. The
30-45 minute rest period allows the gluten in the flour to fully relax. If you try to roll the dough immediately
after kneading, it will be tough and resistant, constantly snapping back. A proper rest ensures the dough is
pliable and will roll out thinly with minimal effort. -
Roll Thin, but Not Paper-Thin: The ideal tortilla is thin enough to be flexible and cook
quickly, but not so thin that it tears easily or becomes crispy. Aim for about 1/16th of an inch, or until you
can almost see your hand through it. -
Stack & Wrap Cooked Tortillas: As each tortilla finishes cooking, immediately stack them in a
clean kitchen towel. This practice traps the steam, keeping them warm, moist, and wonderfully soft until you’re
ready to serve. It prevents them from drying out and becoming stiff.
Common Mistakes and How to Avoid Them
Even experienced cooks can make mistakes. Being aware of these common pitfalls will help you create perfect tortillas every time:
-
Skipping or Shortening the Rest Time: This is arguably the most frequent error. If you attempt to
roll out your tortillas immediately after kneading, the gluten will be too tight, causing the dough to resist and
shrink back. The result will be thick, uneven, and frustratingly difficult-to-roll tortillas. Always allow the dough
to rest for the full 30-45 minutes to let the gluten relax. -
Rolling Too Thick: Tortillas that are too thick will be dense, doughy, and may not cook evenly.
They also won’t have that signature soft, pliable texture. Invest the time to roll them as thinly as possible (around
6-8 inches in diameter) for the best results. The thinner they are, the more tender and quicker they’ll cook. -
Using Too Much Flour When Rolling: While a very light dusting can help if the dough is slightly
sticky, excessive flour on your rolling surface will dry out the dough. This leads to tough, stiff tortillas that
lack the desired pliability. Rely on parchment paper and good dough hydration rather than extra flour. -
Overcooking Your Tortillas: This is a quick way to turn your soft tortillas into brittle chips. If
your pan is too hot or you cook the tortillas for too long, they will dry out, become stiff, and potentially crisp.
Watch closely for small bubbles forming and light golden-brown spots on the surface. Cook for only 30-60 seconds per
side, then flip. They should remain soft and flexible, not crispy. -
Not Kneading Enough: Insufficient kneading will result in a crumbly, inelastic dough that’s hard
to roll and produces tough tortillas. Aim for 3-4 minutes of consistent kneading until the dough is smooth and
elastic.
Delicious Additions & Flavorful Variations
While traditional flour tortillas are wonderful on their own, don’t hesitate to experiment with these exciting variations
to customize your batch:
-
Garlic & Herb Tortillas: Infuse your tortillas with aromatic flavors by mixing 1-2 teaspoons of
garlic powder, dried oregano, dried cilantro, or a blend of your favorite dried herbs directly into the flour mixture.
These are fantastic for savory wraps or alongside grilled meats. -
Cheesy Tortillas: For an extra layer of flavor and melty goodness, fold in about ½ cup of shredded
cheddar, Monterey Jack, or spicy pepper jack cheese into the dough after kneading, just before portioning. These are
perfect for quesadillas or as a flavorful base for any dish. -
Whole Wheat Version: For a more wholesome option, substitute up to half of the all-purpose flour
with whole wheat flour. Whole wheat flour absorbs more liquid, so you may need to add an extra splash (1-2 tablespoons)
of warm water to the dough until it reaches the desired pliable consistency. They will have a nuttier flavor and
slightly denser texture. -
Spicy Kick: Add ½ to 1 teaspoon of chili powder, smoked paprika, or a pinch of cayenne pepper to the
dry ingredients for tortillas with a subtle heat. -
Mini Tortillas: Perfect for street tacos, appetizers, or sliders! Simply divide the dough into 24
portions instead of 16. Roll them out smaller, aiming for about 4-5 inches in diameter, and adjust cooking time
accordingly (they’ll cook even faster!). -
Sweet Tortillas: For a unique dessert, add 1-2 tablespoons of sugar and ½ teaspoon of cinnamon to
the dry ingredients. Serve them warm with honey, fruit, or a sprinkle of cinnamon sugar.
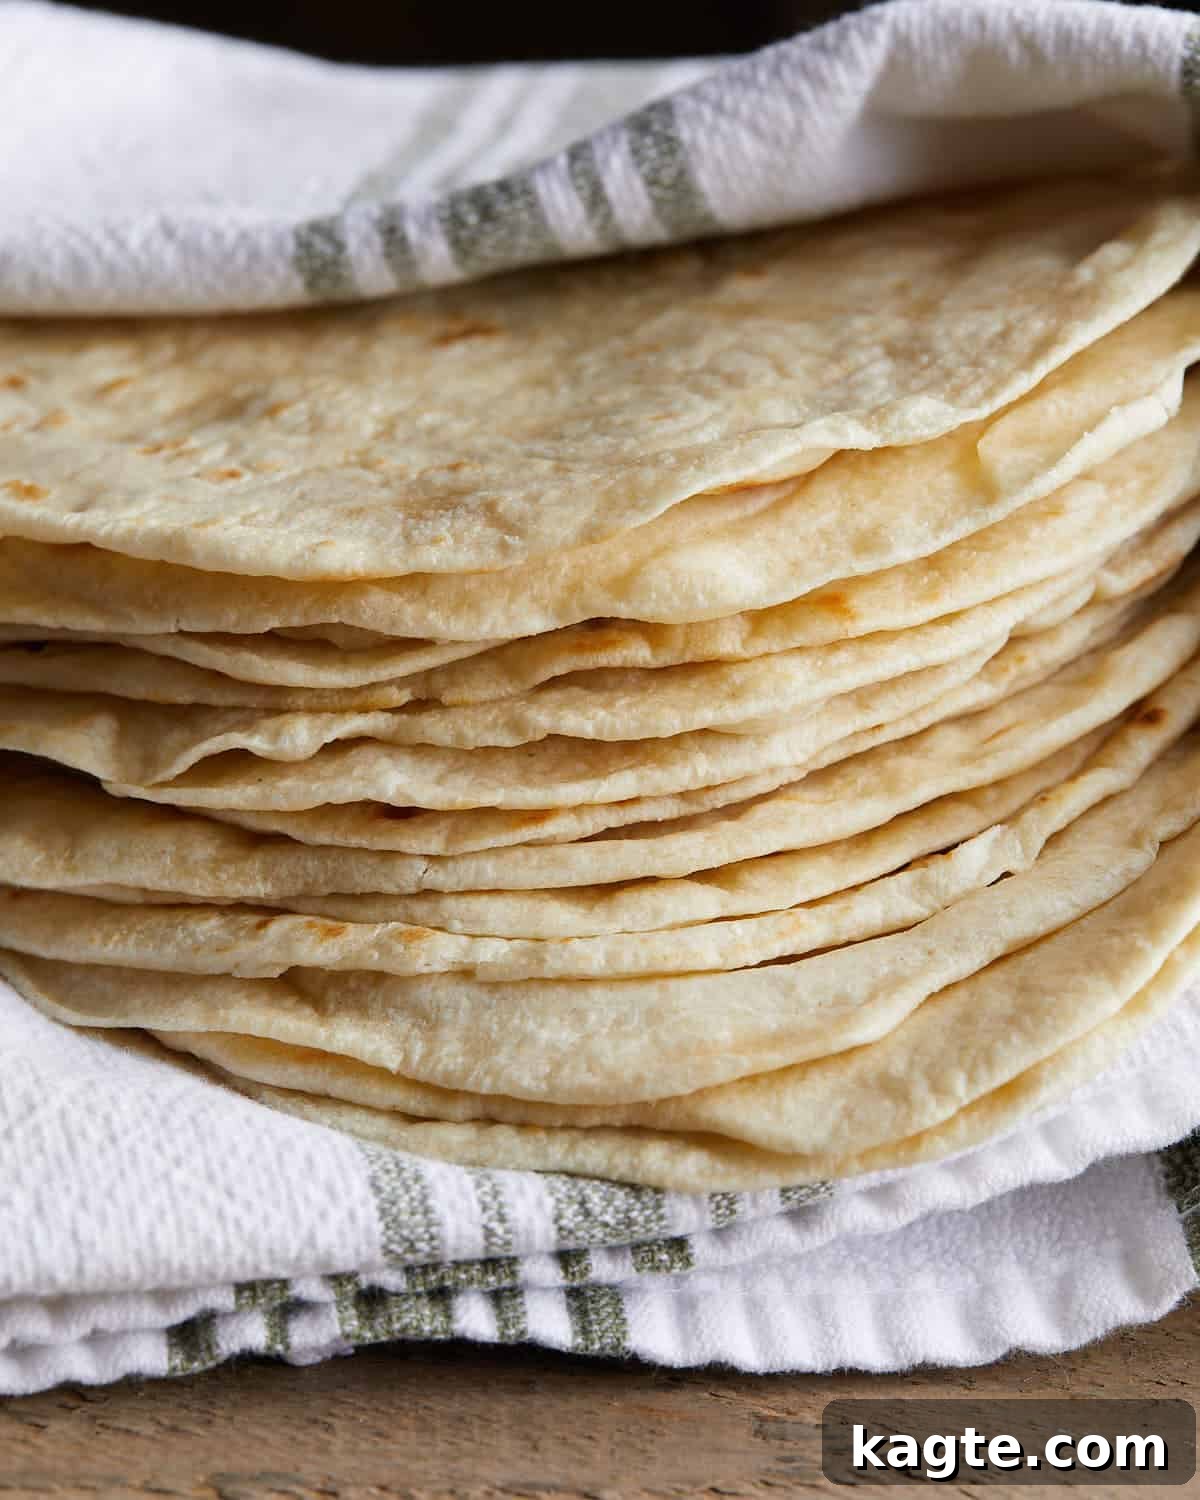
Serving Suggestions: What to Pair with Your Tortillas
Warm, homemade tortillas are incredibly versatile. You can enjoy them simply as a snack, perhaps with a touch of butter,
or use them as the foundation for a spectacular meal. Here are some of my favorite ways to serve them:
-
Grilled Chicken Fajitas:
Wrap these tender, smoky, and boldly flavored chicken fajitas—marinated in a vibrant chipotle-lime blend—in your
fresh tortillas for an unforgettable taco night experience. -
Air Fryer Pork Belly Bites:
Succulent pork belly bites, inspired by the sweet, spicy, and savory notes of al pastor, are a phenomenal filling
that will have everyone asking for more. -
Traditional Carnitas (Mexican Pulled Pork):
Slow-cooked in a Dutch oven until impossibly tender and falling apart, these carnitas are moist, rich, and bursting
with authentic Mexican flavor—a perfect match for homemade tortillas. - Breakfast Burritos: Fill them with scrambled eggs, cheese, beans, and salsa for a hearty morning meal.
- Quick Quesadillas: Layer with cheese and your favorite fillings, then pan-fry until golden and melty.
-
As a Side with Soup or Chili: Tear them into pieces to dip into a comforting bowl of
taco soup or homemade chili.
Complete your Mexican-inspired feast with these traditional side dish recipes:
-
Mexican Red Rice (Arroz Rojo):
A staple side dish, this rice is perfectly fluffy and infused with a rich, savory tomato flavor that complements any
main course. -
Instant Pot Charro Beans:
Also known as frijoles charros, these flavorful pinto beans are simmered with bacon, chorizo, onion, and a medley of
spices, making them an incredibly satisfying and robust accompaniment.
Storage and Reheating Tips
Homemade tortillas are best enjoyed fresh, but they store well for future meals.
-
Storage: Once cooled, stack the tortillas and wrap them tightly in plastic wrap or place them in
an airtight bag. Store at room temperature for up to 2-3 days, or in the refrigerator for up to a week. For longer
storage, they can be frozen for up to 2-3 months. Place parchment paper between each tortilla before stacking to
prevent sticking, then wrap tightly. -
Reheating from Fridge: For best results, reheat tortillas individually on a dry, hot skillet over
medium-high heat for about 15-30 seconds per side, or until warmed through and pliable. You can also stack them,
wrap loosely in a damp paper towel, and microwave for 30-60 seconds. -
Reheating from Freezer: Thaw frozen tortillas overnight in the refrigerator or at room temperature.
Then, reheat as described above.
Homemade Flour Tortillas Recipe Card
Homemade Flour Tortillas Recipe
Author: Brianna May
Once you make these Homemade Flour Tortillas from scratch, you’ll never go back to
store-bought! They’re soft, pliable, and have just the right amount of chew. Made with simple pantry
staples—flour, baking powder, salt, and your choice of lard or butter—these tortillas are surprisingly easy
to make and totally worth the extra few minutes in the kitchen. Use them for tacos, quesadillas, burritos,
wraps, or just warm and slathered in butter.
Prep Time: 10 minutes
Cook Time: 5 minutes
Resting Time: 30 minutes
Total Time: 45 minutes
Servings: 16 tortillas
Equipment
- Mixing Bowls
- Parchment Paper
- Whisk
- Fork
- Liquid Measuring Cups (e.g., Pyrex)
- Rolling Pin
- 12-inch Nonstick Skillet or Griddle
Ingredients
- 3 1/4 cups all-purpose flour
- 1 1/2 teaspoons baking powder
- 1 1/2 teaspoons Morton kosher salt
- 1 cup hot water (around 120-130°F)
- 6 Tablespoons lard or unsalted butter, room temperature
Instructions
-
Mix Dry Ingredients: In a large mixing bowl, whisk together the flour, baking powder,
and salt until evenly combined. -
Cut in the Fat: Add the room temperature lard or butter. Use a fork (or your fingertips)
to work it into the flour until the mixture is crumbly and resembles coarse sand with some pea-sized bits
of fat throughout. -
Add Water & Knead: Pour in the hot water and stir with a fork until a shaggy dough forms.
Switch to your hands and knead the dough in the bowl or on a lightly floured surface for about 3–4 minutes,
until it becomes smooth, elastic, and slightly tacky but not sticky. If too sticky, add flour 1 tablespoon
at a time. If too dry, add a splash of warm water. -
Cut into Portions: Transfer the dough to a clean work surface and form it into a rough
log or disk. Use a bench scraper or sharp knife to cut the dough in half, then cut each half into quarters.
Finally, cut each quarter into 4 equal pieces to make 16 portions. -
Shape & Rest: Roll each piece into a smooth ball, then press gently into a small, thick
disk (about 1 inch thick). Place the disks on a plate or tray, cover with a clean kitchen towel or plastic
wrap, and let them rest at room temperature for 30–45 minutes. This allows the gluten to relax for easier rolling. -
Roll the Tortillas: Place a dough disk on a square piece of parchment paper. Using a
rolling pin, gently press down and roll outward from the center, applying even pressure to start flattening
the dough. Rotate the parchment and dough about 45 to 90 degrees every couple rolls to help keep the tortilla
round. Carefully flip the dough over a couple of times during rolling to prevent sticking and promote even
thickness. Aim to roll the tortilla as thin as possible, about 6–8 inches wide. A very small amount of flour
can be used if needed, but parchment helps prevent drying out the dough. -
Cook the Tortillas: Heat a large skillet or griddle over medium heat until hot. Use the
parchment paper as a sling to carefully transfer the rolled tortilla onto the hot skillet—this prevents tearing.
Cook each tortilla for 30–60 seconds per side, or until bubbles form and golden brown spots appear. Flip once
during cooking. Adjust heat as needed. Stack cooked tortillas in a clean kitchen towel to keep warm and soft.
Notes
- Hot Water is Essential: Water at 120-130°F helps melt the fat and hydrate the dough perfectly.
- Parchment Paper Magic: It prevents sticking and makes rolling and transferring effortless.
- Resting is Non-Negotiable: Don’t rush this step; it relaxes the gluten for easy rolling.
- Don’t Overcook: Keep an eye on them! Overcooked tortillas become dry and crisp.
Did you make this recipe? Leave a comment below!
Nutrition
Calories: 130kcal | Carbohydrates: 19g | Protein: 3g | Fat: 5g | Saturated Fat: 3g | Polyunsaturated Fat: 0.3g |
Monounsaturated Fat: 1g | Trans Fat: 0.2g | Cholesterol: 11mg | Sodium: 42mg | Fiber: 1g | Sugar: 0.1g
Nutrition information is automatically calculated, so should only be used as an approximation.
Frequently Asked Questions
Got questions about making homemade tortillas? Here are answers to some common queries:
-
Can I use a stand mixer to knead the dough?
Yes, you can! Use the dough hook attachment and knead on low speed for about 2-3 minutes until the dough is smooth
and elastic. Be careful not to over-knead. -
My tortillas are tough. What went wrong?
This is usually due to either not letting the dough rest long enough (or at all), or using too much flour during
rolling. Make sure your dough is well-rested and minimize extra flour when rolling. Overcooking can also lead to tough tortillas. -
How do I get my tortillas perfectly round?
Practice makes perfect! Start by shaping your dough balls as round as possible. When rolling, apply even pressure
from the center outwards, and regularly rotate the dough (along with the parchment paper) to maintain a circular shape. -
Can I make the dough ahead of time?
Absolutely! You can prepare the dough, form it into disks, and refrigerate it for up to 2 days, tightly wrapped. Let
it come to room temperature for about 30 minutes before rolling and cooking. -
Why aren’t my tortillas puffing up?
Several factors can affect puffing: not enough baking powder, dough rolled too thick, or your skillet isn’t hot
enough. Ensure your baking powder is fresh, roll the tortillas thinly, and make sure your skillet is at the right
medium-high temperature.
More Delicious Side Dish Recipes
Explore more fantastic side dishes to complement your meals:
Side Dish
What To Serve with
Chicken and Dumplings for Dinner (15 Best Sides)
Side Dish
What To Serve With Mashed
Potatoes (25 Dinner Ideas)
Side Dish
What
To Serve With Taco Soup For Dinner (Toppings & Sides)
Side Dish
Broccoli
Mac and Cheese (Easy & Creamy)
(Email subscription form removed as per instructions to clean JavaScript elements)
Did you make this recipe?
If you try this recipe, please leave a star rating
in the recipe card above and/or comment! I always appreciate your feedback.
Follow me on all of the platforms below.
- TikTok
- YouTube