

How to Dry Orange Slices in the Oven: Your Ultimate Guide for Edible & Decorative Uses

Discover the simple art of transforming fresh oranges into beautiful, versatile dried orange slices right in your own oven. This comprehensive guide will walk you through every step of the process, ensuring you can easily create these charming citrus pieces for both stunning holiday decor and delightful culinary applications. With minimal equipment and straightforward instructions, you’ll be able to produce perfectly dehydrated orange slices in no time, ready to elevate your home aesthetics or add a unique flavor to your dishes. Whether you’re a seasoned chef or a kitchen novice, learning how to dry orange slices in the oven is an incredibly rewarding and effortless endeavor that opens up a world of creative possibilities.
Dried orange slices are truly a marvel of versatility. Imagine them adorning your Christmas tree with a touch of natural elegance, stringing them into festive garlands, or incorporating their vibrant color and subtle citrus notes into sweet bread loaves and desserts. Beyond the holidays, they can brighten up any room as year-round decor or add a sophisticated touch to cocktails and teas. This guide is your ultimate resource for mastering the technique of oven-drying oranges, allowing you to harness their full potential. If you’re eager to explore more kitchen “how-to” guides, be sure to check out our other popular posts:
- How to Make Homemade Strawberry Preserves
- How to Cook a Spiral Ham
- How to Cook a Baked Potato in the Oven
Table of Contents
- Why You’ll Love Drying Orange Slices
- Ingredients & Customizations
- Step-by-Step Guide: Drying Orange Slices in the Oven
- Creative Ways to Use Dried Orange Slices
- Expert Tips for Perfect Dried Oranges
- Storage & Maximizing Shelf Life
- Additions & Variations for Dehydrated Citrus
- Frequently Asked Questions About Drying Oranges
- More Culinary Resources
- Oven-Dried Orange Slices Recipe Card
Why You’ll Love Drying Orange Slices in Your Oven
Drying orange slices in your oven isn’t just a practical kitchen skill; it’s a delightful process that yields a highly versatile product. Here’s why you’ll quickly fall in love with making your own oven-dried oranges:
- Remarkably Simple Process: You truly only need to follow a few straightforward steps to transform fresh oranges into beautifully dried slices. There are no complicated techniques or obscure ingredients, making it accessible for everyone, regardless of their cooking expertise. The process is more about patience and monitoring than intricate culinary skills.
- Effortless & Accessible: This method for how to dry orange slices in the oven is perfect for home cooks of all skill levels, from absolute beginners to experienced enthusiasts. The minimal tools required are likely already in your kitchen, eliminating the need for specialized equipment. This makes it an ideal project for a lazy afternoon or a weekend craft session.
- Only One Core Ingredient: Believe it or not, the main star of this “recipe” is just oranges! This simplicity not only saves you a trip to the grocery store but also highlights the natural beauty and flavor of the citrus itself. It’s a pure, unadulterated way to enjoy fruit.
- Perfect for Beginners: With only a couple of basic kitchen tools and easily understandable steps, this recipe is incredibly beginner-friendly. It’s a fantastic entry point into food preservation, crafting, or simply experimenting with natural decor. You’ll gain confidence in the kitchen and create something truly unique without feeling overwhelmed.
- Cost-Effective & Eco-Friendly: Instead of buying expensive dried citrus for decorations or garnishes, you can make your own for a fraction of the cost, especially when oranges are in season. This also helps reduce food waste by utilizing fruits that might otherwise go uneaten, promoting a more sustainable lifestyle.
- Natural Home Fragrance: As the oranges slowly dehydrate in your oven, they release a wonderfully fresh and inviting citrus aroma that will gently perfume your home, creating a cozy and welcoming atmosphere. It’s a natural alternative to artificial air fresheners.
Ingredients & Customizations
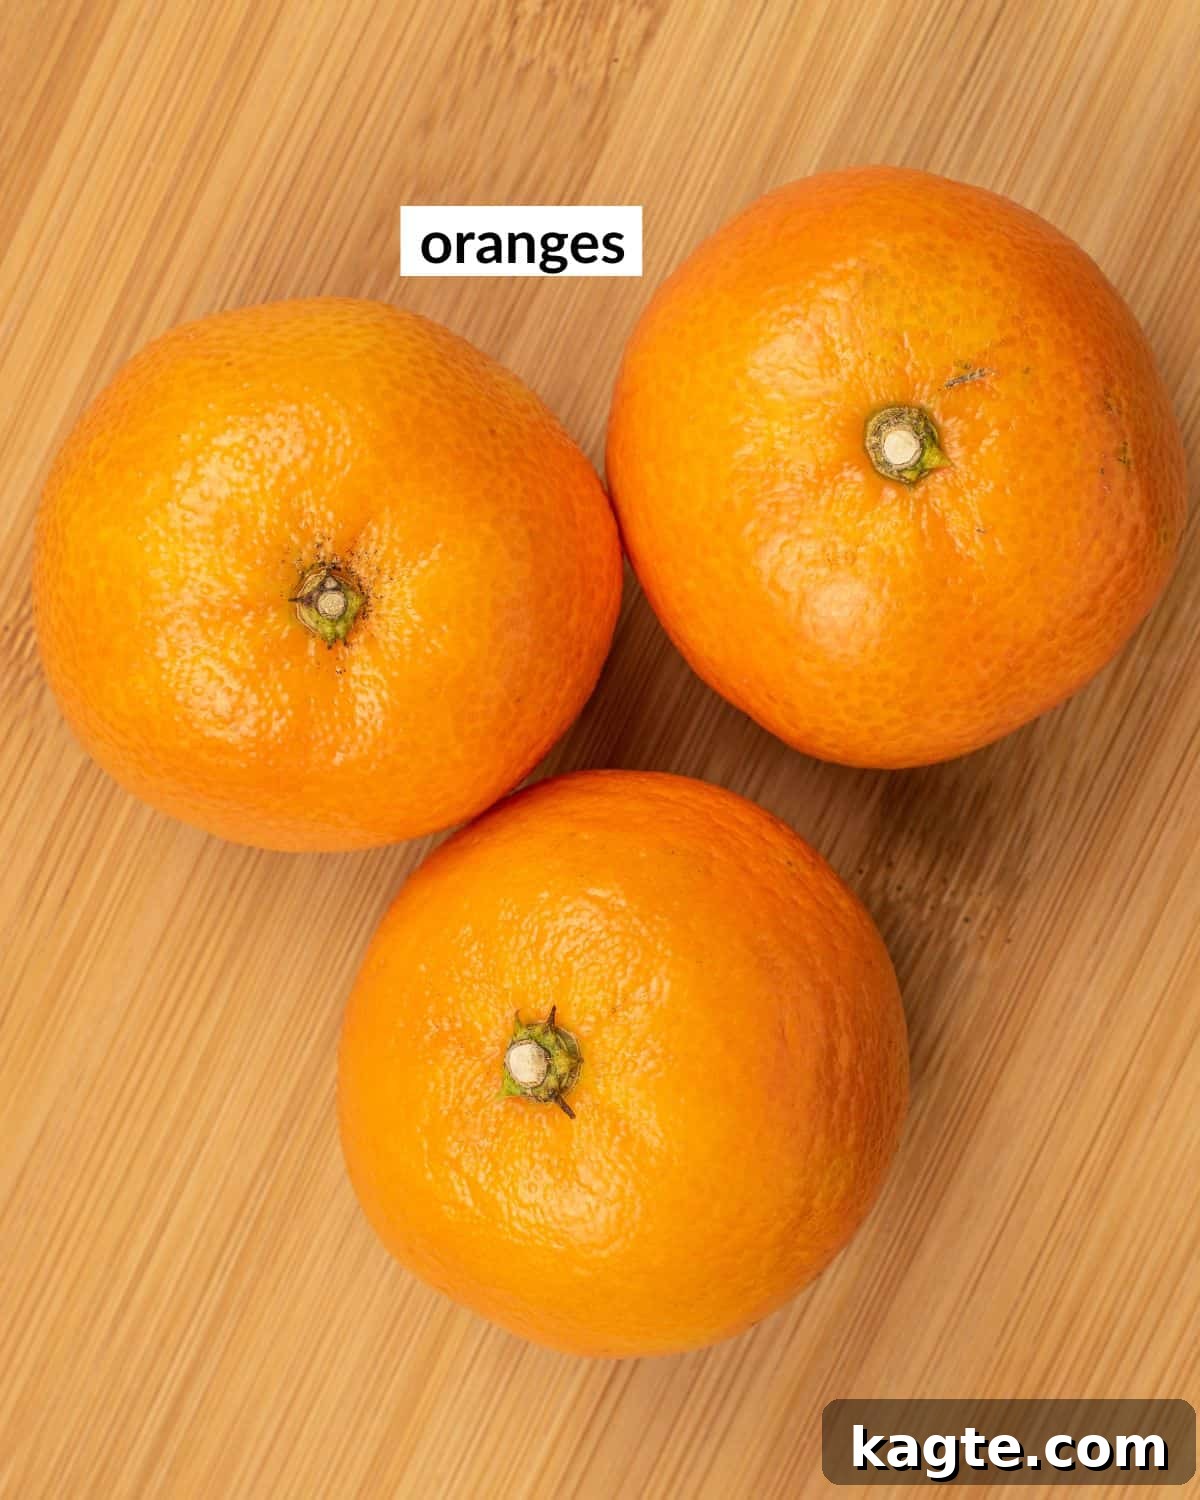
The beauty of drying orange slices lies in its incredible simplicity, requiring virtually no special ingredients. However, understanding the nuances of your citrus choices can elevate your results.
- Oranges (Navel or Valencia): Any variety of orange will technically work when following the steps for how to dry orange slices in the oven. Navel oranges are often recommended due to their relatively fewer seeds and bright, vibrant flesh. Valencia oranges are also an excellent choice, known for their juiciness, which means you’ll want to pat them extra dry before baking. The key is to choose firm, ripe oranges without any soft spots or blemishes. Organic oranges are ideal, especially if you plan to use the dried slices for culinary purposes, as you’ll be consuming the peel.
- Other Citrus Fruits for Variety: Don’t limit yourself to just oranges! This method is wonderfully adaptable for other citrus fruits, allowing you to create a beautiful array of colors and sizes for both decor and food.
- Limes: Limes will dehydrate faster than oranges due to their smaller size and thinner peels. Their bright green color turns into a muted, elegant green-yellow when dried, making them fantastic for contrasting decorative elements or zesty drink garnishes.
- Lemons: Similar to limes, lemons also dry more quickly. They retain a lovely pale yellow hue, perfect for classic drink garnishes or adding a sunny touch to potpourri.
- Grapefruits: For larger, more dramatic slices, grapefruits are an excellent option. They will take longer to dry than oranges, potentially 5-6 hours or more, due to their size and thicker flesh. The resulting slices offer a beautiful pink or yellow tone and make striking decorations.
- Mandarins/Tangerines: These smaller citrus fruits dry very quickly and produce delicate, intensely colored slices. They are wonderful for smaller craft projects or garnishing individual desserts.
Remember, the dehydration time will vary significantly based on the type, size, and thickness of the citrus fruit. Always monitor closely and adjust baking times as needed.
A complete list of ingredients and their precise amounts can be found on the recipe card below for your convenience.
Step-by-Step Guide: How to Make Dried Orange Slices in the Oven
Creating your own beautiful dried orange slices is a simple and rewarding process. Follow these detailed steps to achieve perfect results every time.
Quick Overview
- Preheat your oven to a low temperature.
- Carefully slice the oranges to a uniform thickness.
- Bake slowly until completely dry and firm.
Detailed Step by Step Instructions
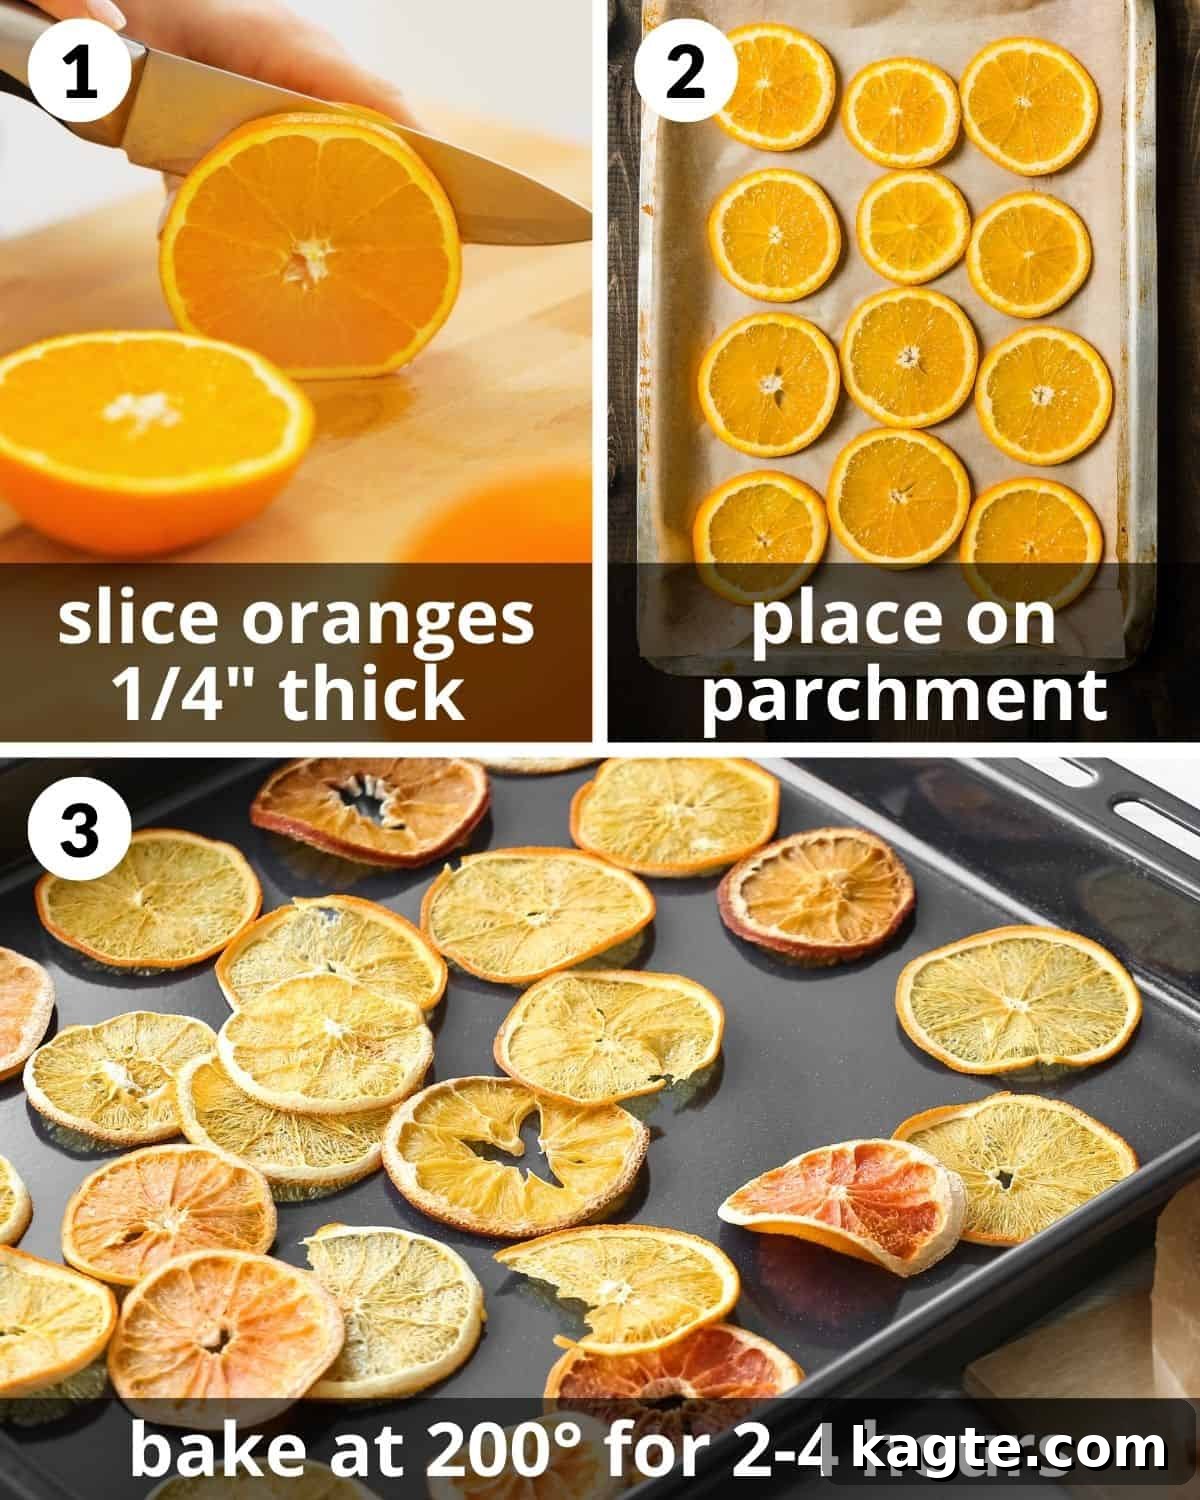
Pro Tip: Achieving uniform, thin slices is crucial for even dehydration. Avoid slicing oranges too thick, as this will significantly prolong the drying time and can lead to uneven results, with some parts remaining damp while others crisp.
Step 1: Prepare Your Oven and Oranges. Begin by preheating your oven to a very low temperature, specifically 200 degrees Fahrenheit (approximately 93 degrees Celsius). A low and slow heat is key to dehydrating, rather than cooking, the oranges. While the oven is heating, meticulously slice your oranges. The ideal thickness is about 1/4 inch (0.6 cm). For best results and uniform slices, use a very sharp chef’s knife or, even better, a mandoline slicer. A mandoline ensures consistent thickness, which is vital for all slices to dry at roughly the same rate. Once sliced, lay the orange rounds on a clean surface and gently pat them thoroughly dry with paper towels. This step is critical as it removes excess moisture, significantly reducing the overall drying time in the oven and helping to prevent them from sticking or becoming soggy.
Step 2: Arrange Slices on Baking Sheets. Line one or more baking sheets with parchment paper. Parchment paper is essential as it prevents the sticky orange slices from adhering to the metal tray during the long baking process. Alternatively, you can use a wire rack placed over a baking sheet, which allows for better air circulation around the slices and can slightly speed up drying time. Carefully arrange the prepared orange slices on the lined baking sheet(s) in a single layer, ensuring there is a small amount of space between each slice. This spacing allows air to circulate evenly around them, promoting consistent dehydration and preventing them from steaming instead of drying.
Step 3: Begin the Dehydration Process. Place the baking sheet(s) into your preheated oven. Bake the orange slices for an extended period, typically between 2 to 4 hours. The precise time will vary depending on the thickness of your slices, the juiciness of the oranges, and the specific calibration of your oven. It is absolutely crucial to flip the orange slices every 30-45 minutes. This regular flipping ensures both sides of the orange slices are exposed to the heat and air, promoting even drying and preventing them from sticking. Keep a close eye on the slices throughout this process. If you notice the edges or centers beginning to turn dark brown or burn, it’s a clear indication that your oven might be too hot, or the slices are drying too quickly. In such cases, you can slightly reduce the oven temperature or reposition the tray. Some slices may dry out faster than others, particularly those on the outer edges of the baking sheet or those cut slightly thinner. Remove these fully dried slices in batches as they are ready to prevent them from over-processing and becoming brittle. The dehydration is complete when the orange slices feel firm, mostly dry to the touch, and are no longer sticky or pliable. They should have a translucent appearance and a slight crispness. Once fully dried, turn off the oven and allow the orange slices to cool completely to room temperature directly on the baking sheet. They will crisp up further as they cool.
Important Note: Consistent monitoring is key. Due to variations in oven temperatures and fruit moisture, always ensure you remove any slices that dry more quickly than others to prevent them from becoming overly browned or burnt. The goal is a beautifully dried, not roasted, orange slice.
Creative Ways to Use Your Beautiful Dried Orange Slices
Once you’ve mastered how to dry orange slices in the oven, a world of creative possibilities opens up. These versatile citrus wonders can be used in countless ways, adding a touch of natural beauty and a hint of zesty fragrance to both your home and culinary creations. Here are some inspiring ideas for your beautiful oven-dried orange slices:
- Homemade Potpourri Mixes: Combine dried orange slices with cinnamon sticks, star anise, dried cranberries, pinecones, and a few drops of essential oils (like frankincense or clove) for a truly enchanting and natural potpourri that fills your home with festive aromas.
- Festive Garlands & Wreaths: String dried orange slices with cranberries, bay leaves, popcorn, or cinnamon sticks to create stunning, all-natural garlands for your fireplace mantle, windows, or Christmas tree. They also make exquisite additions to homemade holiday wreaths, providing vibrant color and texture.
- Cocktail and Mocktail Garnishes: Elevate your beverages! A dried orange slice makes a sophisticated and edible garnish for an Old Fashioned, a gin and tonic, sparkling cider, or even a simple glass of iced tea. Their gentle citrus aroma enhances the drinking experience.
- Elegant Gift Tags & Packaging: Attach a dried orange slice to holiday gifts or homemade baked goods with some twine for a charming, rustic, and environmentally friendly gift tag. They add a personal and beautiful touch to any package.
- Edible Decorations for Cakes & Desserts: Arrange them artfully on top of holiday cakes, fruit tarts, cupcakes, or even chocolate-dipped cookies for an elegant and flavorful edible decoration. They offer both visual appeal and a delicate citrus zest.
- Flavor Boost for Teas & Infusions: Drop a dried orange slice into your hot tea for a subtle, natural orange flavor without adding artificial ingredients. They are also wonderful in infused water or sangria for an extra layer of citrus depth.
- Savory Dish Enhancements: Don’t limit them to sweet applications! Add finely crushed dried orange zest to marinades for poultry or fish, or include whole slices when roasting chicken or duck for a delightful aromatic twist.
- Home Decor Bowl Fillers: Arrange a collection of dried orange slices in a decorative bowl or glass jar as a simple yet elegant centerpiece. They bring a pop of natural color and texture to any room.
- Creative Craft Projects: Beyond garlands, consider using them in candle making (embed them in soy wax), soap making, or as part of handmade ornaments and mobiles. Their natural form is wonderfully adaptable for various crafts.
- Wedding or Event Decor: For rustic or natural-themed events, dried orange slices can be incorporated into table centerpieces, place settings, or even wedding favors, offering an organic and charming aesthetic.
Expert Tips for Perfect Dried Oranges
While drying orange slices in the oven is straightforward, a few expert tips can ensure your results are consistently beautiful, fragrant, and perfectly dehydrated. Pay attention to these details for the best outcome:
- Choose the Right Oranges: Start with fresh, firm, and ripe oranges. Avoid any with soft spots, blemishes, or mold, as these imperfections will become more pronounced during drying. Organic oranges are a great choice, especially if you plan to eat them or use them in drinks, as you’ll be using the peel.
- Clean and Prepare Thoroughly: Before slicing, wash your oranges meticulously under cold running water. You can even use a vegetable brush to gently scrub the peel to remove any wax, dirt, or residues. This is particularly important if using non-organic fruit or for culinary applications.
- Master Thin and Even Slicing: This is perhaps the most crucial step. Aim for slices that are uniformly about ¼ inch (0.6 cm) thick. If slices are too thick, they will take significantly longer to dry and may remain pliable in the center. If too thin, they might become overly brittle or burn easily. A mandoline slicer is highly recommended for achieving consistent thickness; if using a knife, ensure it is extremely sharp and take your time.
- Pre-Dry with Paper Towels: After slicing, lay the orange rounds on a stack of paper towels and gently blot both sides to absorb as much excess moisture as possible. This simple step can dramatically cut down on drying time and help prevent the slices from sticking to the baking sheet. You can even press them gently between two cutting boards for a few minutes.
- Utilize Parchment Paper or Wire Racks: When baking, always line your baking sheets with parchment paper. This prevents the sticky sugars in the oranges from fusing to the metal surface. Even better, consider placing your orange slices on a wire cooling rack set over a baking sheet. This setup allows air to circulate around all sides of the slices simultaneously, leading to faster and more even dehydration without needing to flip them as frequently. If using a wire rack, ensure the holes are small enough so the slices don’t fall through.
- Maintain a Low and Consistent Oven Temperature: The goal is to dehydrate, not cook or roast. A temperature of 200°F (93°C) is ideal for slow, even drying. If your oven runs hot or you notice browning, slightly lower the temperature to 175°F (80°C). Uneven drying or browning indicates the temperature is too high.
- Flip for Even Drying: If you are baking directly on parchment paper, flipping the orange slices every 30-45 minutes is essential. This ensures both sides are exposed to the direct heat, promoting uniform drying and preventing one side from remaining damp while the other over-dries.
- Monitor and Remove in Batches: Keep a close eye on your oranges, especially during the last hour of drying. Different slices, even from the same orange, can dry at varying rates. Some might be ready after 2 hours, while others need up to 4. Remove any slices that are fully dry and firm (no longer sticky or pliable) to prevent them from becoming brittle or scorched.
- Cool Completely for Crispness: After removing from the oven, let the dried orange slices cool completely on the baking sheet at room temperature. They will continue to crisp up as they cool down. Testing for dryness should always be done after they’ve had a chance to cool.
Storage & Maximizing Shelf Life
Proper storage is crucial whether you’ve dried orange slices for decorative purposes or for culinary use. Correct storage ensures their longevity, preserves their vibrant color, and maintains their quality. Here’s how to store your dehydrated orange slices effectively:
- Ensure Full Cooling: Before storing, it is absolutely essential that your dried orange slices are completely cool to room temperature. Any residual warmth can create condensation inside your storage container, leading to moisture buildup, which can cause mold and spoilage.
- Airtight is Key: Pack your fully cooled, dehydrated orange slices in an airtight container. Mason jars with tight-fitting lids are an excellent choice, as are heavy-duty, sealable plastic bags (like Ziplock bags), or vacuum-seal bags for maximum preservation. The goal is to protect them from humidity and air exposure, which can reintroduce moisture and diminish their quality.
- Choose a Cool, Dark Spot: Store your airtight containers in a cool, dark, and dry pantry or cupboard. Direct sunlight and fluctuating temperatures can cause the slices to fade in color and potentially degrade faster. Avoid areas near heat sources like ovens or windows.
- Shelf Life for Edible Use: When properly dried and stored in an airtight container in a cool, dark place, dried orange slices can be eaten or used in recipes for up to one to two years. For best flavor and texture, it’s advisable to use them within one year. Always check for any signs of mold, off-smells, or excessive stickiness before consuming.
- Shelf Life for Decorative Use: For purely decorative purposes, dried orange slices can last even longer, often for several years. While their vibrant color might fade slightly over time to a more subdued, antique hue, they will still retain their charm. If using them as part of potpourri or garlands, refresh their fragrance occasionally with a few drops of essential oil.
- Avoid Refrigeration: There’s no need to refrigerate dried orange slices. The refrigerator’s humidity can actually introduce moisture, potentially shortening their shelf life.
Additions & Variations for Dehydrated Citrus
Once you’re comfortable with the basic oven-drying method, you might want to explore other ways to dehydrate oranges or infuse them with additional flavors for specific uses.
- Using a Food Dehydrator: Instead of relying on your oven, a dedicated food dehydrator offers a more controlled and energy-efficient way to dry orange slices. After slicing your oranges thinly (as described above), arrange them in a single layer on the dehydrator trays. Dehydrate them at a temperature of approximately 135°F (57°C) for about 4-8 hours. The exact time will depend on your dehydrator model, slice thickness, and fruit moisture content. Begin checking them after 4 hours, and then every 45-60 minutes, until they are firm and crisp. This method often yields slightly more uniform results and is excellent for larger batches.
- Spiced Orange Slices: For decorative dried orange slices, especially around the holidays, you can add a festive aroma. Before baking, lightly dust one side of the orange slices with ground cinnamon, nutmeg, or allspice. Alternatively, place whole cloves directly into the pulp of each slice. As they dry, these spices will infuse the air with a beautiful fragrance, making them perfect for potpourri, garlands, or festive bowl fillers.
- Sugar-Coated Candied Slices (for Edible Use): While this method isn’t pure dehydration, you can create candied dried orange slices. Slice oranges thinly and simmer them in a simple syrup (equal parts sugar and water) for about 30-60 minutes until translucent. Then, drain them and dry them in the oven at a low temperature (around 150-175°F / 65-80°C) for 1-2 hours, flipping occasionally, until firm but still slightly pliable. These are wonderful as edible garnishes or in baking.
- Mixing Citrus Types: Create a visually appealing medley by drying a variety of citrus fruits together. Combine orange, lemon, lime, and grapefruit slices on your baking sheet to achieve a beautiful gradient of colors and sizes. This is especially striking for decorative arrangements.

Frequently Asked Questions About Drying Oranges
For the most beautiful and long-lasting decorative dried orange slices, the oven method is highly recommended. The best approach involves slicing oranges thinly (about ¼ inch thick), thoroughly patting them dry to remove excess moisture, and then spreading them in a single layer on a parchment-lined baking tray. Bake them in a low oven, typically around 200-250°F (93-121°C), for approximately three to four hours. Remember to flip them every 30-45 minutes to ensure even drying and prevent sticking. This low and slow heat preserves their color and creates a firm, translucent slice perfect for garlands, wreaths, and other crafts.
To make dried oranges in the oven, start by preheating your oven to the lowest possible temperature, ideally 200°F (93°C) or 250°F (121°C) if your oven doesn’t go lower. Slice the oranges uniformly thin, about ¼ inch, and blot them well with paper towels. Arrange the slices on a baking sheet lined with parchment paper, ensuring they don’t overlap. Bake for 2-4 hours, flipping the slices every 30 minutes to promote even drying. The oranges are done when they are no longer sticky, feel firm, and have a somewhat translucent appearance. Allow them to cool completely on the baking sheet to achieve maximum crispness.
If you’re wondering how to dry orange slices without an oven for a quicker method, the microwave can be an option, though results may vary and it requires careful monitoring. Lay out two pieces of paper towels on a microwave-safe dish. Place thin slices of oranges (again, about ¼ inch thick) in a single layer on the paper towels, leaving space between them. Microwave on the defrost setting (or 30-50% power) for seven minutes, then check. If not dry, flip and microwave in 1-2 minute increments, allowing for cooling time in between to prevent burning. The key is to go slowly and check frequently, as microwaves can easily scorch citrus. This method is best for small batches.
Yes, you can dry orange slices in an air fryer! After slicing your oranges thinly (¼ inch thick), place them in a single layer in your air fryer basket or on the trays, making sure not to overcrowd. Set the air fryer to a very low temperature, around 175°F (80°C). Cook for approximately 3 to 4 hours, checking and flipping the slices every 30-45 minutes. The air fryer circulates heat efficiently, which can speed up the drying process compared to a conventional oven, but careful monitoring is still essential to prevent browning or burning.
Once you’ve followed the steps for how to dry orange slices in the oven, their versatility is truly endless! You can use dried oranges as an elegant garnish for cocktails, mocktails, and hot teas, adding both visual appeal and a subtle citrus flavor. They are perfect for baking, either crushed into zest for cakes and cookies or used whole as beautiful edible decorations. Beyond culinary uses, they shine in crafting: add them to festive wreaths, homemade potpourri, garlands, or hang them as charming Christmas tree ornaments. They also make lovely additions to gift wrapping. The options are limited only by your imagination!
If your dried orange slices turned brown instead of retaining their vibrant color, it’s typically due to the oven temperature being too high, causing them to cook or caramelize rather than slowly dehydrate. To avoid this, ensure your oven is set to its absolute lowest temperature (ideally 200°F/93°C or below) and monitor them closely. Browning can also occur if slices are too thick, requiring longer baking times at a temperature that eventually “cooks” the fruit. Using fresh, blemish-free oranges and patting them very dry before baking also helps maintain their bright color.
More Cooking Resources
Looking for more kitchen inspiration and helpful guides? Explore our collection of related recipes and culinary resources:
Discover More Delicious Ideas
Cooking Resources
The Best Substitutes for Rice Vinegar
Appetizers
Delicious Ways To Eat Spinach Dip (Hot or Cold)
Dessert
Build Your Own Ice Cream Sundae Toppings Bar (BEST Ideas)
Cooking Resources
The 5 Best Substitutes for Parmesan Cheese (for Pasta & More)
Shop my Amazon Storefront for recommended kitchen tools!
If you try this delightful recipe for dried orange slices, please leave a star rating in the recipe card below and/or share your thoughts in the comments! Your feedback is always greatly appreciated. Follow me on Pinterest, Facebook & Instagram for more inspiring recipes and tips.

Save
How to Dry Orange Slices in the Oven
★
★
★
★
5 minutes
2 hours
2 hours
5 minutes
Enough for multiple uses
Equipment
-
Baking Sheets
-
Mandoline Slicer (optional, but recommended for even slices)
-
Parchment Paper
-
Sharp Knife
-
Paper Towels
Ingredients
-
2-4
Navel Oranges (or other citrus like lemons, limes, grapefruits)*
Instructions
-
Preheat the oven to 200°F (93°C). While the oven heats up, carefully slice the oranges into uniform 1/4 inch (0.6 cm) thick rounds using a very sharp knife or a mandoline slicer. Gently pat both sides of the orange slices thoroughly dry with paper towels to remove excess moisture.2-4 navel oranges*
-
Line one or more baking sheets with parchment paper. Arrange the prepared orange slices on the lined baking sheet(s) in a single layer, ensuring there is some space between each slice for proper air circulation.
-
Bake for 2 to 4 hours. It is crucial to flip the orange slices every 30-45 minutes to ensure even dehydration on both sides. Monitor them closely; if they begin to turn dark brown or show signs of scorching, your oven might be too hot; consider slightly reducing the temperature. Some slices may dry faster than others due to thickness or moisture content; remove fully dried slices in batches as needed. The oranges are completely dry when they are firm, no longer sticky, and slightly translucent. Once done, turn off the oven and allow the dried orange slices to cool completely to room temperature on the baking sheet to achieve maximum crispness.
Did you make this recipe?
Leave a comment below!
Notes
- Oranges: Any variety of oranges will work, such as Navel or Valencia. You can also experiment with other citrus fruits like lemons, limes, or even grapefruits, but note that drying times will vary due to their size and moisture content. Lemons and limes will generally dry faster.
- Thinly slice fresh oranges. For consistent drying and appealing results, aim for uniform slices about ¼” (0.6 cm) thick. Thicker slices will take considerably longer to dehydrate and may not dry evenly. A mandoline slicer is highly recommended for achieving consistent thickness.
- Use parchment paper or a wire rack. To prevent your orange slices from sticking to the baking sheet, always use parchment paper. For even better air circulation and faster drying, consider placing the orange slices on a wire cooling rack set over a baking sheet. If neither is available, a very light spray of a neutral-tasting oil (like avocado or grapeseed) can be applied to the baking sheet, but parchment paper is preferred.
- Flip the oranges while they bake. Regularly flipping the orange slices every 30-45 minutes is crucial to ensure both sides dry out evenly. This prevents one side from sticking or remaining damp while the other becomes too brittle.
Nutrition
Calories:
137
kcal
|
Carbohydrates:
35
g
|
Protein:
3
g
|
Fat:
0.4
g
|
Saturated Fat:
0.1
g
|
Polyunsaturated Fat:
0.1
g
|
Monounsaturated Fat:
0.1
g
|
Sodium:
3
mg
|
Fiber:
6
g
|
Sugar:
24
g
Nutrition information is automatically calculated, so should only be used as an approximation.