
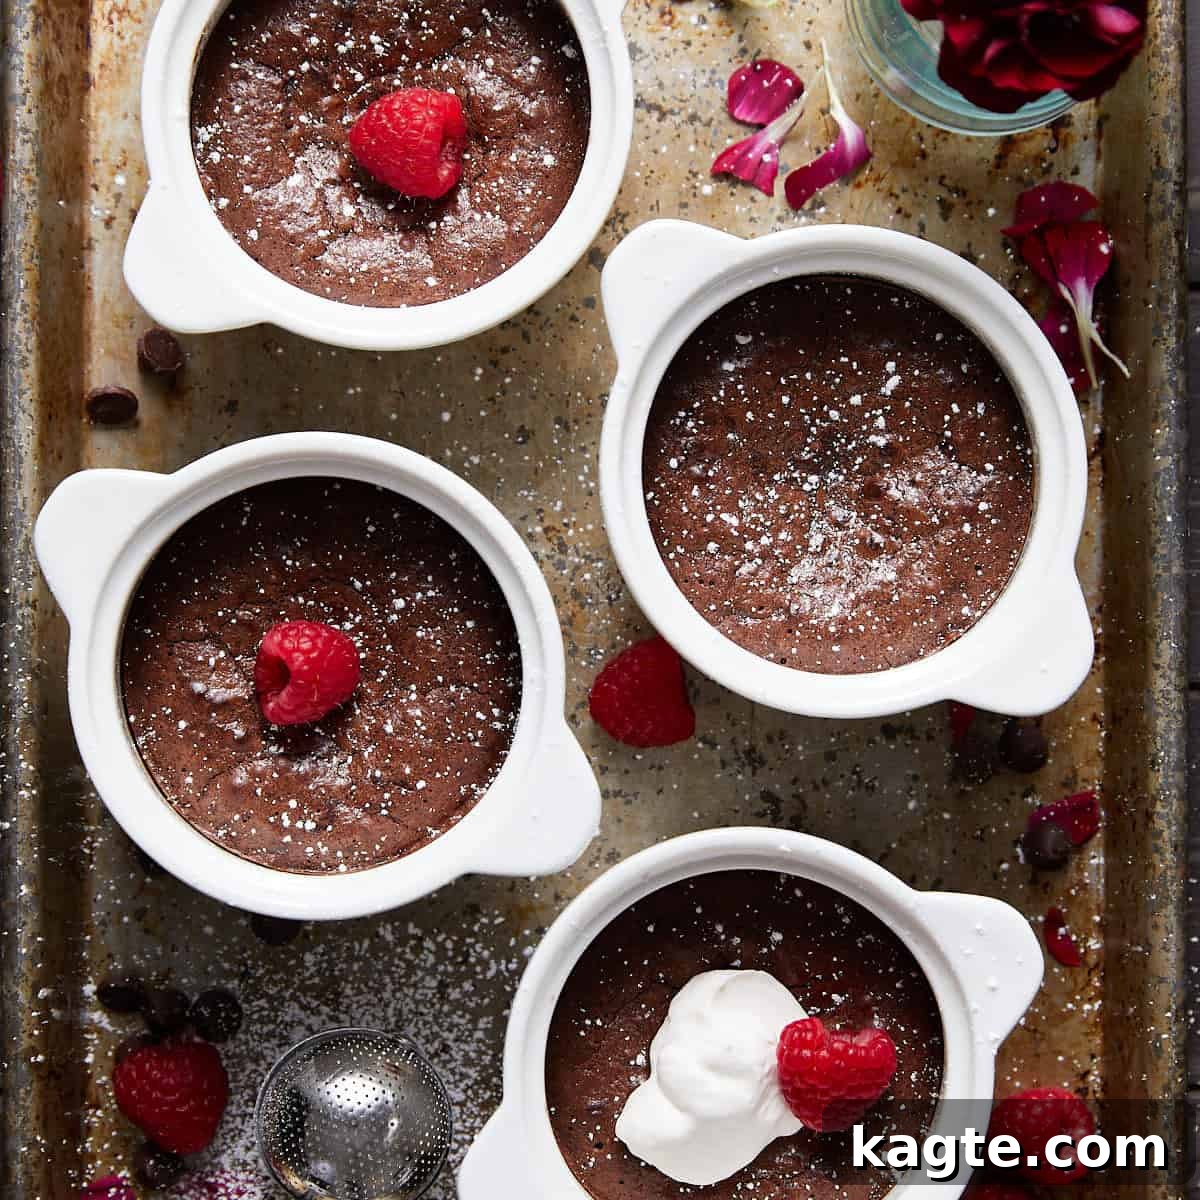
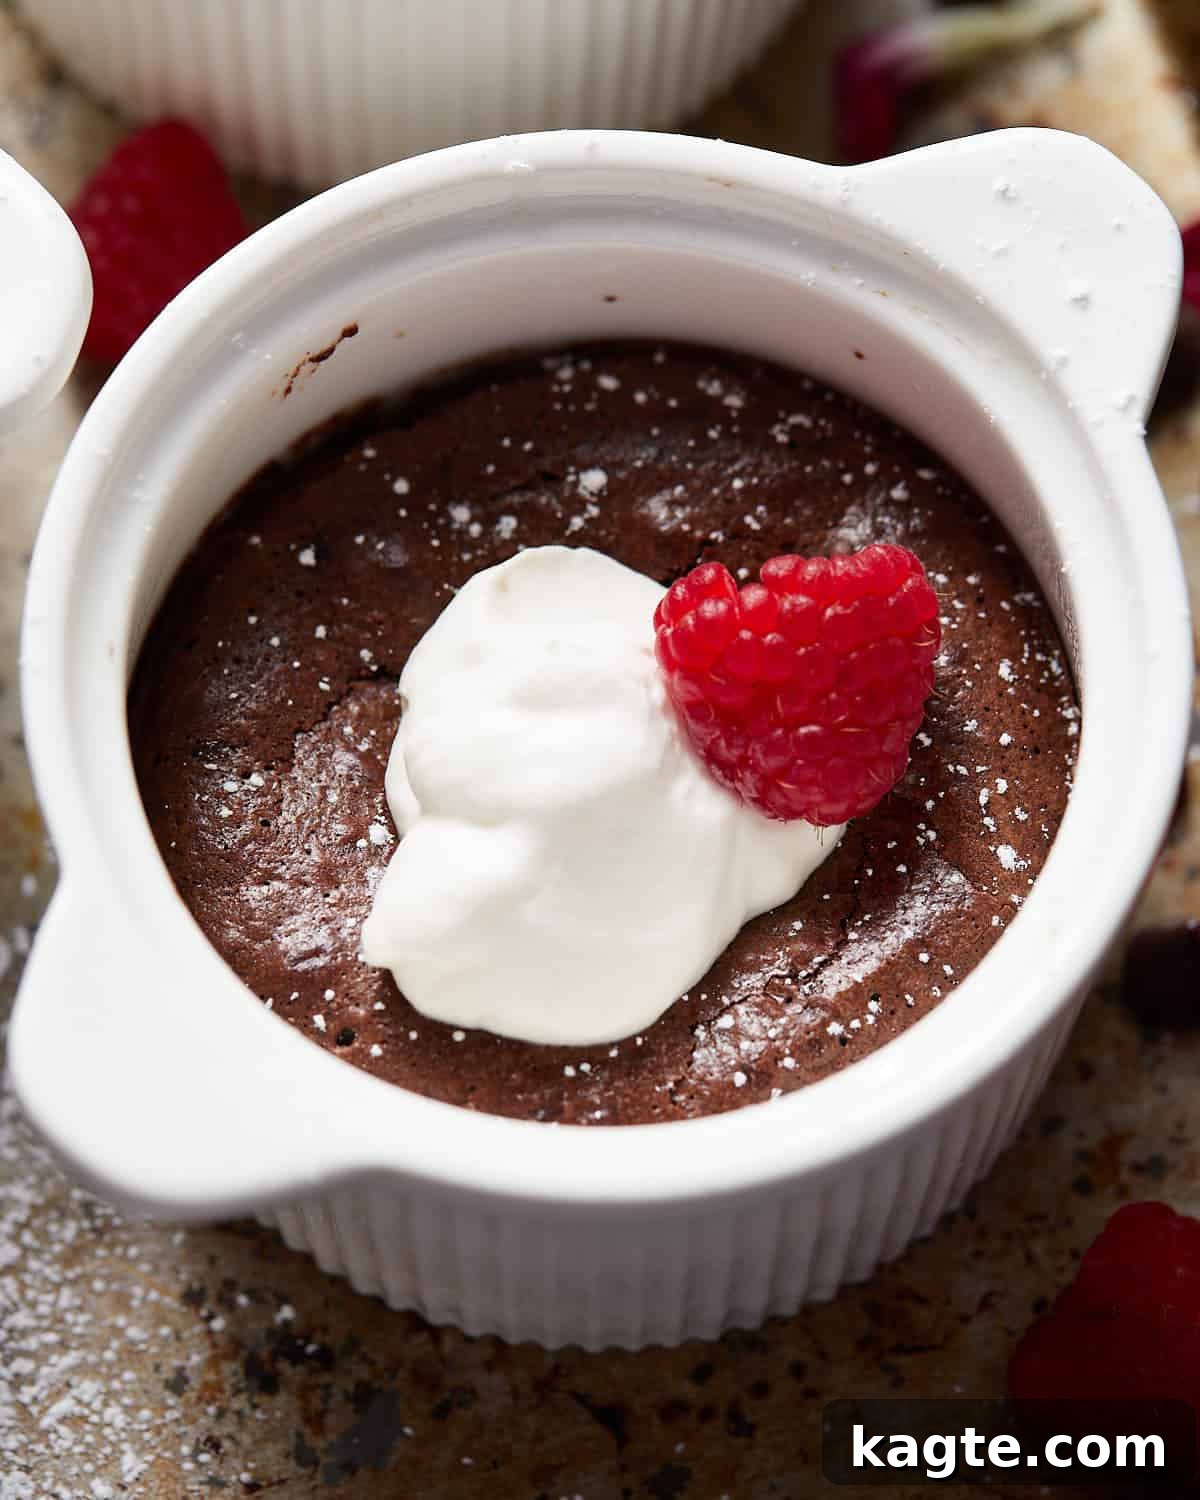
Indulge in pure chocolate bliss with these irresistibly fudgy Mini Flourless Chocolate Cakes. Crafted to perfection, this recipe yields four individual desserts that are exquisitely rich, utterly decadent, and wonderfully gooey – an ideal choice for romantic Valentine’s Day celebrations, intimate dinner parties, or any moment that calls for a truly special treat. Serve these warm delights topped with a dollop of fresh whipped cream for an unforgettable culinary experience.
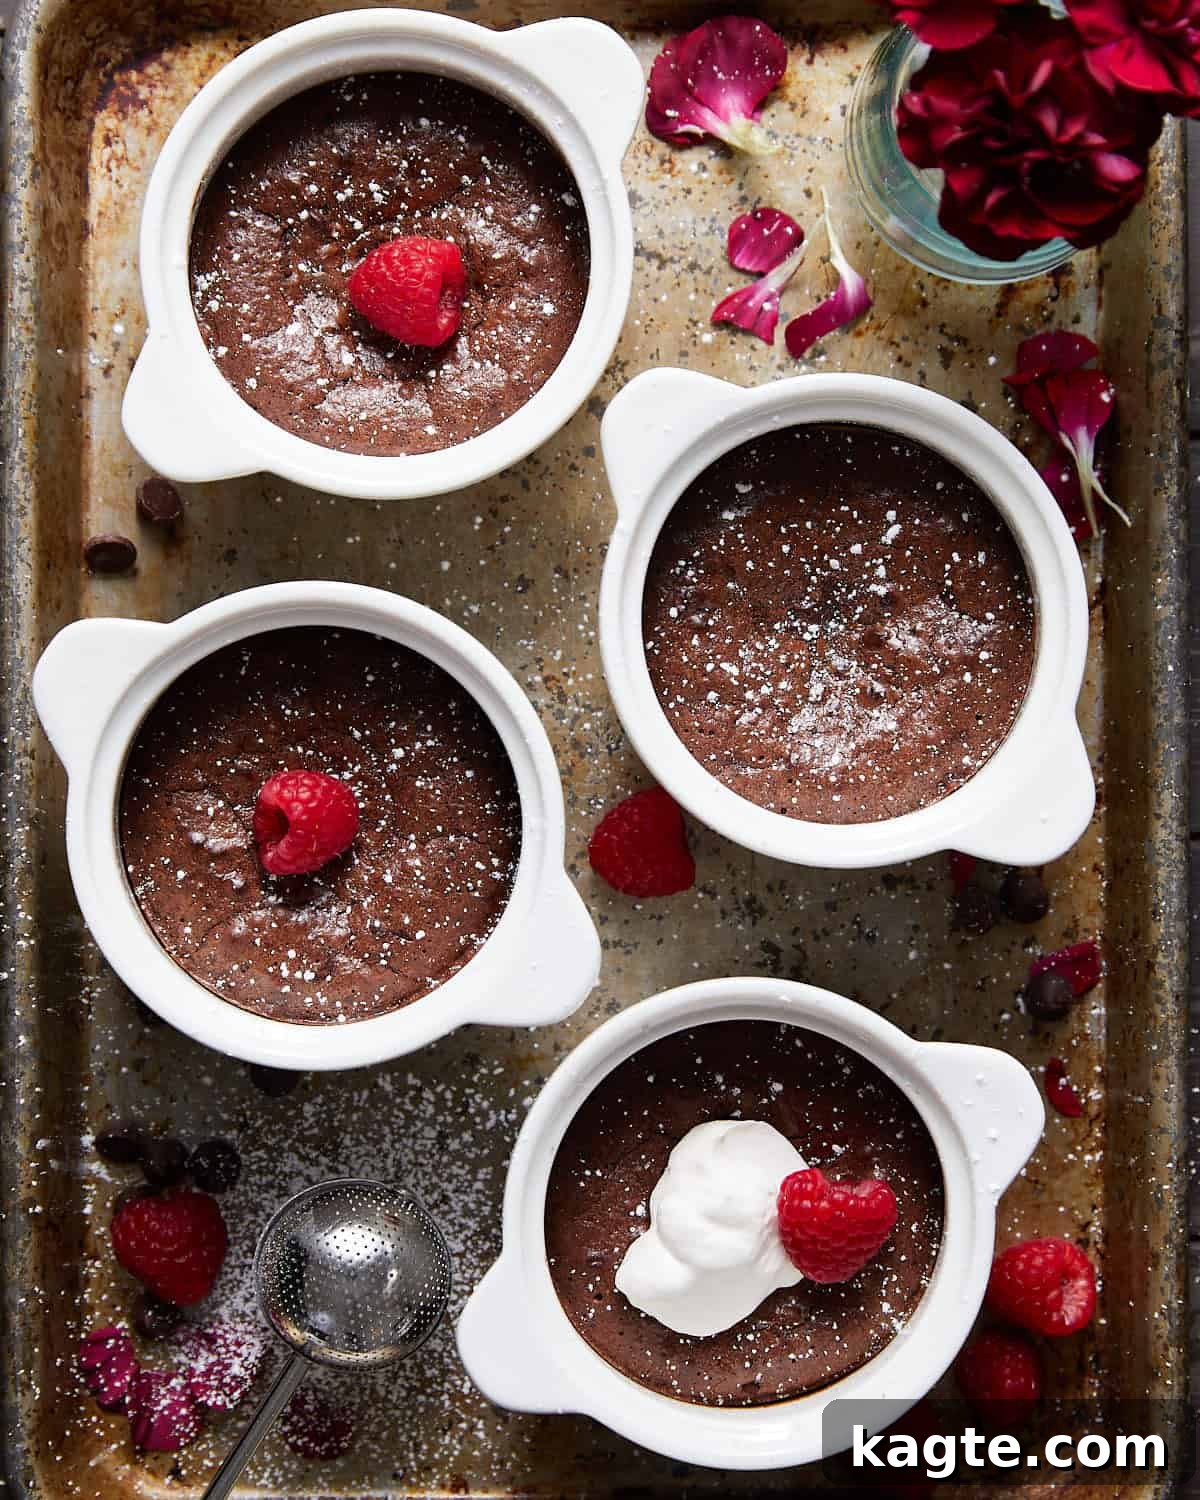
These mini chocolate cakes stand out as the ultimate individual desserts, joining the ranks of other delightful single-serving treats like our No Bake Mini Cheesecakes, the charming Mini S’mores Pie, and elegant Blueberry Creme Brulees for Two. Each recipe is designed to offer a unique and satisfying sweet experience without the fuss of a large cake.
Table of Contents
- Why You’ll Adore These Mini Flourless Chocolate Cakes
- Essential Ingredients & Clever Substitutions
- Mastering the Mini Flourless Chocolate Cakes
- Elevating Your Serving Suggestions
- Expert Tips & Flavor Variations
- Frequently Asked Questions (FAQs)
- More Irresistible Dessert Recipes
- Mini Flourless Chocolate Cakes Recipe Card
Why You’ll Adore These Mini Flourless Chocolate Cakes
There’s a reason these mini flourless chocolate cakes have become a staple for dessert lovers looking for a show-stopping yet remarkably simple treat. Here’s why this recipe will quickly become one of your favorites:
- Unbelievably Gooey & Fudgy Texture – Prepare for a sensory delight! The core of these cakes boasts a luxuriously silky and intensely moist texture that melts in your mouth. Unlike traditional cakes, the absence of flour creates an unparalleled density and a rich, brownie-like consistency that is truly addictive.
- Deeply Rich & Decadent Flavor – Crafted with high-quality semi-sweet chocolate and a touch of instant espresso powder, these cakes deliver an extraordinarily deep and complex chocolate flavor. The espresso doesn’t impart a coffee taste but rather amplifies the cocoa notes, making the chocolate experience even more profound and irresistible.
- Effortlessly Simple with Only 8 Ingredients – Forget long grocery lists! This recipe streamlines dessert making by relying on just eight basic ingredients. You likely already have most of these pantry staples on hand, making these decadent cakes surprisingly accessible for a spur-of-the-moment craving or a planned celebration.
- Perfect for Any Special Occasion – Whether you’re planning a romantic at-home date night, celebrating Valentine’s Day, hosting an elegant dinner party, or simply treating yourself, these individually portioned cakes add a touch of sophistication and indulgence to any event. Their small size makes them ideal for impressing guests without overwhelming them.
- Delightfully Dense Consistency – Due to the intentional omission of leavening agents like baking powder or soda, these cakes offer a naturally dense and incredibly creamy texture. This isn’t a light, airy cake; it’s a substantial, rich dessert that satisfies with every bite, distinguishing it from more traditional cake varieties.
- Naturally Gluten-Free – For those with gluten sensitivities or dietary preferences, this recipe is a dream come true. By design, these cakes contain no flour, making them a naturally gluten-free option. Always double-check ingredient labels for any hidden gluten to ensure your cakes are completely compliant.
Essential Ingredients & Clever Substitutions
Creating these divine mini flourless chocolate cakes requires a few key ingredients. The quality of your chocolate will significantly impact the final taste, so choose wisely!
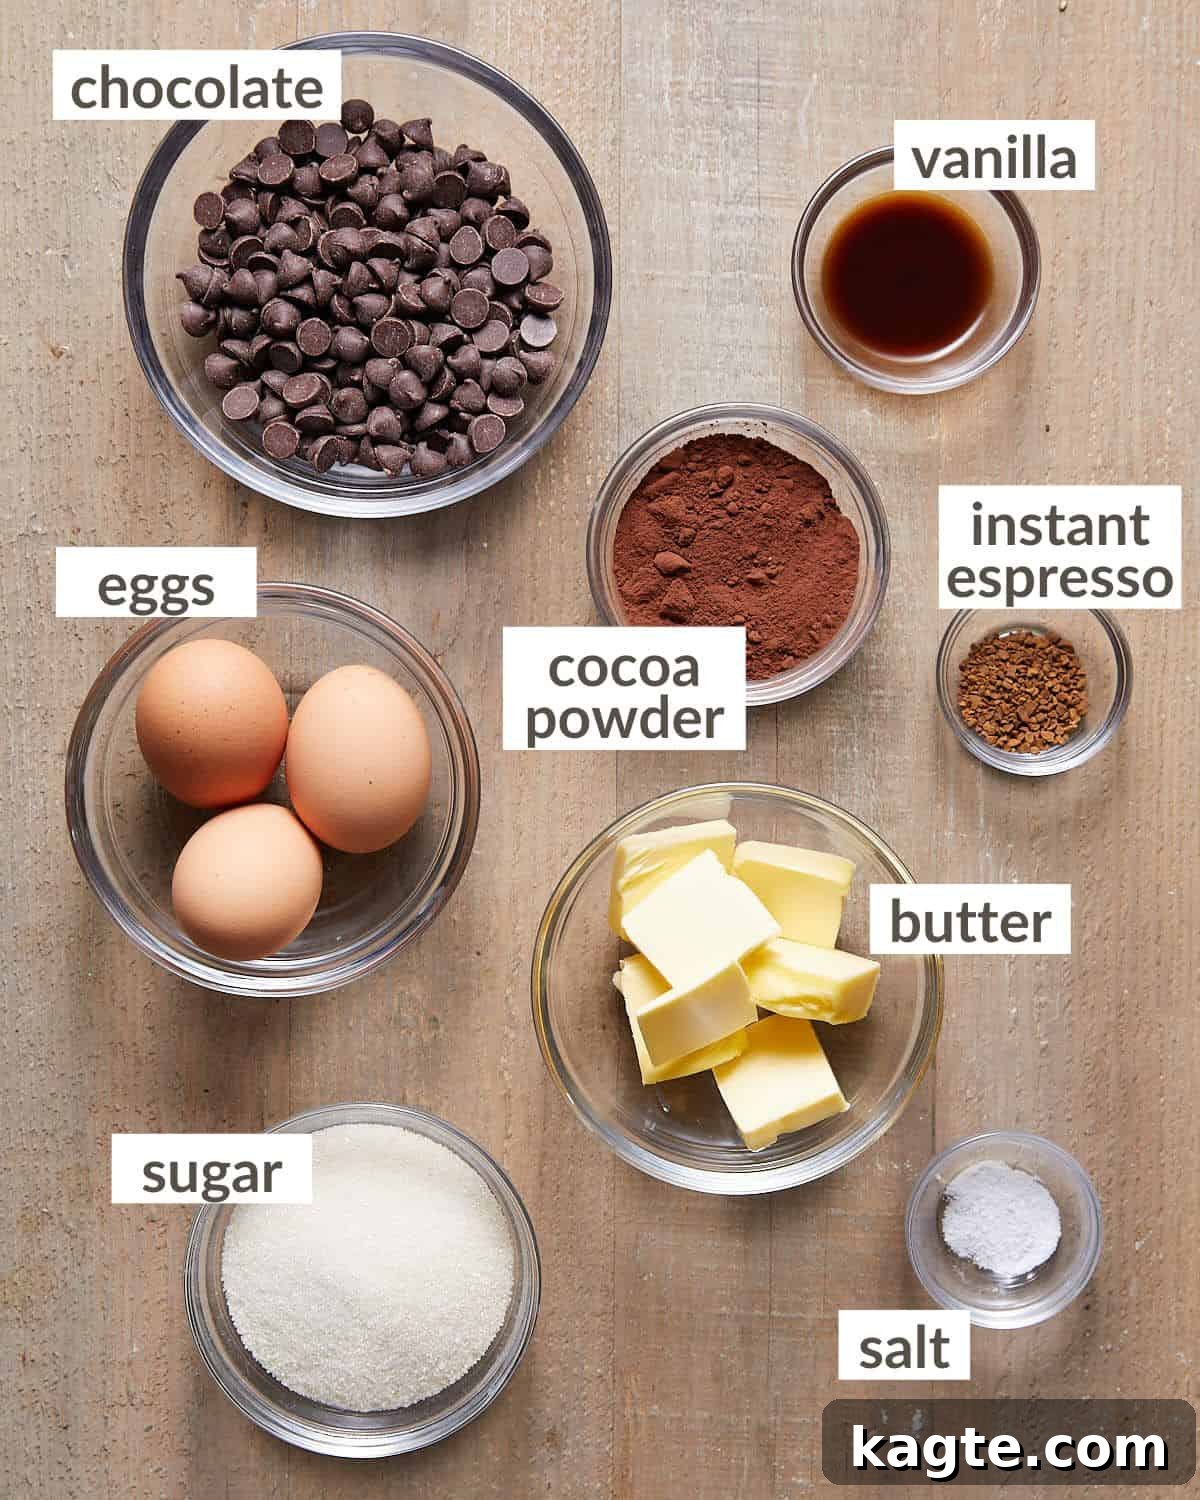
- High-Quality Chocolate: This is the star of your cake! We highly recommend using premium chocolate chips or finely chopped chocolate bars, such as those from Guittard. For a sweeter cake, milk chocolate can be used, while bittersweet chocolate will yield a deeper, more intense flavor profile. Semi-sweet chocolate provides a beautifully balanced taste that’s often preferred for its versatility. Experiment to find your perfect chocolate balance!
- Instant Espresso Powder: Don’t worry, this isn’t meant to make your cakes taste like coffee. Instead, instant espresso powder acts as a secret weapon, significantly enhancing the depth and richness of the chocolate flavor without adding a distinct coffee note. While it can be omitted, we strongly recommend including it for the most robust chocolate experience.
- Unsalted Butter: Good quality butter contributes to the luxurious richness and moist texture of the cakes. If you only have salted butter, reduce the added salt in the recipe by half a pinch. For a dairy-free option, a good quality plant-based butter alternative can often be used, though results may vary slightly.
- Granulated Sugar: Provides the perfect level of sweetness to balance the rich chocolate. You can adjust the amount slightly to your preference, but remember it also contributes to the cake’s structure and moistness.
- Large Eggs: Eggs are crucial for binding the ingredients and creating the signature dense, fudgy texture. They also help to create the airy, frothy base that gives these flourless cakes their unique crumb. Ensure your eggs are at room temperature for better emulsification.
- Vanilla Extract: A touch of pure vanilla extract complements and deepens the chocolate flavor. Always opt for pure vanilla for the best results.
- Dutch-Processed Unsweetened Cocoa Powder: This type of cocoa powder has a milder, less bitter chocolate flavor and a darker color than natural cocoa. It helps achieve that deep, rich chocolate taste and moist crumb.
- Fine Salt: A small amount of fine salt is essential for balancing the sweetness and enhancing all the flavors in the cake, making the chocolate truly sing.
A complete list of ingredients with precise amounts is located on the recipe card below.
Mastering the Mini Flourless Chocolate Cakes
Quick Overview of Preparation
Making these decadent cakes is surprisingly straightforward. Here’s a brief summary of the process:
- Gently melt the butter and chocolate together until smooth.
- Vigorously whisk the wet ingredients to create a frothy base.
- Delicately fold in the dry ingredients until just combined.
- Bake to perfection in a water bath and serve warm!
Step-by-Step Instructions for Perfect Results
Follow these detailed steps to create your own batch of luscious mini flourless chocolate cakes:
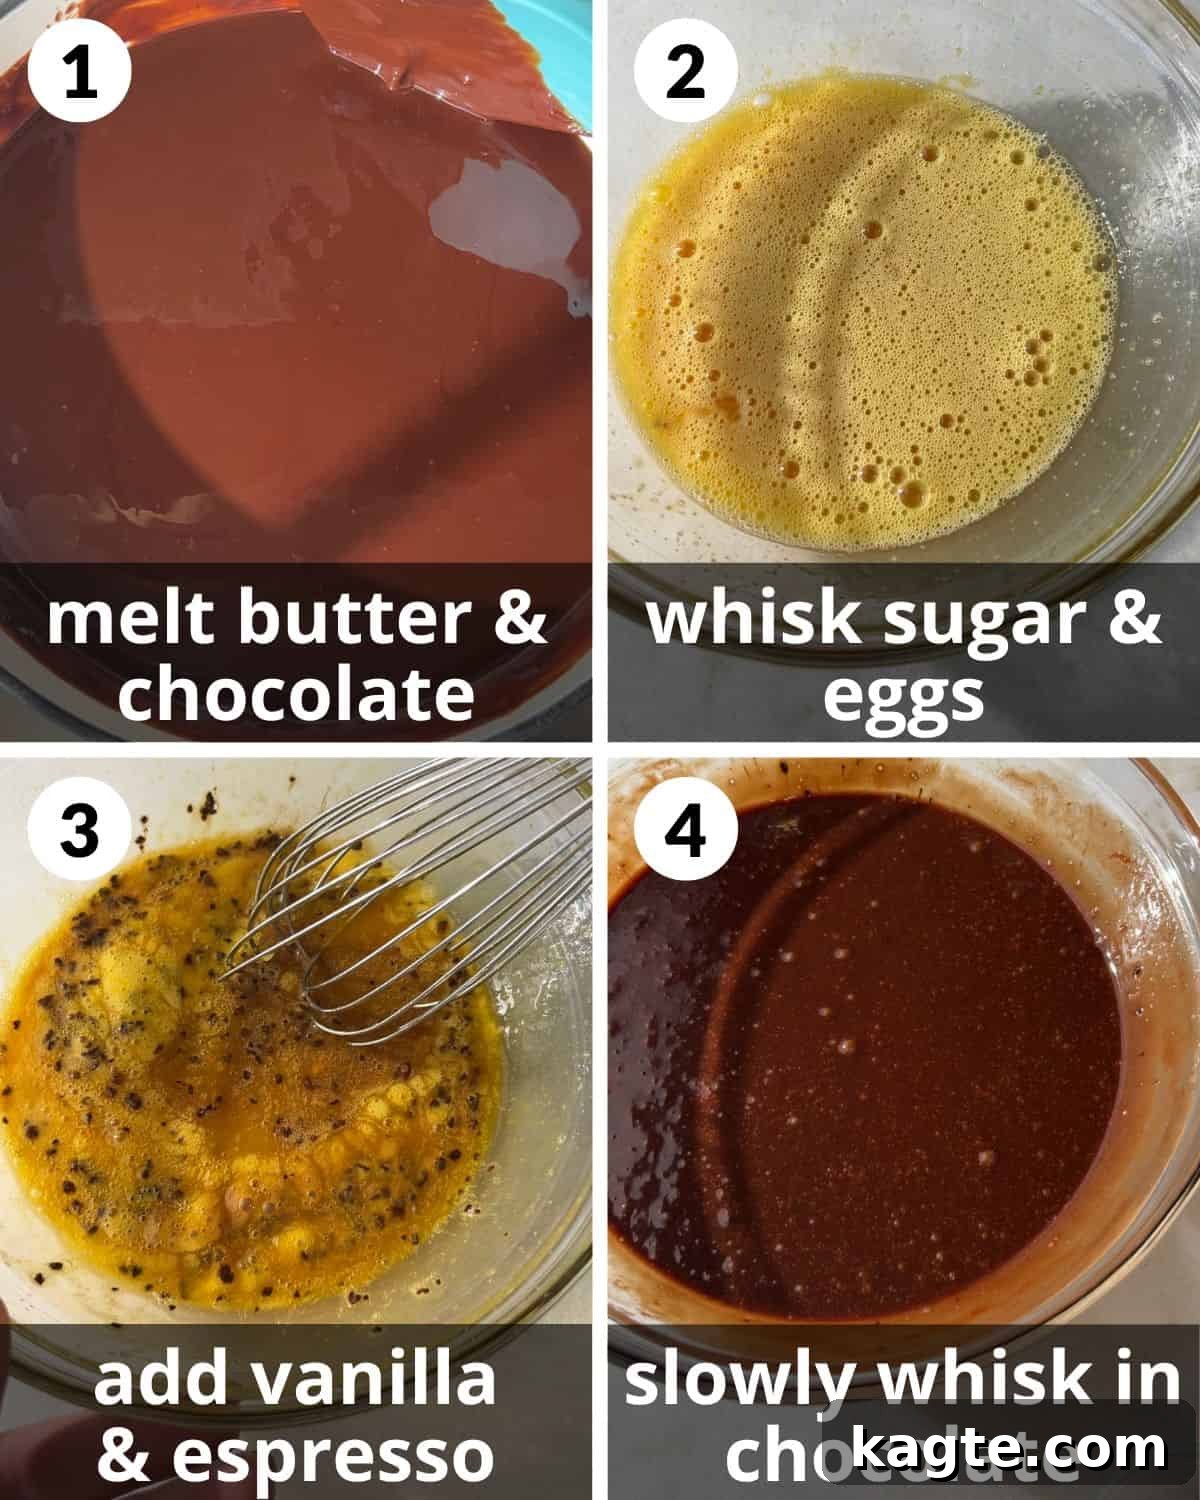
Chef’s Tip: Ensure your egg mixture is light, frothy, and noticeably bubbly before adding other ingredients. This aeration is key to the cake’s unique texture.
Step 1: Begin by preheating your oven to 350 degrees Fahrenheit (175°C). In a small saucepan, combine the butter and chopped chocolate. Melt them gently over very low heat, stirring continuously to prevent scorching. As soon as the mixture is smooth and fully combined, remove it from the heat immediately and set it aside to cool slightly. It’s crucial for the chocolate to be cool enough that it won’t scramble the eggs when combined.
Step 2: In a large mixing bowl, vigorously whisk together the granulated sugar and large eggs. Continue whisking energetically for several minutes until the mixture becomes pale, frothy, and noticeably bubbly. This step incorporates air, contributing to the cake’s final texture.
Step 3: Add the vanilla extract and instant espresso powder to the egg and sugar mixture. Whisk thoroughly until these additional flavors are fully incorporated and distributed evenly.
Step 4: Once the melted chocolate and butter mixture has cooled down (it should be warm to the touch, not hot), slowly pour it into the whisked egg mixture. While pouring, continue whisking constantly to ensure the chocolate is smoothly combined with the eggs without any scrambling. This gradual incorporation is vital for a homogenous batter.
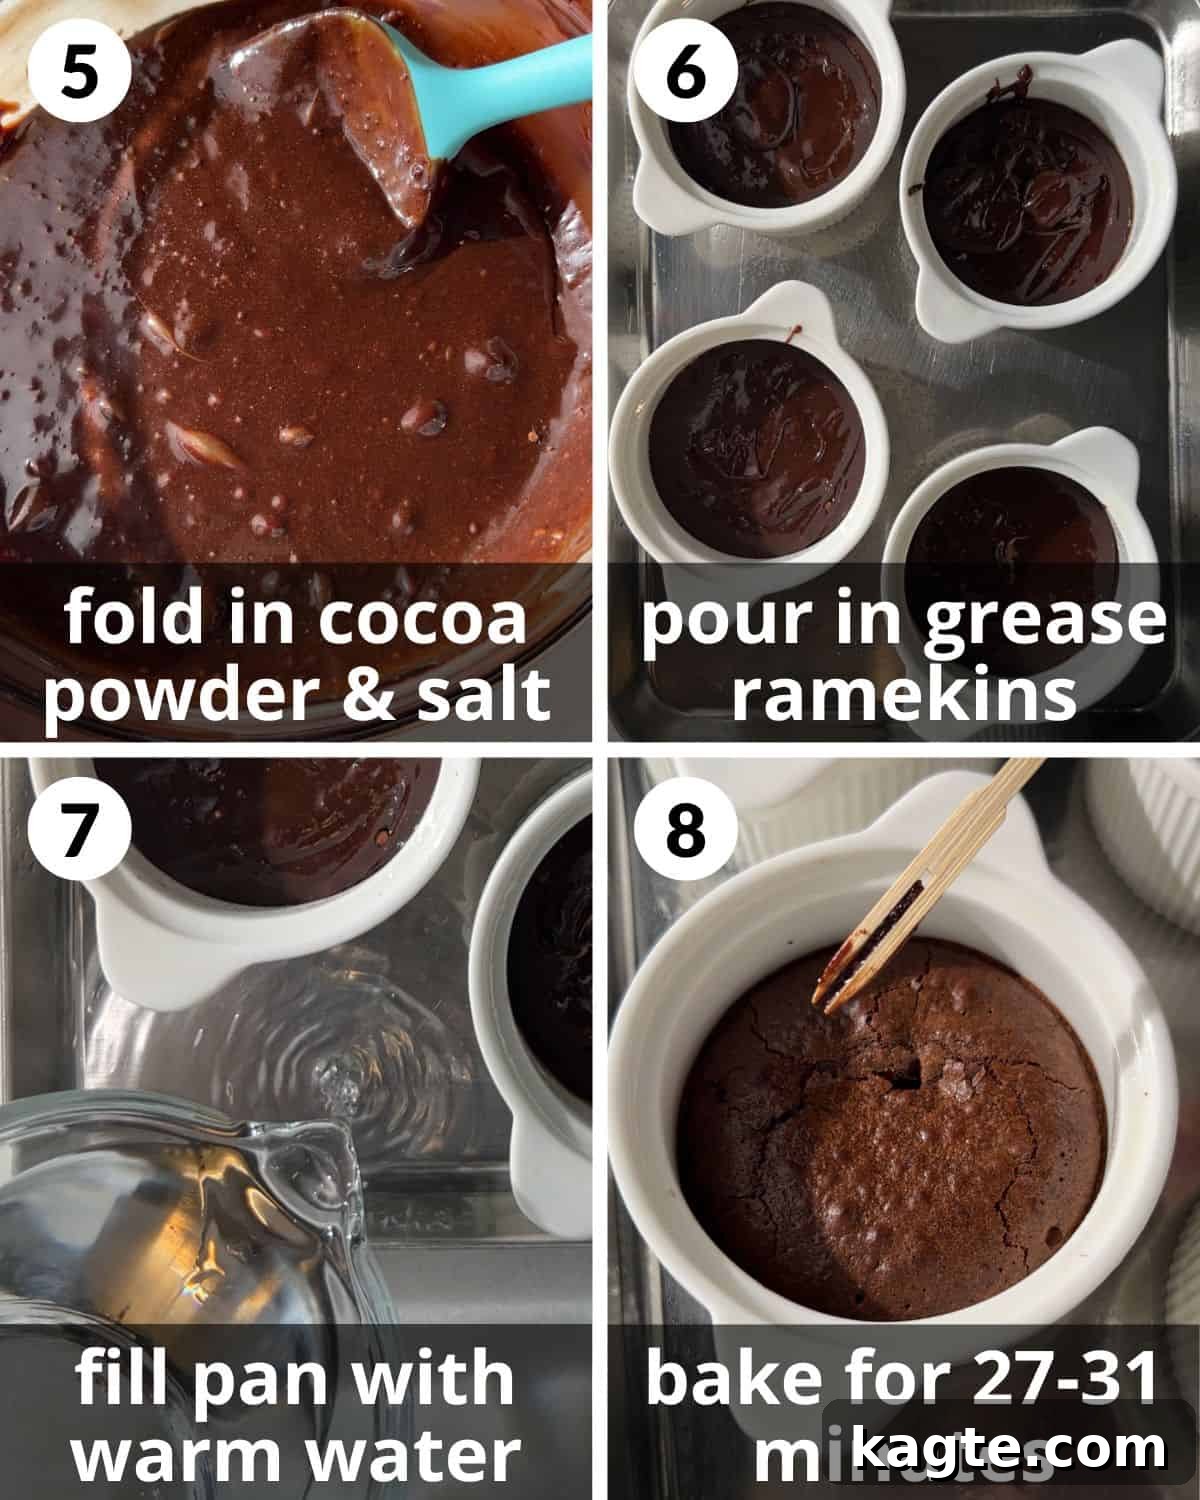
Baking Perfection: The center of your cakes should remain slightly gooey and wet, not entirely firm. A toothpick inserted should still come out with some moist crumbs, indicating a perfect fudgy consistency.
Step 5: Sift in the cocoa powder and fine salt over the chocolate batter. Gently fold these dry ingredients into the mixture using a spatula until just combined. Be careful not to overmix, as this can develop gluten (even without flour, overmixing affects texture) and lead to a tougher cake.
Step 6: Prepare your ramekins by generously greasing four 7-ounce ramekins with cooking spray. Divide the prepared batter evenly among the greased ramekins. Place these filled ramekins onto a rimmed baking sheet; this setup is essential for the water bath.
Step 7: Carefully pour warm water into the rimmed baking sheet, ensuring the water level comes up about halfway to two-thirds of the way up the sides of the ramekins. This water bath (bain-marie) creates a moist baking environment, preventing the cakes from drying out and promoting even baking.
Step 8: Bake for approximately 27-31 minutes. The cakes are done when the tops appear cracked, but the center still feels slightly wet and jiggles subtly when gently shaken. When a toothpick is inserted into the center, it should emerge with moist crumbs and thickened batter, not raw liquid. Immediately remove the ramekins from the hot water bath to stop the cooking process and prevent overbaking. Serve these exquisite cakes warm for the best experience.
Elevating Your Serving Suggestions
While delicious on their own, these mini flourless chocolate cakes truly shine with the right accompaniments. I highly recommend serving them warm and à la mode for the ultimate indulgence.
- Classic À La Mode: A scoop of your favorite store-bought vanilla bean ice cream is a timeless pairing that perfectly contrasts the warm, rich chocolate. For those feeling ambitious, consider making my Eggless Vanilla Ice Cream Recipe from scratch – either way, you can’t go wrong!
- Homemade Whipped Cream: Skip the canned stuff; homemade whipped cream is incomparably better. To make it, simply whip 1 cup of cold heavy cream with 2 tablespoons of granulated sugar and 1 teaspoon of vanilla extract until stiff peaks form. The light, airy cream provides a delightful counterpoint to the dense chocolate.
- Fresh Berry Garnish: Add a burst of color and a touch of tartness with fresh raspberries, strawberries, or even a few blueberries. A sprig of fresh mint can also elevate the presentation and add a subtle aromatic note. The combination of fresh raspberries and rich chocolate is particularly exquisite.
- Decadent Drizzles: For an extra layer of luxury, drizzle your warm cakes with a homemade salted caramel sauce or a velvety chocolate ganache. A dusting of cocoa powder or powdered sugar can also add an elegant finish.
- Coffee or Liqueur Pairing: Serve these cakes alongside a strong cup of coffee, a rich espresso, or a glass of dessert wine. For an adult treat, a shot of raspberry liqueur or a coffee-based liqueur can be drizzled over the cakes or served on the side.
Expert Tips & Flavor Variations
Achieving perfection with flourless chocolate cakes is simple when you follow a few key guidelines and consider some creative variations:
- Invest in High-Quality Chocolate: Since chocolate is the primary ingredient and flavor foundation of these cakes, its quality is paramount. Using a premium brand like Guittard will make a noticeable difference in the richness and overall taste. Avoid baking chocolate or chocolate candy intended for snacking, as they may contain stabilizers or less cocoa butter.
- Crucial: Cool the Chocolate Mixture: After melting the butter and chocolate, allow the mixture to cool significantly before incorporating it into the eggs. If the chocolate is too hot, it will scramble the eggs, leading to a lumpy, unpleasant batter. Whisking continuously and slowly pouring in the cooled chocolate will further prevent this issue. Melting the chocolate over very low heat is also a preventative measure against overheating.
- Always Use a Water Bath (Bain-Marie): Baking these cakes in a water bath is a game-changer. The steam generated in the oven creates a moist cooking environment, ensuring the cakes bake evenly, remain incredibly moist, and develop that coveted silky-smooth texture without drying out or cracking excessively on top.
- Serve Warm and in Ramekins: For the best eating experience and ease of serving, enjoy these cakes warm, directly from their ramekins. Attempting to cool and remove them from the ramekins can be challenging due to their delicate, dense texture. Serving warm enhances their gooey center and rich aroma.
- Storage and Make-Ahead: These cakes are best enjoyed fresh and warm. If you have leftovers, cover them tightly and store them at room temperature for up to 2 days, or in the refrigerator for up to 4 days. Reheat gently in the microwave for 20-30 seconds or in a warm oven for a few minutes before serving.
- Flavor Variations:
- Citrus Zest: Add 1 teaspoon of orange zest or a half teaspoon of lemon zest to the batter for a bright, aromatic lift that complements the chocolate beautifully.
- Chili Chocolate: For a subtle kick, add a pinch of cayenne pepper or chili powder to the cocoa mixture. This creates a wonderful depth of flavor without being overwhelmingly spicy.
- Nutty Twist: Fold in a tablespoon or two of finely ground almonds or hazelnuts with the cocoa powder for a delicate nutty undertone.
- Liqueur Infusion: Replace 1 teaspoon of vanilla extract with a teaspoon of your favorite liqueur, such as Grand Marnier (orange), Kahlúa (coffee), or Frangelico (hazelnut), for an adult-only decadent treat.
Frequently Asked Questions (FAQs)
Making a flourless chocolate cake typically involves melting butter and chocolate together, then vigorously whisking wet ingredients like sugar and eggs, slowly combining the cooled chocolate mixture, folding in dry ingredients such as cocoa powder and salt, and finally baking until just set. The key is often in the cooling and whisking techniques to ensure a smooth, fudgy result.
Flourless chocolate cakes are primarily made from high-quality chocolate, butter, sugar, eggs, and cocoa powder. The absence of flour gives them their unique dense, rich, and intensely chocolatey character, distinguishing them from traditional cakes that rely on flour for structure.
Flourless chocolate cake offers an incredibly dense, moist, and intensely rich chocolate experience. Because there’s no flour or leavening agents, the texture is reminiscent of a decadent brownie or a rich chocolate fudge, often with a slightly crisp top and a gooey, almost molten center when served warm.
Flourless cakes are popular for several reasons: their luxuriously creamy and silky texture is highly appealing, offering a different experience from lighter, airier cakes. They are also naturally gluten-free, making them a fantastic option for those with dietary restrictions. Furthermore, their rich flavor and elegant presentation make them a perfect choice for special occasions.
While these cakes are best served warm immediately after baking, you can prepare the batter a day in advance and store it covered in the refrigerator. Before baking, let the batter come to room temperature for about 30 minutes, then proceed with the baking instructions. Baked cakes can also be stored at room temperature for up to 2 days or refrigerated for up to 4 days, then gently reheated.
This recipe calls for 7-ounce ramekins. Standard ceramic ramekins work perfectly. Ensure they are oven-safe and can withstand the water bath. If you don’t have 7-ounce ramekins, any individual oven-safe baking dish of a similar size will work, though baking times might need slight adjustment.
Shop my Amazon Storefront for recommended baking tools and ingredients!
More Irresistible Dessert Recipes
If you loved these mini flourless chocolate cakes, be sure to explore more of our delightful dessert creations perfect for any craving or occasion:
Indulge in More Sweet Treats
Dessert
No-Chill Chocolate Chip Cookies (Easy & Quick)
Christmas
20 Sweet Peppermint Recipes for Christmas Cheer
Fall
20 Sweet Pumpkin Recipes for Fall (From Breakfast to Dessert Delights)
Breakfast
Blueberry Coffee Cake with Greek Yogurt & Streusel Topping
If you try this exceptional recipe, please leave a star rating in the recipe card below and/or a comment sharing your experience! Your feedback is always valued. Follow me on Pinterest, Facebook & Instagram for more delicious inspiration.
Print Recipe
Mini Flourless Chocolate Cakes
5 minutes
30 minutes
35 minutes
4
Equipment
-
4 x 7 ounce White Ramekins
-
Whisk
-
Baking Spatula
-
Small Saucepan
-
Large Mixing Bowl
-
Rimmed Baking Sheet (for water bath)
Ingredients
- 6 Tablespoons (85 g) unsalted butter
- 6 ounces high quality semi-sweet chocolate, chopped or chips*
- 1/2 cup (100 g) granulated sugar
- 3 large eggs, at room temperature
- 2 teaspoons pure vanilla extract
- 1 teaspoon instant espresso powder*
- 1/4 cup (22g) Dutch-processed unsweetened cocoa powder
- 1/8 teaspoon fine salt
- Cooking spray, for ramekins
Instructions
-
Preheat the oven to 350°F (175°C). In a small saucepan, melt the butter and chocolate over low heat, stirring continuously until smooth. Remove from heat immediately and set aside to cool slightly.
-
In a large bowl, vigorously whisk together the granulated sugar and eggs for 2-3 minutes until the mixture is pale, frothy, and bubbly.
-
Whisk in the vanilla extract and instant espresso powder until fully combined.
-
Slowly pour the cooled chocolate mixture into the egg mixture, whisking continuously until smooth and thoroughly combined. Ensure the chocolate is not hot to prevent scrambling the eggs.
-
Sift in the cocoa powder and salt. Gently fold these dry ingredients into the batter using a spatula until just combined. Be careful not to overmix.
-
Generously grease 4 (7-ounce) ramekins with cooking spray. Divide the batter evenly into the prepared ramekins and place them on a rimmed baking sheet.
-
Carefully pour warm water into the baking sheet until it reaches about halfway to two-thirds up the sides of the ramekins. This creates a water bath for moist, even baking.
-
Bake for 27-31 minutes, or until the tops are cracked and the edges are set, but the center still appears slightly wet and jiggly. A toothpick inserted into the center should come out with moist crumbs, not raw batter. Immediately remove ramekins from the water bath to prevent further cooking. Serve warm.
Did you make this recipe?
Leave a comment below and share your creation!
Notes
- Chocolate Selection: For the best flavor and texture, I highly recommend using high-quality chocolate chips or chopped chocolate bars. Brands like Guittard offer exceptional results. Adjust sweetness by choosing milk chocolate, semi-sweet (my preferred balance), or bittersweet chocolate for a deeper, less sweet profile.
- The Magic of Instant Espresso: While optional, adding instant espresso powder is a secret to intensifying chocolate flavor without imparting a coffee taste. It truly amplifies the richness and depth.
- Cooling the Chocolate is Key: Ensure your melted chocolate and butter mixture has cooled sufficiently before adding it to the egg mixture. This prevents the eggs from scrambling. Pouring slowly and whisking continuously further ensures a smooth emulsion. Melting over low heat helps prevent overheating from the start.
- Bake with a Water Bath: The water bath creates a humid environment in the oven, which is essential for these cakes. It helps them bake more evenly, prevents cracking, and keeps them incredibly moist and fudgy.
- Serve Warm, In Ramekins: These cakes are designed to be enjoyed warm, directly from their ramekins. Attempting to cool and unmold them can be difficult due to their delicate, dense texture. Serving them warm maximizes their gooey center and rich aroma.
Nutrition Facts (per serving)
Carbohydrates: 51g |
Protein: 8g |
Fat: 37g |
Saturated Fat: 22g |
Polyunsaturated Fat: 2g |
Monounsaturated Fat: 11g |
Trans Fat: 1g |
Cholesterol: 170mg |
Sodium: 260mg |
Fiber: 5g |
Sugar: 41g
Nutrition information is automatically calculated and should be considered an approximation. It can vary based on specific ingredients and brands used.