
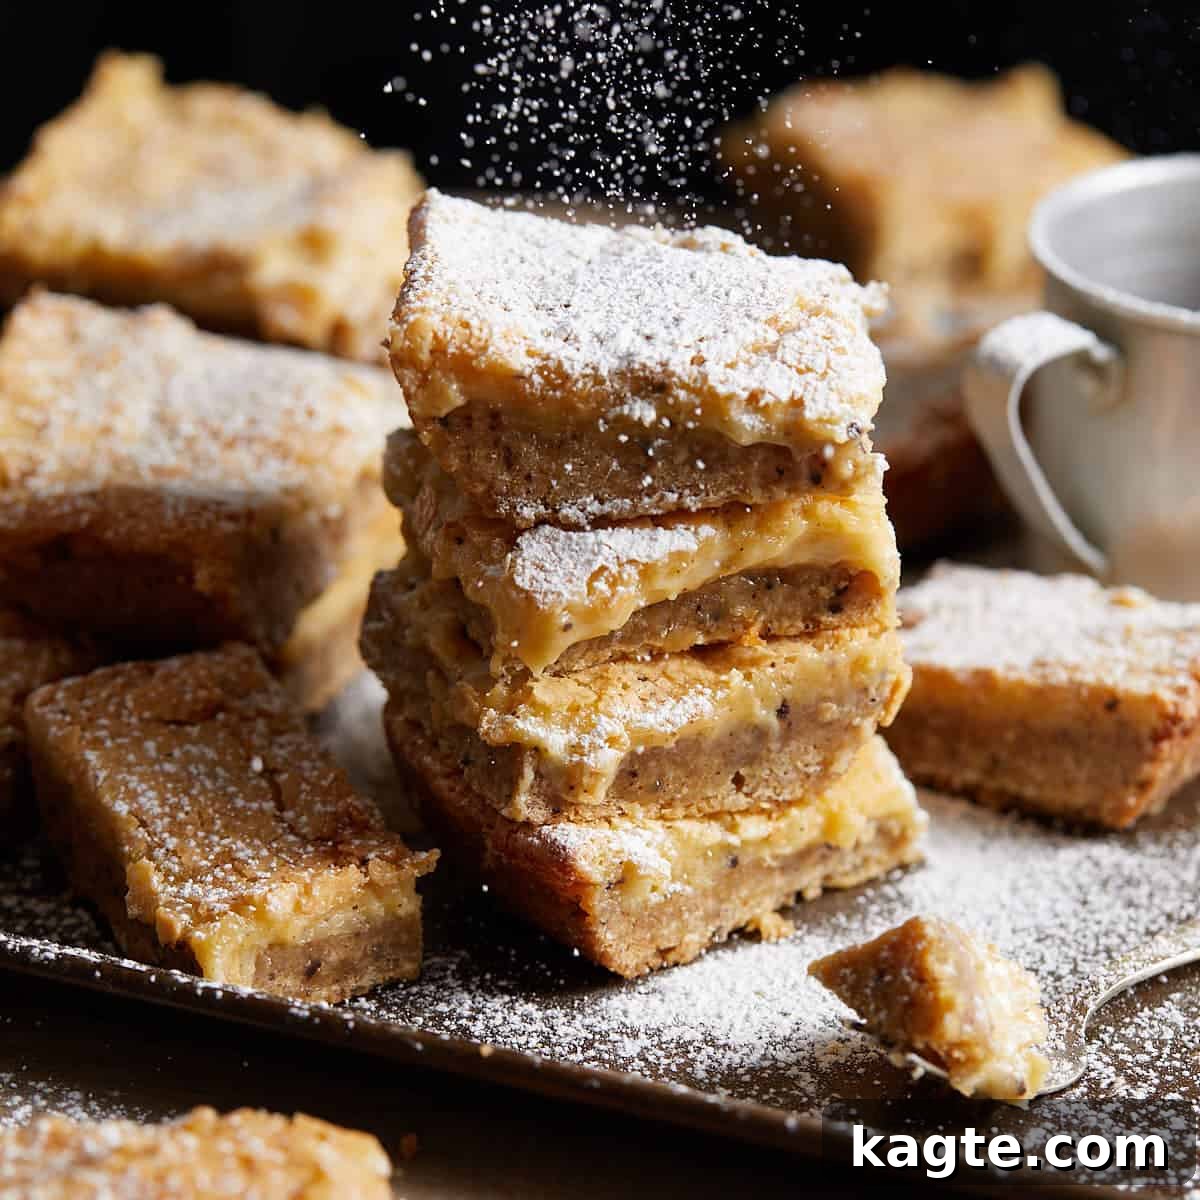
Welcome to a world of irresistible indulgence with these gooey Brown Butter Chess Squares from Scratch. Forget the blandness of boxed mixes; these homemade delights elevate a classic Southern dessert to new heights. The secret lies in the rich, nutty notes of brown butter, which perfectly balances the sweetness of confectioner’s sugar, creating a complex flavor profile that will have everyone reaching for a second (or third!) piece. These bars are not just a treat; they’re an experience – from their tender, chewy crust to their creamy, pudding-like center, each bite is pure bliss. Perfect for potlucks, holiday gatherings, or simply satisfying a sweet craving, prepare to make these a new favorite in your baking repertoire.
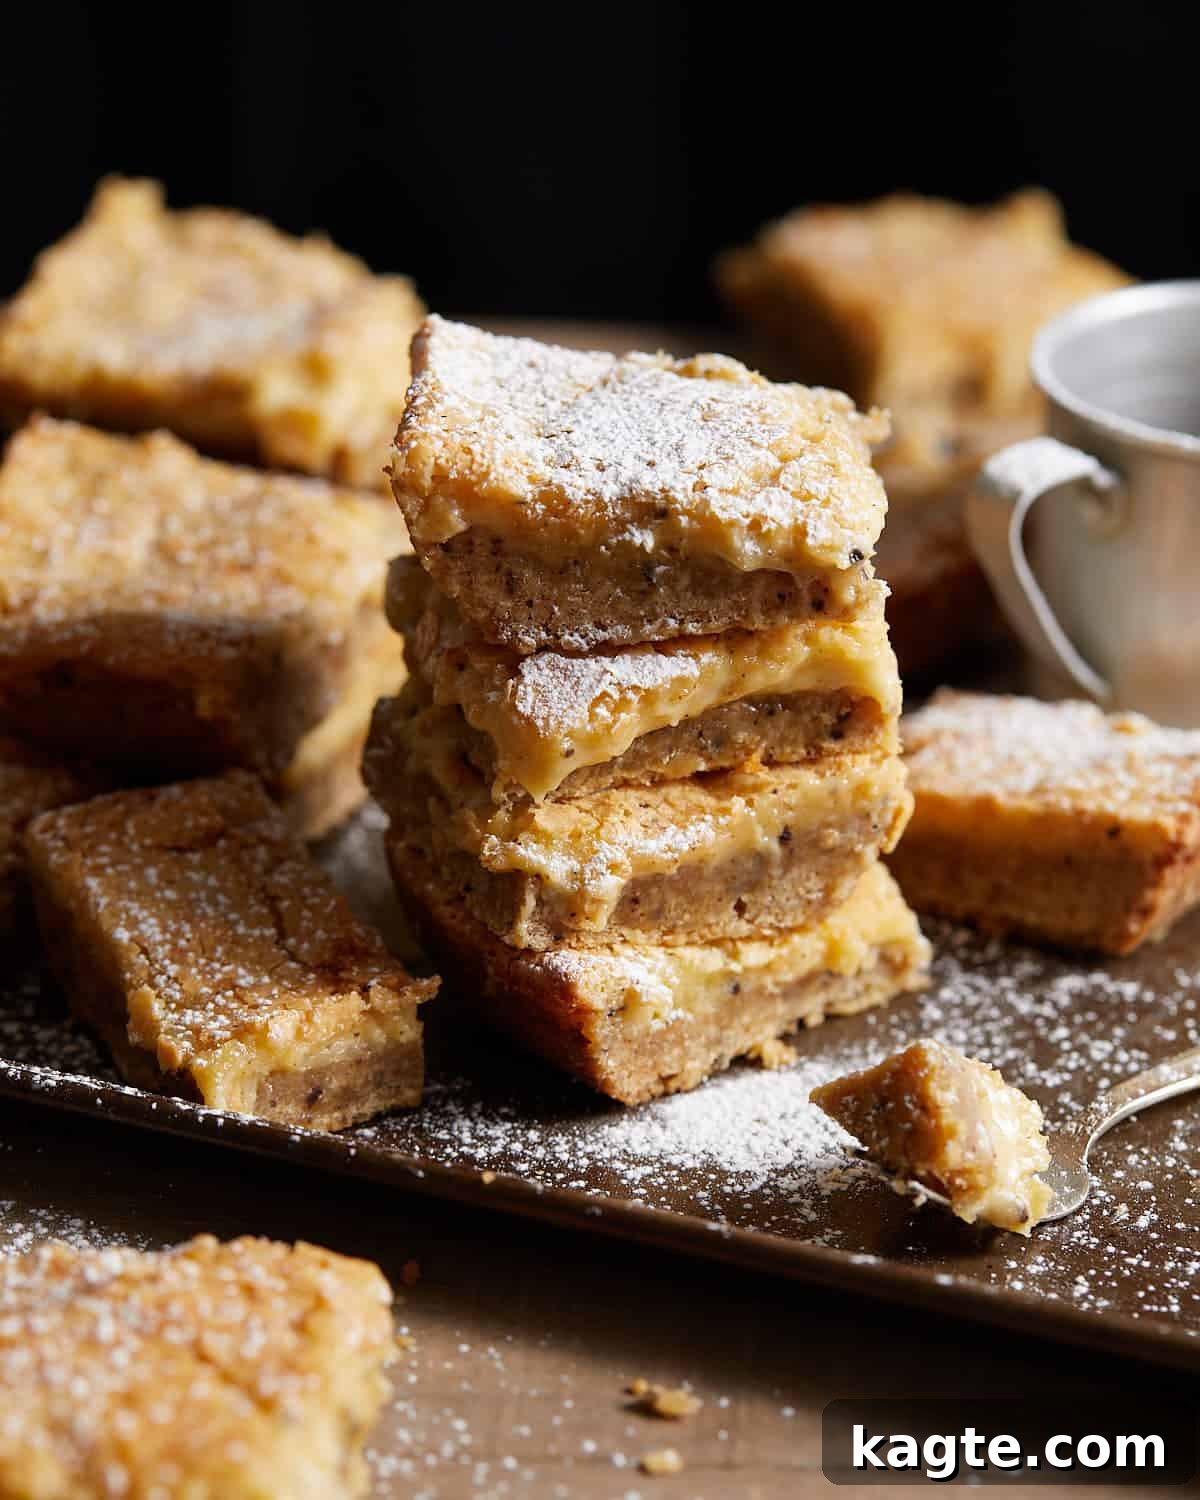
Craving more delightful bar recipes? Be sure to explore my Peanut Butter Banana Bars for another fantastic treat.
Table of Contents
- Why You’ll Love This Recipe
- Ingredients & Substitutions
- How to Make Brown Butter Chess Squares
- Expert Tips & Variations
- Recipe FAQs
- More Dessert Recipes
- Brown Butter Chess Squares from Scratch Recipe
Why You’ll Love These Homemade Brown Butter Chess Squares
- Gooey Perfection: These brown butter chess squares boast an incredibly luscious and creamy filling, almost like a baked pudding. The secret lies in the expertly crafted cream cheese layer, which, when baked just right, achieves a delightful consistency that’s soft, rich, and melts in your mouth without being overly runny. This signature gooey texture is what sets these bars apart, making them utterly irresistible.
- Buttery, Nutty Flavor Profile: The star ingredient here is undeniably brown butter. By carefully browning the butter, you unlock a depth of flavor that ordinary melted butter simply can’t achieve. This process transforms simple butter into a complex elixir with intoxicating notes of toasted nuts, rich caramel, and subtle toffee. This rich, aromatic foundation permeates both the crust and the filling, elevating the entire dessert to a gourmet experience.
- Perfectly Balanced Sweetness: While undeniably sweet, these chess squares are far from cloying. The inherent slight bitterness and profound nuttiness of the brown butter act as a perfect counterpoint to the confectioner’s sugar. This thoughtful balance creates a dessert that satisfies your sweet tooth without overwhelming it, inviting you to savor each harmonious bite.
- An Ideal Holiday Treat: The warm, inviting aroma and rich flavors of brown butter are synonymous with cooler weather and festive occasions. These brown butter chess squares are a fantastic addition to any fall or winter holiday spread, from Thanksgiving feasts to Christmas gatherings. They are easy to transport, serve beautifully, and are always a crowd-plepleaser, making them a stress-free dessert option for entertaining.
- Chewy, Satisfying Crust: The base of these squares is a delectable cookie-like crust, enhanced by the addition of brown sugar. This ensures a wonderfully chewy texture that provides a delightful contrast to the smooth, gooey cream cheese filling. The interplay between the soft, yielding top layer and the slightly resilient, flavorful bottom crust creates an engaging textural experience that keeps you coming back for more.
- Made Entirely from Scratch: Unlike many traditional chess square recipes that rely on a boxed cake mix for convenience, this recipe takes the extra step to craft every component from scratch. This commitment to homemade quality results in a vastly superior flavor, a fresher taste, and a texture that feels authentically artisanal. You’ll taste the difference that real ingredients and careful preparation make, producing a dessert that truly shines.
Key Ingredients & Smart Substitutions for the Best Brown Butter Chess Squares
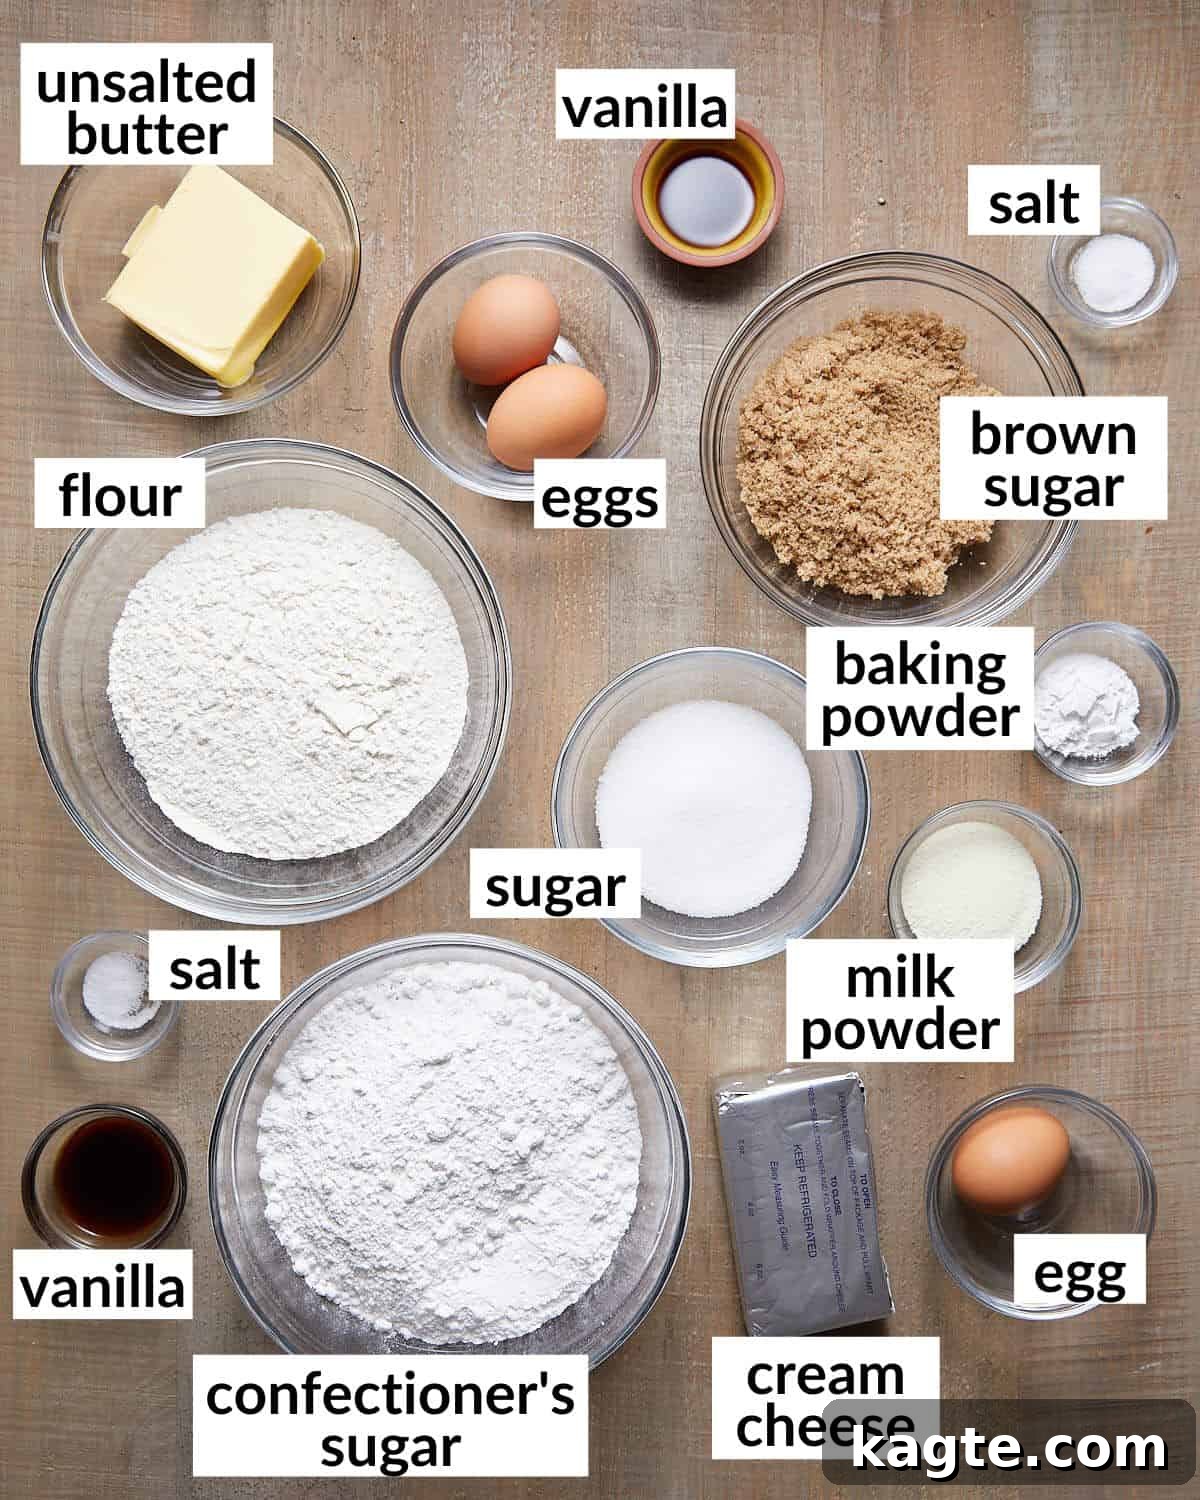
- Butter: For the most superior flavor and the richest brown butter, I highly recommend using a high-quality European butter, such as Kerrygold. European butters typically have a higher fat content and a lower water content, which contributes to a more intense and nuanced flavor profile when browned. However, if European butter isn’t available, any good quality unsalted butter will work. Just be mindful that the browning time might slightly vary. Ensure your butter for the crust layer is at room temperature for optimal mixing.
- Milk Powder: This ingredient is a game-changer for achieving intensely flavorful brown butter. Nonfat dry milk powder significantly increases the milk solids in your butter, which are the components that toast and brown, creating those coveted nutty, caramel notes. While highly recommended for a deeper, richer brown butter flavor and more “brown bits,” this ingredient can be omitted if you don’t have it on hand, without requiring any other adjustments to the recipe. The bars will still be delicious, but the brown butter flavor will be slightly less pronounced.
- Full-Fat Cream Cheese: Essential for the luscious, gooey texture of the filling. Make sure it’s at room temperature for a smooth, lump-free mixture. Do not use low-fat or whipped cream cheese as it will alter the texture of the filling significantly.
- Confectioner’s Sugar: Also known as powdered sugar, this fine sugar ensures a silky-smooth texture in the cream cheese layer. Granulated sugar would make the filling gritty.
- Vanilla Extract: Use pure vanilla extract for the best flavor. It enhances the sweetness and rounds out the other flavors beautifully.
- Eggs: Act as a binder and help set the cream cheese filling. Ensure they are large eggs and at room temperature for easier incorporation into the mixture, preventing curdling.
- All-Purpose Flour: The foundation for our chewy crust. Measure accurately by spooning flour into your measuring cup and leveling it off, rather than scooping directly from the bag.
- Baking Powder: Provides a slight lift and tenderness to the crust, contributing to its pleasant chewiness.
- Brown Sugar & Granulated Sugar: A combination of both sugars in the crust gives it depth of flavor and contributes to its irresistible chewiness. Brown sugar adds moisture and a subtle molasses note, while granulated sugar contributes to crispness.
- Fine Sea Salt: A crucial flavor enhancer, balancing the sweetness in both layers and bringing out the complex notes of the brown butter.
For a complete list of ingredients and their exact amounts, please refer to the recipe card below.
How to Make Decadent Brown Butter Chess Squares
Quick Overview
- Carefully brown the butter to develop its signature nutty flavor.
- Prepare the rich and creamy cream cheese filling.
- Mix and press the chewy, flavorful crust layer.
- Thoughtfully assemble the layers in your baking dish.
- Bake until golden and gooey, then cool completely.
Step by Step Instructions for Irresistible Chess Squares
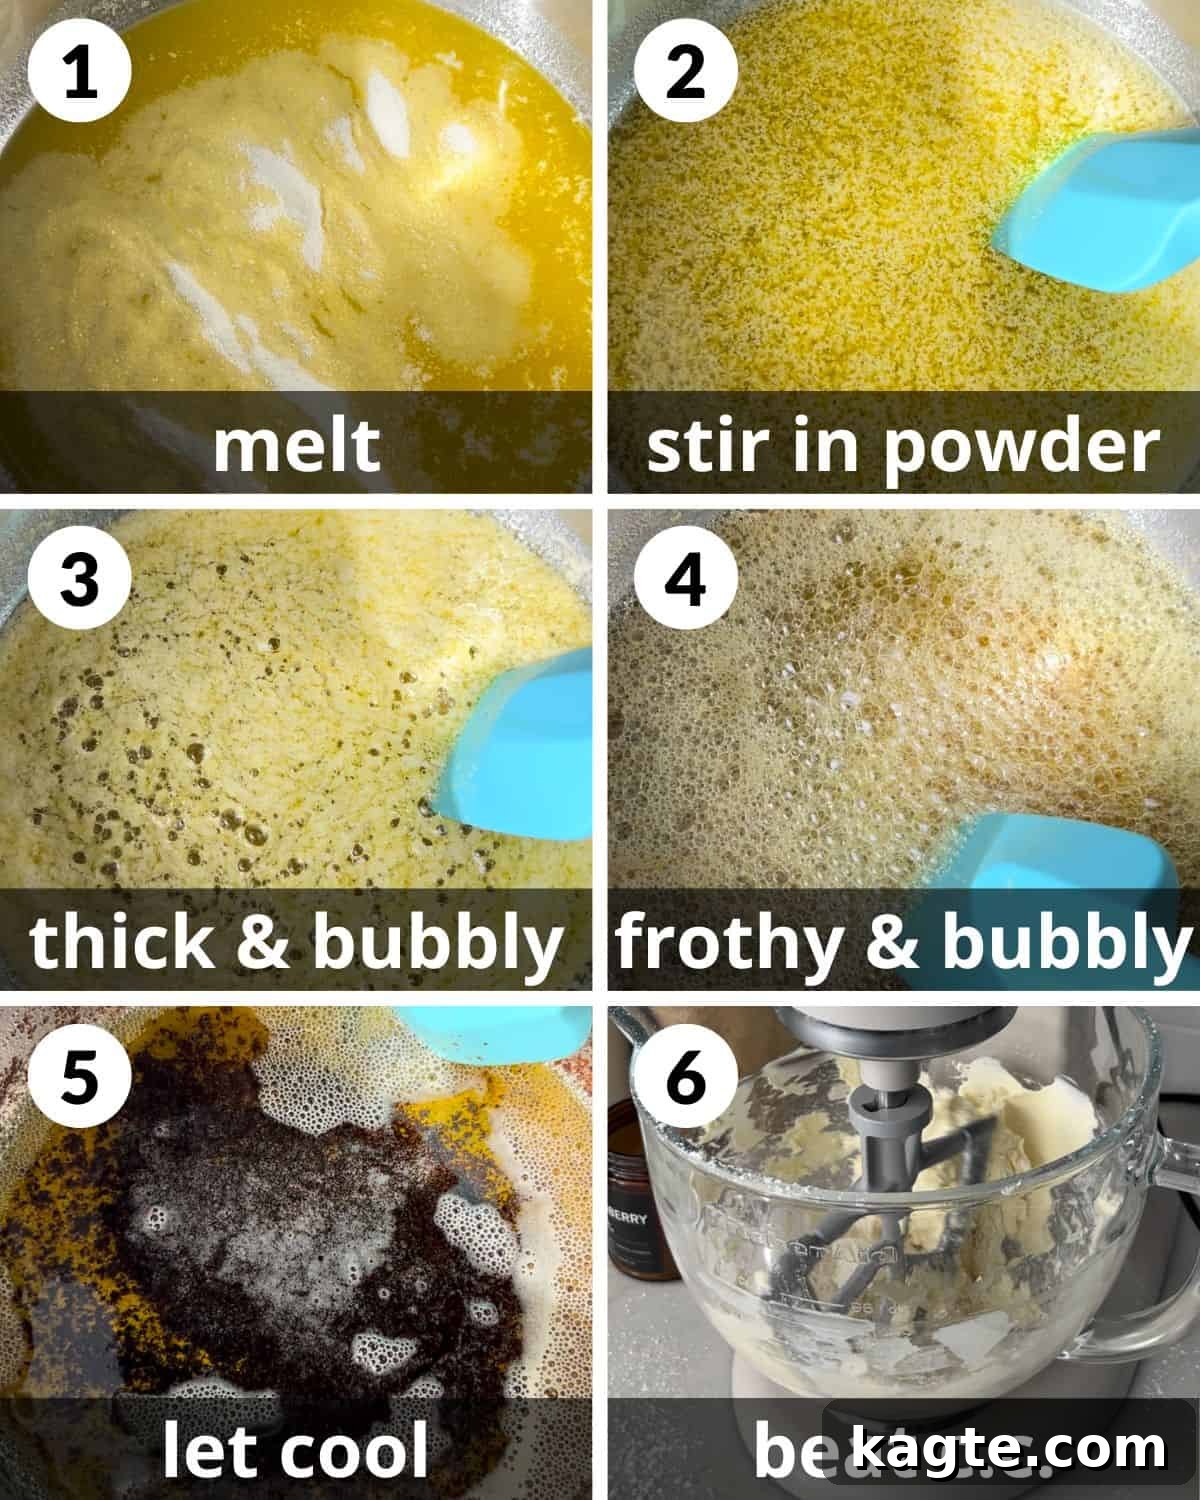
The butter should have a dark brown color and a distinct nutty aroma for optimal flavor.
Step 1: Begin by preheating your oven to 350 degrees Fahrenheit (175°C). Prepare a 9×13 inch baking dish by generously greasing it and lining it with parchment paper, allowing an overhang on the sides for easy removal later. In a light-bottomed saucepan, melt the measured butter over medium-low heat. Once the butter is fully melted, stir in the milk powder (if using).
Step 2: Continue stirring the butter and milk powder mixture. At this stage, the milk powder may appear clumpy as it begins to integrate with the melted butter. Don’t worry, this is a normal part of the process.
Step 3: Increase the heat to medium. Keep stirring continuously. The butter will start to foam and bubble, and you’ll notice a thick layer of milk solids rising to the surface. This indicates that the browning process is actively beginning.
Step 4: Maintain constant stirring and cooking. The butter will become increasingly frothy, and tiny golden-brown bits will begin to form and settle at the bottom of the pan. Pay close attention to the color, smell, and texture as the butter progresses.
Step 5: Once the milk solids at the bottom of the pan turn a rich, dark amber-brown color and the butter emits a distinct nutty aroma, immediately remove the pan from the heat. Pour the brown butter into a heat-safe bowl, ensuring all the flavorful browned bits are scraped from the bottom of the pan. Allow it to cool slightly before proceeding with the next steps.
Step 6: In the bowl of a stand mixer fitted with a paddle attachment, or using an electric hand mixer, combine the softened cream cheese with approximately 1 cup of the confectioner’s sugar. Beat on medium speed until the mixture is completely smooth and free of any lumps, ensuring a uniform base for your filling.
Do not overmix the eggs; mix just until combined to maintain the filling’s delicate texture.
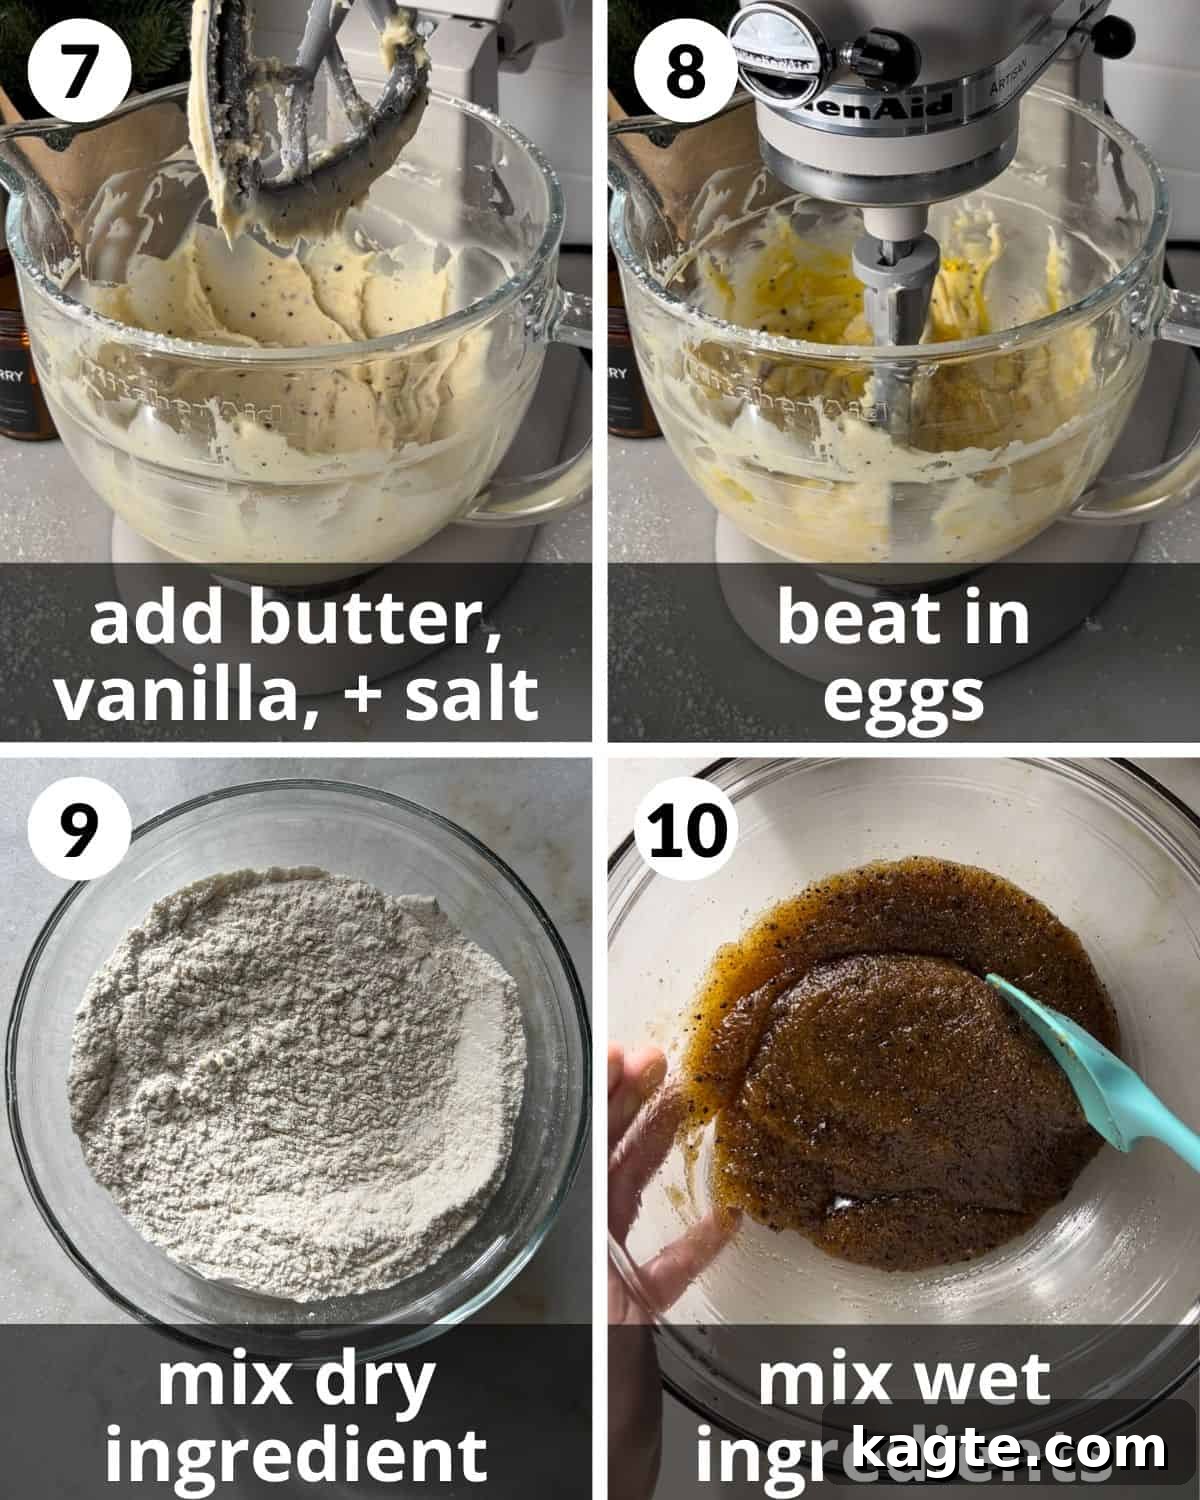
Step 7: Add another cup of confectioner’s sugar to the cream cheese mixture and beat until well combined. Then, incorporate the remaining confectioner’s sugar, 3 tablespoons of the slightly cooled brown butter (reserving the rest for the crust), vanilla extract, and sea salt. Beat again on medium speed until all ingredients are thoroughly mixed and the filling is smooth and creamy.
Step 8: Crack the two large eggs into the cream cheese mixture. Mix on medium-low speed just until the eggs are fully incorporated and no streaks remain. It’s crucial not to overmix at this stage, as overbeating eggs can result in a tougher, less gooey filling. Set this completed cream cheese mixture aside.
Step 9: In a separate medium-sized mixing bowl, whisk together the all-purpose flour, baking powder, and the remaining sea salt. Ensure these dry ingredients are thoroughly combined to distribute the leavening agent evenly throughout the crust.
Step 10: In a large mixing bowl, combine the remaining brown butter (be sure to scrape every last bit of those delicious browned solids from the pan), brown sugar, granulated sugar, the single large egg, and vanilla extract. Stir these wet ingredients together vigorously until they are well blended and smooth.
For delightfully gooey bars, remove them from the oven when the center still has a slight, delicate jiggle. The bars will continue to set as they cool, achieving the perfect texture.
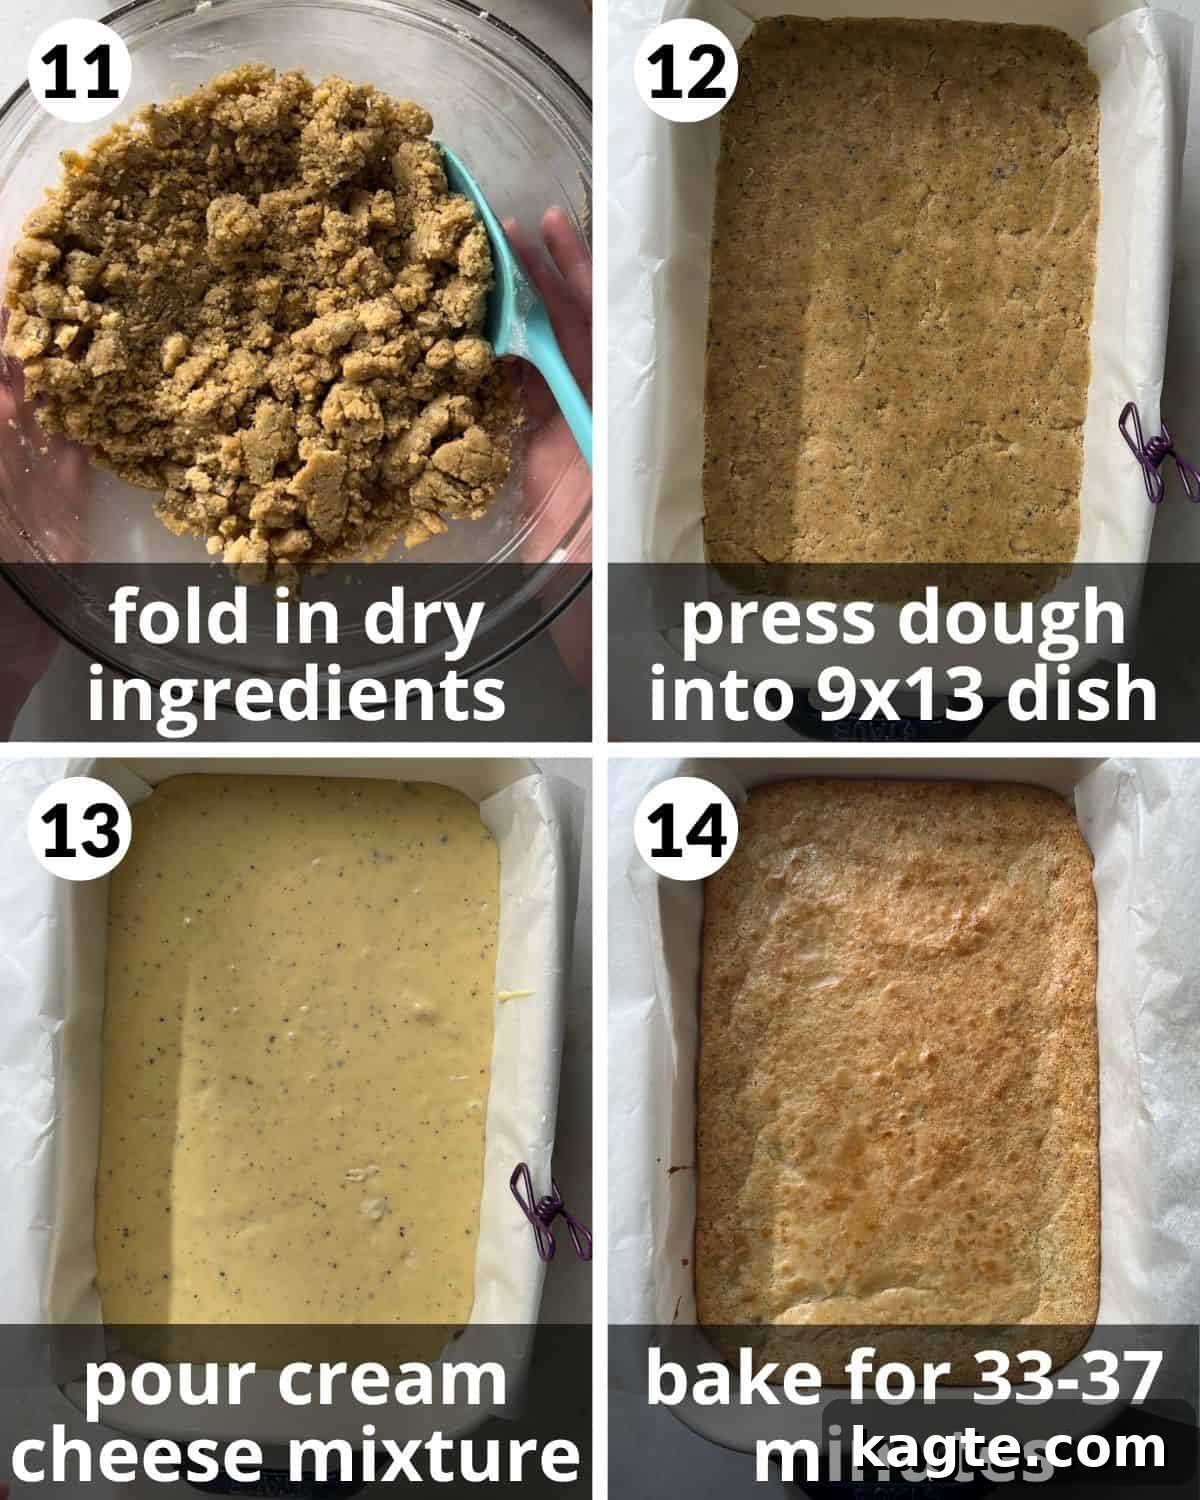
Step 11: Gradually pour the whisked dry ingredients into the wet ingredients mixture. Using a spatula or wooden spoon, gently fold the ingredients together until a cohesive dough forms. Be careful not to overmix, as this can lead to a tough crust.
Step 12: Transfer the prepared dough into your parchment-lined baking dish. Using your hands or the bottom of a flat cup, firmly and evenly press the dough into the bottom of the dish to form a uniform crust. Ensure it reaches all corners for a consistent base.
Step 13: Carefully pour the reserved cream cheese mixture evenly over the pressed crust layer. Gently spread it to cover the entire surface, creating a smooth and even top layer for your chess squares.
Step 14: Bake the chess squares for 33-37 minutes, or until the edges are nicely set and lightly golden, but the center still exhibits a slight, delicate jiggle when gently shaken. An instant-read thermometer inserted into the center should register 165 degrees Fahrenheit (74°C). Once baked, remove from the oven and allow them to cool completely in the pan for at least 2-3 hours at room temperature. After cooling, refrigerate the squares until they are thoroughly chilled and firm before attempting to slice them for the cleanest cuts and best texture.
Expert Tips & Delicious Variations for Brown Butter Chess Squares
- Master the Brown Butter Technique: This step is truly non-negotiable for achieving the signature depth of flavor in these bars. Use a light-colored pan so you can easily observe the color changes. Stir continuously and watch closely, as butter can go from perfectly browned to burned very quickly. The ideal brown butter will have a deep amber color and a rich, nutty aroma, with dark brown bits at the bottom. Don’t skip scraping those bits into your mixture – they’re packed with flavor!
- Always Line Your Baking Dish with Parchment Paper: This simple trick makes a world of difference. Lining your 9×13 inch baking dish with parchment paper, leaving an overhang on the sides, allows you to effortlessly lift the entire slab of cooled bars out of the pan. This not only prevents sticking but also makes slicing incredibly easy and ensures beautifully clean, crisp edges on each square, enhancing presentation.
- Avoid the Pitfall of Overbaking: The key to achieving that wonderfully gooey, almost pudding-like consistency in the cream cheese layer is to avoid overbaking. The bars are ready when the edges are set and a lovely golden brown, but the very center still has a slight, delicate wobble or jiggle. Remember, they will continue to firm up and set as they cool down, a process known as carryover cooking. An internal temperature of 165°F is a perfect indicator of doneness.
- Proper Refrigeration for Optimal Texture and Safety: Due to the custardy, cream cheese-based filling, these bars absolutely must be stored in the refrigerator. Once completely cooled, transfer them to an airtight container and keep them chilled. This not only ensures food safety but also firms up the filling, making the bars easier to slice cleanly and enhancing their overall texture. They will remain fresh and delicious for 3-4 days when stored correctly.
- Flavor Variations: For an extra layer of flavor, consider adding a teaspoon of almond extract along with the vanilla in the cream cheese layer. You can also sprinkle a pinch of cinnamon or nutmeg into the crust for a warmer, spicier note, especially fitting for fall.
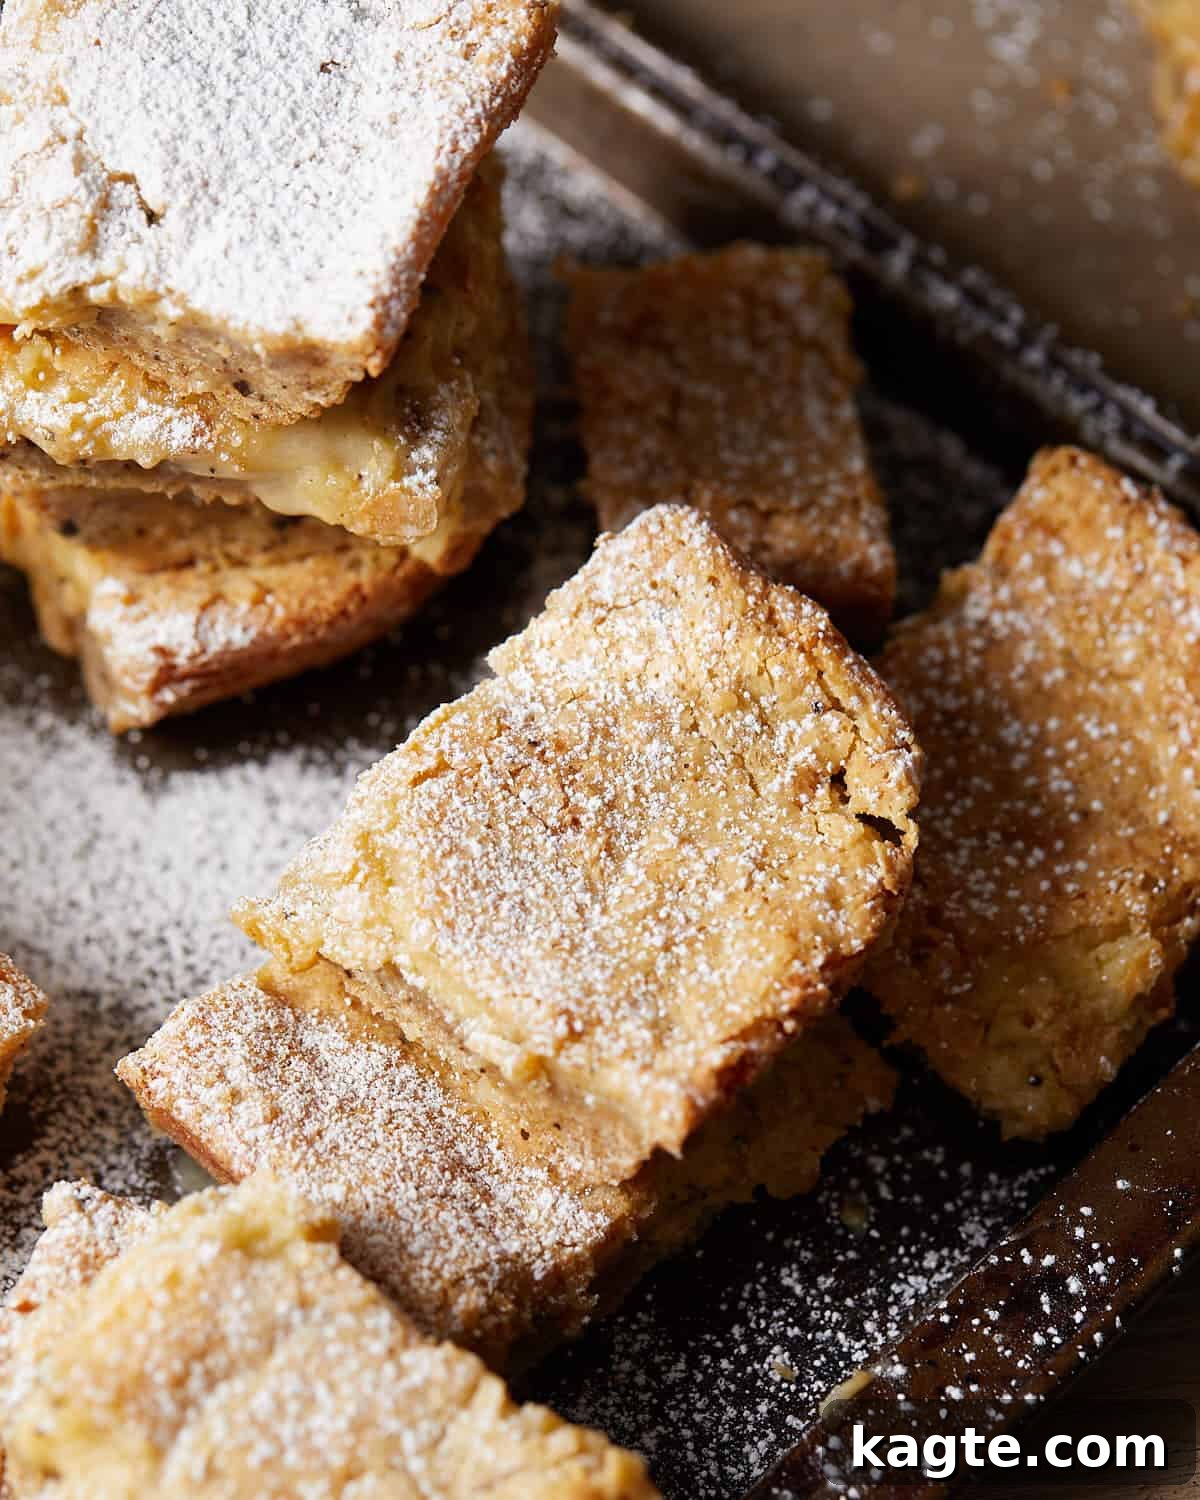
- Topping Ideas: While perfect on their own, a dusting of extra confectioner’s sugar just before serving adds an elegant touch. For a more decadent finish, drizzle with melted dark chocolate or a homemade caramel sauce. A sprinkle of finely chopped toasted pecans or walnuts can also add a delightful crunch.
Recipe FAQs: Your Questions About Brown Butter Chess Squares Answered
Traditional chess squares often feature a simple crust, topped with a sweet, custardy filling typically made from ingredients like yellow cake mix, butter, cream cheese, and powdered sugar. However, this particular recipe takes pride in being completely homemade, foregoing any boxed cake mixes to deliver a superior, richer flavor and texture from scratch ingredients.
Absolutely! These chess squares are an excellent make-ahead dessert. In fact, they often taste even better the next day after the flavors have had a chance to meld and deepen in the refrigerator. Simply bake, cool completely, refrigerate, and slice when you’re ready to serve. This makes them perfect for entertaining or meal prep.
Due to their cream cheese filling, these bars must be stored in an airtight container in the refrigerator for up to 3-4 days. For longer storage, you can freeze individual slices. Wrap each slice tightly in plastic wrap, then place them in a freezer-safe bag or container for up to 2-3 months. Thaw in the refrigerator before serving.
The key indicators are visual and aromatic. Your butter is perfectly browned when the milk solids at the bottom of the pan turn a deep, rich amber color (like toasted hazelnuts) and the butter emits a distinct, nutty, caramel-like aroma. It will also be quite frothy on top. Be careful not to let the bits turn black, as that means it’s burned.
Adding milk powder is a clever trick to intensify the brown butter flavor. Milk solids are what brown and toast during the cooking process. By adding extra milk powder, you introduce more solids to the butter, resulting in a larger quantity of those flavorful, toasted “brown bits” that contribute to the deep, nutty, and complex notes of the brown butter.
Shop my Amazon Storefront for baking essentials!
More Indulgent Dessert Recipes You’ll Love
Dessert
No-Chill Chocolate Chip Cookies (Easy)
Christmas
20 Sweet Peppermint Recipes for Christmas
Fall
20 Sweet Pumpkin Recipes for Fall (From Breakfast to Dessert)
Breakfast
Blueberry Coffee Cake with Greek Yogurt & Streusel
If you try this delightful Brown Butter Chess Squares recipe, please leave a star rating in the recipe card below and/or drop a comment! Your feedback is always appreciated. Follow me on Pinterest, Facebook & Instagram for more delicious recipes and baking inspiration.
SaveSaved
Brown Butter Chess Squares from Scratch
Equipment
-
Stand Mixer
-
Hand Mixer
-
Mixing Bowls
-
Kitchen Scale
-
9×13 Inch Baking Dish
-
Light-Bottomed Saucepan
-
Parchment Paper
Ingredients
For the Brown Butter Base
- 12 Tablespoons (170 g) unsalted butter* (preferably European style)
- 2 Tablespoons nonfat dry milk powder* (optional, for enhanced brown butter flavor)
Cream Cheese Layer
- 1 8 ounce block full fat cream cheese (softened to room temperature)
- 3 1/2 cups (420 g) confectioner’s sugar
- 2 teaspoons vanilla extract
- 1/4 teaspoon fine sea salt
- 2 large eggs (room temperature)
Crust Layer
- 2 cups (260 g) all purpose flour
- 1 Tablespoon baking powder
- 1/2 teaspoon fine sea salt
- 1 cup (200 g) packed light or dark brown sugar
- 1/2 cup (100 g) granulated sugar
- 1 large egg (room temperature)
- 1 Tablespoon vanilla extract
Instructions
-
Preheat your oven to 350 degrees Fahrenheit (175°C). Prepare a 9×13 inch baking dish by lightly greasing it, then lining it with parchment paper, allowing some overhang on the longer sides. In a light-bottomed saucepan (to better observe color changes), melt the 12 tablespoons of unsalted butter over medium-low heat. Once fully melted, add the 2 tablespoons of nonfat dry milk powder, if you are using it.
-
Stir the butter and milk powder continuously. The mixture will initially look a bit clumpy as the milk powder absorbs some fat, but this is expected. Continue stirring to help it dissolve and prevent burning.
-
Increase the heat to medium. Keep stirring. The butter will begin to bubble more vigorously, and a thick layer of white foam or milk solids will rise to the top. The aroma in your kitchen will start to change from simple butter to a richer, more toasted scent.
-
Continue stirring and cooking, observing the color of the milk solids at the bottom of the pan. The frothing will intensify, and these solids will gradually transform from pale yellow to a golden brown, and then to a deeper, richer brown.
-
Once the bits at the bottom become a dark amber-brown (like toasted hazelnuts) and the butter emits a strong, nutty, caramel-like aroma, immediately remove the pan from the heat. Pour the brown butter, ensuring you scrape all the browned bits from the bottom, into a separate heat-proof bowl to stop the cooking process. Allow it to cool slightly before use.
-
Using a stand mixer fitted with a paddle attachment or an electric hand mixer on medium speed, beat the softened cream cheese and approximately 1 cup of the confectioner’s sugar together until the mixture is perfectly smooth and airy, with no lumps remaining.
-
Add another cup of confectioner’s sugar and continue beating until well incorporated. Then, add the remaining confectioner’s sugar, 3 tablespoons of the slightly cooled brown butter, 2 teaspoons of vanilla extract, and 1/4 teaspoon of fine sea salt. Beat on medium speed until all ingredients are thoroughly combined and the mixture is consistently smooth and creamy.
-
Finally, add the 2 large eggs to the cream cheese mixture. Mix on medium-low speed just until the eggs are fully incorporated into the batter. Be careful not to overmix the eggs, as this can affect the texture of the finished squares. Set this creamy filling aside.
-
In a medium mixing bowl, whisk together the 2 cups of all-purpose flour, 1 tablespoon of baking powder, and 1/2 teaspoon of fine sea salt. Ensure these dry ingredients are thoroughly combined to ensure an even distribution in the crust.
-
In a large mixing bowl, combine the remaining brown butter (make sure to scrape all the delicious browned bits from the pan), 1 cup of brown sugar, 1/2 cup of granulated sugar, 1 large egg, and 1 tablespoon of vanilla extract. Stir these wet ingredients together well until they are smoothly integrated.
-
Pour the whisked dry ingredients from Step 9 into the wet ingredients mixture from Step 10. Using a spatula or your hands, fold and mix until the dough just comes together and no dry streaks of flour are visible. Avoid overmixing to keep the crust tender.
-
Press the prepared dough evenly into the bottom of your parchment-lined 9×13 inch baking dish. You can use your hands, the back of a spoon, or the bottom of a flat cup to ensure a uniform and compact crust across the entire base of the pan.
-
Carefully pour the rich and creamy cream cheese mixture from Step 8 over the pressed crust layer. Gently spread the filling with a spatula to create an even, smooth top layer, making sure it reaches all the edges of the pan.
-
Bake the chess squares in the preheated oven for 33-37 minutes. The bars are ready when the edges appear set and lightly golden brown, but the very center still has a slight, delicate jiggle when gently nudged. The internal temperature, when measured with an instant-read thermometer, should be 165 degrees Fahrenheit (74°C). Once baked, remove the pan from the oven and allow the squares to cool completely on a wire rack for 2-3 hours at room temperature. For best results and clean slicing, transfer the pan to the refrigerator and chill the bars until they are thoroughly cold and firm before cutting into squares.
Notes
- Butter: I recommend using a high-quality European butter, like Kerrygold, for its richer flavor and superior browning qualities. It contributes significantly to the nutty depth of these squares.
- Milk Powder: This optional ingredient is highly recommended. It adds more milk solids to the butter, resulting in more brown bits during the browning process, which intensifies the nutty and caramel-like flavor of the brown butter. If omitted, the bars will still be delicious but with a slightly less pronounced brown butter flavor.
- Brown the butter: This step is crucial for the unique flavor of these bars. Don’t skip it! Watch carefully as it browns; it can go from perfect to burnt quickly. The dark brown bits are essential for that nutty, complex taste.
- Line the dish with parchment: This practical tip ensures your brown butter chess squares can be easily removed from the baking dish. The parchment overhang acts as a sling, allowing for effortless lifting and clean, precise slicing once the bars are chilled.
- Do not overbake: For the ultimate gooey center, take the bars out of the oven when the edges are set and golden, but the center still has a slight jiggle. The residual heat will continue to cook them as they cool, achieving the perfect texture.
- Store in the fridge: Given the creamy, custardy cream cheese layer, these chess squares must be stored in an airtight container in the refrigerator. This maintains their freshness, ensures food safety, and helps them set perfectly for clean slicing. They are best enjoyed chilled within 3-4 days.
Nutrition
Nutrition information is automatically calculated, so should only be used as an approximation.