
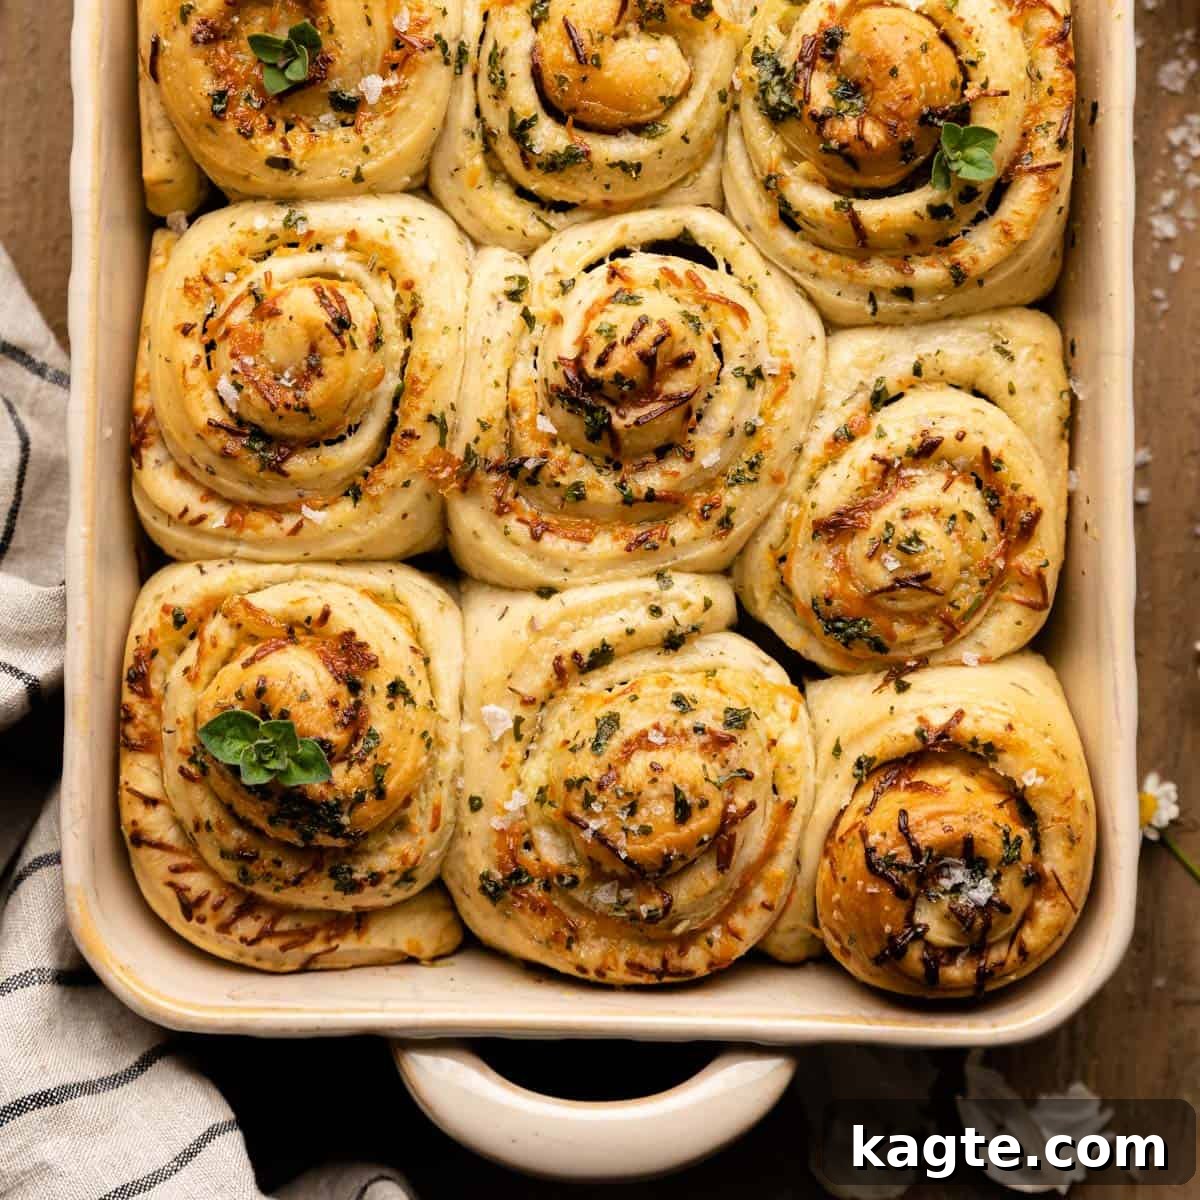
Irresistible Cheesy Garlic Herb Butter Rolls (Cinnamon Roll Style)
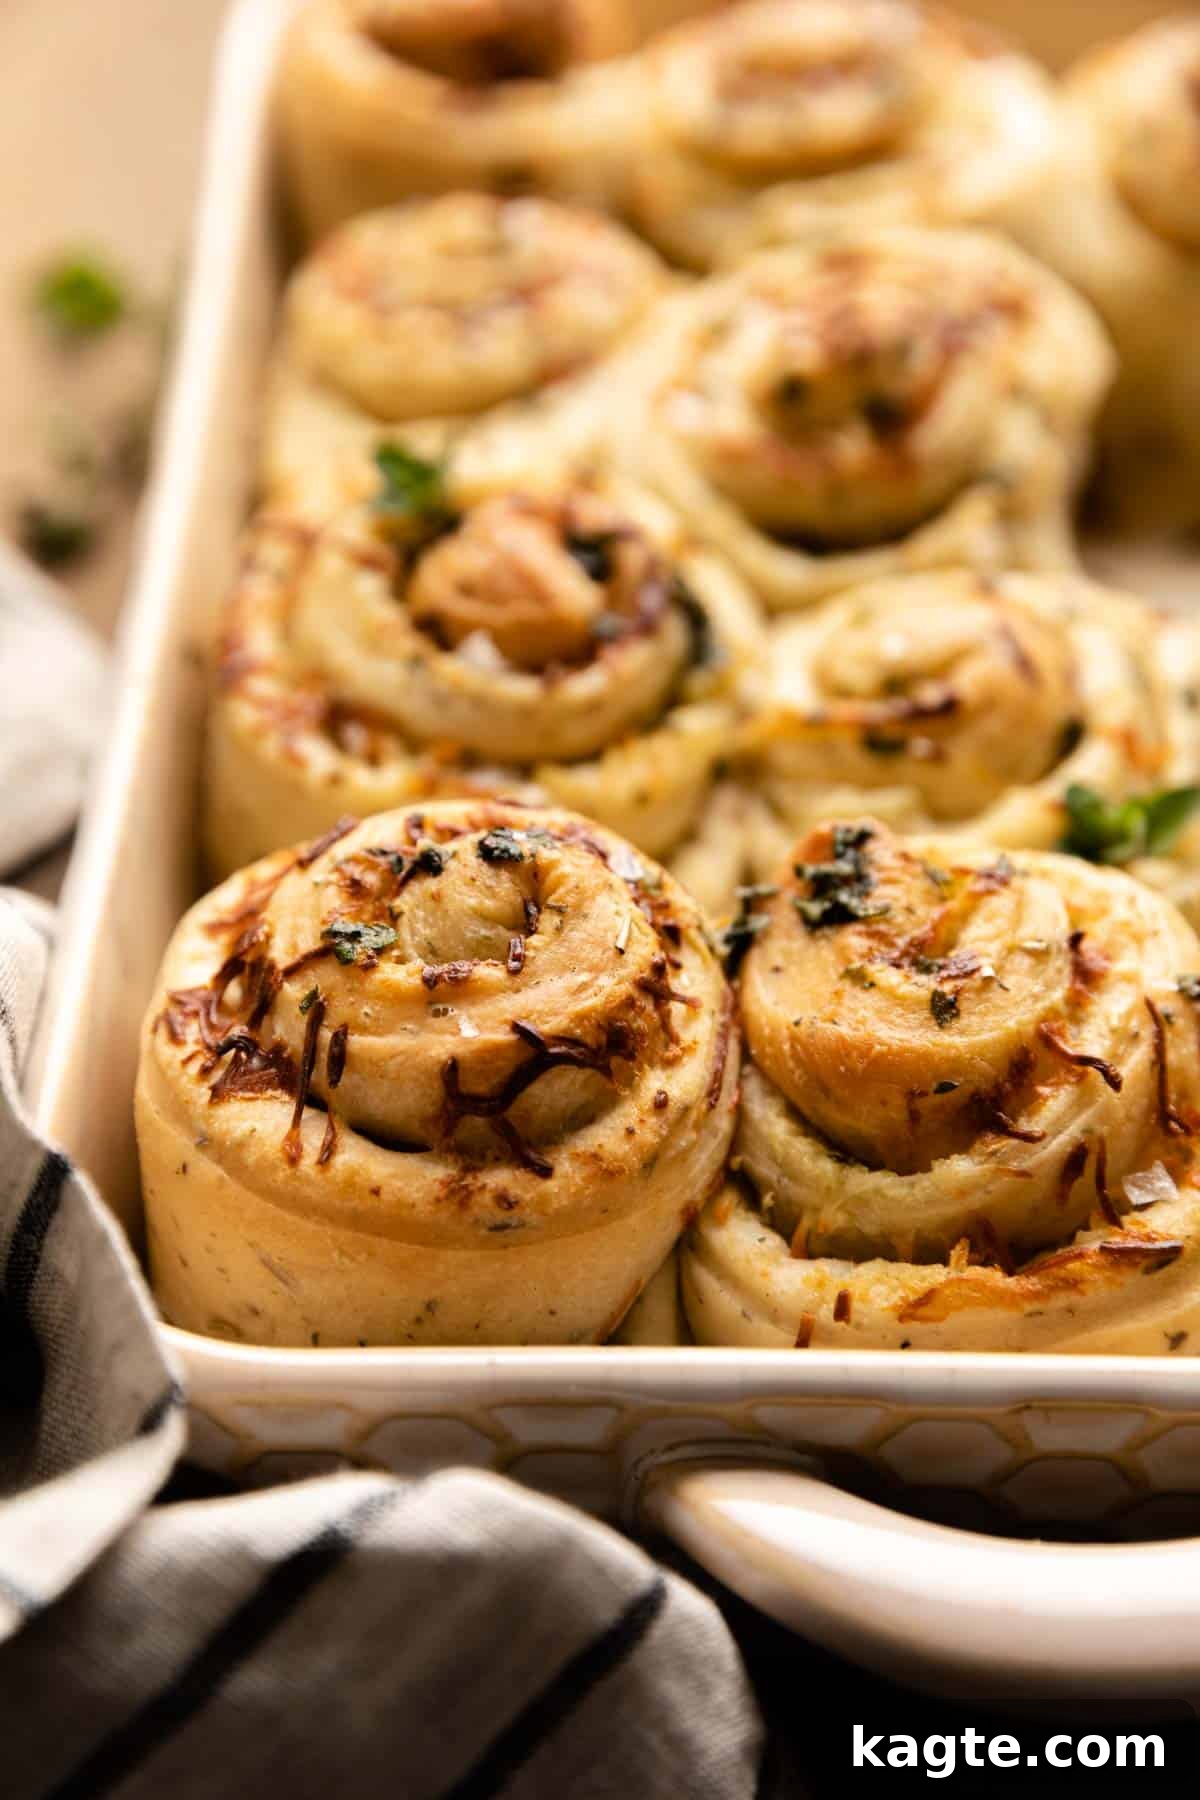
Prepare to elevate your dinner table with these utterly delectable Cheesy Garlic Herb Butter Rolls, crafted in a charming and flavor-packed cinnamon roll style. Imagine fluffy, tender dough swirled with an abundance of fresh garlic, rich butter, aromatic herbs, and savory Parmesan cheese. Each bite promises an explosion of savory goodness, making these rolls not just a side dish, but a star attraction that’s truly addicting.
For anyone who appreciates the comforting warmth of homemade bread and the irresistible combination of garlic, butter, and cheese, this recipe is an absolute must-try. We’ve taken the beloved spiral technique of sweet cinnamon rolls and given it a savory twist, ensuring that every layer is infused with incredible flavor. Get ready to bake a batch of rolls that will disappear almost as fast as they come out of the oven!
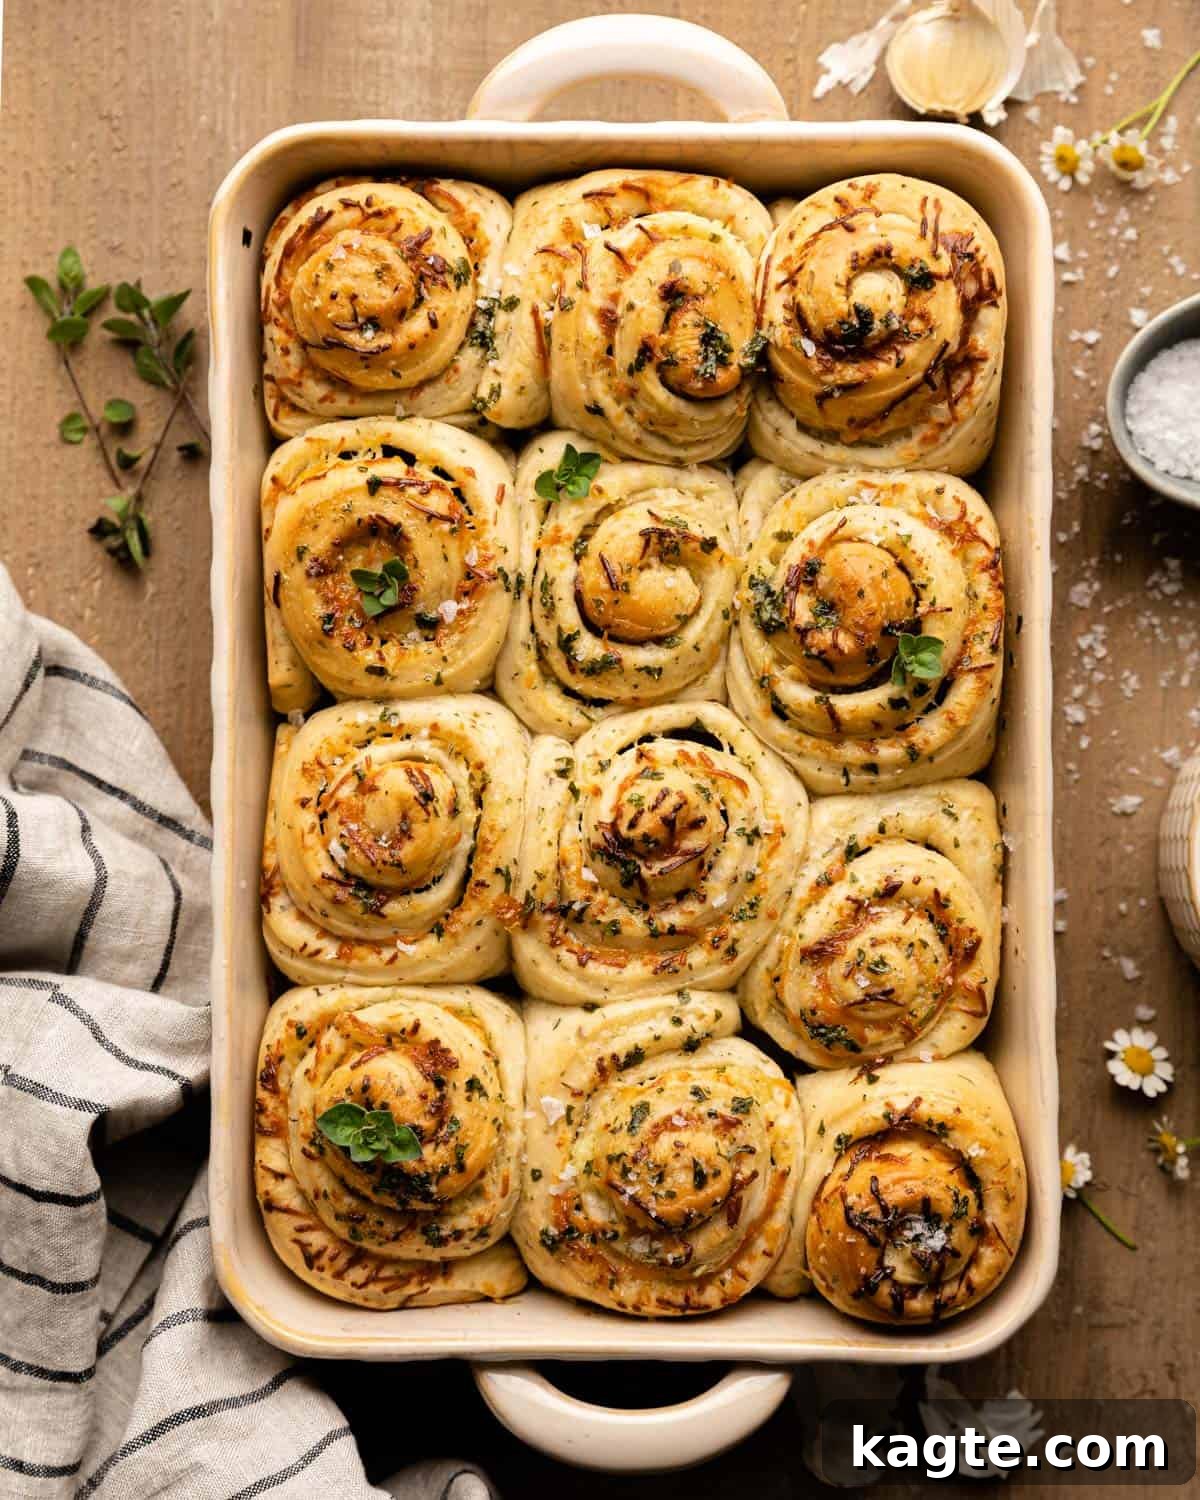
Why You Will Adore These Savory Garlic Herb Butter Rolls
There’s something uniquely satisfying about rolling up dough and watching that perfect spiral emerge. This recipe brings that joy into the savory realm, offering a delightful alternative to traditional sweet rolls. If you’re a fan of salty snacks and robust flavors, these rolls are tailor-made for you.
While classic yeast rolls are always a comforting choice – like my Buttery Old Fashioned Yeast Rolls – these garlic herb butter rolls introduce an exciting new dimension of taste and texture. They’re particularly divine when served alongside hearty meals, such as my Classic Dutch Oven Chicken Noodle Soup, adding a gourmet touch to any spread.
Layers of Unforgettable Flavor
- **Garlic Butter, Three Ways:** We don’t just add garlic butter; we integrate it into the dough, slather it as a luxurious filling, and brush it on top after baking for an unparalleled depth of flavor in every single bite. This triple dose ensures maximum savory impact.
- **Aromatic Herb Infusion:** The dough itself is enriched with three distinct types of herbs, contributing to a complex and fragrant profile that far surpasses your average dinner roll. These herbs become one with the dough, permeating it with their delightful essence.
- **Cheesy Goodness Throughout:** Each roll is generously filled with a layer of delicious cheese, which melts into gooey pockets of savory delight during baking. The cheese adds a rich, tangy counterpoint to the garlic and herbs.
A Texture Dream Come True
- **Fluffy, Soft, and Crispy:** Experience the best of all worlds with a wonderfully fluffy and tender interior, soft sides that gently pull apart, and irresistibly crispy, buttery tops. The unique rolling technique creates these distinct textural zones.
- **Cinnamon Roll Style Perfection:** The spiral shape isn’t just visually appealing; it ensures even distribution of the garlic herb butter and cheese filling, guaranteeing a burst of flavor and a delightful chew in every single piece.
The Ultimate Versatile Side Dish
- **Beyond Just a Side:** While perfect alongside soups, stews, roasted meats, or pasta, these rolls are so flavorful they can easily be enjoyed on their own as a savory snack or appetizer.
- **More Flavor, More Impact:** These rolls offer significantly more character and excitement than traditional plain yeast rolls, making them an impressive addition to any meal or gathering.
Table of Contents
- Why You Will Adore These Savory Garlic Herb Butter Rolls
- Ingredients for Savory Perfection
- Step-by-Step Guide to Baking Excellence
- Expert Baking Tips for Flawless Rolls
- Frequently Asked Questions
- Serving Suggestions and Related Recipes
- Full Cheesy Garlic Herb Butter Rolls Recipe
Ingredients for Savory Perfection
Crafting these extraordinary garlic herb butter rolls begins with selecting the right ingredients. Each component plays a vital role in achieving the perfect texture, rise, and, of course, that incredible savory flavor.
For the Dough
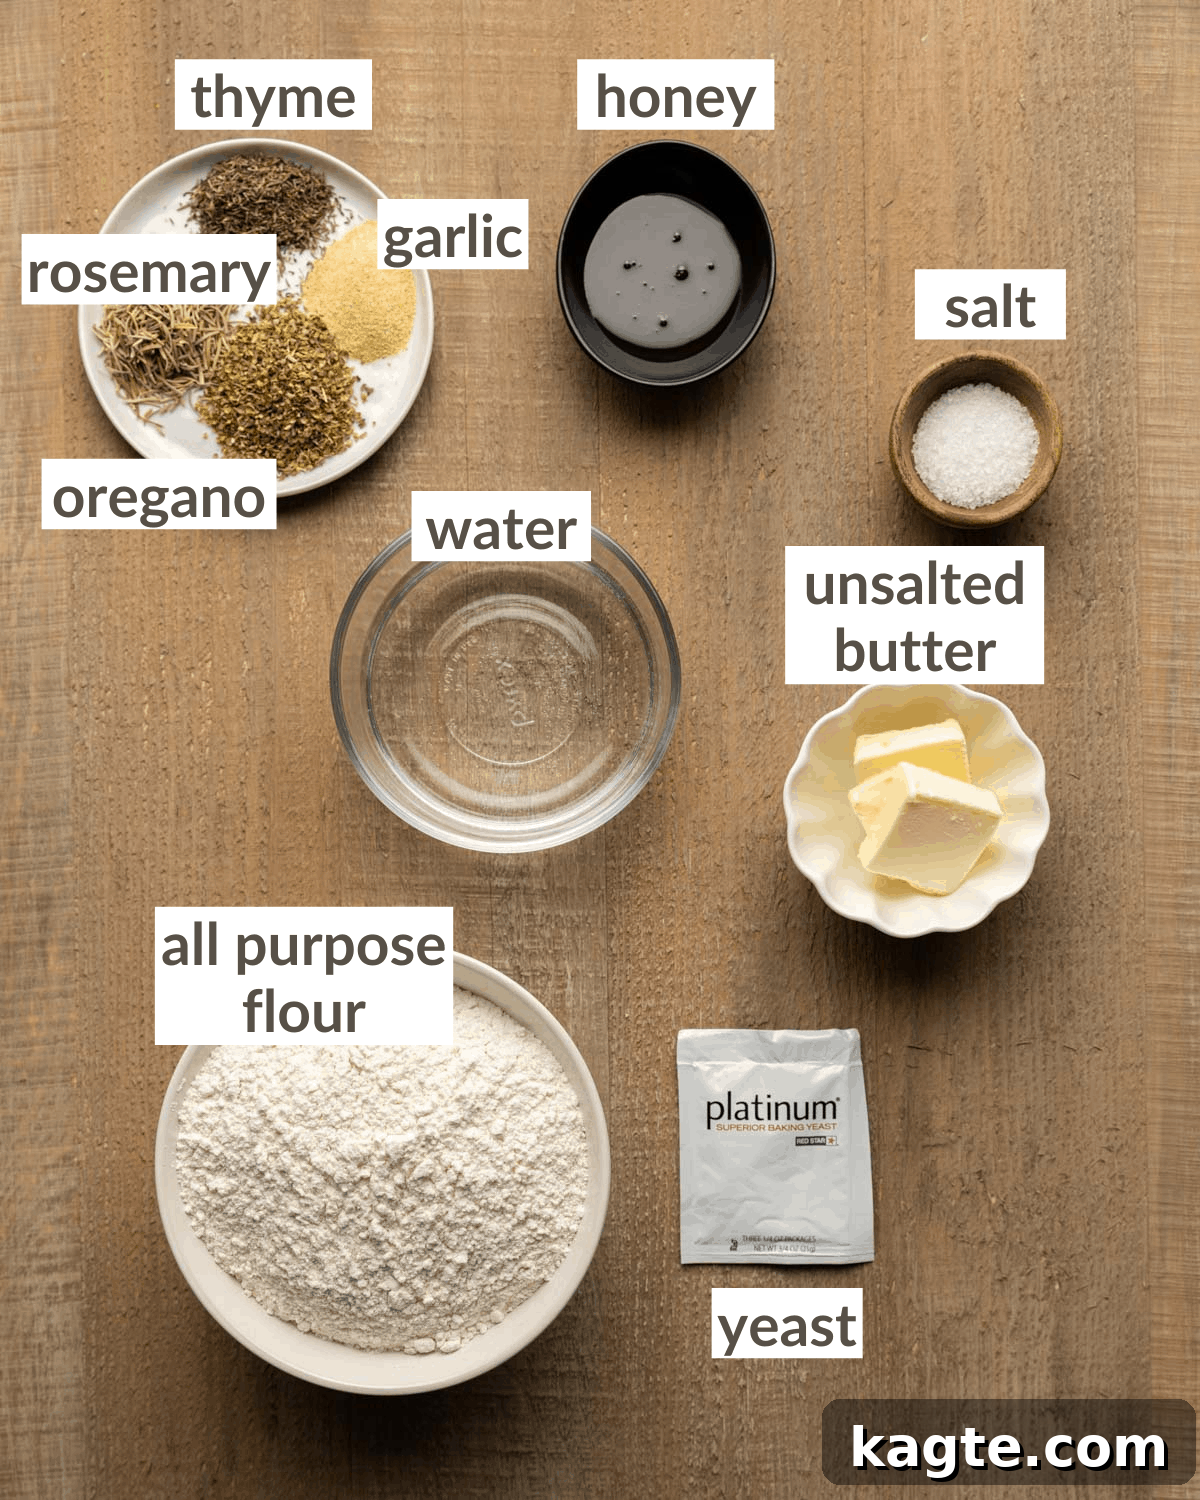
- Water: Lukewarm water is crucial for activating the yeast without killing it. Aim for a temperature around 110°F (43°C) for optimal yeast activity.
- Honey: This provides a touch of sweetness to balance the savory flavors and acts as food for the yeast, helping it to activate and the dough to rise beautifully. You can substitute with 1 Tablespoon of granulated sugar if preferred.
- Yeast: Active dry instant yeast is recommended for its reliability and efficiency. For consistent results, I highly recommend Red Star Platinum Superior Baking Yeast. Ensure your yeast is fresh and active for a proper rise.
- Unsalted Butter (melted and cooled): Butter adds richness and tenderness to the dough. Melting it allows for even distribution, but cooling it prevents it from killing the yeast.
- Dried Herbs (Oregano, Thyme, Rosemary): These Mediterranean herbs infuse the dough with an aromatic, earthy flavor that complements the garlic and cheese perfectly. Using dried herbs ensures a consistent flavor profile and is convenient.
- Garlic Powder: While fresh garlic is in the filling, garlic powder in the dough provides a more subtle, integrated garlic flavor throughout the bread.
- Bread Flour: Bread flour has a higher protein content than all-purpose flour, which helps develop more gluten. This results in a chewier, more structured roll, providing that satisfying texture. If bread flour isn’t available, all-purpose flour can be used, but the texture might be slightly softer.
- Salt: Essential for flavor, salt also plays a role in controlling yeast activity and strengthening the gluten structure. Don’t omit it!
For the Garlic Butter Filling
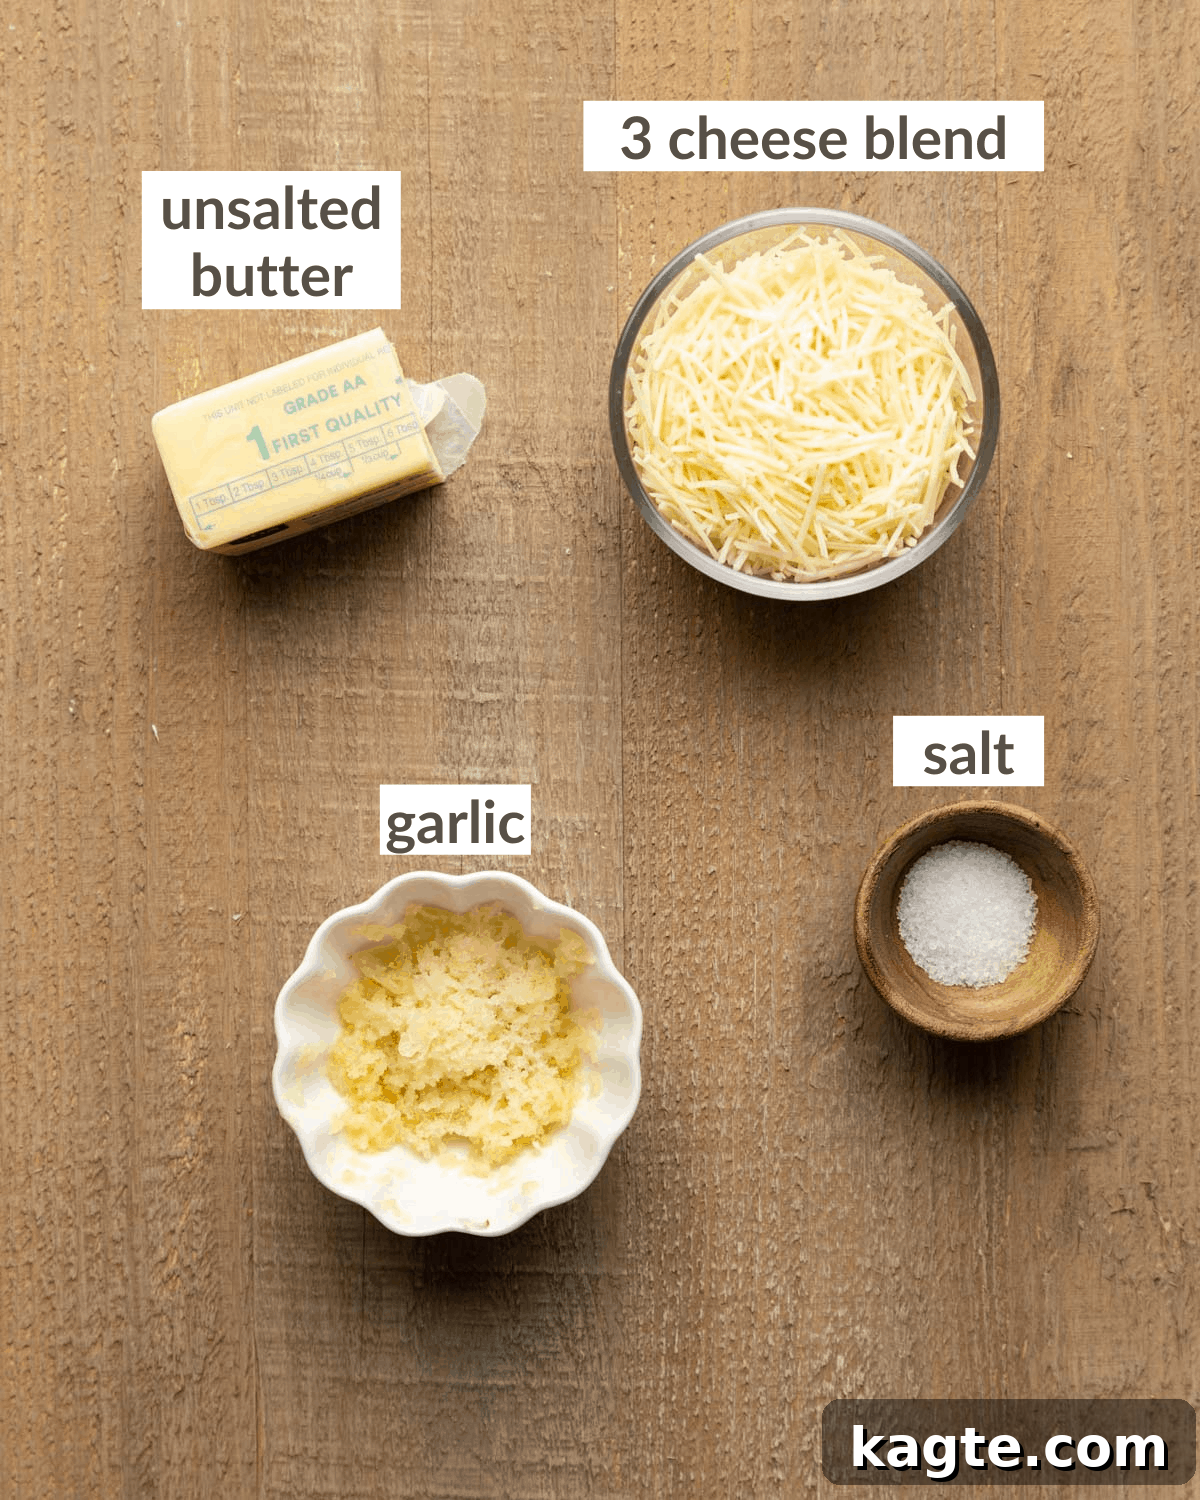
- Unsalted Butter (softened): Softened butter is key for a smooth, spreadable filling that will melt beautifully into the dough.
- Fresh Garlic (grated): Freshly grated garlic delivers an intense, pungent flavor that is central to these rolls. The grating ensures it distributes evenly and melts seamlessly.
- Salt: A touch of salt in the filling enhances the overall savory profile.
- Shredded Parmesan Cheese Blend: Parmesan cheese provides a sharp, salty, and nutty flavor that pairs wonderfully with garlic and herbs. A blend can offer variety, but freshly grated Parmesan is always a great choice. You can swap for 1 cup of shredded cheddar or mozzarella for a different cheesy experience.
For the Garlic Butter Topping
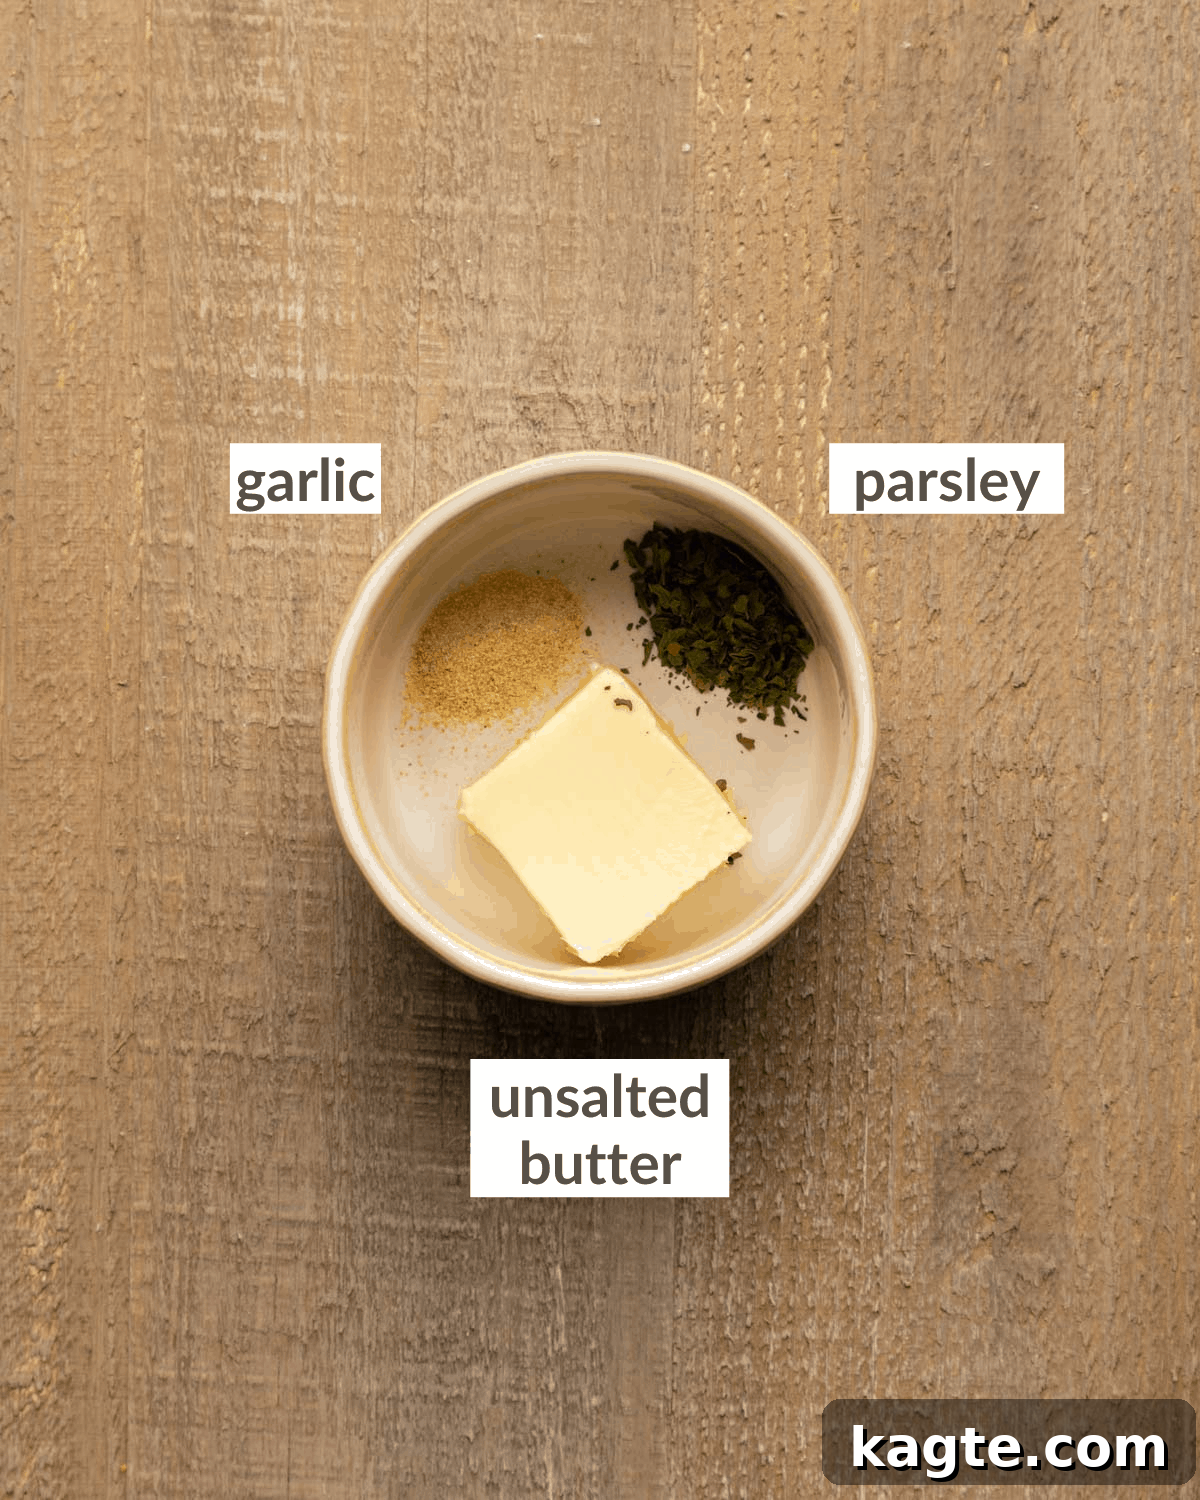
- Unsalted Butter (melted): Brushed on after baking, this final layer of butter adds a glossy finish, extra richness, and helps carry the topping flavors.
- Granulated Garlic: Granulated garlic provides a concentrated garlic flavor without the raw intensity of fresh garlic for the topping, ensuring a smooth finish.
- Dried Parsley: Adds a fresh, herbaceous note and a pop of color to the baked rolls.
A complete list of ingredients and their exact amounts is available in the recipe card below.
Step-by-Step Guide to Baking Excellence
Follow these detailed instructions to create perfect Cheesy Garlic Herb Butter Rolls, from activating the yeast to achieving that golden, buttery finish. Take your time with each step, and enjoy the rewarding process of baking!
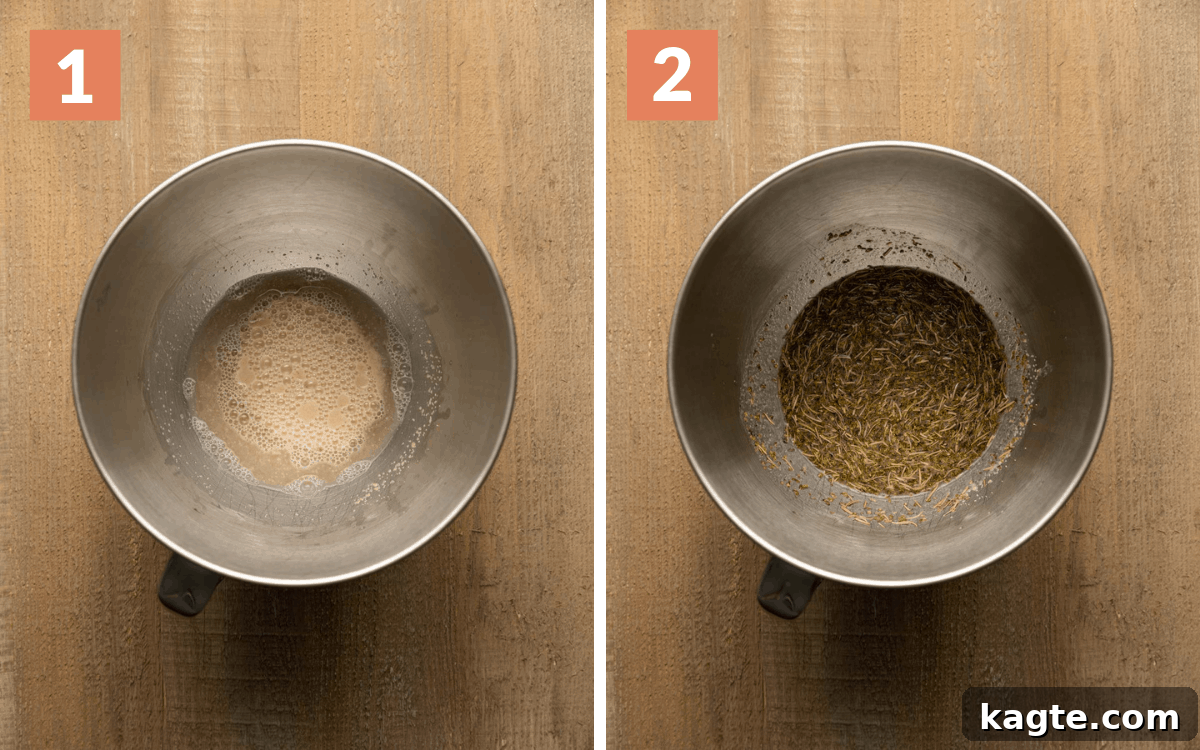
- Step 1: Begin by preparing your yeast. In the bowl of a stand mixer fitted with the paddle attachment, combine the warm water (around 110°F or 43°C), honey, and yeast. Whisk gently until the ingredients are well mixed. Let this mixture stand for 5 minutes. You should see it become bubbly and frothy, indicating the yeast is active and alive.
- Step 2: To the yeast mixture, add the melted and cooled butter, dried oregano, dried thyme, dried rosemary, and garlic powder. Whisk these ingredients together until they are fully incorporated, ensuring the herbs and garlic are evenly distributed throughout the liquid.
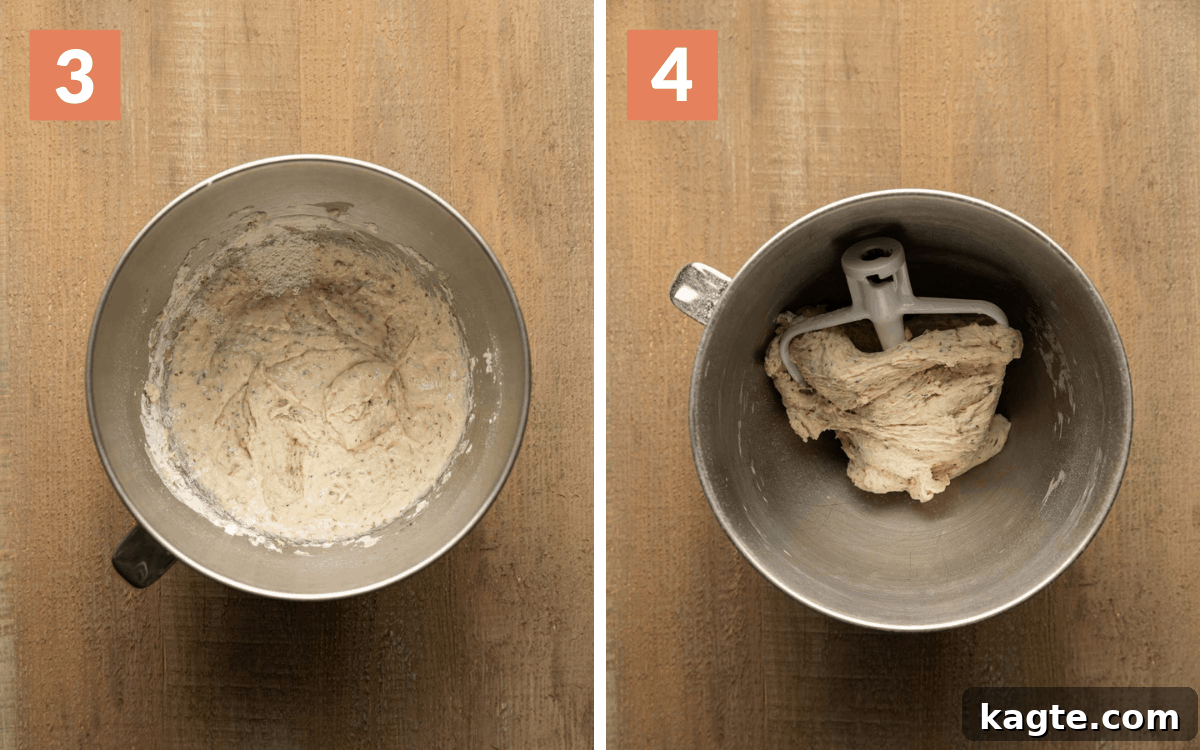
- Step 3: Add the first two cups (260 g) of bread flour and the salt to the mixture in the stand mixer. Mix on a low speed for approximately 2 minutes until the flour is mostly incorporated and a shaggy dough begins to form.
- Step 4: Incorporate an additional cup (130 g) of bread flour. Continue mixing on low speed for another 2 minutes. Observe the dough’s consistency: if it has gathered entirely around the paddle attachment and is no longer sticking to the sides of the bowl, you may not need more flour. If the dough still appears wet and adheres to the bowl, add an extra 1/4 cup (33 g) of flour. The goal is for the dough to form a large, cohesive clump around the paddle. Once this consistency is achieved, increase the mixer speed to medium and knead the dough for an additional 5 minutes to develop its gluten structure.
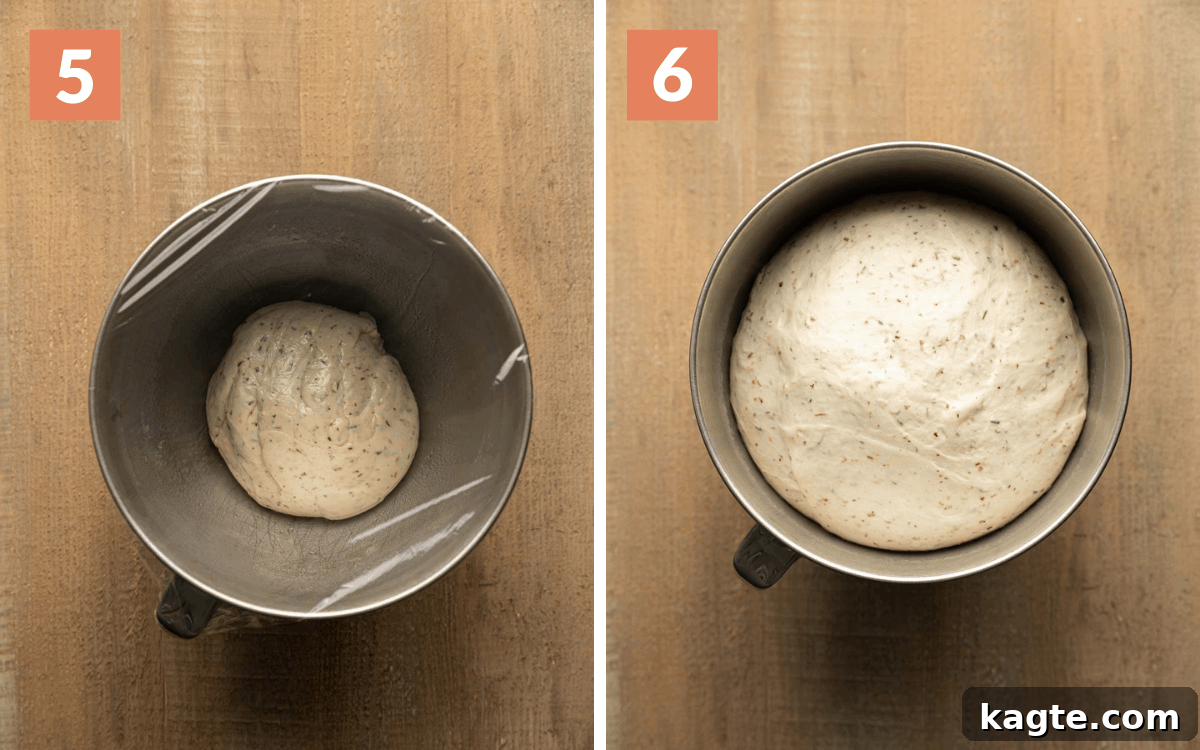
- Step 5: Lightly grease the inside of a clean bowl and the top surface of your dough with cooking spray or a thin layer of oil. This prevents the dough from sticking as it rises.
- Step 6: Cover the greased bowl tightly with plastic wrap or a clean kitchen towel. Place the dough in a warm environment (refer to the recipe notes or FAQs for optimal proofing conditions) and let it rise for 2 hours. During this time, the dough should visibly double in size, indicating successful yeast activation.
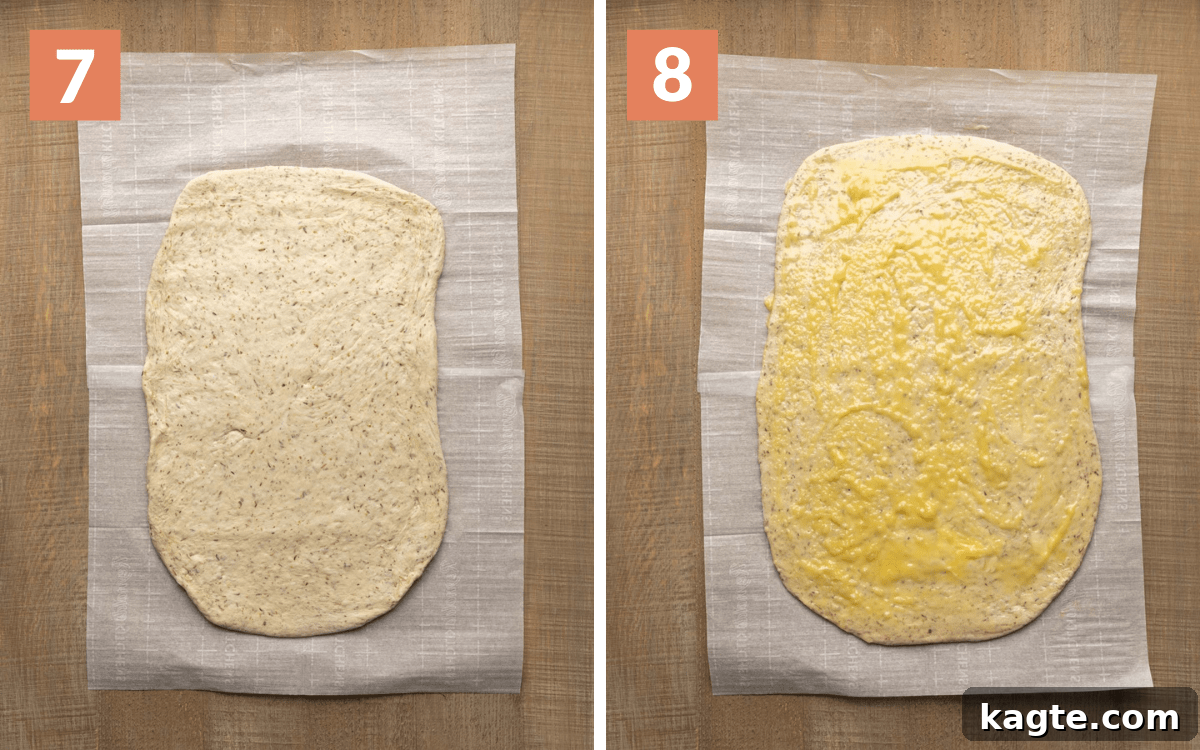
- Step 7: Gently punch the risen dough down to release the trapped air. The greasing from Step 5 should prevent it from sticking to your hands. Transfer the dough to a clean, lightly floured surface. Using a rolling pin, roll the dough out evenly into a large rectangle, approximately 18 inches by 12 inches.
- Step 8: In a small bowl, prepare the filling by combining the softened butter, salt, and freshly grated garlic. If the butter is too firm to spread easily, microwave the mixture for 5-10 seconds until it’s more spreadable (be careful not to melt it completely). Evenly spread this aromatic garlic butter mixture over the entire surface of the rolled-out dough rectangle, leaving a small border at one of the long edges if desired.
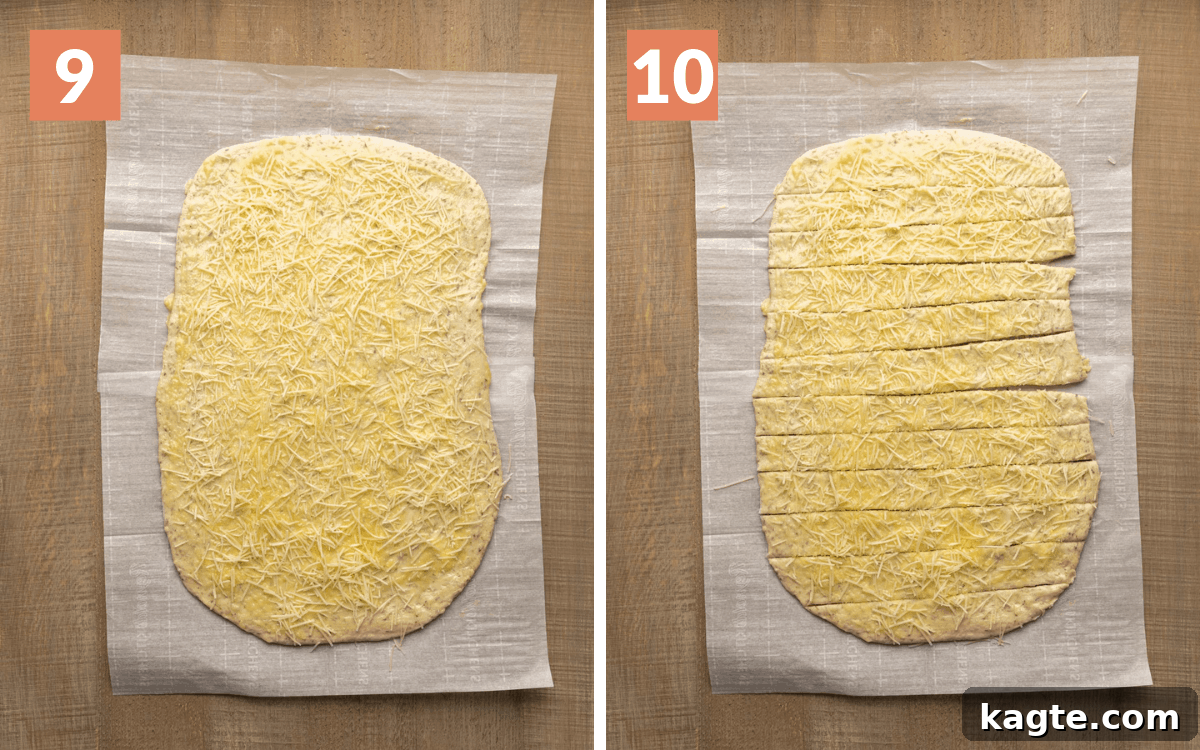
- Step 9: Generously sprinkle the shredded Parmesan cheese blend evenly over the entire butter-coated rectangle of dough. Ensure good coverage for maximum cheesy flavor in every roll.
- Step 10: Using a pizza cutter or a sharp knife, carefully cut the dough rectangle lengthwise into 12 even strips. Each strip should be approximately 1.5 inches wide.
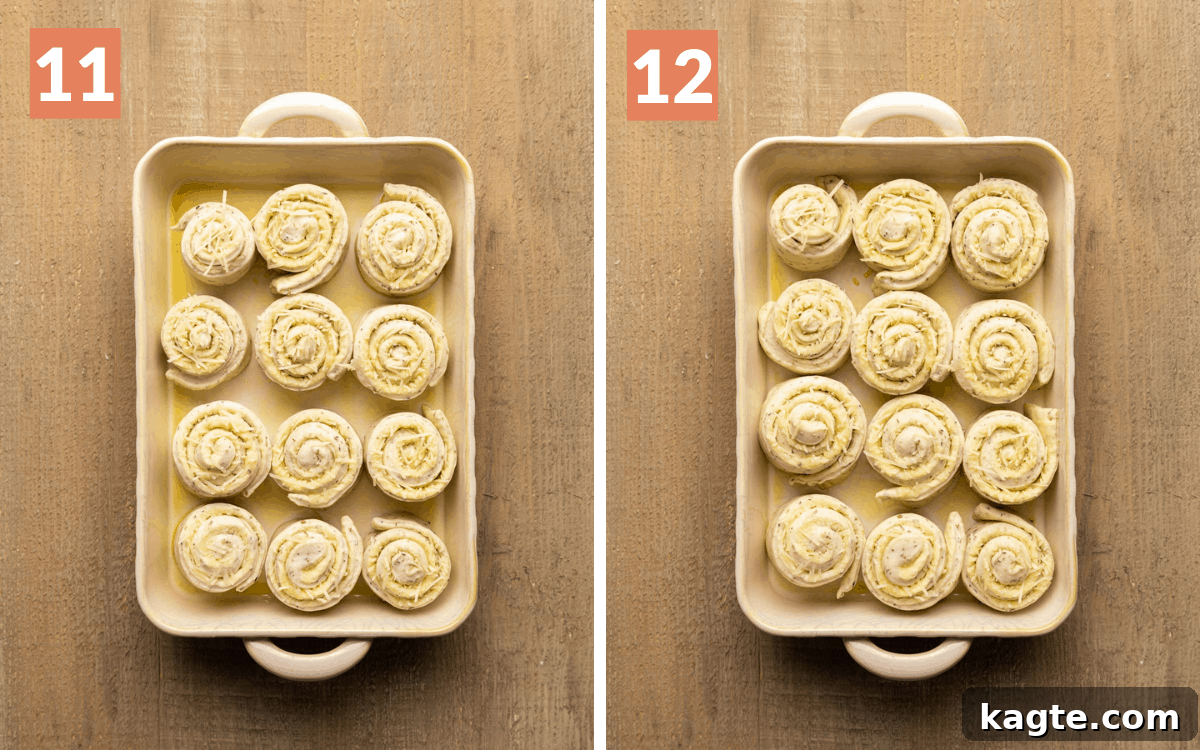
- Step 11: Carefully take each strip of dough and roll it up, starting from one end, to form a spiral (just like a cinnamon roll). Place these rolled pieces on their sides into a well-greased 9×13 inch baking dish. Arrange them snugly, but leave a little room for expansion.
- Step 12: Cover the baking dish loosely with plastic wrap or a kitchen towel. Allow the rolls to undergo a second rise for another 30 minutes in a warm environment. During this period, the rolls will puff up slightly, though the change might not be as dramatic as the first rise.
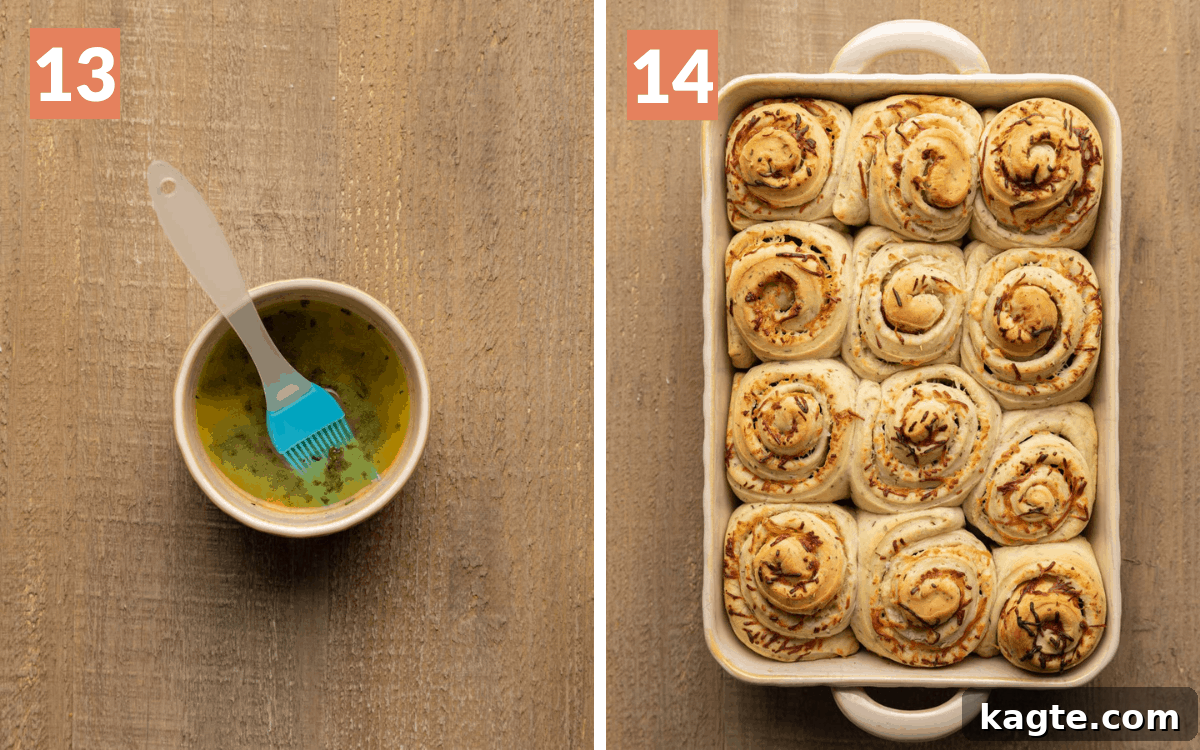
- Step 13: While the rolls are completing their second rise, preheat your oven to 350°F (175°C). In a small bowl, prepare the garlic butter topping by mixing together the melted butter, granulated garlic, and dried parsley until well combined.
- Step 14: Bake the rolls in the preheated oven for approximately 28-33 minutes. Keep an eye on them, and if the tops begin to brown too quickly, loosely cover the baking dish with aluminum foil to prevent over-browning. The rolls should emerge golden brown and fragrant. Immediately after removing them from the oven, generously brush the warm garlic butter topping over all the rolls. Serve warm and enjoy!
PRO TIP: Your stand mixer may wobble considerably during the 5-minute kneading process on medium speed. For safety and stability, I recommend holding the mixer firmly in place.
BAKING TIP: If you find your dough difficult to roll out and it keeps springing back, cover it loosely and let it rest for 5-10 minutes. This allows the gluten to relax, making it much easier to roll into the desired shape.
DON’T STRESS: Don’t worry if your strips aren’t perfectly even. Homemade rolls have a rustic charm, and they will still turn out incredibly delicious!
NOTE: The rolls will puff up slightly during the second rise, but don’t expect them to double in size again. A gentle increase in volume is what you’re looking for.
Expert Baking Tips for Flawless Rolls
Mastering yeast rolls can be incredibly rewarding. Here are some expert tips to ensure your Cheesy Garlic Herb Butter Rolls turn out perfectly every time, achieving that ideal balance of flavor and texture.
- Temperature Matters: Use a Thermometer. The temperature of your water is critical for yeast activation. Water that’s too cold won’t activate the yeast, leading to a flat dough. Water that’s too hot will kill the yeast, with the same undesirable result. Aim for precisely 110°F (43°C). A reliable food thermometer, such as this one, is an invaluable tool for accuracy.
- Measure Accurately with a Scale. Baking is a science, and precise measurements can make all the difference. While measuring cups are common, a kitchen scale provides the most accurate way to measure dry ingredients like flour, ensuring your dough has the correct hydration. This also means fewer dirty dishes! Consider investing in a good quality kitchen scale.
- Embrace the Stand Mixer for Kneading. Kneading dough by hand is a classic technique, but a stand mixer with a dough hook attachment makes the process significantly easier and more consistent, especially for developing gluten. A sturdy KitchenAid mixer is a fantastic investment for any baker. If kneading by hand, be prepared for a good arm workout and ensure you knead for at least 10-15 minutes until the dough is smooth and elastic.
- Avoid Overworking the Dough. While kneading is essential for gluten development, overworking the dough, particularly when rolling it out, can make your rolls tough instead of tender. Work with the dough just enough to achieve the desired shape and thickness, handling it gently to maintain its delicate structure.
- Create the Perfect Proofing Environment. A warm, draft-free environment is crucial for successful rising. If your kitchen is cool, try these tricks: Place the covered dough on a sunny windowsill, or use your oven. Preheat your oven to its lowest setting, then turn it off once it reaches temperature. Wait about 5 minutes for the intense heat to dissipate, then place the covered dough inside with the oven door cracked open. After 20-30 minutes, you can close the door to retain warmth. This method works well for both the first and second rises.
- Monitor Baking Closely. Ovens can vary, so keep a watchful eye on your rolls as they bake. If the tops are browning too quickly before the rolls are fully cooked through, loosely tent the baking dish with aluminum foil. This will prevent over-browning while allowing the inside to finish baking to a golden perfection.
- Consider Fresh Herbs for Extra Zing. While dried herbs are convenient and work beautifully, if you have fresh oregano, thyme, and rosemary on hand, feel free to use them! Roughly chop fresh herbs and use roughly three times the amount of dried herbs for an even more vibrant, fresh flavor.
- Storage and Freezing Options. Leftover rolls can be stored in an airtight container at room temperature for 1-2 days, or in the refrigerator for up to 3 days. For longer storage, these rolls freeze beautifully. Once cooled completely, wrap individual rolls tightly in plastic wrap and then place them in a freezer-safe bag for up to 2-3 months. Reheat frozen rolls in a low oven until warmed through.
Frequently Asked Questions (FAQs)
Here are answers to some common questions you might have when making these delicious garlic herb butter rolls:
As mentioned in the expert tips, a warm, draft-free environment is ideal. A sunny windowsill is great if available. Alternatively, you can use your oven: preheat it to its lowest temperature, then turn it off. After about 5 minutes, place your covered dough inside with the door slightly ajar. After 20-30 minutes, close the door to keep the warmth in. This can be repeated for the second proof as well.
Several factors can contribute to dough not rising. Your yeast might be expired or “dead,” meaning it won’t activate. The water used to activate the yeast might have been too hot, killing the yeast, or too cold, preventing activation. Another common reason is a proofing environment that is too cold, inhibiting yeast activity. Ensuring fresh yeast, correct water temperature, and a warm proofing spot are key.
Store any leftover Cheesy Garlic Herb Butter Rolls in an airtight container at room temperature for up to 2 days, or in the refrigerator for up to 3 days. For best results, gently warm them in the oven or microwave before serving again.
While the recipe calls for garlic powder in the dough for a more subtle, integrated flavor, you could experiment with finely minced fresh garlic. However, fresh garlic has a stronger, more pungent flavor when baked directly into dough and might alter the taste profile. Stick to the grated fresh garlic for the filling, where its flavor truly shines.
Yes, you can! After the second rise (Step 12), you can cover the baking dish tightly with plastic wrap and refrigerate the rolls for up to 12-18 hours. When you’re ready to bake, remove them from the fridge and let them come to room temperature for about 30-60 minutes before proceeding to Step 13. You may need to add a few extra minutes to the baking time.
Absolutely! Once the rolls are fully baked and completely cooled, you can freeze them. Wrap each roll individually in plastic wrap, then place them in a freezer-safe bag or container. They can be stored in the freezer for up to 2-3 months. To reheat, thaw them at room temperature or bake directly from frozen in a preheated oven (around 300°F/150°C) until warm and soft, about 10-15 minutes.
Serving Suggestions and Related Recipes
These Cheesy Garlic Herb Butter Rolls are incredibly versatile and pair beautifully with a wide array of dishes. They’re a perfect accompaniment to a hearty bowl of soup, a comforting stew, or a rich pasta dish. Imagine them alongside roasted chicken, a tender pot roast, or even a simple salad. They also make a fantastic appetizer on their own, or a delightful addition to any brunch spread.
More Savory Bread & Breakfast Ideas
Breakfast
Blueberry Coffee Cake with Greek Yogurt & Streusel
Bread
Savory Pumpkin Muffins with Parmesan & Herbs
Bread
Easy Cheddar Drop Biscuits
Bread
Savory Zucchini Muffins with Cheddar Cheese
Cheesy Garlic Herb Butter Rolls
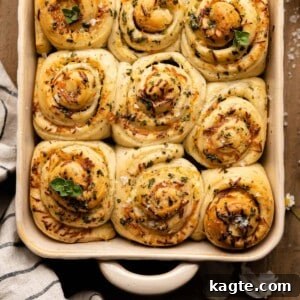
These Cheesy Garlic Herb Butter Rolls are as delicious as they sound. Loaded with fresh garlic, butter, a variety of herbs, parmesan cheese, and more garlic, what is not to love? They are rolled up cinnamon roll style to ensure flavor in every bite. Absolutely addicting!
Ingredients
Dough
- 1 cup (240 ml) water, warmed to 110 degrees
- 1 Tablespoon honey*
- 2 1/4 teaspoons active dry instant yeast*
- 3 Tablespoons (42g) unsalted butter, melted and cooled
- 1 Tablespoon dried oregano
- 1 teaspoon dried thyme
- 1 Tablespoon dried rosemary
- 1 teaspoon garlic powder
- 3 – 3 1/4 cups (390-422g) bread flour*
- 2 teaspoons salt
Garlic Butter Filling
- 6 Tablespoons unsalted butter, softened
- 6-8 cloves garlic, grated
- 1 teaspoon salt
- 1 cup shredded parmesan cheese blend*
Garlic Butter Topping
- 2 Tablespoons unsalted butter, melted
- 1/4 teaspoon granulated garlic
- 1/2 teaspoon dried parsley
Instructions
- Review all recipe notes and instructions before beginning.
- In a stand mixer fitted with the paddle attachment, add the water, honey, and yeast to the bowl. Whisk until combined. Let stand for 5 minutes. The mixture should be bubbly/frothy.
- Add the butter, oregano, thyme, rosemary, and garlic powder. Whisk until combined.
- Add 2 cups (260 g) of flour and the salt. Mix on low for 2 minutes.
- Add another cup (130 g) of flour. Mix on low for another 2 minutes. If the dough is all stuck to the paddle and no longer sticking to the side of the bowl, do not add anymore flour. If the dough is wet enough to still stick to the sides of the bowl, add another 1/4 cup (33 g) flour. The dough should form in a large clump around the paddle. Once this occurs, mix the dough on medium for another 5 minutes.
- Grease the bowl and the top of the dough with spray oil.
- Cover and let rise in a warm environment (see recipe notes) for 2 hours. The dough should double in size.
- Punch the dough down. The dough should be greased enough that it does not stick to your hands. On a clean, lightly floured surface, roll the dough out into an 18 x 12 rectangle using a rolling pin.
- In a small bowl, combine the butter, salt, and garlic for the filling. Microwave for 5-10 seconds to make it more spreadable if needed. Spread the filling over the entire rectangle.
- Sprinkle the cheese over the entire rectangle.
- Using a pizza cutter, cut the dough into 12 even strips (about 1.5 inches each).
- Roll the pieces up and place them on their sides into a well-greased 9 x 13 baking dish.
- Cover and let rise for another 30 minutes in a warm environment.
- While the rolls rise, preheat the oven to 350°F (175°C). Mix together the butter, granulated garlic, and parsley to make the topping.
- Bake the rolls for about 28-33 minutes. Cover loosely with foil towards the end if the tops look too brown. The tops should be golden. Brush with the garlic butter immediately and serve warm.
Notes
Honey: You can swap 1 Tablespoon of granulated sugar for the honey if preferred.
Yeast: For superior baking results, I highly recommend Red Star Platinum Superior Baking Yeast for its consistent performance.
Bread Flour: Bread flour is used to achieve a chewy texture. If you don’t have it, all-purpose flour can be substituted, but the rolls may have a slightly softer crumb.
Parmesan Cheese Blend: For variety, you can substitute the Parmesan with 1 cup of shredded cheddar or mozzarella cheese.
Use a thermometer: Accurate water temperature (around 110°F or 43°C) is crucial for yeast activation. Too hot kills the yeast, too cold won’t activate it. A food thermometer is recommended.
Use a scale to measure ingredients: For the most accurate and consistent baking results, measuring ingredients, especially flour, by weight using a kitchen scale is highly recommended.
Use a stand mixer to knead: While hand kneading is possible, a stand mixer with a dough hook makes the kneading process significantly easier and ensures proper gluten development for tender rolls.
Do not overwork the dough: When rolling out the dough, work quickly and gently. Overworking can lead to tough rolls rather than light and fluffy ones.
Keep an eye on the rolls as they bake: Oven temperatures can vary. If the tops of your rolls are browning too quickly, loosely tent the baking dish with aluminum foil to prevent burning while the interior finishes cooking.
Nutrition
Calories: 380 kcal |
Carbohydrates: 51 g |
Protein: 12 g |
Fat: 14 g |
Saturated Fat: 8 g |
Polyunsaturated Fat: 1 g |
Monounsaturated Fat: 4 g |
Trans Fat: 1 g |
Cholesterol: 35 mg |
Sodium: 714 mg |
Fiber: 3 g |
Sugar: 2 g
Nutrition information is automatically calculated, so should only be used as an approximation.