
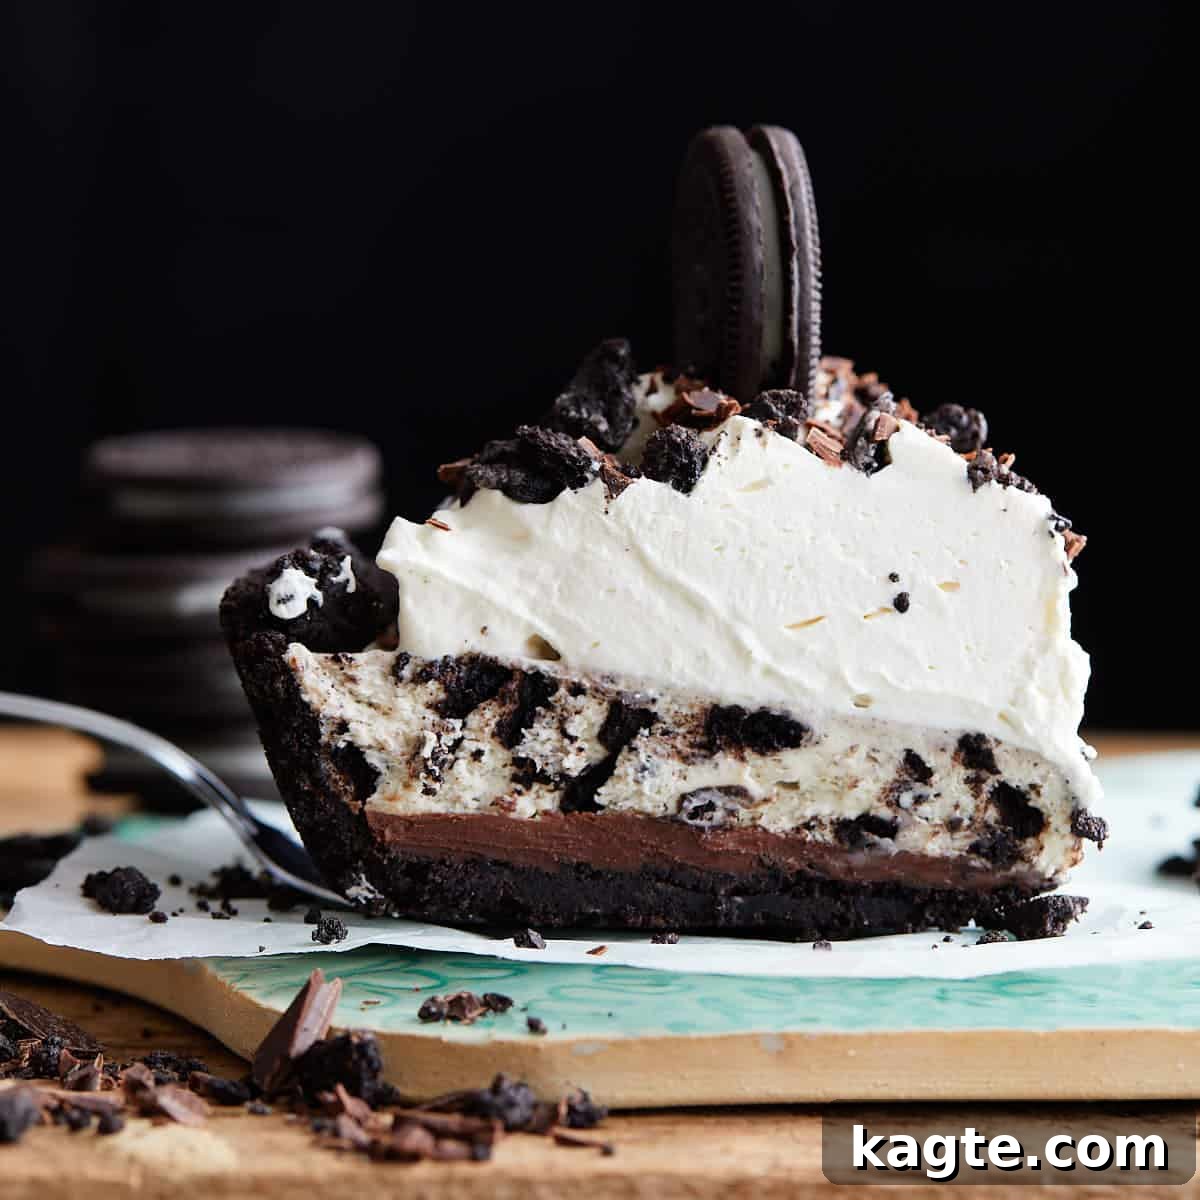
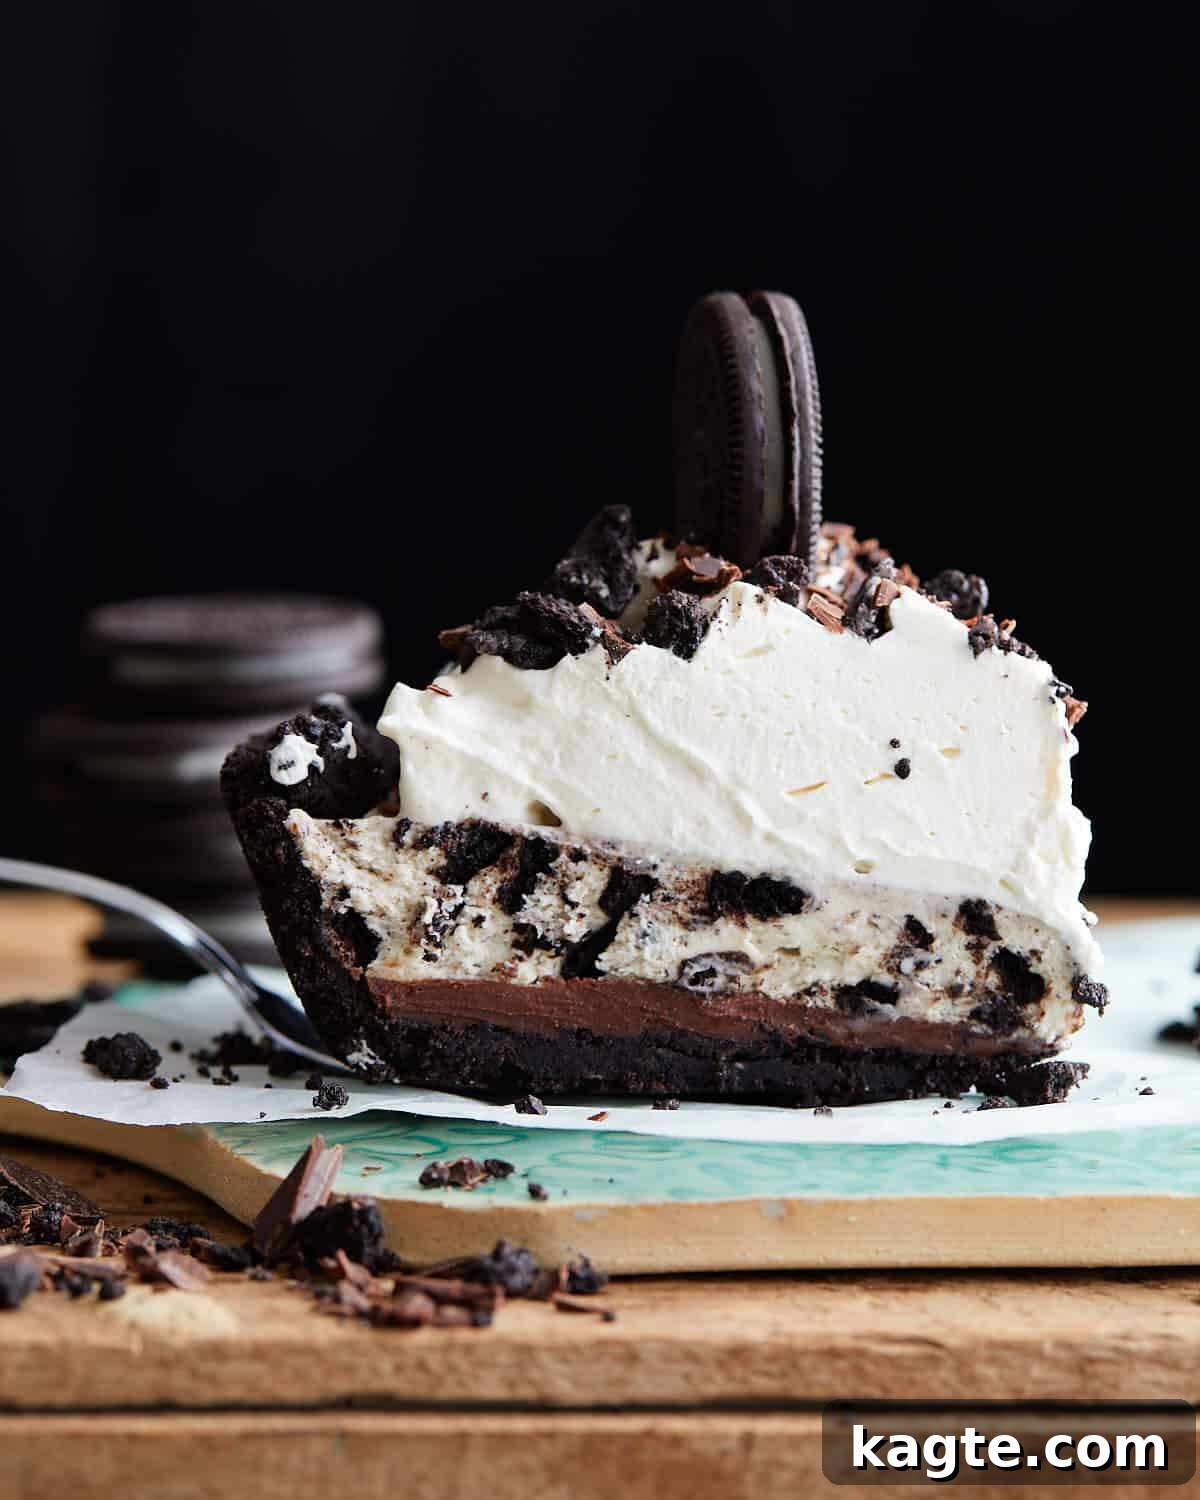
Welcome to the ultimate guide for creating the most luscious and effortless No Bake Oreo Cheesecake Pie! This isn’t just a dessert; it’s a celebration of cookies and cream, meticulously crafted into four decadent layers that promise to be the star of any gathering. Imagine a rich, chocolatey Oreo crust, a smooth layer of dark chocolate ganache, a creamy vanilla Oreo cheesecake filling, and a generous topping of fluffy homemade whipped cream. This pie is a symphony of textures and flavors, making it the perfect showstopper for summer BBQs, holiday feasts, or simply a delightful treat to brighten any day. It’s incredibly easy to make, requires no oven for the filling, and is guaranteed to be a crowd-pleaser that leaves everyone asking for more.
If you’re a fan of uncomplicated yet utterly delicious cheesecake recipes, you’ll love exploring some of our other creations. For a charming individual dessert, be sure to try our No-Bake Mini Cheesecakes, complete with a classic graham cracker crust and a touch of chocolate ganache. Or, for those who crave a rich, nutty flavor, our Reese’s Peanut Butter Pie offers an irresistible combination of peanut butter and chocolate. We’ve even crafted a bite-sized version of this very dessert with our Mini No Bake Oreo Cheesecakes, perfect for portion control or party platters. And for the true chocolate aficionados, our Individual Flourless Chocolate Cakes provide an intensely rich and fudgy experience.
Dive into this guide to discover how simple it is to whip up this show-stopping dessert that tastes like it came straight from a gourmet bakery, all from the comfort of your kitchen without turning on the oven for the main event.
Table of Contents
- What Is No-Bake Cheesecake Filling Made Of?
- Why You’ll Love This Recipe
- Ingredients & Substitutions for the Perfect Pie
- How to Make No-Bake Oreo Cheesecake Pie
- Expert Tips & Delicious Variations
- Storage Tips to Keep Your Pie Fresh
- Recipe FAQs
- More Irresistible Dessert Recipes
- No Bake Oreo Cheesecake Pie Recipe Card
What Is No-Bake Cheesecake Filling Made Of?
The beauty of a no-bake cheesecake lies in its simplicity and its delightful, airy texture. Unlike its baked counterpart, a no-bake cheesecake filling achieves its structure without the need for eggs or an oven. The core ingredients typically mirror those of a traditional cheesecake: rich cream cheese, a touch of sour cream (or sometimes lemon juice for tang), fragrant vanilla extract, and a sweetener like granulated or powdered sugar. The crucial difference is the absence of eggs, which is why it’s perfectly safe and incredibly delicious to enjoy without any cooking.
To give the no-bake cheesecake its signature light, fluffy, and incredibly smooth consistency, it typically incorporates a generous amount of whipped cream. This is a key distinguishing factor from a baked cheesecake, which relies on eggs for its firm yet creamy texture. The powdered sugar often used in no-bake fillings also contributes to its silkiness and helps stabilize the whipped cream, ensuring the pie holds its shape beautifully once chilled. The result is a filling that melts in your mouth, offering a refreshing contrast to the denser, richer baked cheesecakes.
Why You’ll Love This Recipe: A Decadent Delight
This No-Bake Oreo Cheesecake Pie isn’t just a dessert; it’s an experience. Every bite delivers a harmonious blend of textures and flavors that will captivate your taste buds. Here’s why this recipe will quickly become a favorite in your repertoire:
- Simply Decadent: Prepare yourself for an unbelievably rich and indulgent treat. This recipe is generously loaded with heavy cream, luscious cream cheese, and a double dose of chocolate from the Oreos and ganache. It’s a truly satisfying dessert that feels luxurious without being overly complicated to make. The depth of flavor is truly remarkable, satisfying even the most intense sweet cravings.
- Exquisitely Layered Perfection: What sets this Oreo pie apart is its magnificent four-layer structure, each contributing a unique element to the overall experience. You start with a robust homemade Oreo cookie crust, followed by a thick, velvety layer of chocolate ganache. Next comes the star: a smooth, vanilla-infused Oreo cheesecake filling, generously studded with crushed cookies. Finally, it’s crowned with a mound of light, airy homemade whipped cream, creating a visual and textural masterpiece.
- Irresistible Homemade Oreo Cookie Crust: Forget about flimsy store-bought crusts! Our recipe guides you in creating a sturdy, flavorful Oreo crust that forms the perfect foundation for this pie. The secret ingredient? A touch of salted butter, which not only binds the crumbs but also enhances the rich chocolate flavor of the Oreos, adding a subtle, delightful contrast that elevates the entire pie. Baking the crust briefly also ensures it stays crisp and doesn’t get soggy.
- Rich Chocolatey Bliss: For true chocolate lovers, this pie delivers on all fronts. Beyond the crushed Oreo crust and the delightful chunks of Oreos mixed throughout the filling, a thick, glossy layer of chocolate ganache is absolutely essential. This deep, intense chocolate layer adds significant depth and complexity, preventing the pie from being one-note. It’s a vital component that balances the creamy sweetness of the cheesecake, making each bite incredibly satisfying.
- Velvety Smooth Cheesecake: The cheesecake layer itself is a marvel of creamy texture. The combination of softened cream cheese, subtle sweetness, and gently folded whipped cream creates a filling that is incredibly silky, light, and airy, dissolving deliciously on your tongue. Topped with even more fluffy whipped cream, this pie is a dream for anyone who appreciates a truly smooth and luscious dessert.
- Effortless No-Bake Filling: One of the biggest advantages of this recipe is the no-bake filling. Without eggs, there’s no need to worry about water baths, cracking, or uneven baking. This makes the preparation much simpler and less intimidating than traditional baked cheesecakes, perfect for novice bakers and seasoned pros alike looking for a stress-free dessert.
- Simpler Than Traditional Cheesecake: Say goodbye to the common anxieties associated with baked cheesecakes! The absence of baking for the filling eliminates the risks of over-baking, cracking, or tedious water baths. This streamlined process makes this recipe significantly easier and more approachable, allowing you to achieve professional-level results with minimal fuss and maximum enjoyment.
Ingredients & Substitutions for the Perfect Pie
Crafting this incredible No-Bake Oreo Cheesecake Pie begins with selecting the right ingredients. Each component plays a vital role in achieving the perfect flavor and texture profile. Here’s a closer look at what you’ll need and some helpful substitution tips:
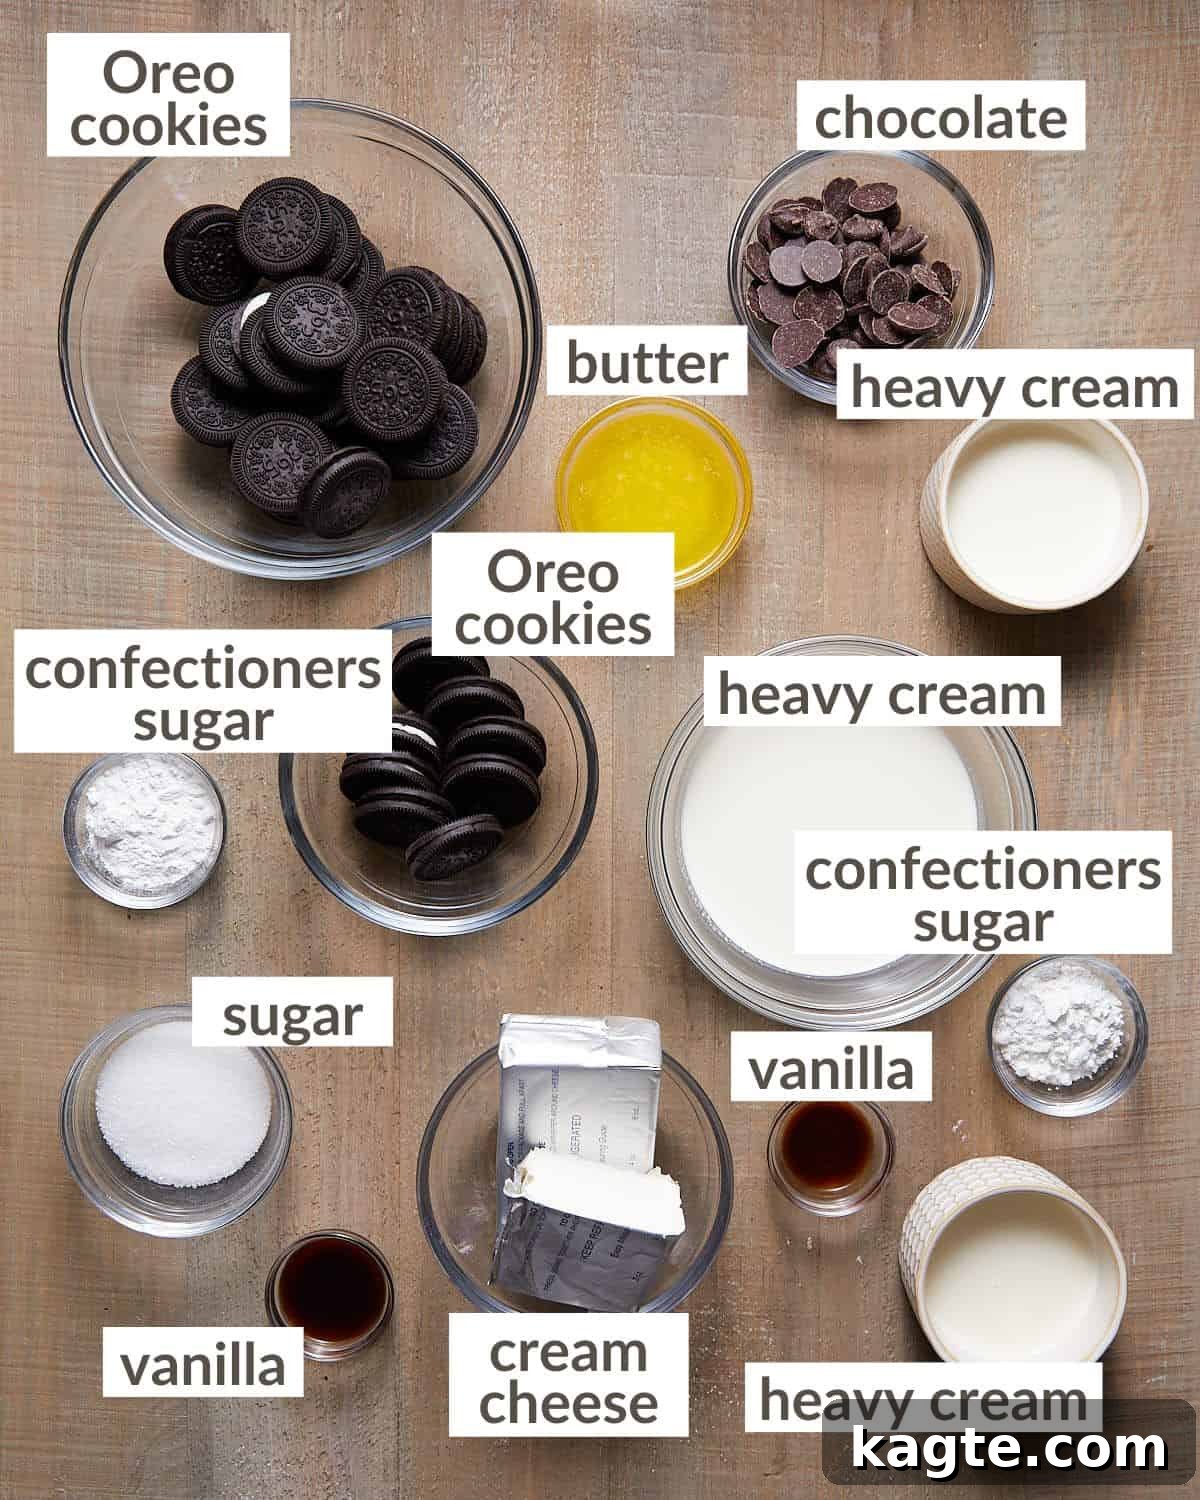
- Oreos: The star of the show! You’ll need approximately one standard package of regular (not double-stuffed) Oreos for this recipe. This quantity is perfectly balanced to provide enough cookies for both the robust crust, the delightful crunch within the cheesecake filling, and additional crumbs for a decorative topping. Using regular Oreos ensures the right cookie-to-cream ratio for the crust and prevents the filling from becoming overly sweet. If you prefer a different flavor profile, consider using mint Oreos for a refreshing twist, or golden Oreos for a vanilla-forward pie.
- Semi-Sweet Chocolate: For the decadent chocolate ganache layer, the quality of your chocolate truly matters. We highly recommend using chopped chocolate bars or high-quality chocolate wafers or chips. Brands like Guittard or Ghirardelli offer superior melting properties and a richer, more complex chocolate flavor compared to standard baking chips, which often contain stabilizers that prevent smooth melting. A good quality semi-sweet chocolate ensures a glossy, luscious ganache that adds significant depth to the pie.
- Cream Cheese: The foundation of any great cheesecake! It is absolutely essential to use full-fat, brick-style cream cheese. Avoid using whipped or low-fat varieties, as they contain too much water and will result in a runny, unstable filling that won’t set properly. For the smoothest possible cheesecake filling, remember to pull your cream cheese out of the refrigerator about 1 hour before you plan to start mixing. This allows it to soften to room temperature, ensuring it beats smoothly with the sugar and prevents any unsightly lumps in your final product.
- Heavy Cream / Heavy Whipping Cream: This ingredient is crucial for both the ganache and the various whipped cream components. Ensure you’re using heavy cream (often labeled as heavy whipping cream), which has a fat content of 36% or more. This high fat content is what allows it to whip up into stiff, stable peaks for the cheesecake filling and topping. For best results when whipping, ensure your heavy cream is extremely cold. You can even place your mixing bowl and whisk attachment in the freezer for 5-10 minutes beforehand to help the cream whip more efficiently and maintain its volume.
- Melted Salted Butter: Used for binding the Oreo crust. The salted butter not only holds the crumbs together but also complements the sweetness of the Oreos, creating a more balanced flavor. Unsalted butter can be used, but you might want to add a tiny pinch of salt to the crust mixture.
- Granulated Sugar & Confectioners’ Sugar: Granulated sugar adds sweetness and helps dissolve smoothly into the cream cheese, while confectioners’ sugar (powdered sugar) contributes to the silky texture of the filling and stabilizes the whipped cream. Do not interchange these two in the filling; each has a specific role.
- Vanilla Extract: Pure vanilla extract provides a warm, classic flavor that rounds out the sweetness of the cheesecake and enhances the cookies and cream profile. Use good quality vanilla for the best results.
A complete list of ingredients and precise amounts for each component of this delightful pie can be found on the recipe card below.
How to Make No-Bake Oreo Cheesecake Pie
Creating this stunning No-Bake Oreo Cheesecake Pie is a straightforward and rewarding process. Follow these steps to assemble your decadent dessert:
Quick Overview
Here’s a snapshot of the key stages involved in bringing this delightful pie to life:
- Prepare and bake the perfectly crunchy Oreo crust.
- Whip up the rich, glossy chocolate ganache.
- Create the silky, cookies-and-cream cheesecake filling.
- Carefully layer the ganache and filling into the prepared crust.
- Chill the pie thoroughly to allow all layers to set.
- Top generously with freshly made whipped cream and garnishes before serving.
Step by Step Instructions
Let’s walk through each stage to ensure your No-Bake Oreo Cheesecake Pie turns out absolutely perfect:
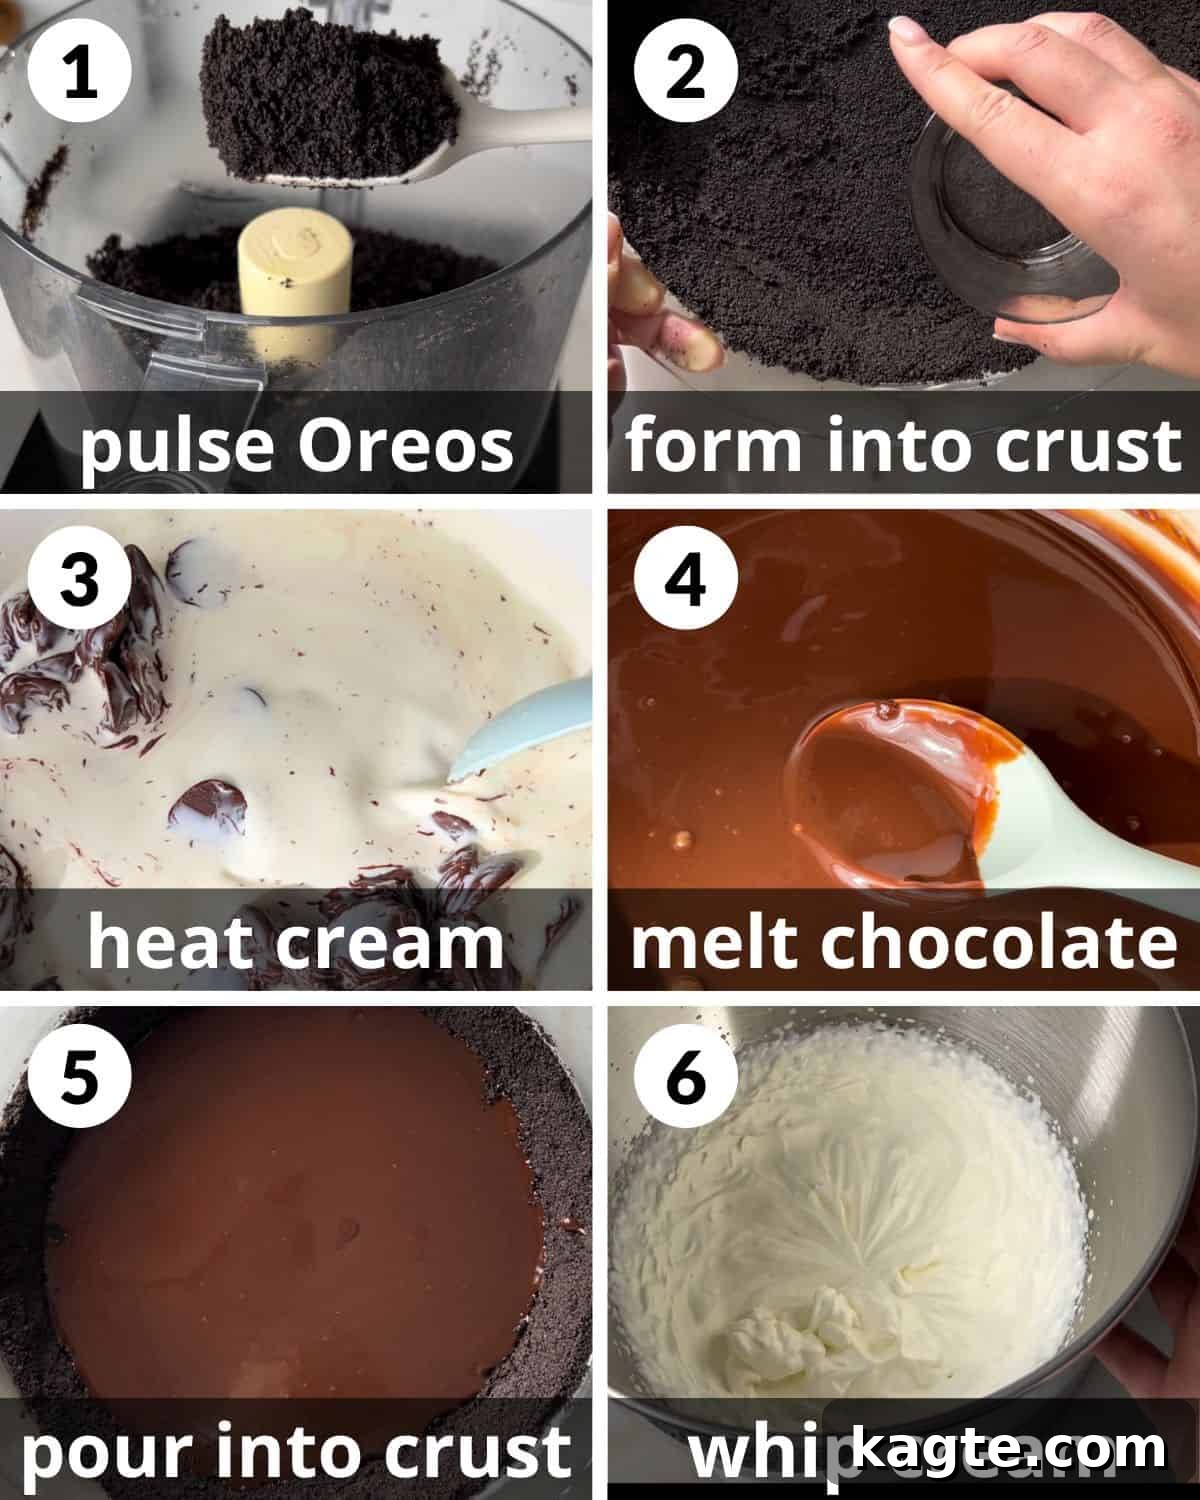
Baking the crust for a short time is a crucial step that prevents it from becoming soggy when chilled with the wet filling, ensuring a perfectly crisp base.
Step 1: Prepare the Oreo Crust. Begin by preheating your oven to 350 degrees Fahrenheit (175°C). In a large food processor, combine 22 Oreo cookies (regular, not double-stuffed). Pulse until they form a fine, sand-like crumb. Pour in 4 tablespoons (57g) of melted salted butter and pulse again until the crumbs are evenly moistened and resemble wet sand. This ensures a cohesive crust.
Step 2: Form and Bake the Crust. Transfer the buttery Oreo crumbs into a 9.5-inch pie dish. Using your hands or the flat bottom of a glass, firmly press the crumbs into an even layer across the bottom and up the sides of the pie dish. Bake for 8-10 minutes. This short baking time helps the crust set and become delightfully crisp, preventing it from getting soggy later. Once baked, remove the crust from the oven and allow it to cool completely on a wire rack.
Step 3: Begin the Chocolate Ganache. In a small saucepan, gently heat 1/2 cup of heavy cream over medium-low heat. Watch it carefully; it should reach a gentle simmer with small bubbles forming around the edges, but it should not come to a rolling boil. Once simmering, remove the saucepan from the heat immediately. Add 4 ounces of high-quality semi-sweet chocolate (chopped or wafers) to the hot cream. Stir continuously until the chocolate is mostly melted and the mixture begins to look smooth.
Step 4: Achieve Silky Ganache. Continue stirring the ganache, even after removing it from the heat. The residual heat from the cream will melt any remaining small pieces of chocolate. Keep stirring until the ganache is completely smooth, glossy, and uniform in color. It should have a beautiful, pourable consistency.
Step 5: Layer the Ganache. Pour the freshly made chocolate ganache into the cooled Oreo crust. Using the back of a spoon or an offset spatula, carefully spread the ganache into an even layer, ensuring it covers the bottom of the crust entirely. Once spread, immediately place the pie crust with the ganache layer into the freezer. This step allows the ganache to firm up quickly while you prepare the cheesecake filling.
Step 6: Whip the Cream for Filling. In the bowl of a stand mixer fitted with a paddle attachment (or using an electric hand mixer), pour 1/2 cup of very cold heavy whipping cream. Beat on medium-high speed until stiff peaks form. The cream should hold its shape when the beater is lifted. Be careful not to overbeat, as it can turn into butter. Set this whipped cream aside; it will be gently folded into the cream cheese mixture.
When combining the whipped cream with the cream cheese mixture, be incredibly gentle. Overmixing can deflate the whipped cream, leading to a runny cheesecake filling that won’t set properly and will lose its desired light, airy texture.
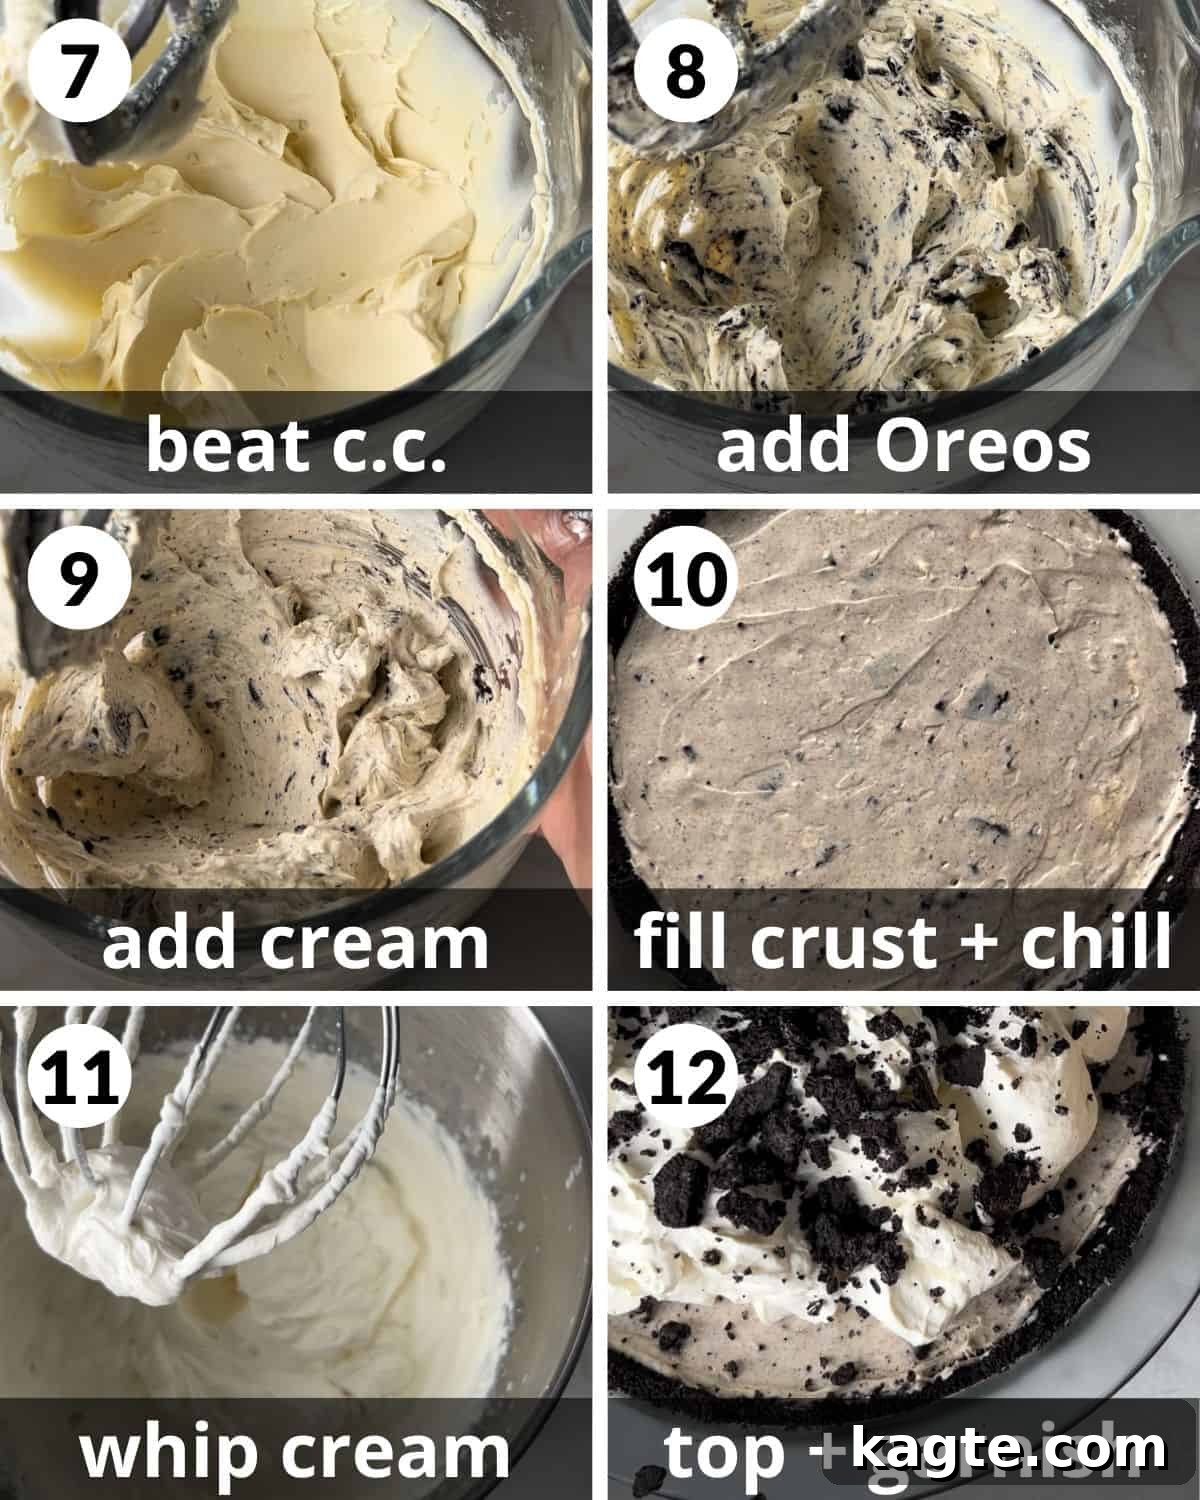
Step 7: Prepare the Cream Cheese Mixture. In a separate, clean mixing bowl, using a stand mixer with a paddle attachment or an electric hand mixer, beat 12 ounces of full-fat, brick-style cream cheese (softened to room temperature), 1/4 cup (50g) of granulated sugar, 2 tablespoons (15g) of confectioners’ sugar, and 2 teaspoons of vanilla extract. Beat on medium speed until the mixture is completely smooth, light, and creamy, with no lumps whatsoever. Scrape down the sides of the bowl as needed to ensure everything is well combined.
Step 8: Incorporate Crushed Oreos. Take 8 additional Oreo cookies and crush them into medium-sized pieces. You can do this by placing them in a plastic bag and crushing them with a rolling pin, or by hand. It’s perfectly fine to have some larger chunks for added texture, as these should not be as finely ground as the crust crumbs. Gently add these crushed Oreos to the smooth cream cheese mixture and mix on low speed, or fold by hand, until they are just combined. You want distinct Oreo pieces throughout the filling.
Step 9: Fold in Whipped Cream. Now, very carefully add the reserved whipped cream from Step 6 to the cream cheese and Oreo mixture. Using a spatula, gently fold the whipped cream into the cheesecake mixture. The key here is to fold, not beat, to prevent deflating the cream. Continue folding until the whipped cream is just incorporated and no streaks remain, ensuring the filling maintains its light and airy texture.
Step 10: Fill and Chill the Pie. Spoon the completed cheesecake filling into the cooled pie crust, which now has its set ganache layer. Using an offset spatula or the back of a spoon, gently spread the filling into an even and smooth layer across the top. Cover the pie loosely with plastic wrap, being careful not to touch the surface of the filling. Place the pie in the refrigerator and chill for a minimum of 6-8 hours. For optimal setting and the cleanest slices, we highly recommend chilling the pie overnight. This allows the filling to firm up completely.
Step 11: Prepare the Whipped Cream Topping. Just before you are ready to serve the pie, prepare the final layer of fresh whipped cream. In a clean mixing bowl, using a stand mixer fitted with a paddle attachment or an electric hand mixer, combine 1 1/2 cups of very cold heavy whipping cream, 3 tablespoons (23g) of confectioners’ sugar, and 1 teaspoon of vanilla extract. Whip on medium-high speed until stiff peaks form. The cream should be light, fluffy, and hold its shape well.
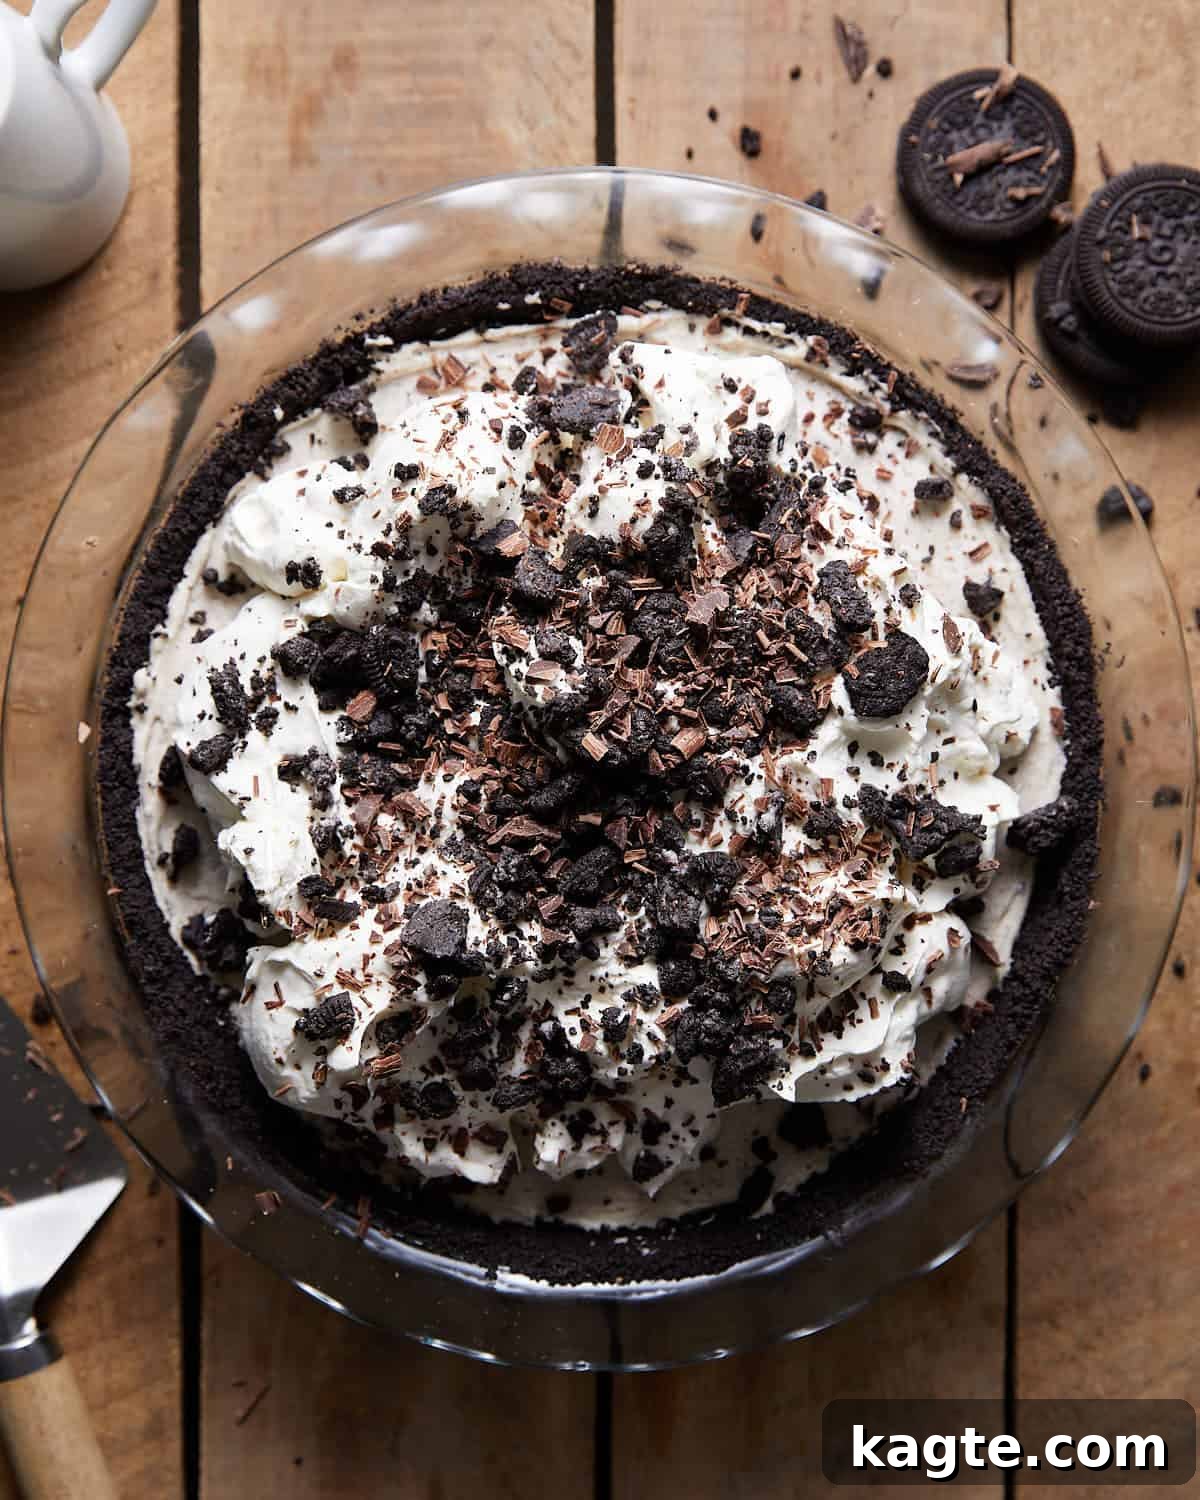
Step 12: Garnish and Serve. Generously spoon all of the freshly whipped cream on top of the thoroughly chilled and set cheesecake pie. For an extra touch of elegance and flavor, garnish the pie with a sprinkle of grated chocolate and additional crushed Oreos. Slice and serve immediately to enjoy this magnificent, layered dessert!
Expert Tips & Delicious Variations
Achieving the perfect No-Bake Oreo Cheesecake Pie is all about understanding a few key techniques and being open to creative twists. Here are some expert tips to ensure your pie is a smashing success, along with ideas for delicious variations:
- Always Bake the Crust: While the filling is no-bake, giving the Oreo crust a short bake (8-10 minutes) is a game-changer. This simple step toasts the cookie crumbs slightly, enhancing their flavor and, more importantly, prevents the crust from becoming soggy after it’s filled and chilled. A baked crust remains crisp and provides a wonderful textural contrast to the creamy filling.
- Room Temperature Cream Cheese is Non-Negotiable: This is perhaps the most crucial tip for a smooth cheesecake filling. Cold cream cheese will be lumpy and difficult to incorporate fully with the sugar, leading to a textured, unappetizing filling. Always allow your full-fat, brick-style cream cheese to soften at room temperature for at least 1 hour (or even 2 hours if your kitchen is cool) before you begin mixing. It should be soft enough to easily press your finger into.
- Ensure Your Heavy Cream is Ice Cold: For whipped cream that holds its volume and whips up beautifully, temperature is everything. Heavy cream (or heavy whipping cream) must be extremely cold. You can give it a head start by popping the entire carton into the freezer for 5-10 minutes before you plan to whip it. Even better, place your mixing bowl and whisk attachment in the freezer for about 15 minutes prior to whipping. The cold environment helps the fat globules in the cream emulsify more efficiently, resulting in stiffer, more stable peaks.
- Mix Oreos and Whipped Cream Gently: When incorporating the crushed Oreos into the cream cheese mixture, and especially when folding in the whipped cream, gentle handling is key. For the Oreos, you want distinct pieces for texture, not a fine powder blended completely into the filling. Overmixing can break down the cookie pieces too much. For the whipped cream, aggressive beating or overmixing will cause it to deflate, resulting in a runny, dense cheesecake filling rather than the desired light and airy texture. Use a spatula and a gentle folding motion until just combined.
- Chill the Pie Overnight for Best Results: Patience is a virtue when it comes to no-bake cheesecakes. While 6-8 hours is the minimum chilling time, an overnight rest in the refrigerator is highly recommended. This allows all the layers, particularly the cheesecake filling, to set completely and firm up. The result will be clean, picture-perfect slices that hold their shape beautifully, rather than a soft, messy slice.
Delicious Variations to Try:
- Mint Oreo Dream: Swap regular Oreos for Mint Oreos in both the crust and the filling. You can also add a drop or two of peppermint extract to the cheesecake filling for an intensified mint flavor.
- Peanut Butter Swirl: After spreading the cheesecake filling, drizzle melted peanut butter over the top and swirl it gently with a knife before chilling. Garnish with chopped Reese’s Peanut Butter Cups.
- White Chocolate Raspberry: Use Golden Oreos for the crust. For the ganache, use high-quality white chocolate. Swirl a raspberry puree or jam into the cheesecake filling before chilling, and top with fresh raspberries.
- Coffee Lovers’ Delight: Add 1-2 teaspoons of instant espresso powder (dissolved in a tiny bit of hot water) to the cheesecake filling for a subtle coffee flavor. A coffee-flavored liqueur could also be used for an adult twist.
- Caramel Drizzle: After chilling, drizzle homemade or store-bought caramel sauce over the top of the whipped cream just before serving. A sprinkle of sea salt can balance the sweetness beautifully.
- Different Crusts: While Oreos are classic, feel free to experiment with other cookie crusts like Nilla Wafers, graham crackers, or shortbread cookies. Adjust the butter quantity as needed for desired consistency.
Storage Tips to Keep Your Pie Fresh
Once you’ve gone through the effort of creating this magnificent No-Bake Oreo Cheesecake Pie, you’ll want to ensure it stays fresh and delicious for as long as possible. Proper storage is key to maintaining its creamy texture and vibrant flavors. Here’s how to store your pie, including tips for freezing leftovers:
- Refrigerator Storage: Any leftover pie should be stored covered in the refrigerator. To prevent the delicate whipped cream from absorbing refrigerator odors or drying out, gently cover the pie dish with plastic wrap, ensuring it doesn’t touch the whipped topping. Alternatively, you can cover individual slices with plastic wrap. When stored correctly, the pie will remain fresh and delightful for 2-3 days. It’s crucial not to leave the pie out of the refrigerator for extended periods, especially in warm environments, as the cream cheese and whipped cream-based filling will melt and soften quickly, compromising its texture and safety.
- Freezing Leftovers for Longer Enjoyment: This No-Bake Oreo Cheesecake Pie freezes exceptionally well, allowing you to savor it for up to 3 months. To freeze, it’s best to slice the remaining pie into individual pieces. This makes thawing and serving much more convenient. Gently wrap each slice first with plastic wrap, ensuring a tight seal to prevent freezer burn. Then, wrap each plastic-wrapped slice again with aluminum foil for an extra layer of protection. Place all of the individually wrapped pieces into a freezer-safe bag or an airtight container, and seal tightly. When you’re ready to enjoy a slice, simply remove it from the freezer. Unwrap the desired portion and let it sit out at room temperature for about 30 minutes to an hour before serving. This allows the cheesecake to soften slightly and reach its optimal creamy texture. We do not recommend thawing the entire pie or individual slices in the refrigerator overnight, as this can sometimes lead to a slightly watery consistency. Room temperature thawing is usually sufficient and yields the best results.
Recipe FAQs
Here are answers to some of the most common questions about making and enjoying your No-Bake Oreo Cheesecake Pie:
While some no-bake cheesecake recipes suggest a no-bake crust, I highly recommend and strongly advise baking the crust for this Oreo cheesecake pie. Baking the crust for just 8-10 minutes at 350°F (175°C) is a crucial step that significantly improves the final product. This process helps the Oreo crumbs crisp up, giving the crust a much better texture and preventing it from becoming soggy when it absorbs moisture from the cheesecake filling during chilling. This is especially important if you plan to store the pie in the fridge for a few days, as an unbaked crust can turn soft and less appealing. A crispy, buttery crust provides a wonderful contrast to the creamy filling.
Absolutely, yes! Your no-bake cheesecake will set beautifully, resulting in firm, clean slices, provided you follow a few key guidelines. The most important factors are using full-fat, brick-style cream cheese (softened to room temperature), and being very gentle when folding in the whipped cream. Overmixing the whipped cream can cause it to deflate, making the filling runny. If you incorporate the whipped cream gently and ensure the pie chills in the refrigerator for at least 6-8 hours, or ideally overnight (which is highly recommended), the filling will set completely and offer that perfect, sliceable consistency you desire.
Yes, absolutely! While Oreos are the classic choice and star of this recipe, feel free to get creative with other cookies. For the crust, you could use graham crackers, Nilla wafers, chocolate chip cookies, or even shortbread. Just ensure you adjust the amount of melted butter as needed to achieve a “wet sand” consistency that presses well. For the filling, you can experiment with other crushed cookie types, like chocolate chip cookies, or even candies like chopped peanut butter cups or crushed peppermint candies for a seasonal twist.
Yes, this No-Bake Oreo Cheesecake Pie is an excellent dessert to prepare in advance, which makes it perfect for parties and gatherings. You can assemble the entire pie (crust, ganache, and cheesecake filling) up to 2 days before your event. Just make sure it’s thoroughly covered and chilled in the refrigerator. We recommend adding the final whipped cream topping and garnishes just before serving to ensure the whipped cream is fresh, fluffy, and looks its best. The longer chilling time will also result in a perfectly set and easy-to-slice pie.
Shop my Amazon Storefront for recommended baking tools and ingredients!
More Irresistible Dessert Recipes You’ll Love
If you enjoyed making this No-Bake Oreo Cheesecake Pie, we have plenty more delightful dessert recipes to tempt your sweet tooth. Explore these other fan favorites from our collection:
Dessert
No-Chill Chocolate Chip Cookies (Easy & Quick!)
Christmas
20 Sweet Peppermint Recipes for Christmas Cheer
Fall
20 Sweet Pumpkin Recipes for Fall (Breakfast to Dessert)
Breakfast
Blueberry Coffee Cake with Greek Yogurt & Streusel Topping
If you try this delightful No-Bake Oreo Cheesecake Pie recipe, we would absolutely love to hear from you! Please leave a star rating in the recipe card below and/or drop a comment to share your feedback and experience. Your insights are incredibly valuable to us and help other bakers too! For more delicious recipes and baking inspiration, be sure to follow me on Pinterest, Facebook & Instagram. Happy baking!
SaveSaved
No Bake Oreo Cheesecake Pie
Equipment
-
9.5 inch Pie Dish
-
Large Food Processor
-
Stand Mixer
-
Hand Mixer
-
Mixing Bowls
-
Baking Spatula
Ingredients
Oreo Crust
- 22 Oreo cookies
- 4 Tablespoons (57 g) melted salted butter
Chocolate Ganache
- 1/2 cup heavy cream
- 4 ounces high quality semi sweet chocolate*
Cheesecake Filling
- 1/2 cup heavy whipping cream
- 12 ounces full fat brick-style cream cheese, softened to room temperature*
- 1/4 cup (50 g) granulated sugar
- 2 Tablespoons (15 g) confectioner’s sugar
- 2 teaspoons vanilla
- 8 Oreo cookies, plus more for topping
Whipped Cream*
- 1 1/2 cups heavy whipping cream
- 3 Tablespoons (23 g) confectioner’s sugar
- 1 teaspoon vanilla
Instructions
-
Preheat the oven 350 degrees. In a large food processor, pulse 22 Oreos into a fine crumb. Pour in the melted butter and pulse until combined.
-
Pour the Oreo crumbs into a 9.5 inch pie dish. Press into the bottom and up the sides using your hands or a flat bottom glass. Bake for 8-10 minutes and cool.
-
In a small saucepan, heat the cream over medium low. It should be simmering, but not bubbling at all. Add the chocolate and stir continuously until the chocolate is mostly melted.
-
When only a few small pieces remain, remove from the heat and keep stirring until it is all melted.
-
Pour the ganache into the crust and use the back of a spoon to spread it into an even layer. Place the crust into the freezer to chill while you prepare the filling.
-
Using a stand mixer fitted with a paddle or an electric hand mixer on medium high, whip the cream until stiff peaks form. Set aside.
-
In a separate bowl, using a stand mixer fitted with a paddle or an electric hand mixer on medium, beat the cream cheese, granulated sugar, confectioners sugar, and vanilla until completely smooth. There should not be any lumps.
-
In a plastic bag or bowl, crush 8 Oreos. It is okay if there are larger pieces. These should not be as fine as the crust. Add the crushed Oreos to the cream cheese mixture and mix on low until just combined.
-
Add the whipped cream and mix on low or fold until just combined so the cream does not deflate.
-
Spoon the cheesecake filling into the cooled crust. Using an offset spatula or the back of a spoon, smooth the filling to an even layer. Cover and chill in the refrigerator for at least 6-8 hours. I recommend chilling the pie overnight so the filling can set completely.
-
Right before serving, using a stand mixer fitted with a paddle or an electric hand mixer on medium high, whip the cream, sugar, and vanilla until stiff peaks form.
-
Spoon all of the whipped cream on top of the pie. Garnish with grated chocolate and crushed Oreos.
Notes
- Oreos: 1 standard package of regular (not doubled stuffed) Oreos is enough for the crust, filling, and topping.
- Semi Sweet Chocolate: Use chopped chocolate bars or high quality wafers or chips. I prefer Guittard.
- Cream Cheese: Pull the cream cheese out of the refrigerator about 1 hour before making the filling.
- Whipped Cream: While I prefer homemade whipped cream, you can top this with cool whip instead.
- Bake the crust. This prevents the crust from getting soggy in the fridge.
- Use room temperature cream cheese. The cream cheese must be soft so that it can incorporate smoothly with the sugar. Cold cream cheese can make the filling lumpy.
- Use cold cream. The heavy cream should be extremely cold. You can pop into the freezer 5-10 minutes before whipping. This will help it whip better. You can also pop the bowl into the freezer to help keep the heavy cream cold as it whips.
- Mix in the oreos and cream gently. There should be pieces of oreo in the cream cheese filling. They should not be completely mixed in. The whipped cream must be combined gently so it does not deflate. Beat the whipped cream into the cheesecake and make the filling runny. The texture will also not be light and airy.
- Chill the pie overnight. Chilling the pie overnight ensures the filling sets and will slice cleanly.
Nutrition
Nutrition information is automatically calculated, so should only be used as an approximation.