
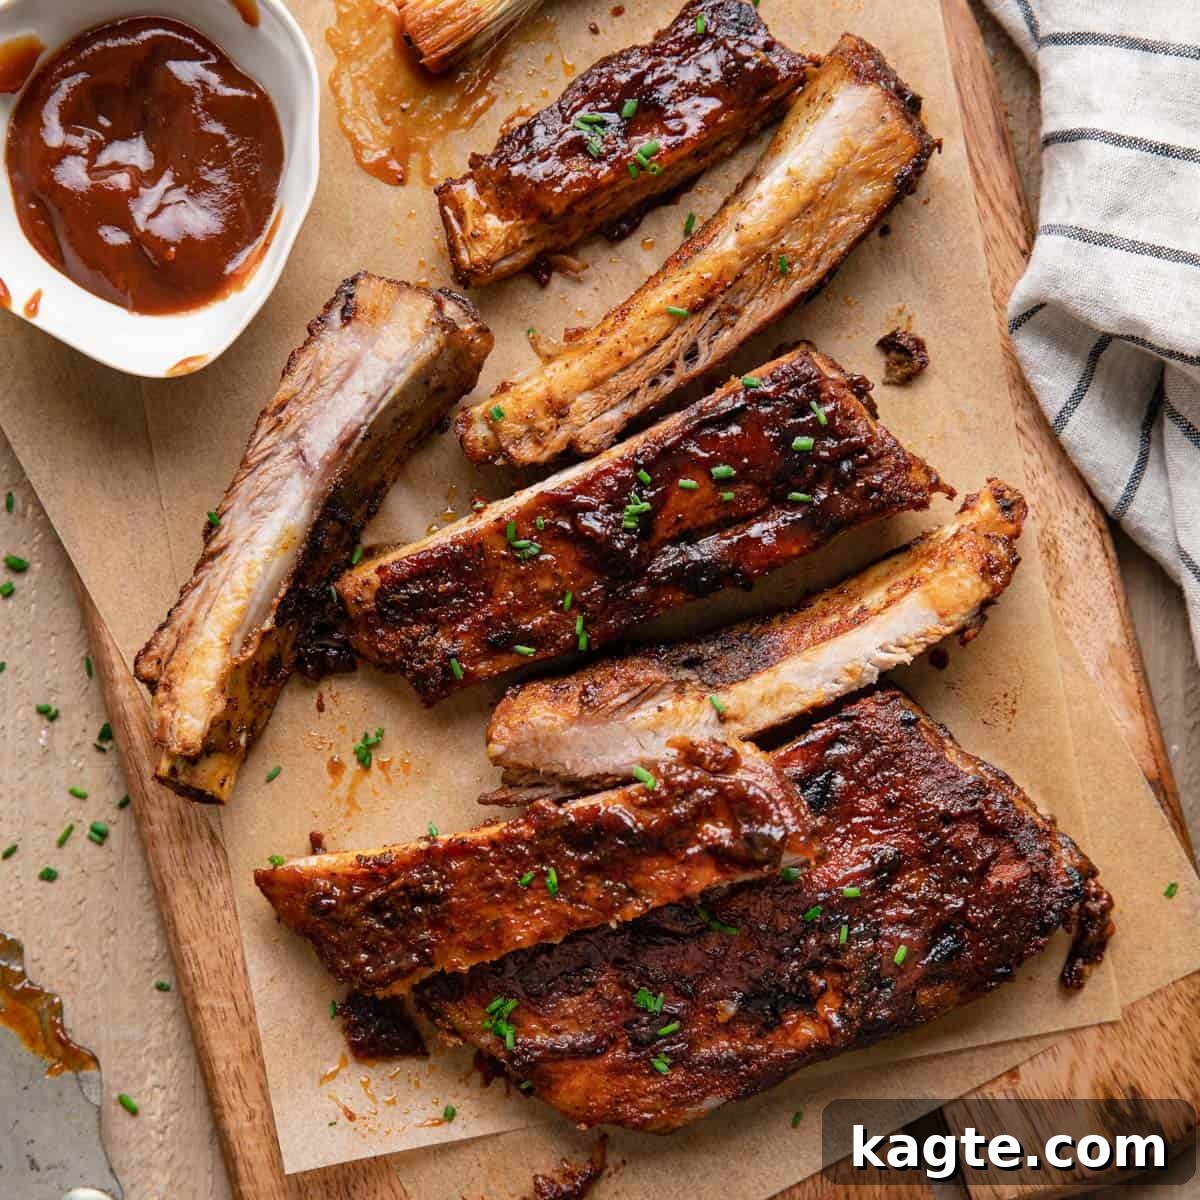
Unlock the secret to fall-off-the-bone tenderness and irresistible flavor with these easy Oven-Baked BBQ St. Louis Ribs. Forget the grill or smoker – this recipe delivers perfectly tender, sweet, and saucy ribs, crowned with a beautiful caramelization, all from the comfort of your kitchen oven. We begin with a savory dry rub, meticulously applied to enhance every bite, followed by hours of low and slow cooking at 275 degrees Fahrenheit. Throughout this gentle cooking process, the ribs are regularly basted with a unique blend of apple cider vinegar and honey, infusing them with moisture and a delightful balance of tang and sweetness. The result is a truly remarkable BBQ experience that’s surprisingly simple to achieve.
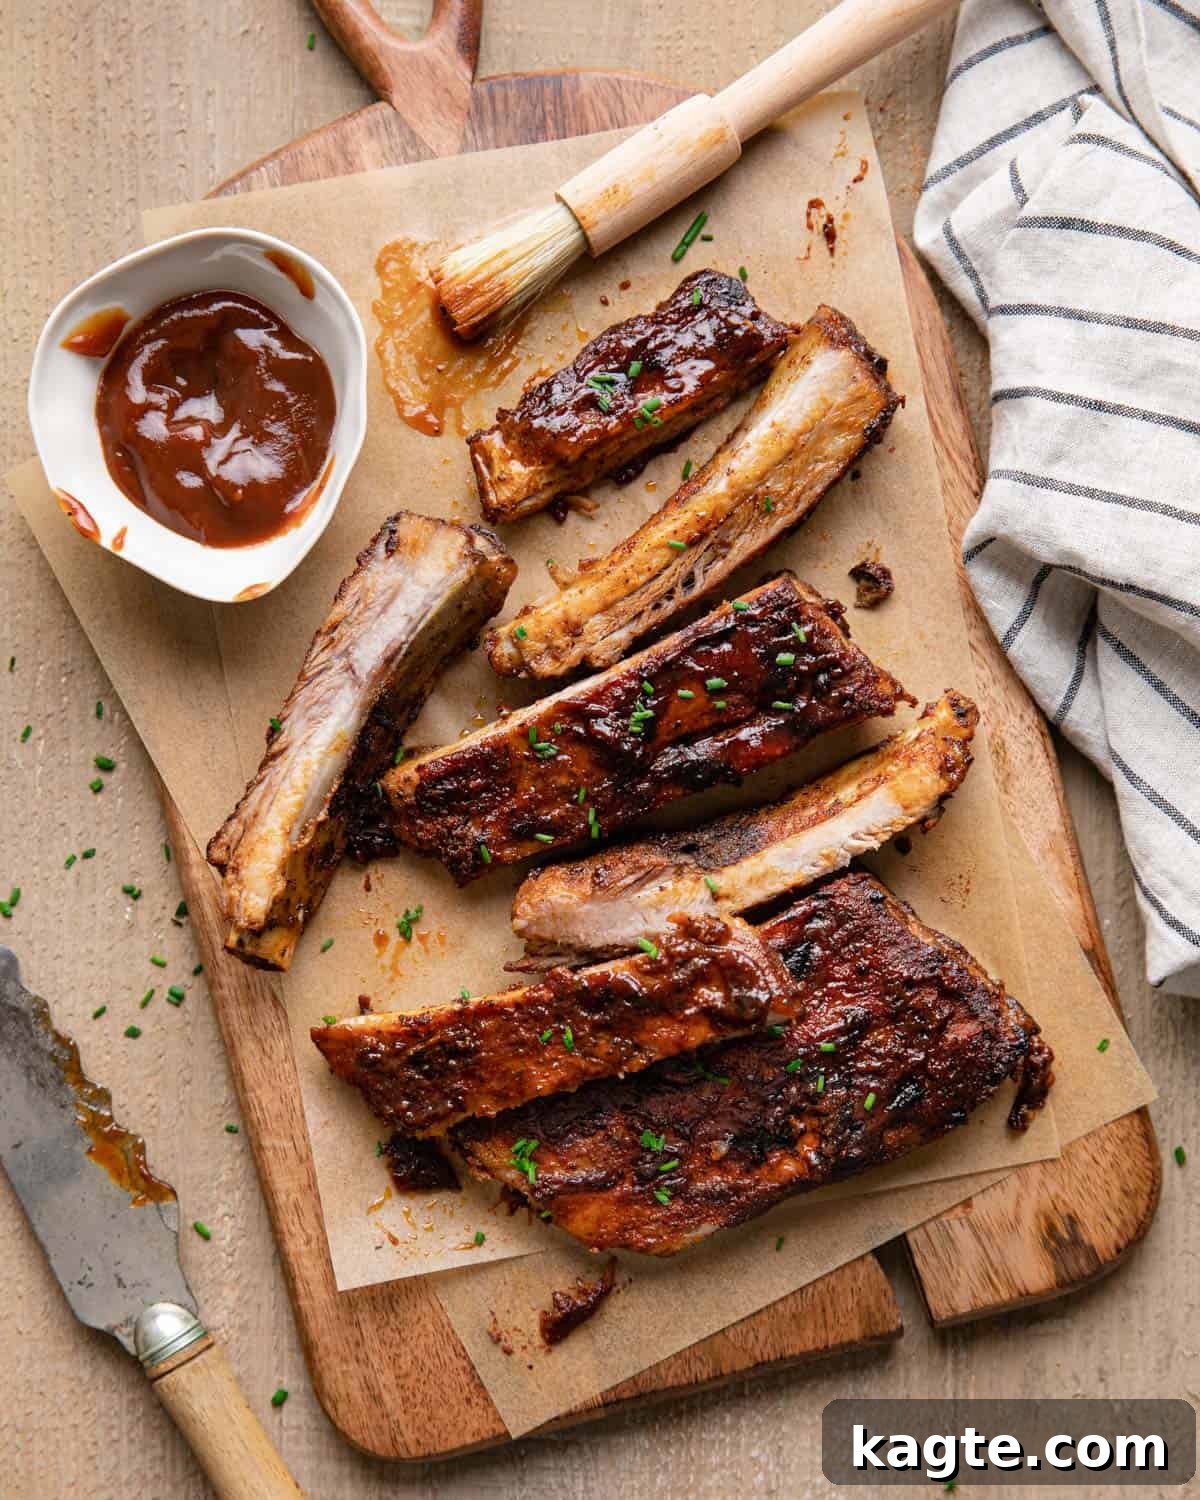
If you’re seeking more effortless oven-cooked main dishes, be sure to explore our guide on How to Cook Pork Tenderloin in the Oven for another delicious option.
For additional succulent rib recipes, you’ll adore our Slow Cooker Dr. Pepper Ribs, offering a different take on tender pork. And for those looking for a quick and easy alternative, don’t miss our Easy Bratwurst in the Air Fryer.
If your craving leans towards baby back ribs, learn How To Make Baby Back Ribs in the Oven, or venture into exciting Asian flavors with our Sticky Asian Pork Rib Recipe.
And if you’re simply in pursuit of the perfect seasoning blend, discover the BEST Dry Rub for Ribs to elevate any pork dish.
Table of Contents
- Why You’ll Love These Oven-Baked St. Louis Ribs
- Ingredients & Smart Substitutions
- How to Make Tender BBQ St. Louis Ribs in the Oven
- Delicious Serving Suggestions for Your Ribs
- Expert Tips & Recipe Variations
- St. Louis Ribs vs. Baby Back Ribs: What’s the Difference?
- Storing & Reheating Leftover Ribs
- Oven Ribs Recipe FAQs
- More Mouthwatering Main Dish Recipes
- Oven Baked St. Louis BBQ Ribs Recipe Card
Why You’ll Love These Oven-Baked St. Louis Ribs
Prepare to fall in love with this St. Louis-style rib recipe, meticulously crafted for maximum flavor and minimal fuss. It’s an ideal choice for home cooks looking to impress without needing specialized grilling equipment.
- Effortless & Accessible: This St. Louis-style ribs recipe is incredibly easy to prepare, requiring no grill or smoker. It’s the perfect solution for achieving authentic BBQ flavor indoors, regardless of the weather or your outdoor cooking setup. You’ll master delicious ribs with simple oven techniques.
- Bursting with Flavor: The magic truly happens with the harmonious blend of a robust dry rub and your favorite barbecue sauce. The dry rub, featuring aromatic garlic powder, smoky paprika, and a hint of chili powder, creates a foundational layer of savory depth. This combines with the sweet and tangy barbecue sauce to produce incredibly flavorful BBQ St. Louis Ribs right from your oven.
- Irresistibly Tender & Moist: Unlike some drier rib recipes, these ribs are consistently basted with a special concoction of honey and apple cider vinegar. This basting liquid not only adds a unique sweet and tangy note but also plays a crucial role in keeping the ribs wonderfully moist and contributing to their ultimate tenderness throughout the long, slow cook.
- Perfect for Any Occasion: Whether you’re hosting a lively summer barbecue, celebrating the Fourth of July, or simply craving comforting, delicious ribs for a family dinner, these oven-baked St. Louis ribs are an absolute crowd-pleaser. They bring that classic BBQ joint taste directly to your table.
- Master Essential Rib-Cooking Skills: This recipe isn’t just about eating delicious ribs; it’s also a fantastic opportunity to learn valuable cooking techniques. You’ll gain confidence in how to prepare and apply a dry rub for ribs, the art of basting for moisture and flavor, and precisely how long to cook St. Louis ribs in the oven at a low and slow temperature of 275 degrees for perfect results every time.
Ingredients & Smart Substitutions
Crafting the perfect batch of oven-baked St. Louis ribs starts with quality ingredients. Here’s what you’ll need and some helpful tips for choosing and substituting.
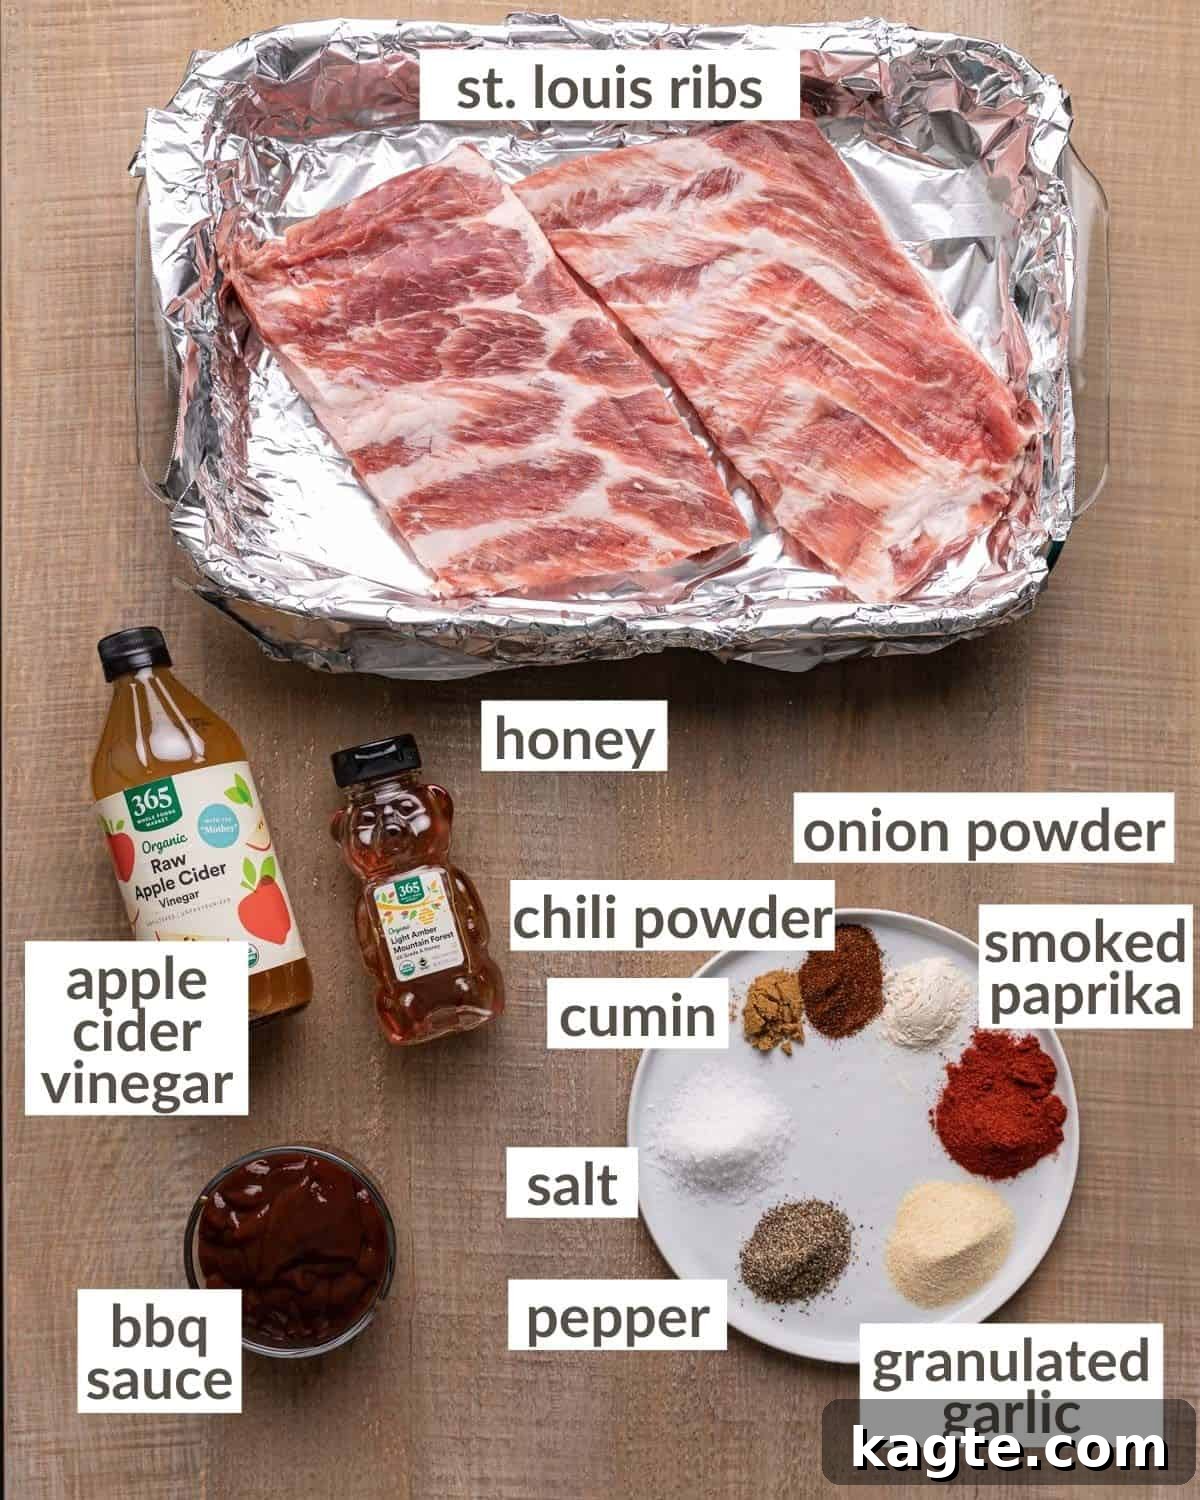
- St. Louis Ribs: Look for full racks of St. Louis-style pork ribs that have a good amount of meat on them. Before cooking, it’s crucial to remove the thin membrane (often called silver skin) from the bone side of the ribs. This membrane can become tough and chewy during cooking, preventing the dry rub and flavors from truly penetrating the meat. If your butcher hasn’t already removed it, simply slide a knife under one corner to lift it, then grip it with a paper towel for leverage and pull it off. Cut the full rack into about 2-3 manageable pieces to ensure they fit comfortably in your baking pan and cook evenly.
- BBQ Sauce: The right barbecue sauce can elevate your ribs significantly. You can opt for a store-bought favorite or even make your own from scratch. Popular choices like Stubbs, Jack Daniels, and Sweet Baby Ray’s offer a range of flavor profiles from smoky to sweet to tangy. Consider what kind of flavor you prefer – a sweeter sauce will caramelize beautifully, while a tangier sauce will add a nice zing. Don’t hesitate to use a homemade recipe if you have one you love!
- Dry Rub Ingredients: Our carefully balanced dry rub features salt, black pepper, granulated garlic, smoked paprika, cumin, onion powder, and chili powder.
- Salt & Pepper: The foundational seasonings that enhance all other flavors.
- Granulated Garlic & Onion Powder: These provide essential savory depth and aromatic notes that permeate the meat during the long cooking process.
- Smoked Paprika: Crucial for that authentic BBQ flavor, adding a beautiful reddish hue and a deep, smoky aroma without needing a smoker.
- Cumin & Chili Powder: These spices add warmth, a subtle earthiness, and a mild kick, complementing the pork perfectly. Feel free to adjust the chili powder for more or less heat.
- Basting Liquid: This simple yet powerful mixture of apple cider vinegar and honey is key to tender, flavorful ribs.
- Apple Cider Vinegar: The acidity of the vinegar works wonders to tenderize the pork, breaking down tough fibers and ensuring a succulent result.
- Honey: Not only does honey add natural sweetness, but it also aids in the caramelization process during the final stages of baking, contributing to that desirable glossy, slightly charred crust. You can substitute with maple syrup or brown sugar syrup if honey is unavailable.
For more detailed information on alternative ingredients, check out the best substitutes for apple cider vinegar!
A complete list of specific ingredients and their exact amounts can be found on the recipe card below.
How to Make Tender BBQ St. Louis Ribs in the Oven
Creating these sensational BBQ St. Louis ribs in your oven is a straightforward process, designed for delicious results every time. Follow these steps for tender, flavorful ribs with a perfect caramelized finish.
Quick Overview of the Cooking Process
- Prepare your oven and apply the savory dry rub to the ribs.
- Wrap each section of ribs securely in aluminum foil to lock in moisture.
- Bake the ribs low and slow at 275 degrees, basting periodically for 4 hours.
- Remove the ribs from the foil, brush with remaining basting liquid and BBQ sauce.
- Finish baking uncovered, then broil briefly for an irresistible caramelized crust.
Step-by-Step Instructions for Perfect Oven Ribs
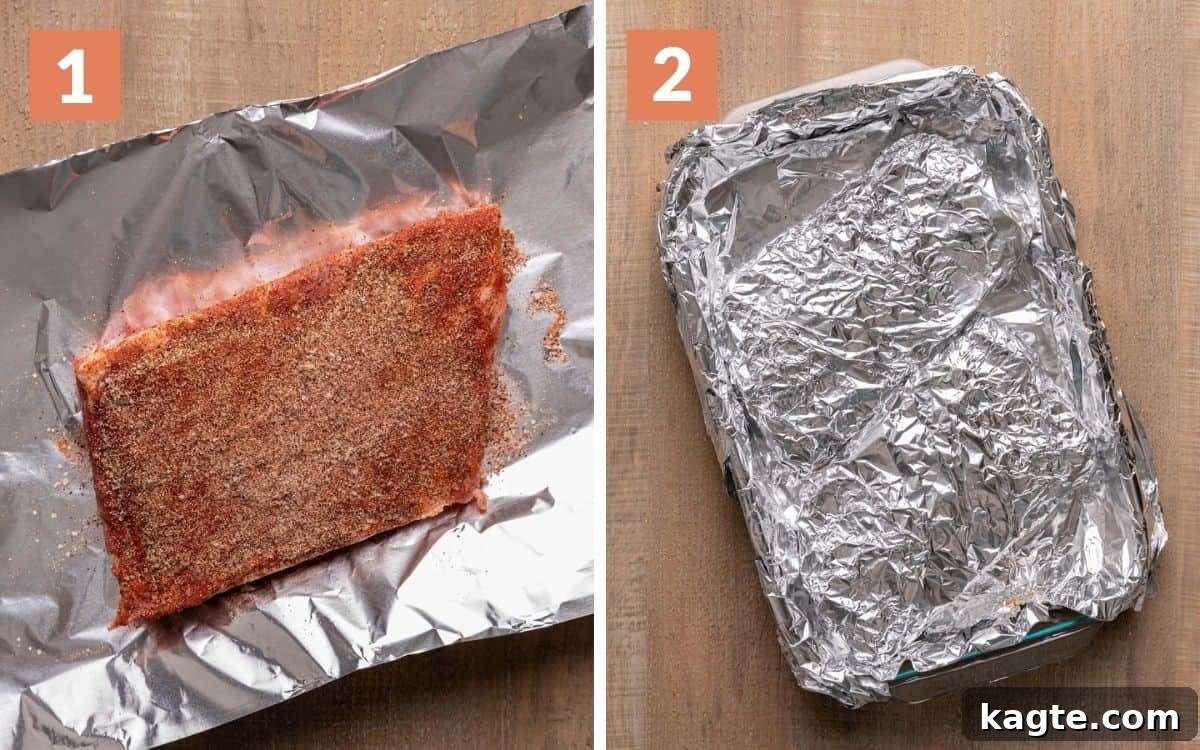
Step 1: Begin by preheating your oven to a consistent 275 degrees Fahrenheit. In a small bowl, thoroughly combine all the ingredients for your dry rub: salt, pepper, granulated garlic, smoked paprika, cumin, onion powder, and chili powder. Once mixed, generously rub this blend all over the St. Louis ribs, paying particular attention to the meaty side. Ensure the rub adheres well to every surface, pressing it gently into the meat with your hands for maximum flavor infusion.
Step 2: Take each individual piece of the rack of ribs and wrap it tightly in aluminum foil. The goal is to create a secure, completely sealed package around each piece, preventing any moisture from escaping during the initial baking phase. Place these foil-wrapped ribs into a large, sturdy baking pan. For even easier cleanup, it’s highly recommended to line your baking pan with an additional layer of aluminum foil before placing the ribs inside.
PRO TIP – Always line your baking pan with foil. This small step will save you significant time and effort when it comes to washing up after your delicious ribs are cooked!
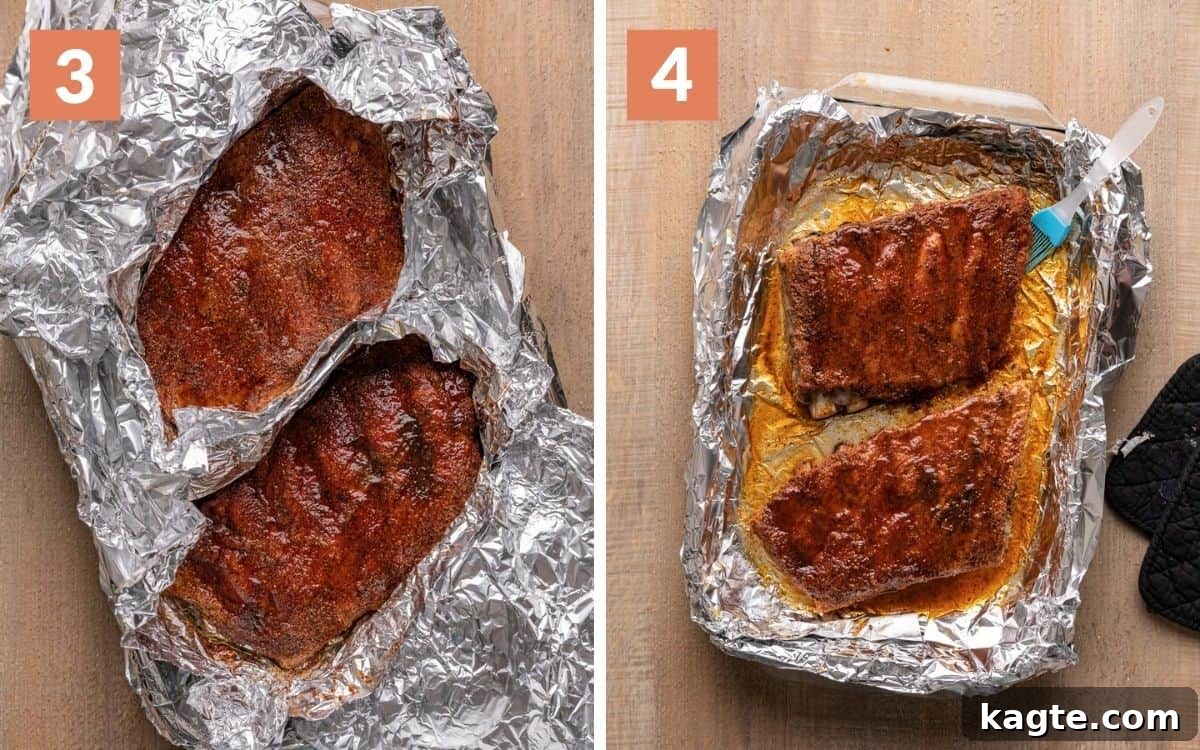
Step 3: Place the wrapped ribs in the preheated oven and bake for 2 hours. While the ribs are gently cooking, prepare your basting liquid: in a separate small bowl, combine the apple cider vinegar and honey, stirring until well mixed. Set this aside. After the initial 2 hours, carefully remove the pan from the oven. Gently lift the foil on each rib piece just enough to expose the top surface of the ribs. Using a spoon or a pastry brush, evenly apply about half of the prepared vinegar and honey mixture over the ribs, ensuring a good coating.
Step 4: Once basted, carefully rewrap each rib piece tightly with the foil, ensuring they are once again completely sealed. Return the pan to the oven and continue baking for another 2 hours. This extended slow cooking will further tenderize the meat. After this second baking period, remove the ribs from the oven. Carefully unwrap them entirely and discard the foil. At this point, increase your oven temperature to 350 degrees Fahrenheit. Brush the unwrapped ribs with the remaining half of the vinegar and honey basting mixture.
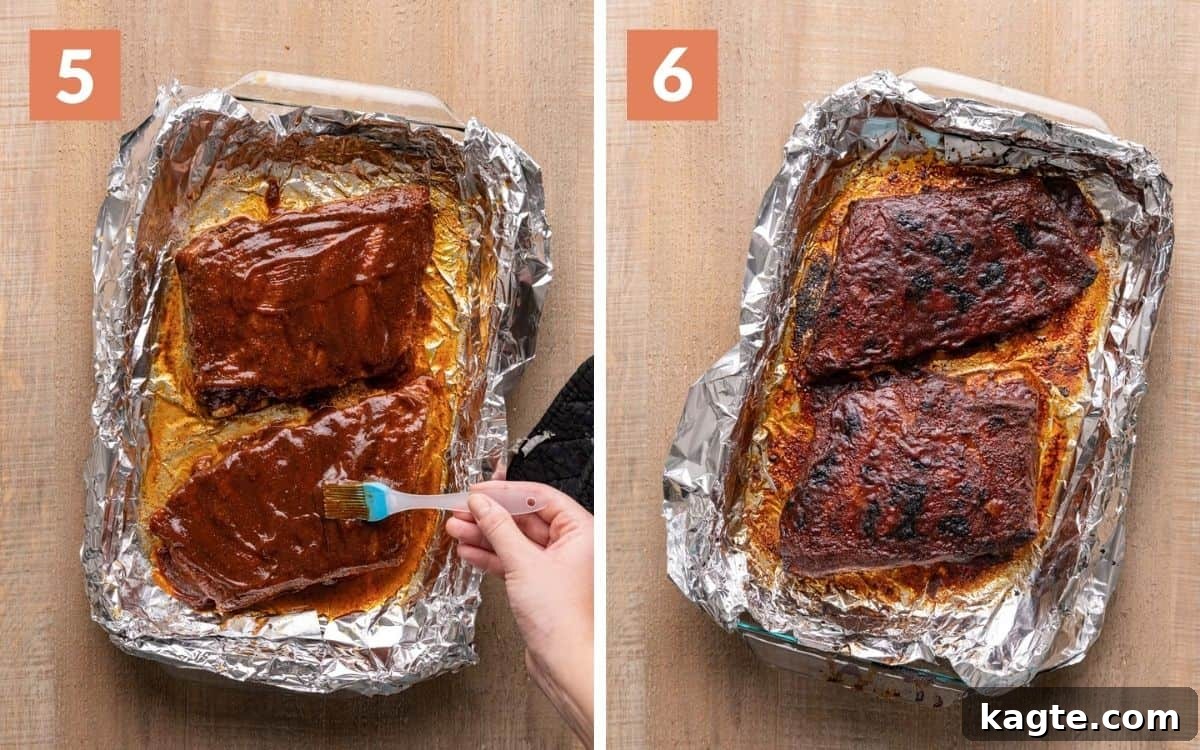
Step 5: Now it’s time for the delicious barbecue sauce! Generously brush your favorite BBQ sauce over all surfaces of the ribs. Ensure an even coating. Return the ribs to the oven, now uncovered, and bake for an additional 30 minutes at 350 degrees Fahrenheit. This step allows the barbecue sauce to bake onto the ribs, creating a sticky, flavorful glaze and initiating the caramelization process.
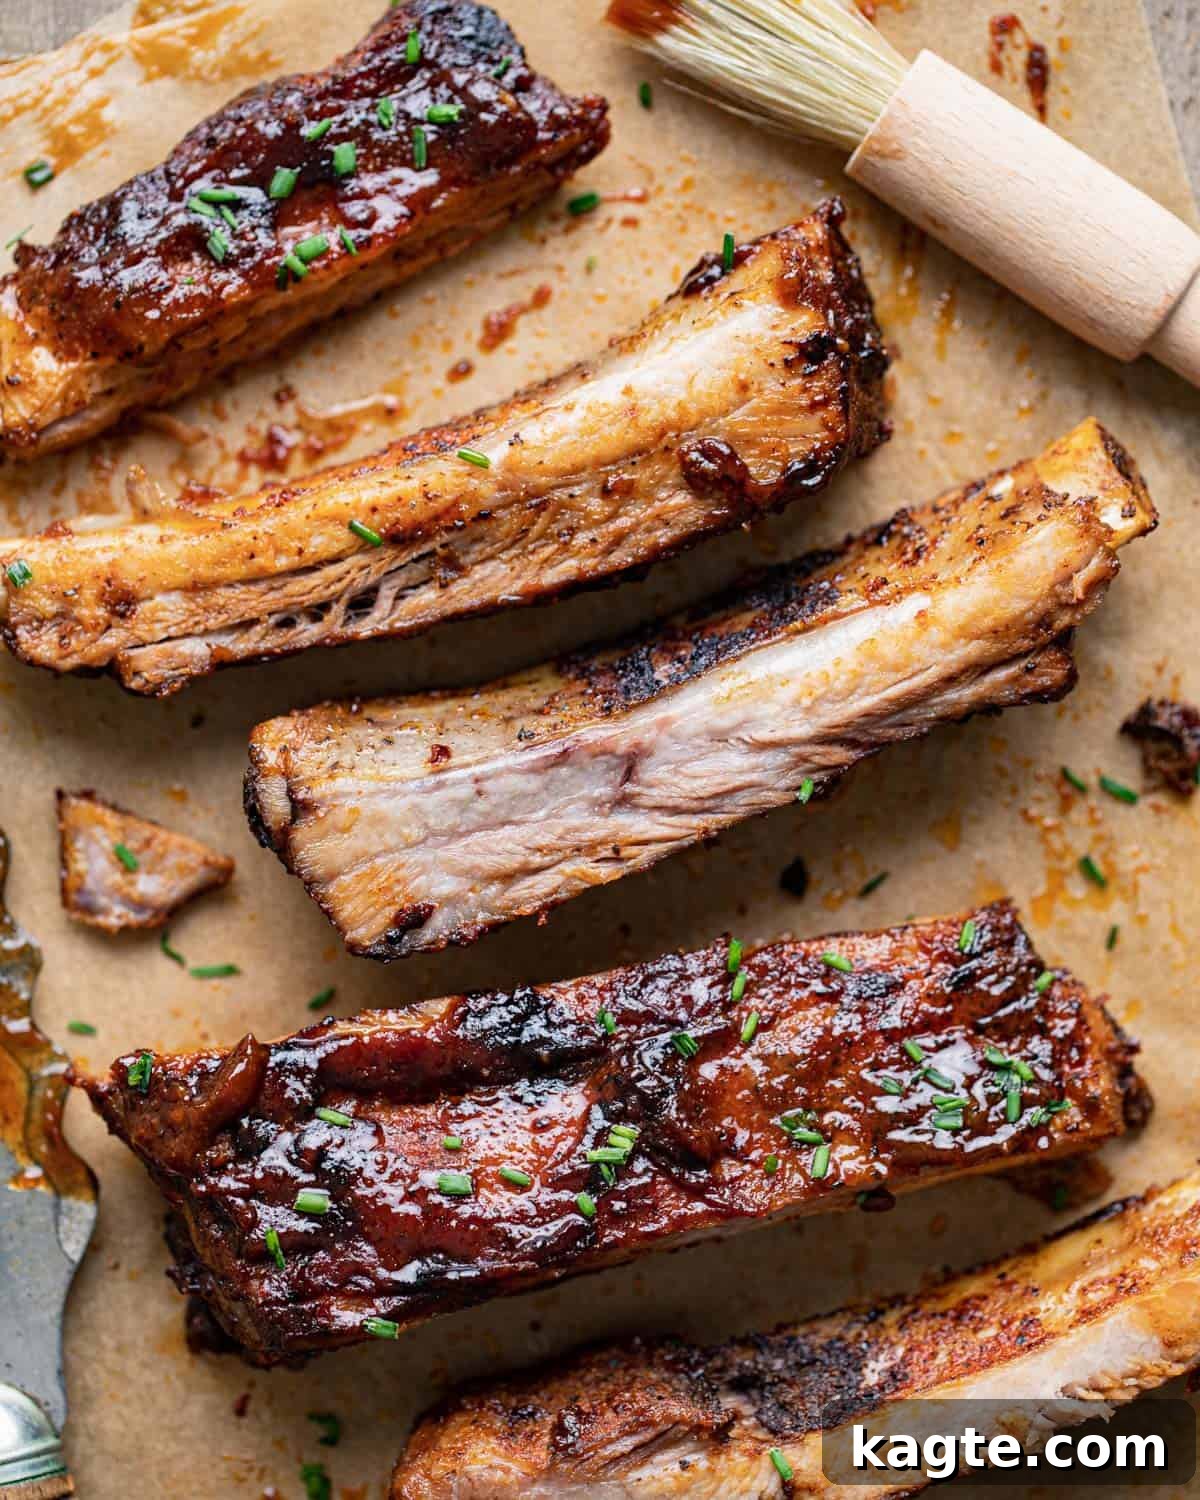
Step 6: For that perfect finish, move the ribs to the broiler. Broil on high for 5-10 minutes, keeping a very close eye on them to prevent burning. The goal is for the barbecue sauce to bubble and dark, caramelized spots to begin forming, creating a slightly charred, intensely flavorful crust. This step mimics the char you’d get from a grill. Once they’ve reached your desired level of caramelization, remove them from the oven. Serve these magnificent ribs immediately, perhaps with extra barbecue sauce on the side or a drizzle of the flavorful pan drippings. Enjoy!
TEMPERATURE TIP – For truly tender ribs, aim for an internal temperature between 195-200 degrees Fahrenheit. This range indicates that the collagen has broken down sufficiently, resulting in that desirable melt-in-your-mouth texture.
Delicious Serving Suggestions for Your Ribs
These Oven-Baked BBQ St. Louis Ribs are hearty and flavorful enough to stand alone, but they truly shine when paired with complementary side dishes. Here are some of my favorite accompaniments to complete your meal:
- Classic Baked Potatoes: A simple yet satisfying side, perfect for soaking up any extra BBQ sauce. Load them up with butter, sour cream, and chives for a truly comforting experience.
- Crispy Seasoned Tater Tots: For a fun and crunchy accompaniment that everyone will love, these tater tots offer a great texture contrast to the tender ribs.
- Creamy Red Skin Mashed Potatoes: Smooth, buttery mashed potatoes are always a welcome addition, providing a rich and comforting counterpoint to the smoky ribs.
- Copycat Panera Broccoli Cheddar Mac & Cheese: Elevate your meal with this incredibly cheesy and satisfying macaroni and cheese, a perfect indulgent pairing.
- Instant Pot Southern Green Beans: These tender, flavorful green beans bring a touch of home-style goodness and a nice vegetable balance to the plate.
- Perfectly Crispy Cast Iron Corn: Sweet and slightly charred corn offers a delightful crunch and natural sweetness that complements the savory ribs beautifully.
- Old Fashioned Soft and Buttery Yeast Rolls: Don’t forget something to sop up all that delicious sauce! Warm, fluffy rolls are ideal for this.
- Creamy Coleslaw: The crisp, tangy freshness of coleslaw cuts through the richness of the ribs wonderfully.
- Cornbread: A classic Southern side, cornbread offers a slightly sweet, crumbly texture that pairs perfectly with BBQ.
- Fresh Garden Salad: For a lighter option, a simple salad with a vinaigrette dressing can provide a refreshing contrast.
Should you find yourself with any delicious leftovers, get creative and transform them into exciting new meals with our Recipes with Leftover Ribs.
Expert Tips & Recipe Variations
Mastering oven-baked ribs is all about technique and a few key insights. These expert tips will help you achieve incredibly tender, flavorful, and perfectly caramelized St. Louis ribs every time, along with ideas for exciting variations.
- Start with Dry Ribs: Before applying your dry rub, pat the ribs thoroughly dry with paper towels. Removing excess surface moisture is crucial because it helps the rub adhere better to the meat, forming a flavorful crust rather than a soggy layer. A dry surface also promotes better browning and caramelization during the later stages of cooking.
- Press the Rub In: Don’t just sprinkle the rub over the ribs. Use your hands and apply firm pressure to really press the spice mixture into all surfaces of the meat. This ensures the rub penetrates deeper into the pork, creating a more intense and even flavor throughout. If the rub isn’t pressed in, it tends to fall off during handling or cooking, resulting in less flavorful ribs.
- Double-Wrap in Foil for Ultimate Moisture: While wrapping in foil is essential, going the extra mile by double-wrapping each section of ribs, or at least using heavy-duty foil, makes a significant difference. I’ve tested this recipe with single foil layers, and the ribs were noticeably drier. A robust foil package creates a steamy environment that locks in precious moisture and tenderizes the meat effectively. When in doubt, add another layer of foil to prevent any juices from escaping.
- Do NOT Skip the Basting: Pork, especially ribs, greatly benefits from the addition of acid. The apple cider vinegar in our basting liquid tenderizes the meat by breaking down connective tissues, leading to a more succulent texture. The honey perfectly balances this acidity with sweetness, which also contributes to the beautiful caramelization and sticky glaze you desire. This sweet and tangy baste is a game-changer for flavor and moisture.
- Utilize a Meat Thermometer: For foolproof results and to ensure your ribs are incredibly tender, investing in a good meat thermometer is paramount. While pork is safely cooked at 145°F, ribs require a higher temperature of about 190-200 degrees Fahrenheit. This is the sweet spot where the tough collagen and connective tissues in the ribs begin to break down into gelatin, yielding that desirable melt-in-your-mouth tenderness. You can also use a fork to check for tenderness – it should easily twist and pull meat away from the bone.
- Perfect the Broil for Charred Perfection: The final broiling step is your opportunity to achieve that coveted caramelized, slightly charred sugar crust, reminiscent of ribs cooked on a grill. This step should be quick and watched carefully. The sugars in the barbecue sauce and basting liquid will caramelize rapidly under high heat. Don’t be afraid to let some dark spots form; these add a depth of flavor and texture, but ensure you don’t burn them completely. It’s a fine line between perfectly charred and burnt, so stay vigilant!
- Rest Your Ribs: Once the ribs are out of the oven, cover them loosely with foil and let them rest for 10-15 minutes before slicing. This allows the juices to redistribute throughout the meat, resulting in even more tender and moist ribs.
- Flavor Variations:
- Spicy Kick: Add a pinch of cayenne pepper or a dash of hot sauce to your dry rub or BBQ sauce for extra heat.
- Smokier Flavor: If you love a deeper smoky profile, consider adding a teaspoon of liquid smoke to your basting liquid, or use a BBQ sauce with strong smoky notes.
- Herb Infusion: Incorporate dried herbs like thyme, oregano, or rosemary into your dry rub for an herbaceous twist.
- Citrus Brightness: A squeeze of orange or lemon juice in the basting liquid can add a bright, fresh note to the ribs.
St. Louis Ribs vs. Baby Back Ribs: What’s the Difference?
Understanding the distinctions between St. Louis-style ribs and baby back ribs is key to appreciating their unique characteristics and ensuring you choose the right cut for your preferred outcome. Both are delicious, but they offer different textures, fat content, and cooking times.
St. Louis-style ribs are cut from the belly side of the pig, specifically from the area just below the loin, where the bacon comes from. This cut involves trimming off the sternum bone, cartilage, and any fatty tips, resulting in a more uniform, rectangular rack. They are generally:
- Larger and Flatter: St. Louis ribs are typically flatter and more uniform in shape compared to baby backs, making them easier to cook evenly and present beautifully.
- Higher Fat Content: Originating near the pork belly means these ribs contain more marbling and fat. This higher fat content translates to a richer, more robust pork flavor and keeps the meat incredibly moist during long cooking processes.
- More Bones, Longer Cook Time: While they might have more bones, the meat-to-bone ratio is still excellent. However, due to their size and fat content, St. Louis ribs typically require a longer cooking time to achieve optimal tenderness and allow the fat to render properly.
- More Economical: Generally, St. Louis ribs are less expensive per pound than baby back ribs, offering great value for their flavor and size.
In contrast, Baby Back Ribs (also known as loin back ribs) come from the upper part of the rib cage, closer to the backbone, where the loin meat is found. They are:
- Leaner and More Tender: Baby backs are leaner and have smaller, more curved bones. This leaner profile often means they cook faster and can achieve a “fall-off-the-bone” tenderness more readily than St. Louis ribs.
- Slightly Sweeter Meat: The meat on baby back ribs is often described as slightly sweeter and more delicate.
- Smaller and Curvier: They are shorter and more curved, resembling the shape of the pig’s spine, and often have less meat per bone compared to St. Louis ribs.
If your ultimate goal is ribs that literally fall off the bone with minimal effort, baby back ribs might be your preferred choice due to their inherent tenderness and leaner nature. However, if you appreciate a richer, meatier flavor with a satisfying chew and a beautiful caramelization that holds its shape, these oven-baked St. Louis-style ribs will undoubtedly deliver a deeply satisfying BBQ experience.
Storing & Reheating Leftover Ribs
Leftover ribs are a true treat! Proper storage and reheating will ensure they remain delicious for future meals.
Refrigerator Storage: To keep your cooked St. Louis ribs fresh and flavorful, allow them to cool completely before storing. Once cooled, place the leftover ribs in an airtight container or wrap them tightly in aluminum foil. They will last for 3-4 days in the refrigerator, making them perfect for quick weeknight dinners or lunch the next day.
How to Reheat Ribs in the Oven for Best Results
Reheating ribs in the oven is the best method to retain their tenderness and flavor, preventing them from drying out. Here’s how:
- Preheat Oven: Set your oven to a low temperature, around 275 degrees Fahrenheit. This gentle heat helps to warm the ribs through without overcooking them.
- Prepare Ribs: Place the leftover ribs in a baking dish. For extra moisture and flavor, you can brush them with a little extra BBQ sauce, a splash of apple juice, or melted butter.
- Cover: Tightly cover the baking dish with aluminum foil. This traps moisture and creates a steamy environment, ensuring the ribs reheat evenly and remain succulent.
- Bake: Bake the covered ribs for approximately 30-45 minutes, or until they are thoroughly heated through. The exact time will depend on the thickness of your ribs and how many you are reheating.
- Optional: Finish Uncovered: If you desire to bring back a slightly caramelized crust, you can remove the foil for the last 5-10 minutes of reheating, or even briefly broil them (watching carefully!).
You can also reheat ribs on a grill for a smoky touch, or quickly in the microwave if you’re in a hurry (though this method can sometimes dry them out slightly).
Oven Ribs Recipe FAQs
Here are answers to some of the most common questions about making tender, delicious St. Louis ribs in your oven.
Baking ribs in two stages—covered and then uncovered—is essential for achieving the perfect texture and flavor. The initial covered portion of the baking process allows the ribs to cook in a moist, steamy environment. This gentle, humid heat is crucial for breaking down tough connective tissues, ensuring the ribs become incredibly tender and remain succulent. Once uncovered, the ribs are exposed to direct heat, which enables the barbecue sauce and basting liquid to caramelize. This creates that desirable sticky, glossy, slightly charred crust that adds depth of flavor and texture. If you were to bake them covered for the entire duration, you would essentially be steaming the ribs, preventing that delicious caramelization from forming.
If your ribs aren’t as tender as you’d like, it’s most likely because they haven’t cooked long enough or reached the optimal internal temperature. As mentioned earlier, ribs need to get above 190 degrees Fahrenheit (ideally 195-200°F) for the collagen and connective tissues to properly break down into gelatin. This process is what creates that signature melt-in-your-mouth tenderness. St. Louis ribs, being a meatier and fattier cut than baby back ribs, typically require a longer cooking time to achieve a similar level of tenderness. Don’t rush the process; low and slow is key for perfect ribs.
Absolutely, yes! Wrapping ribs tightly in foil during the initial cooking phase is one of the most important steps to create the most tender and moist ribs. The foil acts as a mini-oven, trapping all the steam and juices, which tenderizes the meat from within. Without foil, the ribs are much more prone to drying out. However, remember that you will want to unwrap them for the final stage of cooking to allow the sauce to caramelize and form a delicious crust. For the first few hours of baking, tightly wrapped foil is your best friend.
For St. Louis ribs in the oven, I highly recommend cooking them at a consistent 275 degrees Fahrenheit. This low-and-slow approach is crucial for ribs. Any higher temperature can cause the meat to cook too quickly, resulting in dry, tough ribs. A lower temperature allows the connective tissues to slowly break down over several hours, rendering the fat, and ultimately producing incredibly tender and juicy results.
Yes, spare ribs (which St. Louis ribs are a trimmed version of) generally take longer to cook than baby back ribs to reach the same level of tenderness. This is primarily because spare ribs are a larger, meatier cut with more bones and a higher fat content. The extra meat and connective tissue require more time at a low temperature for proper breakdown and rendering, leading to a richer flavor and texture profile.
Yes, ribs generally become more tender the longer they cook, up to a certain point, provided they are cooked low and slow in a moist environment. The prolonged heat allows the collagen in the meat to convert into gelatin, which makes the ribs incredibly tender. However, there is a “sweet spot.” While pork is technically safe to eat at 145 degrees Fahrenheit, ribs need to reach a higher temperature (190-200°F) to achieve optimal tenderness through collagen breakdown. Overcooking them beyond this point, especially if they lose too much moisture, can eventually lead to dry and mushy meat rather than tender.
Ribs will begin to truly “fall off the bone” when their internal temperature reaches between 190 and just over 200 degrees Fahrenheit. This is the temperature range where the collagen has fully broken down. While some people prefer ribs with a slight chew (often referred to as “bite-through” tender), if you’re aiming for that classic fall-off-the-bone experience, target this temperature range and ensure consistent low heat throughout the cooking process. Do not cook them significantly past this range, as they can start to dry out.
More Mouthwatering Main Dish Recipes
Looking for more culinary inspiration? Explore these other fantastic main dish recipes that are sure to become family favorites.
Chicken
Garlic Butter Chicken Thighs (Baked & Crispy)
Pasta
Baked Stuffed Shells with Meat Sauce
Fall
Hearty Dutch Oven Pot Roast
Soup & Chili
Flavorful Ground Chicken Chili with Beans
If you’ve had the pleasure of trying this recipe for Oven-Baked St. Louis BBQ Ribs, please take a moment to leave a star rating in the recipe card below and/or share your thoughts in the comments! Your feedback is always greatly appreciated. Connect with me and discover more delicious recipes by following on Pinterest, Facebook & Instagram.
Print Recipe
Save RecipeSaved!
The Best Oven Baked St. Louis BBQ Ribs
Ingredients
- 3 pounds St. Louis style pork ribs (about 1 large rack, trimmed & membrane removed*)
For the Dry Rub
- 1 Tablespoon salt
- 2 teaspoons black pepper
- 1 Tablespoon granulated garlic
- 1 Tablespoon smoked paprika
- 1 teaspoon cumin
- 1 teaspoon onion powder
- 1 teaspoon chili powder
- ¾ cup barbecue sauce (your favorite brand*)
For the Basting Liquid
- 4 Tablespoons apple cider vinegar
- 2 Tablespoons honey
Instructions
-
Preheat your oven to 275 degrees Fahrenheit. In a small bowl, combine the salt, pepper, granulated garlic, smoked paprika, cumin, onion powder, and chili powder. Generously rub this spice mixture onto all surfaces of the St. Louis ribs, focusing particularly on the meaty side. Ensure the rub adheres well by gently pressing it into the meat.
-
Take each piece of the rack of ribs and wrap it individually and tightly with aluminum foil, ensuring it is completely sealed. This creates a steamy environment for tender cooking. Place the wrapped ribs in a large baking pan, ideally lined with an extra layer of foil for easy cleanup.
-
Bake the ribs for 2 hours. While they cook, prepare the basting liquid by combining the apple cider vinegar and honey in a small bowl; stir well and set aside. After 2 hours, carefully remove the pan from the oven. Gently lift the foil on each rib section to expose the top. Spoon or brush about half of the vinegar and honey mixture evenly over the ribs.
-
Rewrap the ribs tightly with the foil and return them to the oven for another 2 hours of baking. After this second bake, remove the ribs from the oven and unwrap them completely, discarding the foil. Increase your oven temperature to 350 degrees Fahrenheit. Brush the unwrapped ribs with the remaining basting liquid.
-
Next, generously brush your favorite barbecue sauce over all surfaces of the ribs. Return the ribs to the oven, now uncovered, and bake for 30 minutes. This allows the sauce to bake onto the ribs, forming a delicious glaze.
-
For a perfect finish, move the ribs under the broiler. Broil on high for 5-10 minutes, watching them very closely. The goal is for the sauce to bubble and develop dark, caramelized spots for an irresistible crust. Serve your perfectly tender BBQ St. Louis ribs immediately, with extra sauce or pan drippings on the side.
Notes
- St. Louis Ribs: Ensure you remove the membrane (or silver skin) from the bone side of the ribs for the best texture and flavor absorption. Cut the rack into 2-3 manageable pieces to fit your pan and for easier handling.
- BBQ Sauce: Feel free to use your absolute favorite barbecue sauce! Whether it’s a sweet, tangy, or smoky variety, popular brands like Stubbs, Jack Daniels, and Sweet Baby Ray’s all work wonderfully.
- Press in the rub. For maximum flavor penetration and adherence, use your hand to firmly press the dry rub into the ribs. Simply sprinkling it won’t achieve the same depth of flavor.
- Wrap tightly in foil. For incredibly moist and tender ribs, it’s essential to wrap each piece of the rack individually and very tightly in heavy-duty aluminum foil. This prevents juices and steam from escaping, which can lead to dry ribs. Using a double layer of foil can also provide extra security.
- Don’t skip out on the basting. The apple cider vinegar provides essential acidity that helps tenderize the pork, while the honey adds a balancing sweetness and aids in caramelization. This basting liquid is crucial for both flavor and moisture.
- Use a meat thermometer. For perfectly tender ribs that fall off the bone (or are nearly there), aim for an internal temperature of 190-200 degrees Fahrenheit. This temperature ensures the collagen breaks down adequately. A fork inserted into the thickest part should also twist easily when they’re done.
- Broil with caution. The broiling step is quick and transformative, creating a caramelized, slightly charred crust that mimics grilling. Keep a very close eye on the ribs during this stage to achieve golden-brown bubbling without burning them. Allowing some dark spots to form adds to the authentic BBQ character.
Nutrition Information
Nutrition information is automatically calculated and should be considered an approximation based on standard ingredient values. Individual results may vary.