
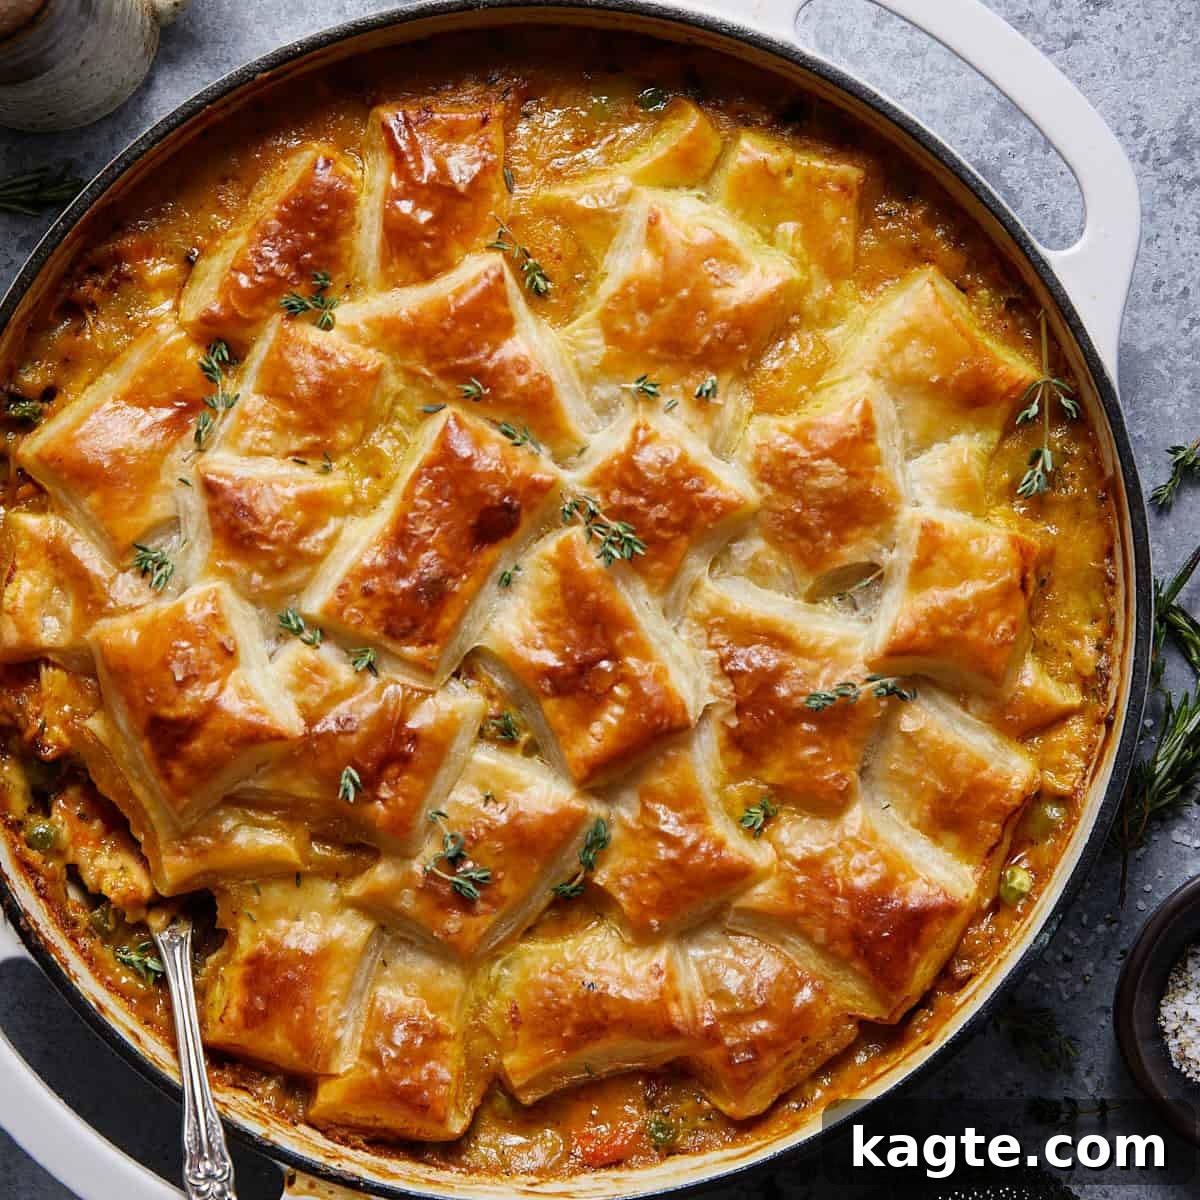
There’s nothing quite like a warm, hearty chicken pot pie to chase away the chill of a cold evening. This rendition, featuring a gloriously golden, flaky puff pastry crust, transforms a classic comfort food into an effortlessly elegant meal. Forget complicated homemade pie crusts; our recipe leverages the convenience of store-bought puff pastry and can even be made simpler with pre-cooked rotisserie chicken, making it an ideal choice for busy weeknights or relaxed weekend gatherings. It’s the ultimate cozy dinner, promising a creamy, richly flavored filling beneath a buttery, irresistible topping.
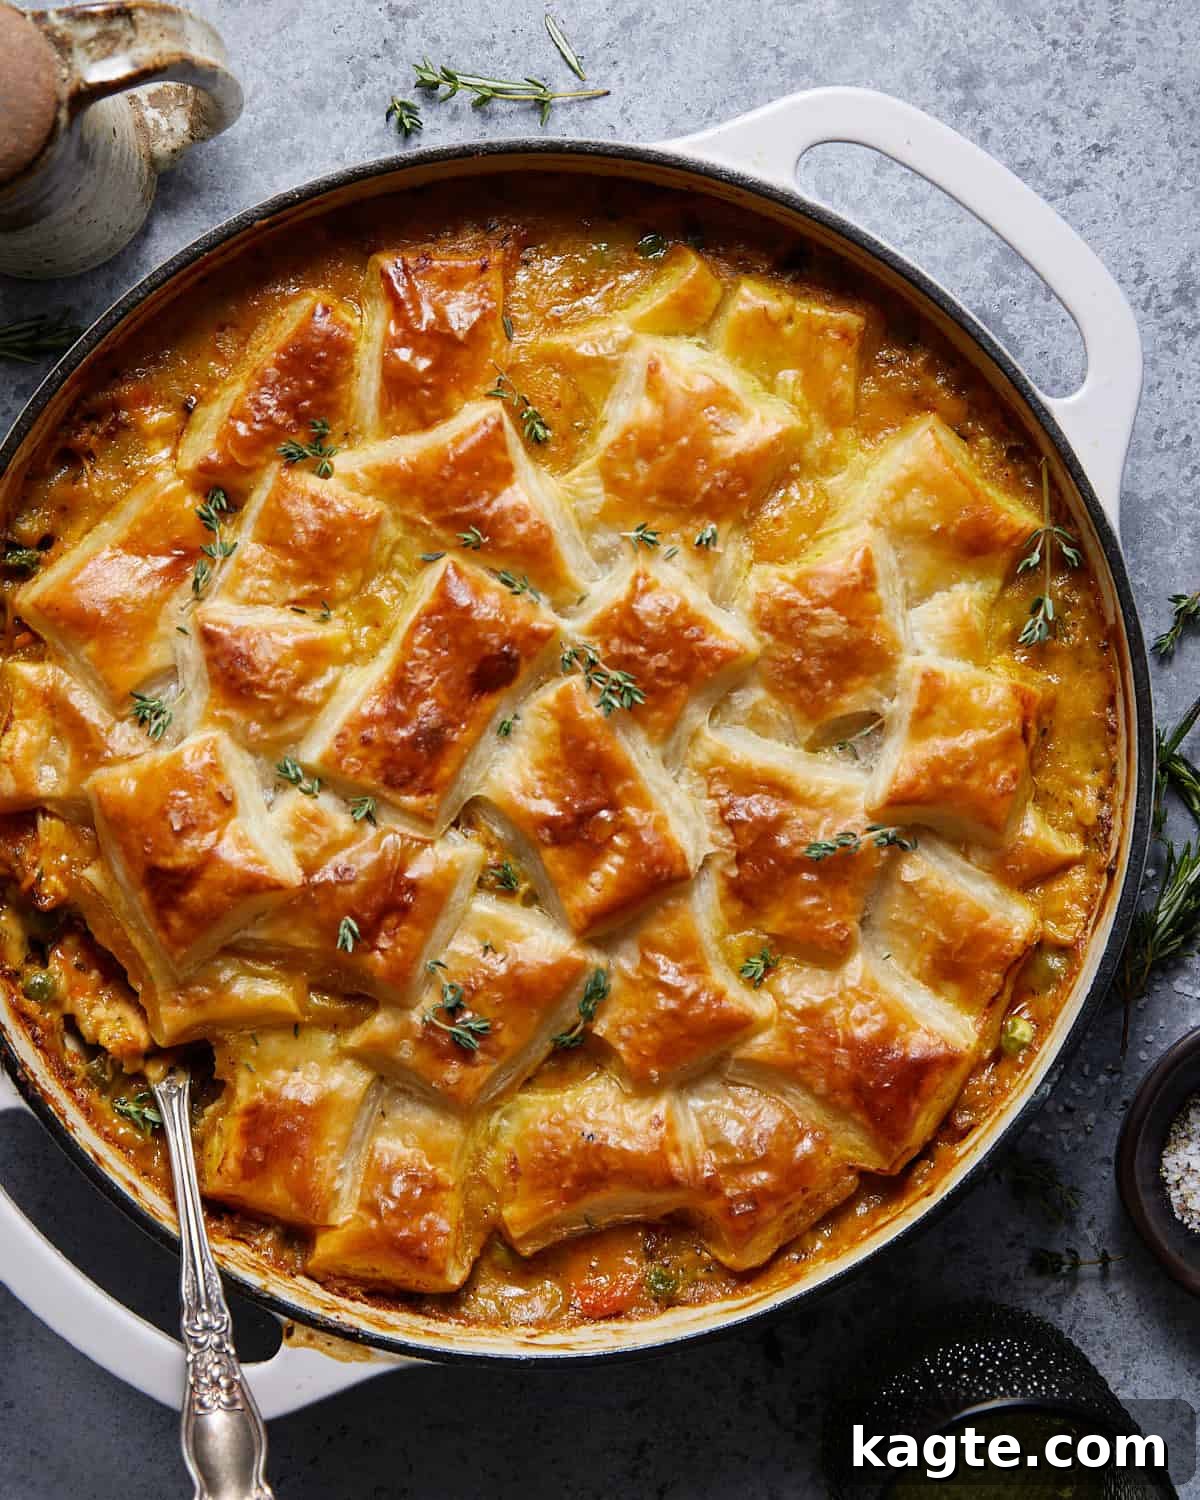
Whenever I find myself with leftover shredded chicken, my mind immediately turns to transforming it into something spectacular. This puff pastry chicken pot pie is a top contender, alongside other family favorites like Cheesy Chicken Stuffed Peppers or Crispy Air Fryer Buffalo Chicken Tacos. If you’re a fan of comforting beef dishes, you might also enjoy my Beef Pot Pie with Puff Pastry, offering a similar delightful experience with a different main protein.
Table of Contents
- Why You’ll Love This Chicken Pot Pie Recipe
- Essential Ingredients & Smart Substitutions
- How to Make Chicken Pot Pie with Puff Pastry
- Delicious Serving Suggestions
- Expert Tips & Creative Variations
- Make Ahead & Reheat Instructions
- Frequently Asked Questions (FAQs)
- More Hearty Main Dish Recipes
- Chicken Pot Pie with Puff Pastry Recipe Card
Why You’ll Love This Chicken Pot Pie Recipe
This isn’t just any chicken pot pie; it’s a testament to simple, delicious home cooking that delivers maximum flavor with minimal fuss. Here’s why this recipe will quickly become a favorite in your kitchen:
- Easier Than Traditional Pie Crust: One of the biggest advantages of this recipe is the use of store-bought frozen puff pastry. Unlike conventional pie crusts, which can be time-consuming and tricky to perfect, puff pastry simply needs to be thawed, cut, and placed on top. It puffs beautifully in the oven, creating a light, airy, and incredibly buttery crust that’s far superior in texture and taste to many homemade pie crusts. This significantly cuts down on prep time and guarantees a professional-looking finish every time.
- A Fantastic Way to Utilize Leftovers: This recipe is incredibly versatile and perfect for using up cooked chicken. Whether you have leftover shredded chicken from a previous meal or a store-bought rotisserie chicken, it seamlessly integrates into the rich filling. This not only makes meal prep faster but also helps reduce food waste, transforming simple leftovers into a gourmet-level dish. For those starting from scratch, we also provide instructions for cooking raw chicken breast.
- Abundant with Wholesome Vegetables: Each spoonful of this pot pie is packed with a colorful array of nutritious vegetables. We load it with classic pot pie ingredients like sweet carrots, crisp celery, aromatic onions, and tender peas. These vegetables not only add essential nutrients and vibrant color but also contribute diverse textures and natural sweetness that balance the savory chicken and rich sauce.
- Incredibly Creamy and Indulgent: The heart of any great pot pie is its filling, and ours is exceptionally creamy and rich. This velvety texture is achieved through a perfectly executed roux—a mixture of butter and flour—which thickens the chicken stock and milk into a luxurious sauce. This robust base envelops the chicken and vegetables, ensuring every bite is moist, flavorful, and utterly satisfying.
- Bursting with Deep, Savory Flavor: Bland chicken pot pie is a thing of the past with this recipe. We elevate the flavor profile significantly by incorporating crispy bacon, a generous blend of fresh herbs (thyme, rosemary, and sage), and a splash of dry white wine. The bacon renders savory fat and adds a smoky depth, while the herbs infuse the filling with an aromatic freshness. The white wine deglazes the pan, capturing all the delicious browned bits and adding a subtle acidity that brightens the entire dish.
- Irresistibly Crispy & Buttery Puff Pastry: For many, the puff pastry topping is the star of the show, and for good reason! As it bakes, the delicate layers of pastry expand dramatically, creating a spectacularly airy, crispy, and shatteringly flaky crust. Brushing it with an egg wash before baking gives it that signature golden-brown color and a beautiful sheen, making it as visually appealing as it is delicious.
- The Quintessential Winter Dinner Idea: When the weather turns cold, there’s nothing more comforting and soul-warming than a hearty, homemade pot pie. This recipe embodies cozy comfort, making it the perfect meal for a chilly evening, a family dinner, or a festive holiday gathering. It’s a dish that brings warmth and joy to the table.
Essential Ingredients & Smart Substitutions
Crafting the perfect chicken pot pie starts with understanding each ingredient and its role. Here’s a breakdown of the key components and helpful tips for substitutions:
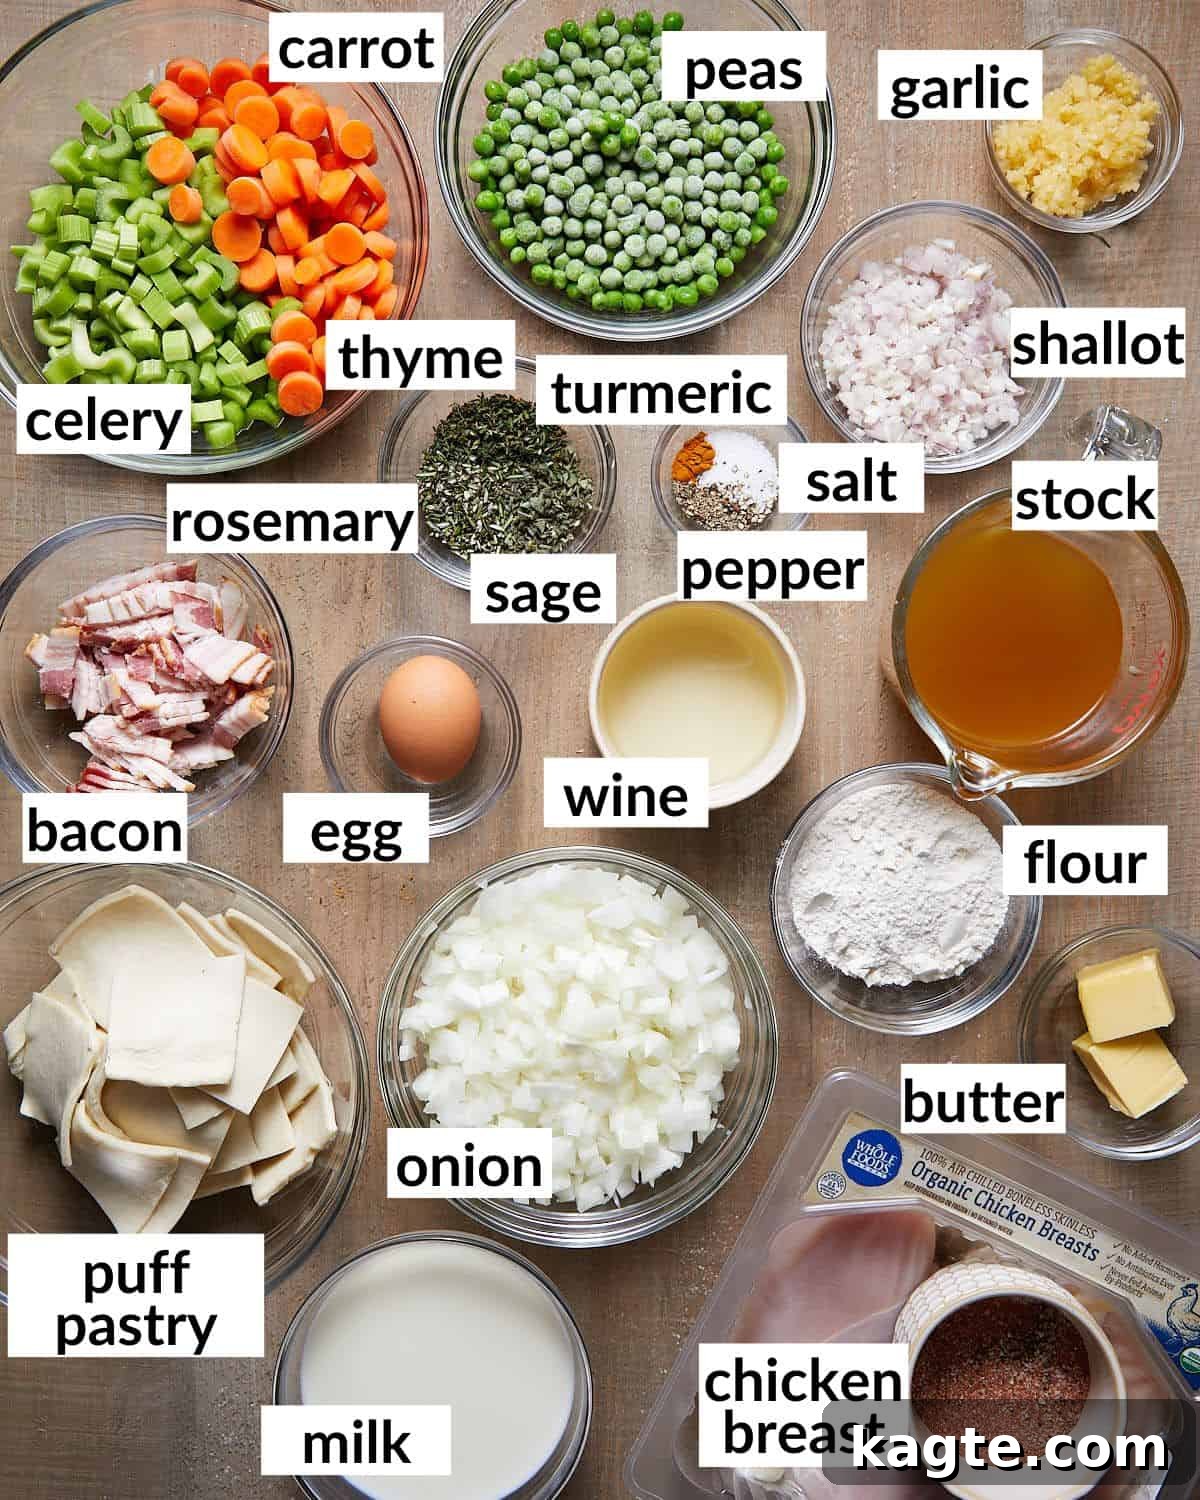
- Chicken Breast: This recipe is incredibly flexible. While boneless, skinless chicken breast is specified, you can easily use leftover cooked chicken or a store-bought rotisserie chicken for maximum convenience. If using fresh raw chicken, you’ll need approximately 1.25 pounds (about 3 small breasts). Season them generously with 1 teaspoon Morton kosher salt, 1 teaspoon smoked paprika, and 1/2 teaspoon each of granulated garlic, onion powder, and pepper. Bake them at 425 degrees Fahrenheit for 30-35 minutes, or until cooked through, then shred with two forks. This can often be done while you prepare the filling. Shredded turkey, especially leftover from Thanksgiving, also makes an excellent substitution.
- Morton Kosher Salt: All my recipes are developed and tested using Morton kosher salt unless explicitly stated otherwise. Its coarser grain and pure flavor make it superior for everyday cooking as it’s easier to control seasoning without over-salting. If you’re using table salt, which is much finer and denser, be sure to reduce the amount by about half to avoid making the dish too salty. I highly recommend investing in a box of kosher salt on your next grocery trip!
- Dry White Wine: A dry white wine like Sauvignon Blanc or Pinot Grigio adds a wonderful depth and acidity to the pot pie filling, helping to deglaze the pan and lift all the flavorful browned bits. If you prefer not to cook with wine, or don’t have any on hand, you can simply omit it. In its place, add an additional 1/2 cup of chicken stock or broth to deglaze the pan effectively. The flavor profile will be slightly different but still delicious.
- Vegetables: Carrots, celery, and onion form the aromatic base. Ensure they are sliced or diced evenly for consistent cooking. Peas are added frozen at the end for freshness. Feel free to add other quick-cooking vegetables like corn, green beans, or mushrooms if desired.
- Fresh Herbs: Thyme, rosemary, and sage bring a classic, earthy aroma to the pot pie. Using fresh herbs makes a significant difference in flavor compared to dried. If using dried herbs, reduce the quantity to about 1/3 of the fresh amount, as their flavor is more concentrated.
- Flour and Butter (for Roux): These two ingredients are crucial for creating the creamy sauce. Unsalted butter allows you to control the overall saltiness of the dish. All-purpose flour is ideal for the roux. Ensure you cook the flour long enough to remove its raw taste.
- Chicken Stock/Broth & Milk: Use a good quality chicken stock or broth for the best flavor. Whole milk or half-and-half will provide the richest, creamiest texture for the filling. Lighter milk alternatives can be used, but may result in a thinner sauce.
- Puff Pastry: Look for all-butter puff pastry for the best flavor and flakiness, though standard puff pastry works well too. Make sure to thaw it according to package directions before cutting and applying.
The complete list of ingredients and precise amounts can be found on the recipe card below.
How to Make Chicken Pot Pie with Puff Pastry
Creating this delicious chicken pot pie is a straightforward process, broken down into a few simple stages. Here’s a quick overview followed by detailed step-by-step instructions to guide you through making this ultimate comfort food.
Quick Overview
- Render bacon for flavor and fat.
- Sauté aromatic vegetables until tender.
- Season the vegetables with herbs and spices.
- Prepare a roux to create the creamy base.
- Gradually add liquids (wine, broth, milk) to form the sauce.
- Stir in frozen peas and shredded chicken.
- Top with puff pastry and bake until golden and bubbly.
Step by Step Instructions
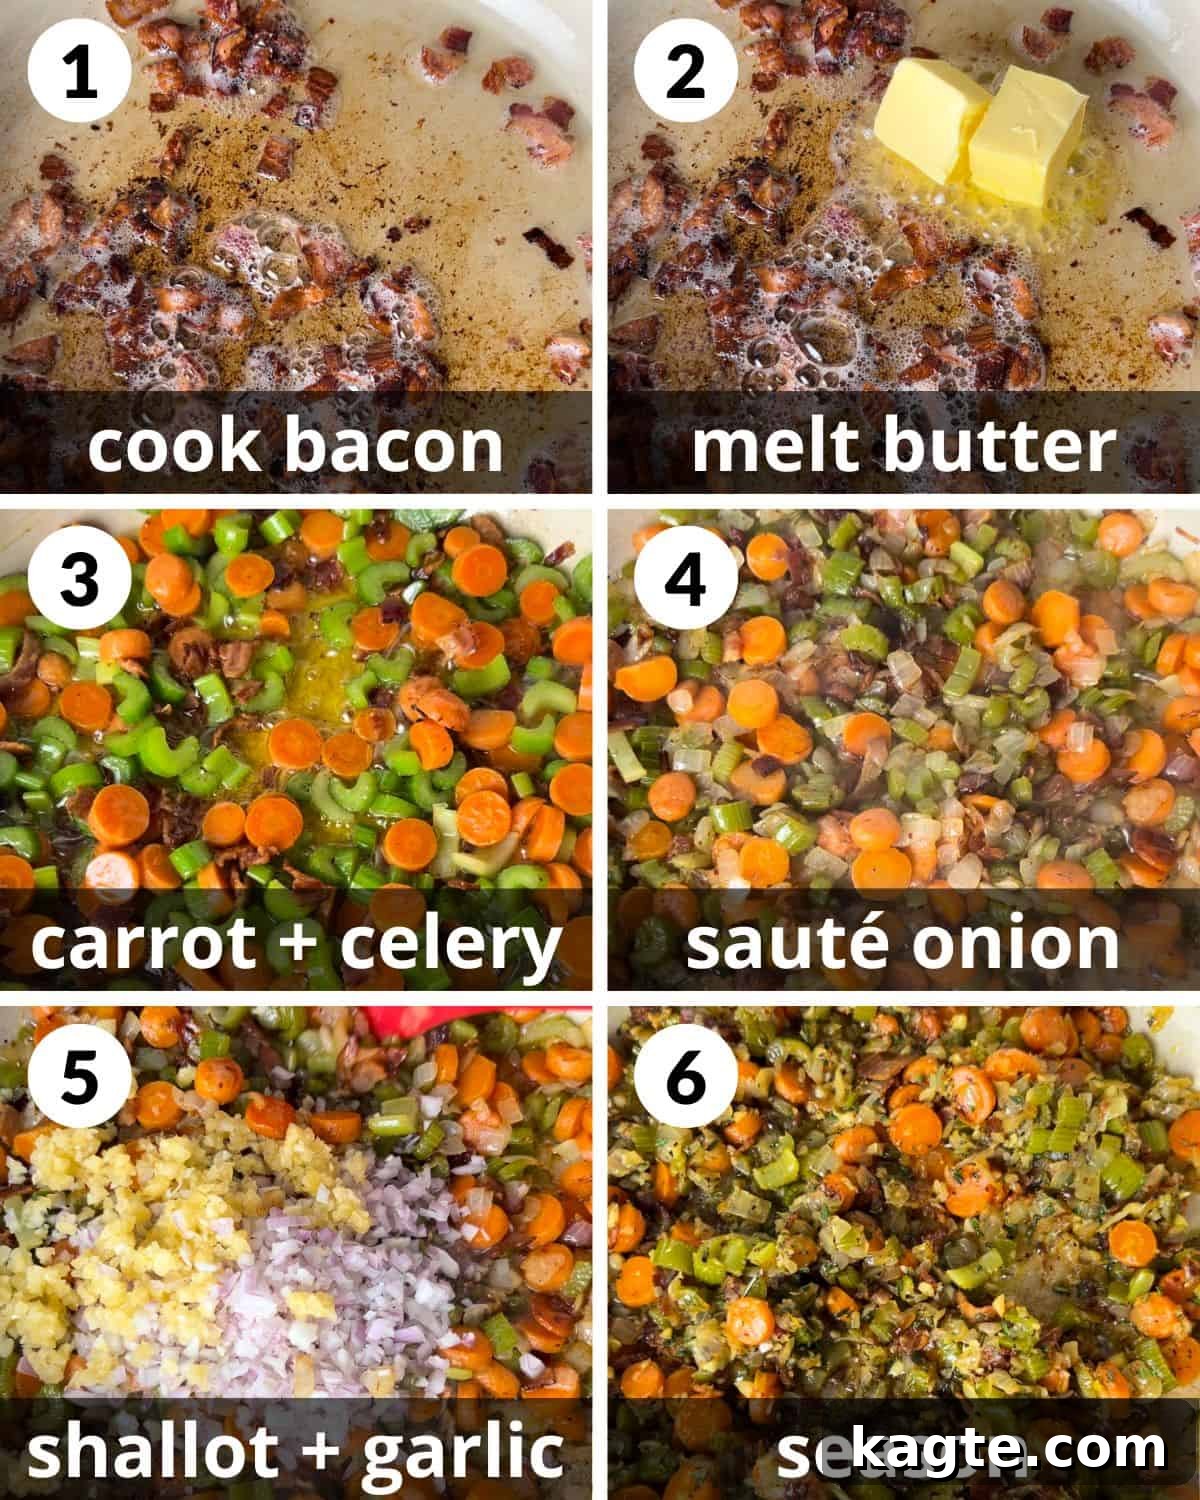
Tip: The vegetables should be soft and significantly reduced in volume to ensure a smooth, cohesive filling.
Step 1: Begin by preheating your oven to 400 degrees Fahrenheit (200°C). In a 3.5-quart shallow Dutch oven or a large, oven-safe skillet, cook the diced bacon over medium-low heat. Continue to cook until the bacon is beautifully browned and most of its fat has rendered into the pan. This step is crucial for building a foundational layer of savory flavor. Once cooked, the crispy bacon can be removed and set aside to drain on paper towels, or you can leave it in for extra texture.
Step 2: Add the unsalted butter to the pan with the rendered bacon fat. Stir gently until the butter is completely melted and combined with the bacon fat. This rich base is essential for sautéing the vegetables and forming the roux.
Step 3: Introduce the sliced carrots and celery to the pan. Increase the heat to medium and sauté for 2-3 minutes. This initial sautéing begins to soften the harder vegetables and allows them to absorb some of the rich fat.
Step 4: Add the diced yellow onion to the pan with the carrots and celery. Continue to sauté for about 10 minutes, or until the onion becomes translucent and very soft. It’s important for all the mirepoix (carrots, celery, onion) to be tender, as this contributes to the creamy texture of the filling and ensures no raw crunch.
Step 5: Next, add the finely diced shallot and minced garlic. Sauté for another 2-3 minutes, stirring constantly, until the aromatics become fragrant. Be careful not to burn the garlic, as this can impart a bitter flavor to your pot pie.
Step 6: Season the sautéed vegetables by adding the salt, pepper, turmeric (if using), fresh thyme, rosemary, and sage. Stir well and sauté for another 2 minutes. This brief cooking time helps to bloom the spices and herbs, releasing their full aromatic potential and deepening the overall flavor of the filling.
Tip: Turn the heat to low when adding liquids to prevent the sauce from thickening too rapidly or becoming lumpy.
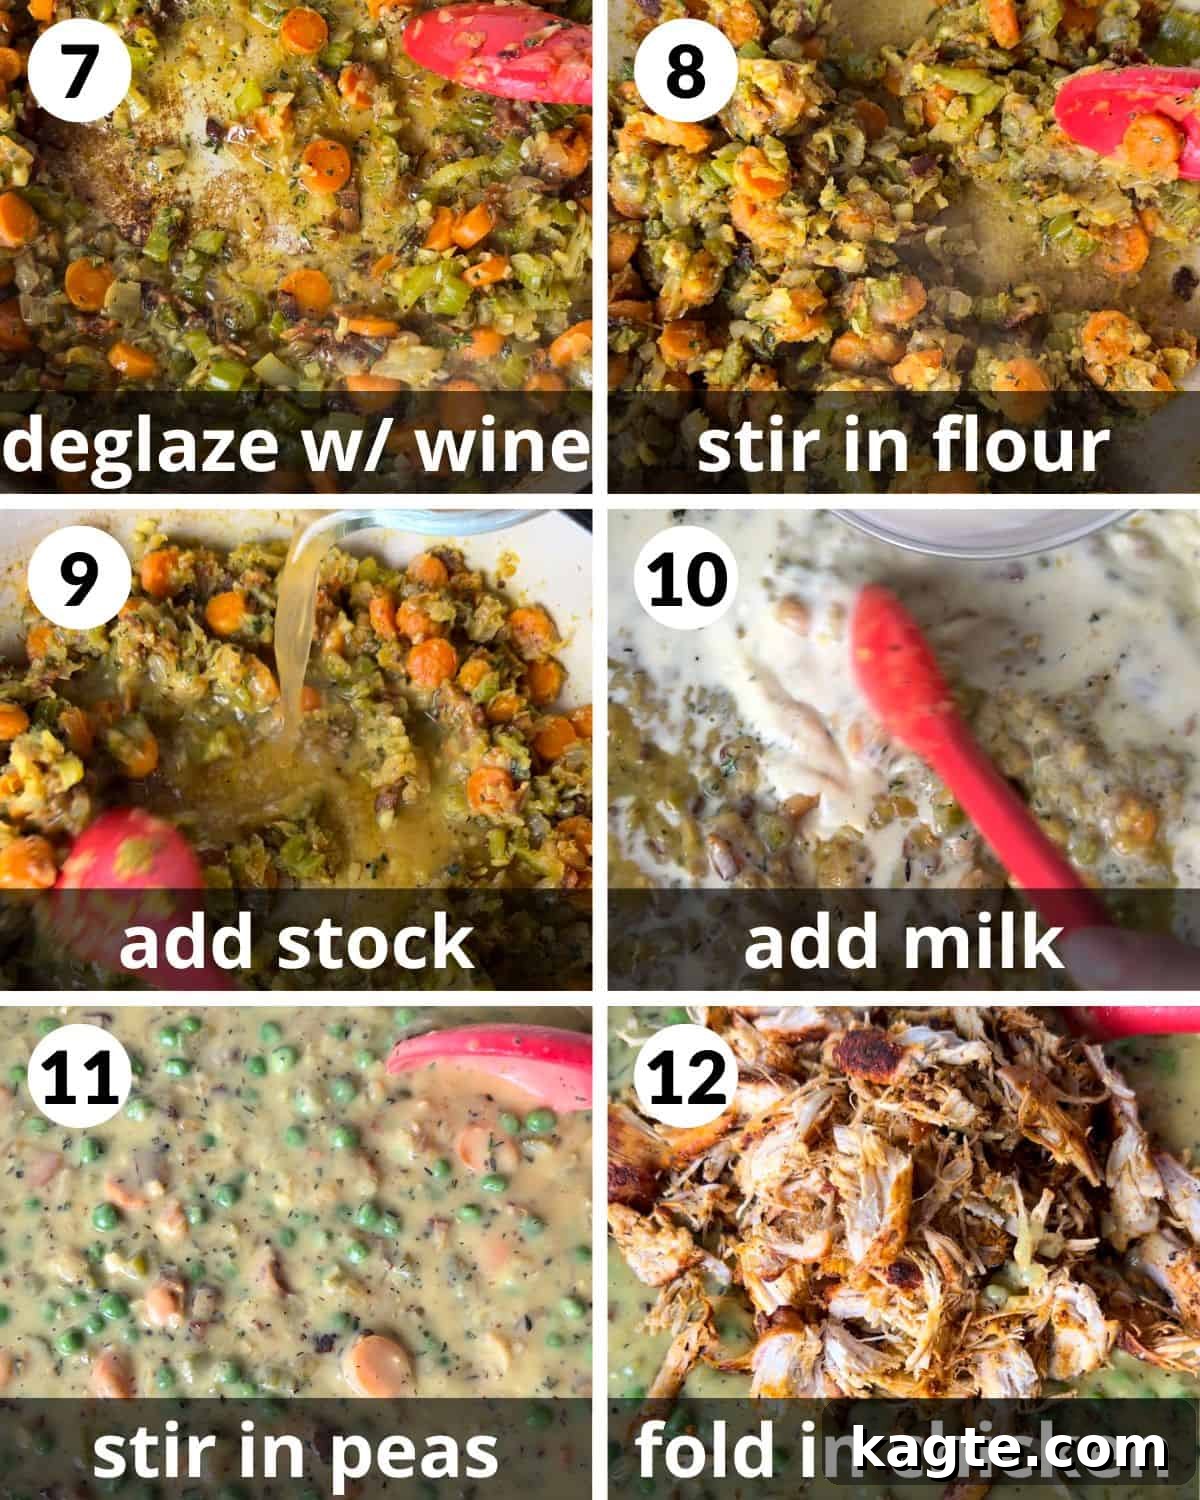
Step 7: Deglaze the pan with the dry white wine. Pour it in and use a wooden spoon or spatula to scrape up any browned bits (fond) from the bottom of the pan. These bits are packed with flavor! Allow the wine to reduce until almost all of it has evaporated, concentrating its essence into the vegetable mixture.
Step 8: Sprinkle the all-purpose flour over the vegetable mixture. Stir continuously for 2-3 minutes, cooking the flour to create a roux. The mixture should thicken into a paste-like consistency and lose its raw flour smell. This step is crucial for thickening your sauce and ensuring it has a smooth, rich texture. Reduce the heat to low.
Step 9: While stirring continuously with a whisk or spoon, slowly pour in the chicken broth, a little at a time, until it is completely combined and the sauce begins to smooth out. Continuous stirring is key here to prevent lumps from forming.
Step 10: Repeat the process from Step 9: while stirring continuously, slowly pour in the milk until it is fully incorporated into the sauce. Continue to stir gently until the sauce reaches your desired creamy consistency. It will thicken further as it cools slightly.
Step 11: Stir in the frozen peas. The residual heat from the sauce will be enough to warm them through. Once the peas are added, turn off the heat to prevent overcooking the vegetables and chicken.
Step 12: Gently fold in the shredded cooked chicken. Ensure the chicken is evenly distributed throughout the rich, creamy vegetable filling. At this point, taste the filling and adjust seasonings (salt and pepper) if necessary.
Tip: The puff pastry topping should be beautifully golden brown and puffed for optimal texture and appearance.
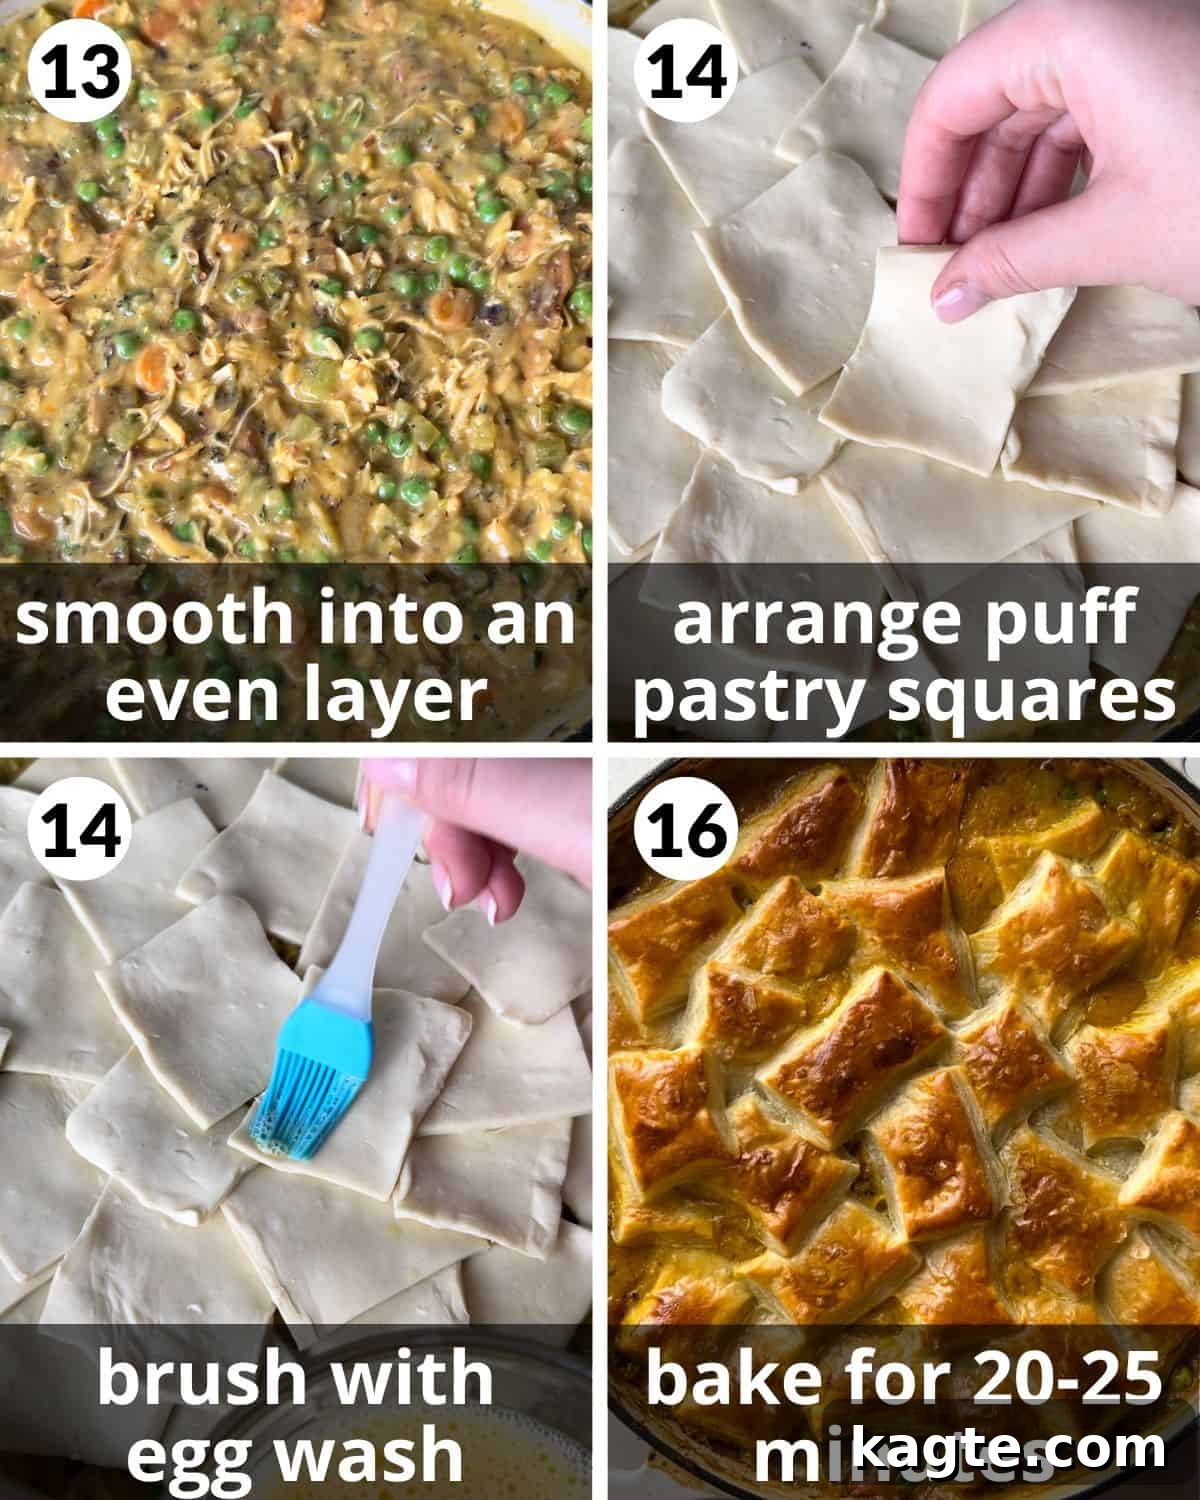
Step 13: Smooth the chicken and vegetable mixture into an even layer in your Dutch oven or skillet. If your pan is not oven-safe, carefully transfer the entire filling to a 3.5-quart baking dish. If the dish is very full, place it on a baking sheet to catch any potential spills during baking.
Step 14: Arrange the thawed puff pastry squares over the top of the filling. Overlap the edges slightly to ensure the entire surface is covered. You can create a decorative pattern or simply lay them flat, ensuring a complete seal to trap the steam and flavors.
Step 15: In a small bowl, whisk together the large egg and 1 tablespoon of water to create an egg wash. Lightly brush each puff pastry square with this mixture. The egg wash will give your crust a beautiful golden-brown color and a lovely shine as it bakes.
Step 16: Transfer the pot pie to the preheated oven. Bake for 20-25 minutes, or until the puff pastry has dramatically puffed up, turned a deep golden brown, and the filling is visibly bubbling around the edges. This indicates that your pot pie is perfectly cooked and ready to serve. Allow it to cool for a few minutes before serving to prevent burns and allow the filling to set slightly.
Delicious Serving Suggestions
This chicken pot pie is incredibly hearty and satisfying on its own, making it a complete meal. However, pairing it with a simple side can elevate the dining experience. For an extra touch of sophistication, consider enjoying a glass of that leftover dry white wine from the recipe with your meal. Here are some complementary side dishes that pair wonderfully with the rich flavors of pot pie:
- Goat Cheese Salad with Arugula: A light, peppery salad with tangy goat cheese provides a refreshing contrast to the richness of the pot pie.
- Kale Crunch Salad: The crisp texture and slightly bitter notes of a kale salad offer a delightful counterpoint to the creamy filling.
- Panera Greek Salad: A bright, zesty Greek salad can cut through the richness and add a fresh, Mediterranean flair.
- Air Fryer Butternut Squash: Roasted or air-fried butternut squash adds a touch of sweetness and vibrant color, complementing the earthy flavors of the pot pie.
- Cornbread without Buttermilk: A warm slice of cornbread offers a different kind of comforting carb, perfect for soaking up any extra sauce.
- Rustic Bread: A crusty rustic bread is always a good idea for dipping into the delicious gravy-like filling.
Expert Tips & Creative Variations
Achieving the perfect chicken pot pie is simple with a few insider tips. Plus, don’t be afraid to get creative with variations to suit your taste!
- Properly Season Your Chicken: If you’re opting to use raw chicken for this recipe, it’s paramount to season it generously before cooking. A well-seasoned chicken breast contributes significantly to the overall flavor of your pot pie. I recommend a simple “house spice blend” as detailed in the recipe card notes: 1 teaspoon kosher salt, 1 teaspoon smoked paprika, and 1/2 teaspoon each of granulated garlic, onion powder, and pepper per 1.25 pounds of chicken. This ensures every bite of chicken is flavorful, not bland.
- Sauté Vegetables Until Tender: The key to a smooth and enjoyable pot pie filling is to ensure your vegetables are perfectly tender. Once the onion, carrots, and celery are added to the pan, allow them to sauté for a good 15 minutes, or even a bit longer, until they are noticeably soft and translucent. Skipping this step or undercooking them will leave you with hard, crunchy chunks in your creamy filling, which detracts from the pot pie experience.
- Incorporate Liquids Gradually Over Low Heat: When it’s time to add the chicken broth and milk to your roux, patience is a virtue. Pour the liquids in slowly, in a thin stream, while continuously whisking or stirring. Crucially, maintain a low heat during this process. Adding liquids too quickly or over high heat can cause lumps to form, resulting in a grainy sauce. Low and slow ensures a velvety, smooth, and perfectly incorporated sauce.
- Bake Until Deeply Browned and Bubbly: Don’t pull your pot pie from the oven too soon! The filling should be visibly bubbling around the edges, indicating it’s heated through and deliciously saucy. More importantly, the puff pastry topping needs to achieve a deep, rich golden brown color. This ensures maximum crispiness and flakiness. The egg wash applied before baking not only gives it this beautiful color but also adds a lovely shine and contributes to its irresistible crunch.
- Create Individual Pot Pies: For a charming presentation and easy portion control, consider making individual pot pies. Simply divide the prepared chicken and vegetable filling among 4-5 large ramekins or oven-safe bowls. Then, cut your thawed puff pastry into squares or circles sized to fit the top of each ramekin. Arrange the pastry over each, allowing it to slightly hang over the edges for a rustic look if desired. Bake as instructed, adjusting baking time slightly if needed, until the pastry is golden and puffed.
- Spice it Up: For a little kick, add a pinch of cayenne pepper or a dash of hot sauce to the filling.
- Cheese Please: A handful of shredded cheddar or Gruyere cheese can be folded into the filling along with the chicken for an extra layer of richness.
- Herb Variations: Experiment with different herbs like parsley or dill for a fresh twist, or use dried Italian seasoning if fresh herbs are unavailable.
- Mushroom Magic: Sauté sliced mushrooms along with the carrots and celery to add an umami depth to the filling.
Make Ahead & Reheat Instructions
This chicken pot pie is perfect for meal prepping, allowing you to enjoy a comforting dinner even on the busiest days. Here’s how to make it ahead and reheat it for the best results:
Making Ahead:
To prepare this pot pie in advance, follow the recipe instructions through Step 12, completing the creamy chicken and vegetable filling. Once the filling is ready, transfer it to an airtight container and refrigerate it for up to 1 day. When you’re ready to bake, simply retrieve the cold filling and assemble the pie starting from Step 13. Because the filling will be cold, the baking time might be slightly longer than specified. Keep an eye on the puff pastry; if it starts to brown too quickly before the filling is heated through, loosely cover the top of the pie with aluminum foil to prevent over-browning while the interior warms up.
Reheating Leftovers:
Reheating pot pie can affect the crispiness of the crust. If you reheat a slice in the microwave, the puff pastry will inevitably soften. While some people don’t mind this for the sake of convenience, if you desire a crispy crust, reheating in the oven is the way to go. Preheat your oven to 325°F (160°C). Place individual slices or the entire leftover pot pie (if a large portion) in an oven-safe dish. Reheat until thoroughly warmed through, which typically takes about 15-25 minutes for a slice. Again, if the pastry starts to brown too quickly, loosely cover it with foil. This method helps restore some of the beloved crispiness to the puff pastry, making your leftovers almost as good as fresh.
Frequently Asked Questions (FAQs)
While technically possible, I generally do not recommend using puff pastry for the bottom crust of a pot pie. The filling will likely make the bottom pastry soggy and gummy, preventing it from puffing up and achieving its signature flaky texture. Puff pastry truly shines when used as a top crust, where it can rise and crisp beautifully.
No, there is no need to pre-cook or blind bake puff pastry before adding it to the top of your pie filling. Simply arrange the raw, thawed puff pastry dough directly over the filling, and it will puff up and cook perfectly in the oven, creating a golden, flaky crust.
Yes, I highly recommend applying an egg wash to your puff pastry before baking. An egg wash (typically one egg whisked with a tablespoon of water or milk) serves a couple of purposes: it helps the pastry achieve a beautiful, deep golden-brown color and imparts a lovely, appealing sheen. It also aids in crisping the surface slightly.
Yes, you can place puff pastry on top of warm filling. The filling doesn’t need to be completely cold, but it shouldn’t be boiling hot. A slightly cooled, or at least not actively simmering, filling is ideal. The side of the pastry touching the warm filling may not develop as much color, but the top will still puff up and brown beautifully, cooking through perfectly in the oven.
Absolutely, and many people, myself included, prefer it! Puff pastry offers a distinct texture that is buttery, light, and incredibly flaky, creating a more decadent and appealing crust compared to a traditional pie crust. It also tends to be easier to work with when using a store-bought version.
The best way to thaw frozen puff pastry is to transfer it from the freezer to the refrigerator the night before you plan to use it. If you need it quicker, you can thaw it at room temperature for about 30-40 minutes, but be careful not to let it get too warm and sticky, as it can be difficult to handle once fully thawed and warm.
Shop my Amazon Storefront for recommended kitchen tools and ingredients!
More Hearty Main Dish Recipes
If you loved this comforting pot pie, you’re sure to enjoy these other delicious and satisfying main dish recipes:
Chicken
Garlic Butter Chicken Thighs (Baked & Crispy)
Pasta
Baked Stuffed Shells with Meat Sauce
Fall
Dutch Oven Pot Roast
Soup & Chili
Ground Chicken Chili with Beans
If you try this recipe, please leave a star rating in the recipe card below and/or comment! I always appreciate your feedback. Follow me on Pinterest, Facebook & Instagram.

Chicken Pot Pie with Puff Pastry
4.98 from 318 votes
30
50
1
20
8
people
Equipment
-
Shallow Dutch Oven
-
Large Cutting Board
-
8 inch Chef’s Knife
Ingredients
- 3 – 3.5 cups shredded chicken breast, see notes*
Filling
- 4 slices bacon, diced
- 4 Tablespoon unsalted butter
- 1 1/2 cup sliced carrots
- 1 1/2 cup sliced celery
- 1 large yellow onion, diced
- 1 shallot, diced finely
- 8-10 cloves garlic, minced finely
- 1 teaspoon Morton kosher salt*
- 1/2 teaspoon pepper
- 1/4 teaspoon turmeric, optional
- 1 Tablespoon of EACH fresh chopped thyme, rosemary, & sage
- 1/2 cup dry white wine*
- 1/2 scant cup all purpose flour
- 2 1/4 cups chicken stock or broth
- 1 cup milk
- 1 1/2 cups frozen peas
Puff Pastry Topping
- 1 package frozen puff pastry (14 ounces), thawed & cut into 2.5-3 inch squares
- 1 large egg
- 1 Tablespoon water
Instructions
-
Preheat the oven to 400 degrees. In a 3.5 quart shallow dutch oven or large skillet, sauté the bacon over medium low heat, until most of the fat has rendered and the bacon has browned.
-
Add the butter and stir until melted.
-
Add the carrots and celery. Increase the heat to medium and sauté for 2-3 minutes.
-
Add the onion. Sauté for 10 minutes, or until translucent.
-
Add the shallot and garlic. Sauté for 2-3 minutes or until fragrant.
-
Add the salt, pepper, turmeric, thyme, rosemary, and sage. Sauté for 2 minutes.
-
Deglaze the pan with the wine, scraping any brown bits off the bottom of the pan. Reduce until almost all of the wine has evaporated.
-
Add the flour and cook for 2-3 minutes. It should turn into a paste. Reduce the heat to low.
-
While stirring continuously, pour in the chicken broth slowly until completely combined.
-
While stirring continuously, pour in the milk slowly until completely combined.
-
Stir in the frozen peas. Turn the heat off.
-
Fold in the shredded chicken.
-
Smooth the mixture into an even layer. If the pan is not oven safe, transfer to a 3.5 quart baking dish. Place on a baking sheet if the dish is very full.
-
Arrange the puff pastry squares so that they are overlapping and cover all of the filling.
-
Whisk together the egg and water. Brush each square so that they are all coated.
-
Bake for 20-25 minutes, or until the pastry has puffed up and browned.
Did you make this recipe?
Leave a comment below!
Notes
- Chicken Breast: You can use leftover or rotisserie chicken. If using fresh chicken, you will need about 1.25 pounds raw boneless skinless chicken breast (about 3 small). Season with 1 teaspoon Morton kosher salt, 1 teaspoon smoked paprika, 1/2 teaspoon of EACH granulated garlic, onion powder, & pepper. Bake for 30-35 minutes at 425 degrees. I usually bake these while I cook the filling. Shred using 2 forks. You could even use leftover shredded turkey.
- Kosher Salt: All of my recipes are tested with Morton kosher salt unless noted otherwise. It is the best salt for everyday cooking because of its size and flavor. If using table salt, the amount should be reduced. I highly recommend picking up some kosher next time you are at the store!
- White Wine: Use a dry sauvignon blanc or pinot grigio. You can omit this and use an additional 1/2 cup of stock to deglaze the pan.
- Season the chicken. If you are using raw chicken, be sure to season it before cooking. I recommend a “house spice blend”. See measurements in the recipe card notes.
- Sauté the veggies. Once the onion is added, the veggies will take about 15 minutes to soften. You do not want hard chunks in the filling.
- Add the liquids over low heat. When adding the broth and milk, stir continuously so they incorporate evenly. The heat should be on low so they do not thicken too much.
- Bake until browned. The filling should be bubbling and the pastry should be deep golden brown. This will ensure the topping is crispy. The egg wash also helps the pastry to develop color and shine.
- Make individual pies. Transfer the filling to 4-5 large ramekins before topping with the pastry. Arrange the squares over each ramekin. It is fine if they hang off the edge.
Nutrition
Calories: 532kcal
|
Carbohydrates: 27g
|
Protein: 37g
|
Fat: 29g
|
Saturated Fat: 10g
|
Polyunsaturated Fat: 4g
|
Monounsaturated Fat: 12g
|
Trans Fat: 0.2g
|
Cholesterol: 133mg
|
Sodium: 692mg
|
Fiber: 3g
|
Sugar: 5g
Nutrition information is automatically calculated, so should only be used as an approximation.