
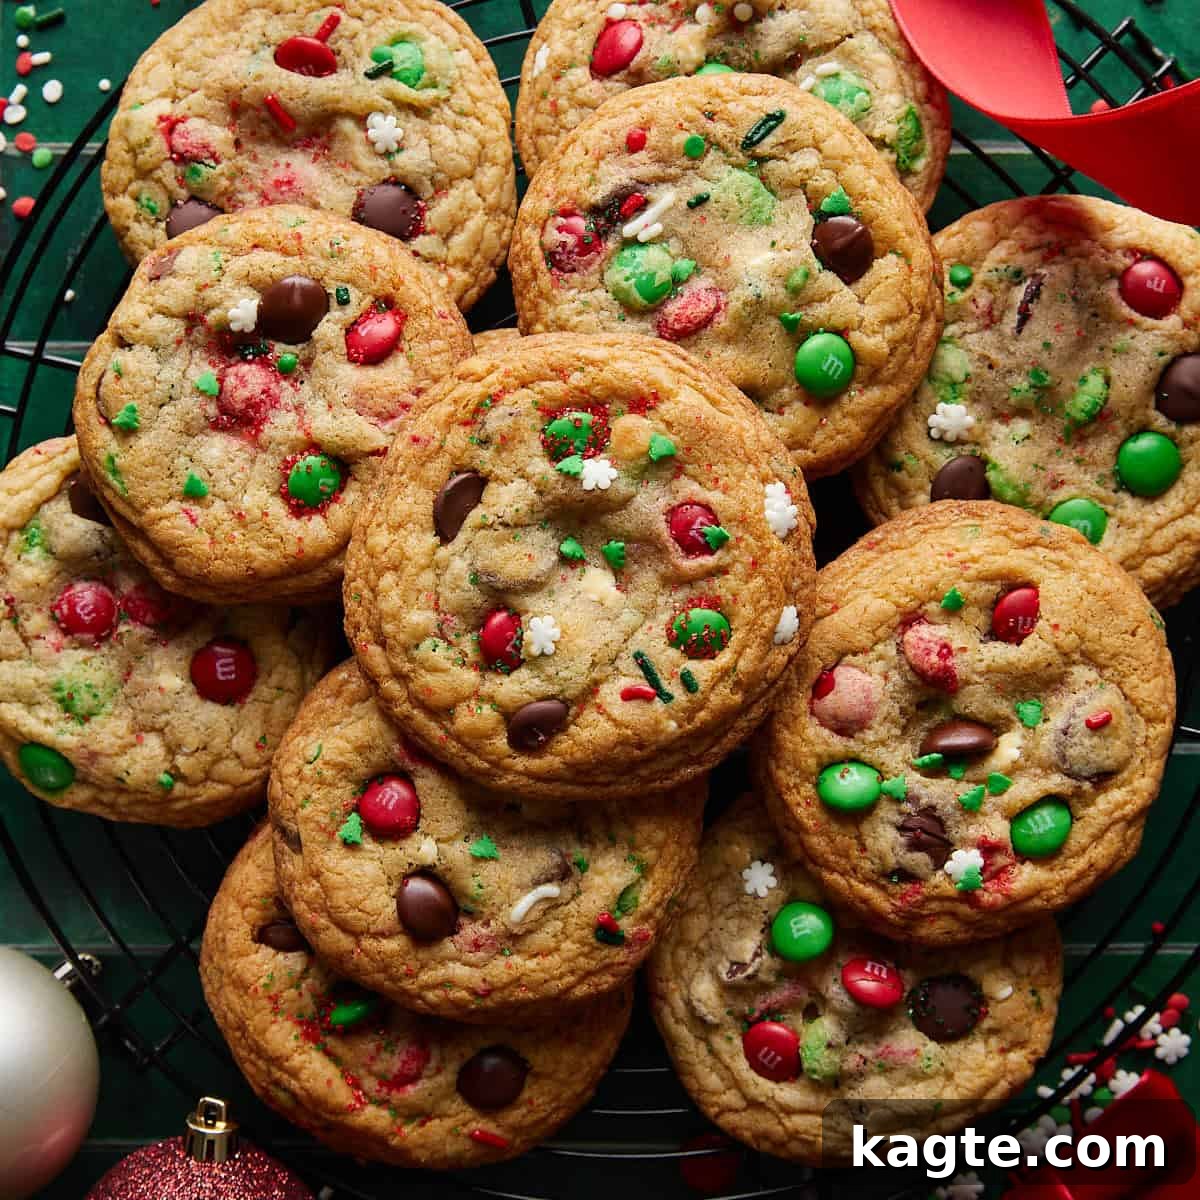
Get ready to infuse your holiday season with irresistible sweetness and festive cheer! These Christmas Chocolate Chip Cookies are more than just a dessert; they’re a celebration in every bite. Perfectly crafted to capture the spirit of the holidays, they’re loaded with melt-in-your-mouth semi-sweet chocolate chips, vibrant red and green M&Ms, and a generous scattering of cheerful sprinkles. Each cookie is a little piece of joy, destined to become a beloved tradition on your holiday table. Whether you’re whipping up a batch for a lively cookie exchange, preparing thoughtful homemade gifts, or simply craving a cozy, comforting treat on a frosty evening, these holiday cookies are an absolute must-make. They embody everything wonderful about Christmas baking: warmth, joy, and unforgettable flavor.
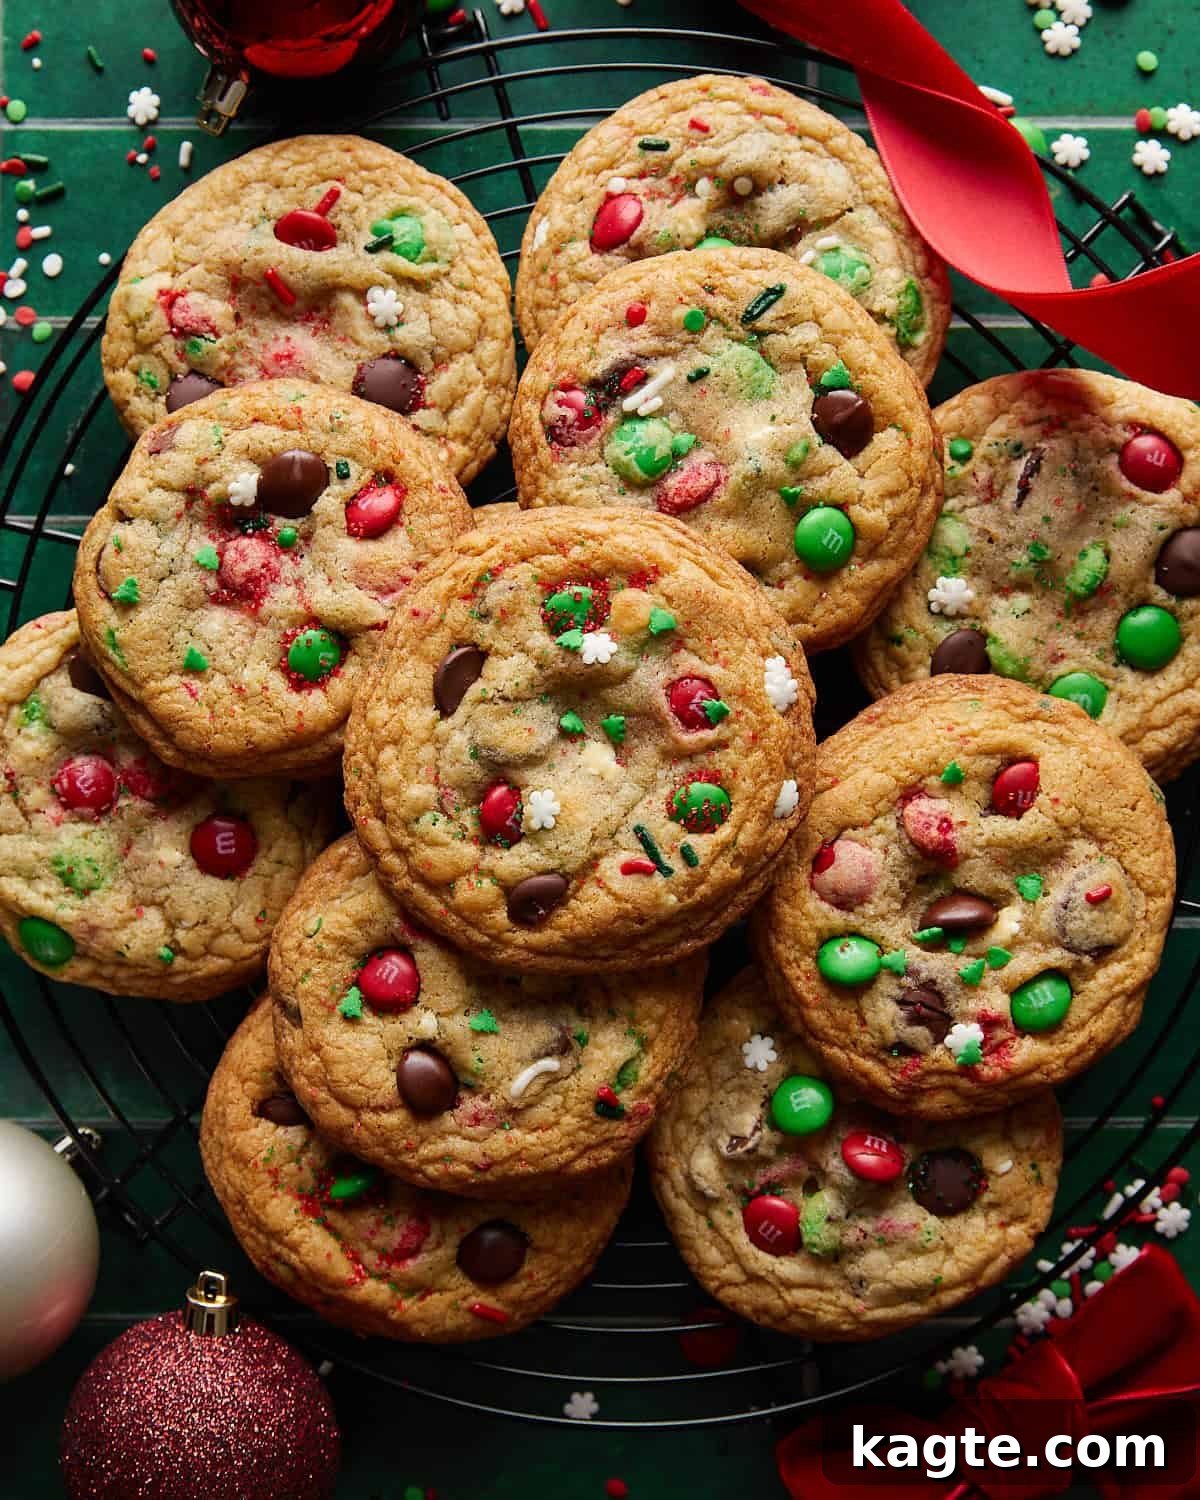
Few things evoke the warmth and comfort of home quite like a batch of freshly baked chocolate chip cookies. It’s a classic for a reason, but with a few special touches, we can elevate it into something truly spectacular for the holiday season. If you’re a connoisseur of decadent chocolate chip cookies, you’ve come to the right place. My passion for baking leads me to create unique and rich cookie experiences that go beyond the ordinary. For instance, my Salted Toffee Chocolate Chip Cookies are an indulgent masterpiece, incredibly rich and utterly addictive, a recipe that consistently earns rave reviews and often disappears in a single sitting! They offer a delightful crunch and a buttery, sweet depth that’s simply irresistible.
For those who prefer a different kind of sweet profile, perhaps without the prominent molasses notes typically found in brown sugar-based cookies, my Chocolate Chip Cookies without Brown Sugar recipe offers a delightful alternative. These are perfect for when that sudden sweet craving strikes, providing a quick and satisfying fix without compromising on flavor or that beloved chocolate chip cookie texture. Moreover, if you’re looking for an innovative and impressive twist on the classic cookie, my Chocolate Chip Cookie Pie flawlessly combines the best elements of a cake, a cookie, and a pie into one magnificent dessert! This unique creation is sure to be the star of any party, offering a comforting yet exciting culinary experience.
Table of Contents: Your Comprehensive Guide to Perfect Christmas Cookies
- Why You’ll Adore These Holiday Cookies
- Essential Ingredients & Smart Substitutions
- Step-by-Step Guide: Crafting Your Christmas Chocolate Chip Cookies
- Expert Tips for Bakery-Style Cookies
- Creative Variations & Flavor Enhancements
- Perfect Pairings: What to Serve with Your Cookies
- More Festive Recipes to Explore
- Christmas Chocolate Chip Cookies Recipe Card
Why You’ll Adore These Holiday Cookies: A Celebration in Every Bite
These Christmas Chocolate Chip Cookies aren’t just another cookie recipe; they’re an experience designed to bring joy and deliciousness to your festive season. Here’s why they’re destined to become a new holiday favorite, cherished by friends and family alike:
- Festive & Fun for All Ages: With their vibrant red and green M&Ms and an array of cheerful Christmas sprinkles, these cookies are a visual delight that instantly adds a pop of holiday spirit to any platter. They are perfect for children’s parties, family gatherings, or as a vibrant addition to your holiday dessert spread. Their playful appearance is matched only by their incredible taste, promising smiles and festive cheer with every single bite, making them a true holiday showstopper.
- The Magic of Browned Butter: This isn’t just regular butter; it’s butter meticulously transformed into a liquid gold elixir. Browning the butter introduces a deep, nutty, and complex caramel-like flavor that elevates these cookies far beyond a standard chocolate chip recipe. It adds a sophisticated layer of depth and richness that will have everyone wondering what your secret ingredient is. This simple extra step is incredibly easy to master and makes an extraordinary, unforgettable difference in flavor.
- Effortlessly Make-Ahead Friendly: The busy holiday season calls for recipes that seamlessly fit into your schedule, not the other way around. This recipe is wonderfully accommodating and perfect for planning! You can prepare the cookie dough in advance, chill it for several days, and then bake fresh, warm cookies whenever a craving strikes or unexpected guests arrive. This flexibility means less stress during the bustling holidays and more time to enjoy the festivities, all while still enjoying the delight of warm, homemade cookies.
- Irresistibly Chewy & Gooey Texture: Thanks to the thoughtful combination of ingredients and precise techniques, including the use of an extra egg yolk and cornstarch, these cookies boast a perfectly chewy texture with slightly crispy, golden edges and a delightfully gooey, tender center. They strike the ideal balance between soft and firm, ensuring a satisfying bite that melts in your mouth every single time.
- Simple Ingredients, Spectacular Results: While the flavor profile and appearance of these cookies are gourmet and impressive, the ingredients themselves are straightforward and readily available in most grocery stores. You don’t need obscure or hard-to-find items to create these show-stopping holiday treats. With pantry staples and a few festive additions, you’ll be baking like a seasoned professional, dazzling everyone with your culinary skills.
Essential Ingredients & Smart Substitutions for Perfect Christmas Cookies
Crafting the perfect Christmas chocolate chip cookie starts with understanding your ingredients. Each component plays a crucial role in achieving the desired flavor, texture, and festive appeal. Here’s a detailed look at what you’ll need and how thoughtful substitutions can impact your final bake, ensuring success every time:
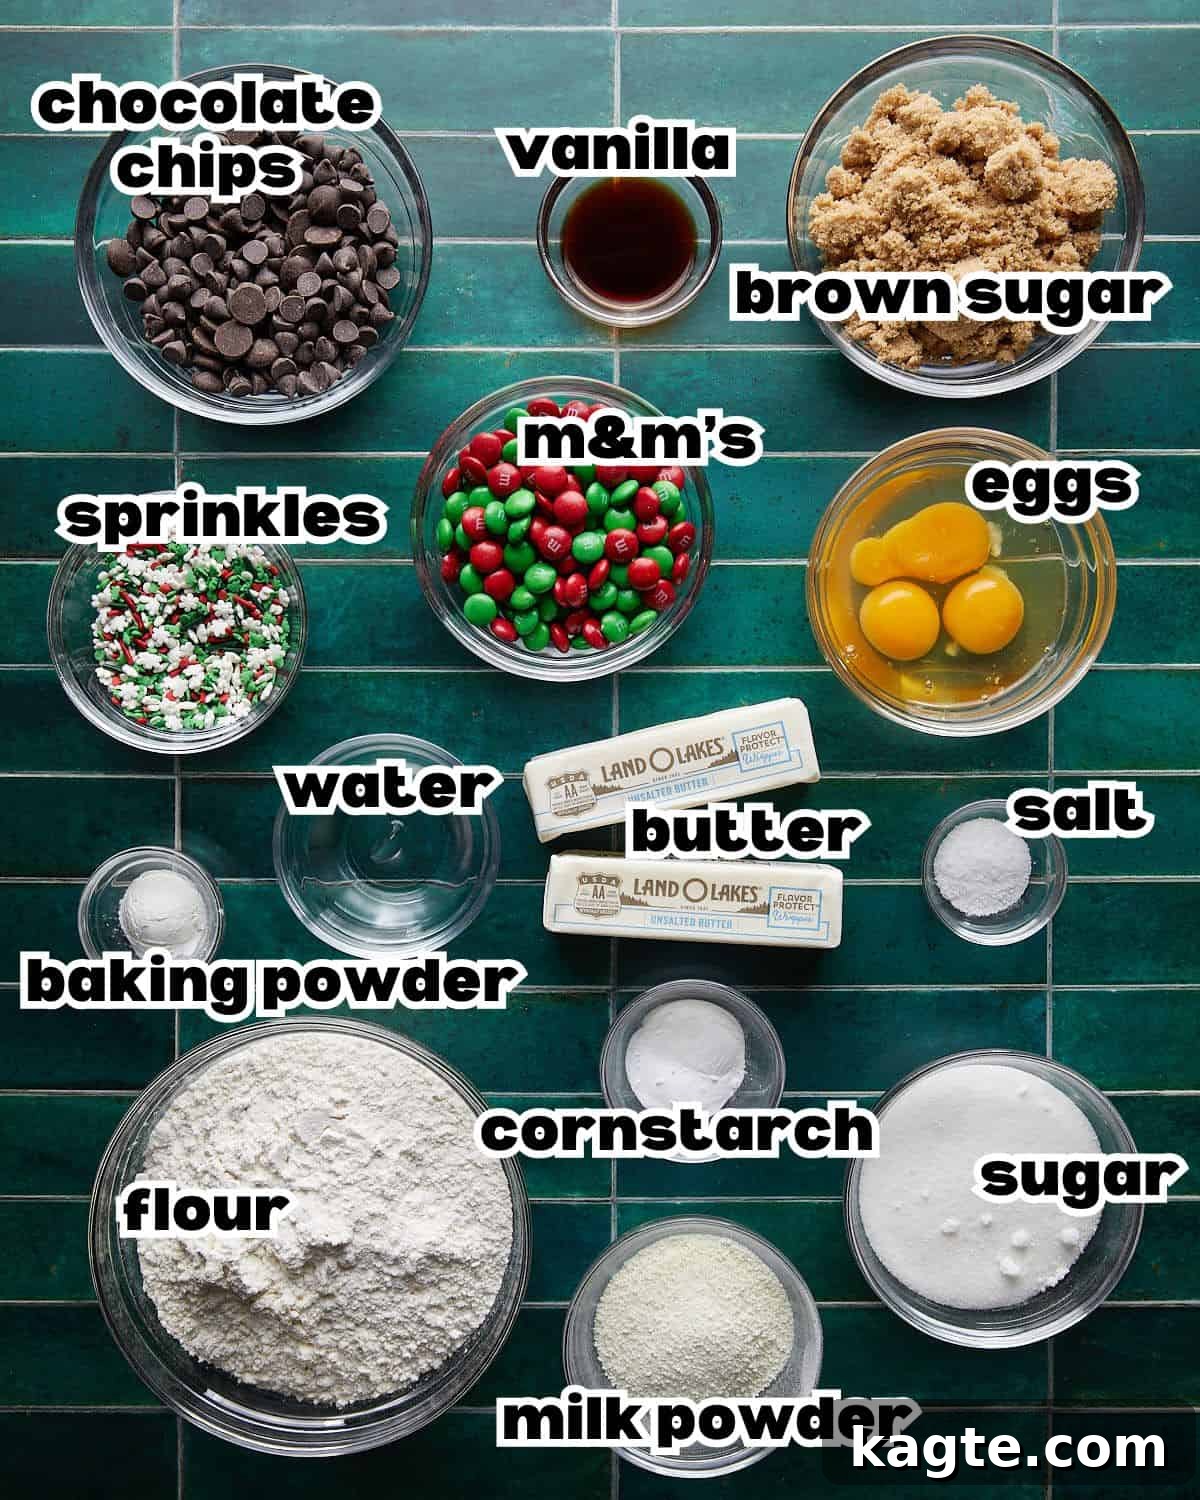
- Butter (Unsalted): Always opt for unsalted butter when baking. This provides you with complete control over the overall saltiness of your cookies, allowing you to fine-tune the flavor profile. If salted butter is your only option, simply reduce the amount of added kosher salt in the recipe by about ¼ to ½ teaspoon to prevent your cookies from becoming overly salty. The process of browning the butter is fundamental here, transforming simple butter into a rich, nutty, and aromatic foundation for your cookies, essential for that deep flavor.
- Milk Powder (Low-Fat): This often-overlooked ingredient is a true game-changer! Milk powder adds a beautiful depth of flavor and a subtle richness, enhancing the caramel notes developed during the browned butter process and contributing significantly to a softer, more tender cookie texture. While you *can* omit it if you absolutely don’t have it on hand, be aware that the cookies might not achieve quite the same profound depth and complexity of flavor. It’s a small addition that yields a remarkably big impact on the final taste.
- Water (Cold): After browning the butter, the addition of cold water serves two incredibly important purposes: first, it rapidly cools down the hot browned butter mixture, which is critical for preventing the sugars from caramelizing further and, more importantly, stopping the eggs from scrambling when they are added later. Second, it helps to rehydrate the dough slightly, compensating for some of the moisture lost during the butter browning process, ensuring your cookies remain perfectly moist and chewy.
- Brown Sugar (Light or Dark): Brown sugar is an absolute must-have for achieving that signature chewy texture and for locking in moisture within the cookies. Light brown sugar will impart a milder, sweeter flavor, while dark brown sugar, with its higher molasses content, will contribute a deeper, more pronounced caramel and richer flavor profile. Feel free to use whichever you prefer, or even a mix of both for a beautifully balanced taste.
- White Granulated Sugar: This classic baking staple provides essential sweetness and plays a key role in helping the cookies develop those desirable crispy edges that perfectly contrast with the soft, chewy interior. The harmonious combination of both brown and white granulated sugar is fundamental to achieving the cookie’s unique and satisfying texture.
- All-Purpose Flour: As the foundational component of most cookie recipes, all-purpose flour provides the necessary structure and body. For those who desire an even chewier cookie, you can experiment by substituting about ¼ cup of the all-purpose flour with bread flour, which has a slightly higher protein content and contributes to a more substantial chew.
- Eggs (Large, Room Temperature): Using large eggs that are at room temperature is absolutely crucial for proper emulsion and for achieving a smooth, cohesive batter. Cold eggs can cause the butter to seize up, leading to a lumpy dough that is difficult to work with. Room temperature eggs integrate more seamlessly and evenly into the mixture, resulting in a more uniform texture and a more consistent bake in your final cookies.
- Egg Yolk (Extra): This is another secret weapon in this recipe for superior chewiness and increased richness! The addition of an extra egg yolk contributes extra fat and powerful emulsifiers without introducing excess moisture, which can thin out the dough. The result is a wonderfully tender, incredibly chewy cookie crumb that is simply irresistible.
- Cornstarch: A fantastic ingredient often used to achieve soft, thick cookies that resist spreading too much. Cornstarch helps to tenderize the dough significantly and acts as a stabilizer, preventing the cookies from spreading excessively in the oven, ensuring they remain wonderfully plump, soft, and thick even after cooling.
- Baking Powder & Baking Soda: These are your essential leavening agents, working in tandem to give your cookies their perfect rise and texture. Baking powder provides a gentle, even lift, contributing to a slightly puffier cookie, while baking soda reacts with the acidic brown sugar to encourage spread and tenderness, ensuring the cookies have a pleasant, slightly crisp exterior.
- Kosher Salt (Morton): Salt is vital in baking for balancing sweetness and enhancing all the other wonderful flavors in your cookies. My recipes are always tested with Morton kosher salt due to its consistent grain size and pure, clean flavor. If you’re using finer table salt, remember to reduce the amount by about half, as it’s much denser by volume and can quickly make your cookies too salty. Investing in kosher salt is highly recommended for all your baking and cooking needs!
- Semi-Sweet Chocolate Chips: The classic choice for a reason! Semi-sweet chocolate chips offer a perfectly balanced sweetness that beautifully complements the rich, nutty cookie dough. However, don’t hesitate to experiment with your personal favorites: milk chocolate for a sweeter profile, dark chocolate for a deeper intensity, or even white chocolate for a creamy, contrasting element. You can also use chocolate chunks or chopped chocolate bars for varied melty pockets of chocolate throughout the cookies.
- M&Ms (Christmas Colors): These vibrant candies add a delightful pop of color, a satisfying textural crunch, and an extra layer of chocolatey goodness. The iconic red and green varieties instantly scream “Christmas!” and make these cookies exceptionally festive. But this recipe is incredibly versatile – feel free to swap them for M&Ms in any seasonal color (e.g., pastels for Easter, orange and black for Halloween) or even use mini chocolate candies to adapt these cookies for any time of year.
- Holiday Sprinkles: Sprinkles are the ultimate final touch of festivity! Nonpareils (tiny round balls) or jimmies (rod-shaped sprinkles) are generally the best choices as they tend to hold their shape and vibrant colors exceptionally well during baking, maintaining their visual appeal. Avoid delicate sugar crystals, as they might dissolve and lose their impact in the heat of the oven, leaving your cookies looking less festive.
A complete list of specific ingredient amounts can be found on the recipe card below.
Step-by-Step Guide: Crafting Your Perfect Christmas Chocolate Chip Cookies
Creating these festive and irresistible cookies is a straightforward process, but paying close attention to each step will ensure a truly spectacular and bakery-worthy result. Here’s a quick overview followed by detailed, easy-to-follow instructions to guide you through every stage of baking:
Quick Overview: Baking Success at a Glance
- Brown the butter to unlock unparalleled rich, nutty flavors.
- Carefully mix wet and dry ingredients to form a cohesive dough.
- Shape and chill the dough for ideal texture and reduced spreading.
- Bake to golden perfection, then allow to cool properly.
Detailed Step-by-Step Instructions
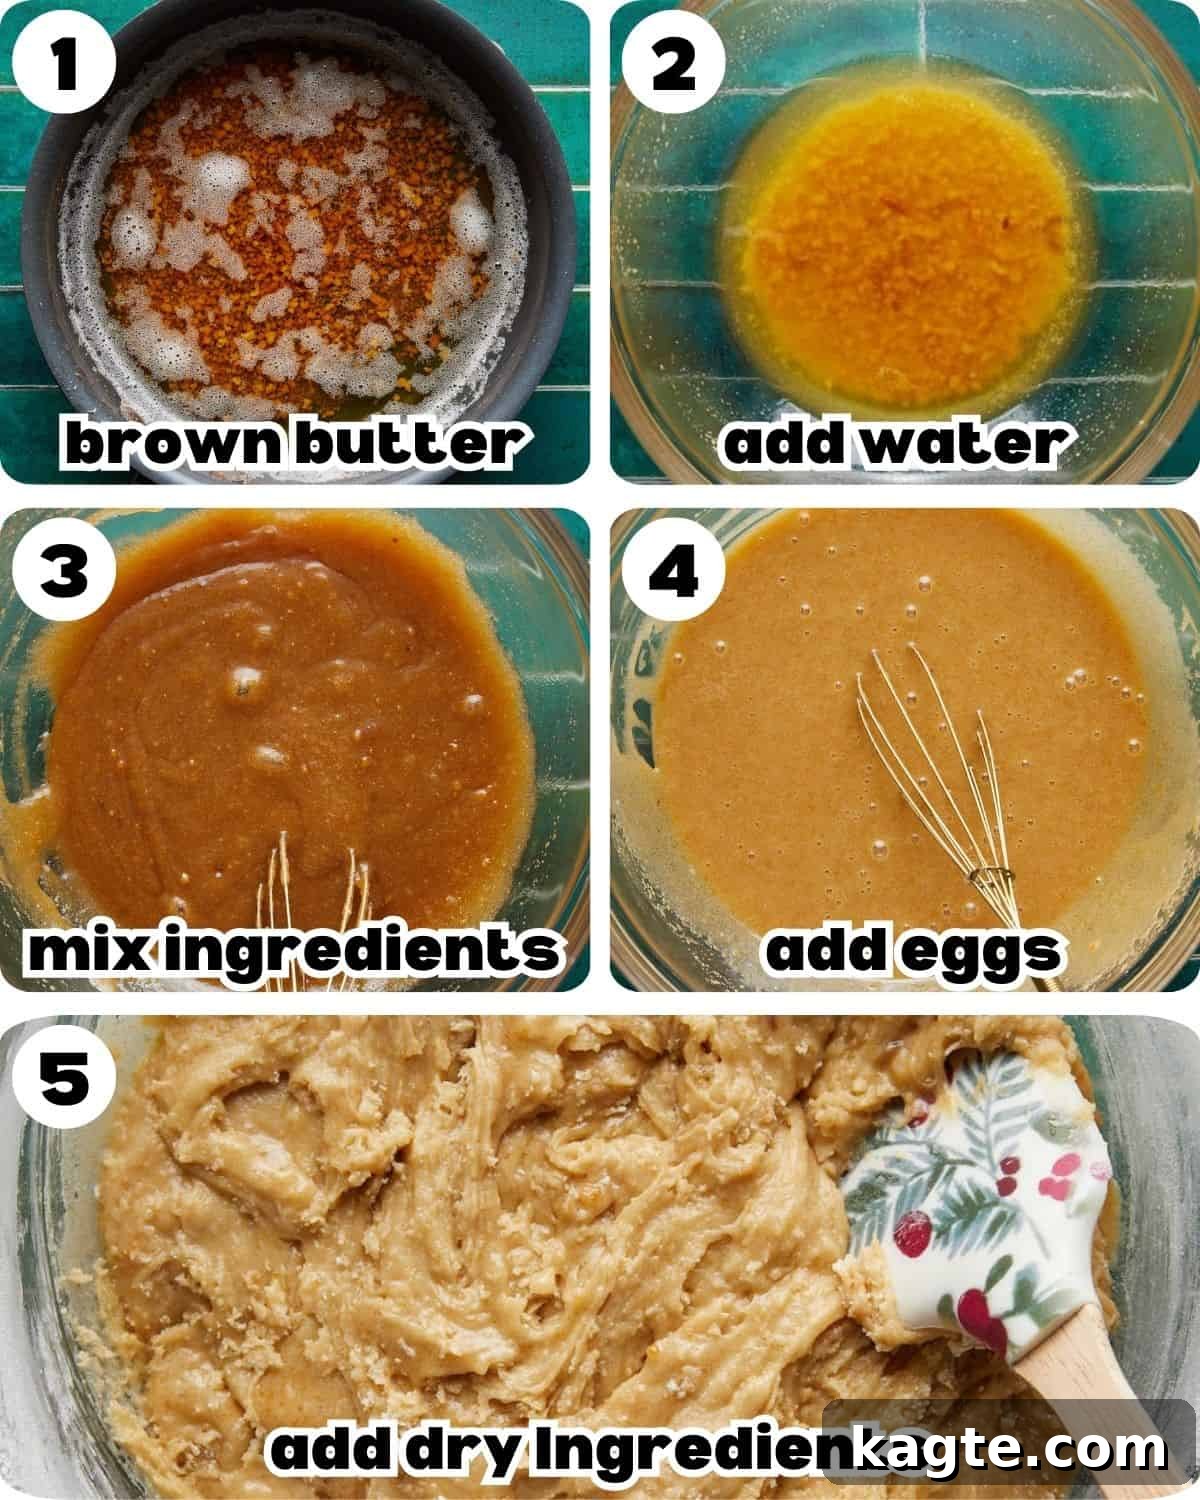
Baker’s Insight: The Transformative Browned Butter Difference
Do not be tempted to skip the browned butter step! While it adds a few extra minutes to your preparation time, the profound warm, nutty, and caramel-like flavor it imparts to the cookies is absolutely worth the effort. This simple technique truly sets this recipe apart, delivering a depth of flavor you simply won’t achieve with regular melted butter.
- Brown the Butter to Perfection: Place the unsalted butter in a medium-sized, light-bottomed saucepan (a light-colored pan is essential as it helps you clearly observe the browning process). Melt the butter completely over medium heat. Once the butter is fully melted, whisk in the milk powder until it’s entirely incorporated and no lumps remain. Continue to cook the mixture, whisking constantly to prevent the milk solids from burning, until the butter solids at the bottom of the pan turn a rich golden brown and emit a wonderfully nutty, toasted aroma, reminiscent of toasted hazelnuts. This crucial step usually takes about 5-8 minutes after the butter has melted. Keep a very close eye on it, as butter can go from perfectly browned to burnt in a matter of seconds.
- Cool with Cold Water: Immediately remove the saucepan from the heat once the butter has reached its perfect browned state. Carefully pour the hot browned butter into a large, heat-proof mixing bowl. Stir in the cold water. This critical step serves two important functions: it rapidly cools the butter mixture down, which is essential for preventing your eggs from scrambling in a later step, and it also replaces some of the moisture lost during the browning process, ensuring your cookies remain perfectly moist and tender.
- Combine Sugars & Vanilla: To the slightly cooled browned butter mixture, add both the brown sugar, granulated white sugar, and the vanilla extract. Whisk vigorously until the mixture is beautifully smooth, glossy, and thoroughly combined. At this point, the mixture should be cool enough that you can comfortably touch the side of the bowl without it feeling hot. If it still feels warm, simply place the bowl in the freezer for about 5-10 minutes, stirring occasionally, until it reaches room temperature. This step is crucial to prevent the eggs from cooking prematurely.
- Incorporate the Eggs: Add the large eggs and the extra egg yolk, one at a time, mixing thoroughly after each addition until each egg is fully incorporated into the batter. Continue to beat until the mixture lightens in color and becomes noticeably fluffy, which typically takes about 1-2 minutes. This ensures everything is well emulsified, contributing to a smoother dough.
- Prepare the Dry Ingredients: In a separate, medium-sized bowl, whisk together the all-purpose flour, cornstarch, baking powder, baking soda, and kosher salt. It’s imperative that these ingredients are well combined to guarantee an even distribution of the leavening agents and salt throughout your cookie dough, leading to a consistent bake.
- Gently Combine Wet & Dry: Gradually add the whisked dry ingredients to the wet butter-sugar-egg mixture. Mix on low speed, or gently by hand with a sturdy spatula, until just combined. Be extremely careful not to overmix the dough at this stage; overmixing can develop too much gluten, which will result in tough, less tender cookies. Stop mixing as soon as no streaks of flour are visible and the dough comes together.
Insider Tip: The Non-Negotiable Importance of Chilling Dough
Do not underestimate the power of chilling your cookie dough! This step is paramount for preventing excessive spreading in the oven, ensuring your cookies maintain a thick, desirable shape. More importantly, chilling allows the flour to fully hydrate and the flavors to meld beautifully, resulting in a more complex, nuanced taste and a superior chewy texture. Patience truly pays off here!
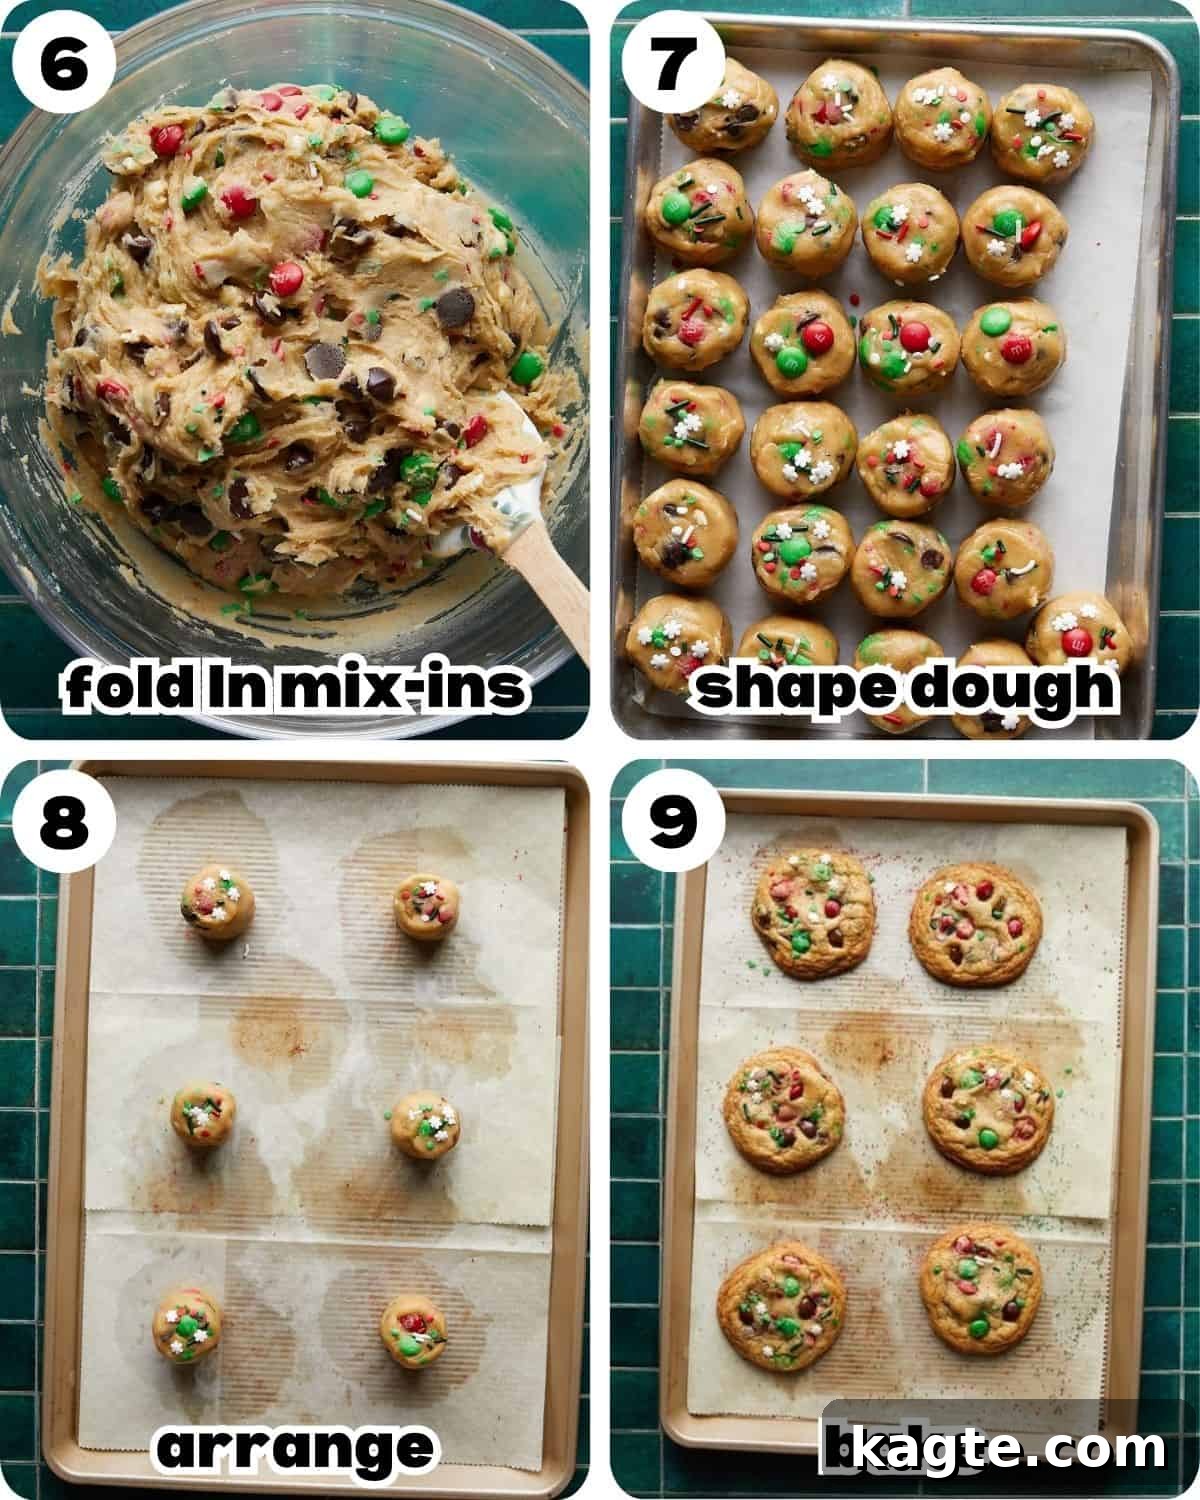
- Fold in the Festive Mix-Ins: Gently but thoroughly fold in the semi-sweet chocolate chips, Christmas M&Ms, and holiday sprinkles. Mix just until they are evenly distributed throughout the dough. The goal is to have visible pops of color and chocolate in every single bite, making each cookie a delightful surprise.
- Shape and Chill the Dough Balls: Using a 3-tablespoon cookie scoop, portion out the dough. If the dough feels too sticky or soft to handle easily, place the entire bowl in the freezer for 10-15 minutes to firm it up slightly. Once portioned, gently roll each dough ball between your palms to smooth it, then shape it slightly taller than it is wide, creating a cylindrical or slightly oblong shape. This unique shaping technique helps create those coveted thick, wonderfully chewy, bakery-style cookies. Place the shaped dough balls onto a parchment-lined baking sheet. For optimal results, freeze the cookie dough balls for a minimum of 20-30 minutes, or until they are firm to the touch. This firming is absolutely essential for achieving the perfect texture and preventing excessive spreading. After freezing, you can either bake them directly or transfer them to an airtight container and store them in the refrigerator for up to 2-3 days, or even in the freezer for up to 3 months, for convenient future baking sessions.
- Preheat Oven & Arrange for Baking: Preheat your oven to 350°F (175°C). Line a baking sheet with parchment paper or a silicone baking mat to prevent sticking and ensure even heat distribution. Arrange the chilled cookie dough balls on the prepared baking sheet, ensuring they are spaced generously about 2 inches apart to allow for proper spreading during baking (typically 6-8 cookies fit comfortably per standard baking sheet). For an extra festive touch and a more appealing presentation, gently press a few additional M&Ms and sprinkles onto the tops of each dough ball just before they go into the oven.
- Bake & Enjoy Your Creation: Bake for 12-14 minutes. The cookies are ready when their edges are lightly golden and set, but their centers still appear slightly soft and wonderfully underbaked. This is the secret to achieving that coveted chewy, gooey interior! It is crucial not to overbake them, as this will lead to dry, crumbly cookies. Immediately upon removing them from the oven, let the cookies cool on the hot baking sheet for at least 5 minutes. This crucial resting period allows them to continue baking gently from residual heat and firm up without becoming dry. After 5 minutes, carefully transfer them to a wire rack to cool completely. Serve warm with milk, coffee, or your favorite holiday beverage, and savor the festive flavors and the joy you’ve baked into every single cookie!
Expert Tips for Bakery-Style Christmas Chocolate Chip Cookies Every Time
To ensure your Christmas chocolate chip cookies turn out absolutely perfect, thick, and chewy every single time, rivaling those from your favorite bakery, keep these expert tips in mind:
- Embrace a Kitchen Scale for Precision: For the most accurate and consistent baking results, especially when measuring flour, a digital kitchen scale is your ultimate best friend. Volumetric measurements (using cups) can vary significantly based on how ingredients are scooped and packed, but a scale ensures you’re using the exact amount every time, leading to flawlessly consistent cookies with the perfect texture and spread.
- Ensure Butter Mixture Cools Properly: After you’ve browned the butter and combined it with the sugars, it is paramount that the mixture cools down to at least room temperature before you proceed to add the eggs. If the butter mixture is too warm, the eggs will scramble instantly when added, which will ruin the texture of your dough and ultimately result in an undesirable cookie. A quick stint in the freezer for 5-10 minutes can help speed this cooling process if you’re in a bit of a hurry.
- Shape Dough Balls Taller Than Wide: This is a tried-and-true pro tip for achieving those beautifully thick, wonderfully chewy, bakery-style cookies. By deliberately shaping the dough into taller cylinders or slightly oblong shapes rather than flat discs, you encourage the cookies to spread vertically rather than horizontally during baking. This results in a more substantial, satisfying, and aesthetically pleasing cookie.
- The Non-Negotiable Chill: Chilling the cookie dough is not just an optional suggestion; it’s a vital, non-negotiable step for truly superior cookies. Cold dough spreads much less in the oven, directly leading to thicker, chewier cookies. More importantly, chilling allows the flour to fully hydrate, and it gives all the flavors ample time to meld and deepen, resulting in a richer, more complex taste and a wonderfully superior chewy texture. Do not skip this crucial step!
- Rotate Your Baking Sheets Mid-Bake: Most home ovens have internal hot spots, which can lead to uneven baking. To ensure all your cookies bake evenly and achieve a uniform golden brown on both sides, make it a habit to rotate your baking sheets 180 degrees halfway through the total baking time. This simple action prevents one side of the cookies from browning more quickly than the other.
- Enhance Visual Appeal with Extra Toppings: For that irresistible “wow” factor and a truly professional finish, gently press a few extra M&Ms and vibrant holiday sprinkles onto the tops of the shaped dough balls just before they are placed into the oven. This ensures that the beautiful, festive colors and delightful chocolatey goodness are prominently visible on the finished cookies, making them even more inviting, photogenic, and undeniably festive.
- Underbake Slightly for Chewy Perfection: This is arguably the most crucial secret to achieving perfectly chewy cookies. The golden rule is to pull them from the oven when their edges are visibly set and lightly golden, but their centers still look wonderfully soft and slightly underbaked. The residual heat from the hot baking sheet will continue to gently cook them as they cool down, achieving that perfect balance of slightly crispy edges and gloriously gooey, wonderfully chewy centers.
- Proper Storage for Lasting Freshness: Once completely cooled to room temperature, store your delightful Christmas Chocolate Chip Cookies in an airtight container. At room temperature, they will maintain their freshness and chewiness for up to 3-4 days. For longer storage, you can freeze the baked cookies in an airtight container or freezer bag for up to 3 months, allowing you to enjoy fresh-baked holiday treats whenever the craving strikes.
Creative Variations & Flavor Enhancements for Your Holiday Cookies
While these Christmas Chocolate Chip Cookies are absolutely perfect as they are, the holiday season is all about creativity and personalizing your treats! Don’t hesitate to experiment with these delightful variations to make your batch uniquely yours:
- Nutty Delight: For an added layer of delightful crunch and a wholesome, earthy flavor, stir in ½ cup of finely chopped pecans, walnuts, or even macadamia nuts along with the chocolate chips and M&Ms. For an even deeper flavor, consider toasting the nuts lightly in a dry skillet for a few minutes before adding them to the dough.
- Extra Chocolaty Indulgence: Transform these already delicious treats into decadent double chocolate chip cookies by adding 2 tablespoons of unsweetened cocoa powder to the dry ingredients. This will give the cookie dough a rich, deep chocolate base, perfect for serious chocolate lovers. For an intriguing visual and flavor contrast, consider using a mix of white chocolate chips with the semi-sweet ones.
- Warm Spiced Cookies: Infuse your cookies with the quintessential cozy aromas and flavors of classic holiday spices. Mix ¼ teaspoon of ground cinnamon, a generous pinch of nutmeg, and a tiny dash of ground cloves or allspice into the dry ingredients. These warm spices pair exquisitely with chocolate and truly evoke the comforting essence of Christmas.
- Peppermint Swirl: For a refreshing and vibrant winter twist, add ½ teaspoon of pure peppermint extract (you might want to slightly reduce the vanilla extract to accommodate) and ½ cup of finely crushed candy canes or peppermint chips to the mix-ins. This variation delivers a cool, minty flavor profile that is utterly festive and invigorating.
- Oatmeal Cookie Base: For a chewier, heartier, and slightly more textured cookie, replace ½ cup of the all-purpose flour with quick-cooking rolled oats. This addition not only introduces a wonderful new texture but also adds a hint of wholesome goodness that balances the sweetness.
- Citrus Zest Brightness: For a subtle yet incredibly refreshing brightness that cuts through the richness, add 1-2 teaspoons of finely grated orange or lemon zest to the wet ingredients. Citrus flavors surprisingly well with chocolate and can elevate the overall taste profile, adding an unexpected sparkle to your holiday cookies.
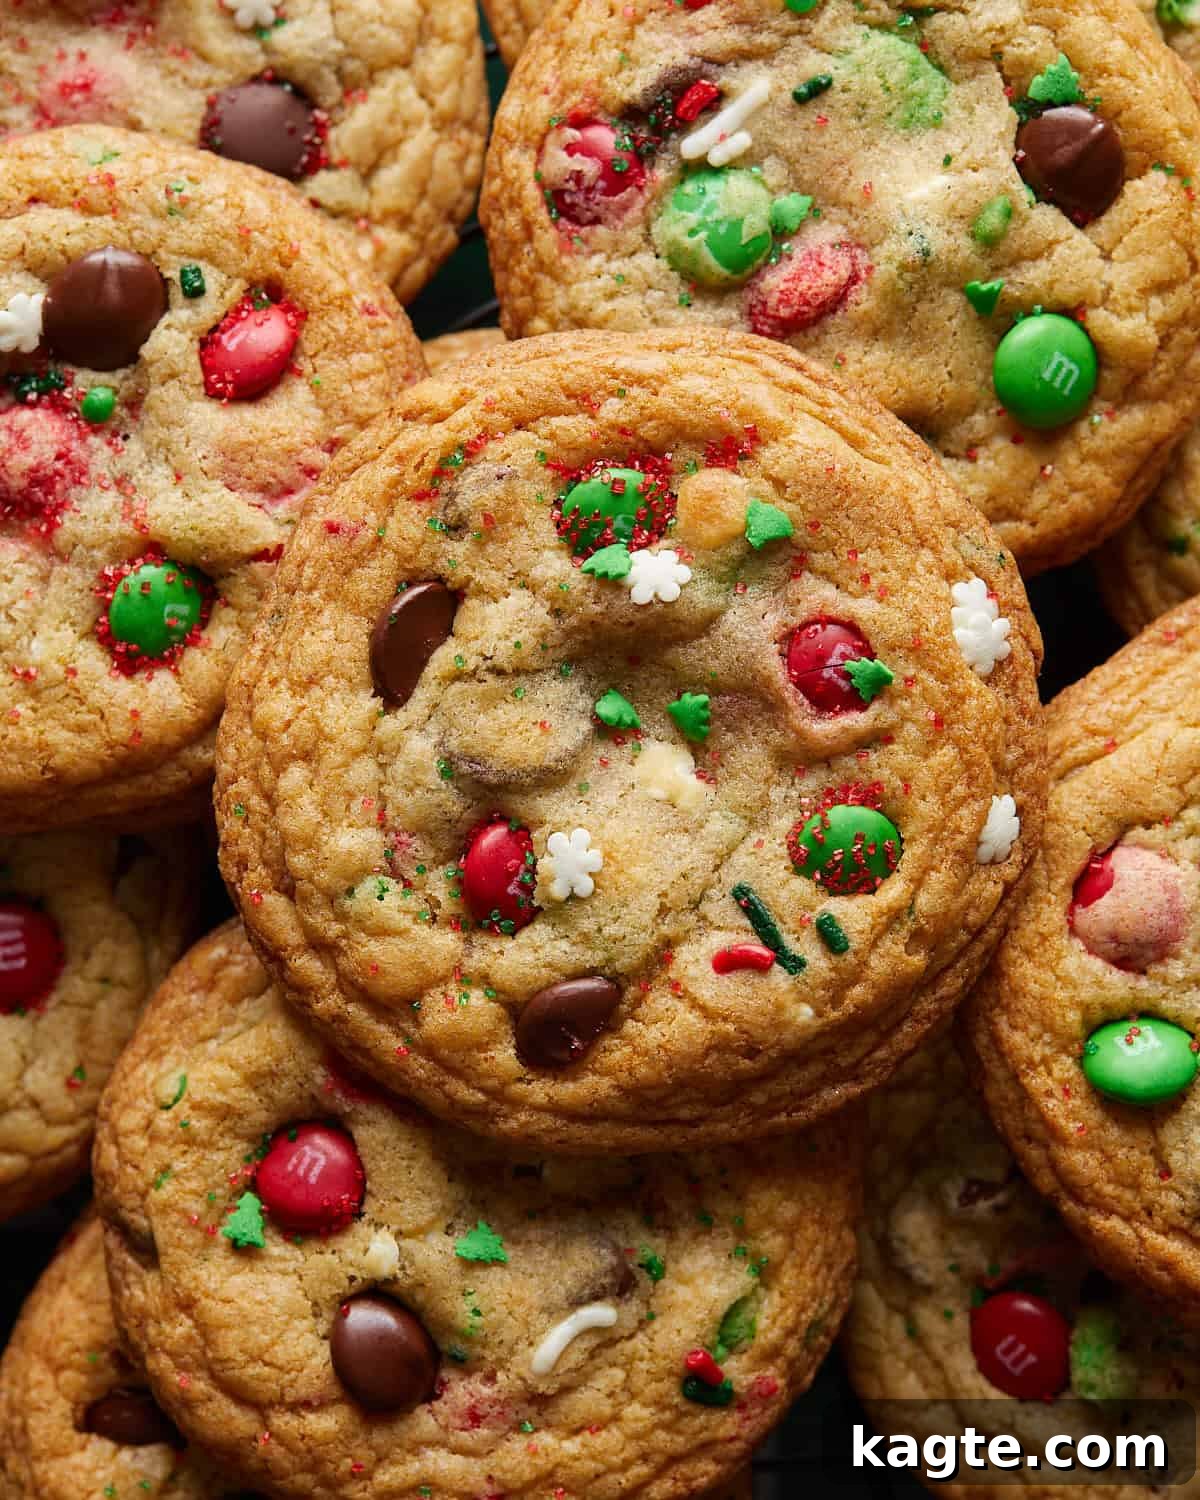
Perfect Pairings: What to Serve with Your Christmas Chocolate Chip Cookies
Enhance the festive experience by pairing your warm, delightful Christmas Chocolate Chip Cookies with equally inviting beverages. Creating a harmonious flavor combination makes for an even more memorable holiday treat. Keep the cozy holiday vibes flowing with these yummy drinks:
- Instant Pot Hot Chocolate: Rich, incredibly creamy, and wonderfully easy to make, this hot chocolate prepared in your Instant Pot is the ultimate cozy companion for your holiday cookies. Its deep, luxurious chocolate flavor perfectly complements the sweetness and varied textures of the cookies, creating a truly comforting sensation.
- Starbucks Chai Tea Latte (Copycat Recipe): For those who appreciate a spiced and aromatic beverage, a warm chai latte, beautifully topped with a dollop of whipped cream and a delicate sprinkle of extra cinnamon or nutmeg, offers a comforting and fragrant pairing. The blend of spices in the chai latte harmonizes wonderfully with the sweet cookies, highlighting the festive notes.
- Iced White Chocolate Mocha (Copycat Recipe): If you prefer a chilled and refreshing drink, this creamy, sweet white chocolate mocha provides a delightful contrast to the warm or room-temperature cookies. It’s surprisingly simple to make with just a few ingredients and offers a luxurious coffee shop experience right in the comfort of your home.
- Classic Cold Milk: Sometimes, the simplest pairing is unequivocally the best. A tall, frosty glass of cold milk is a timeless and refreshing complement to any chocolate chip cookie. Its crisp, clean taste cuts through the richness and sweetness of the cookies, refreshing the palate and making you eager for another bite.
- Mulled Wine or Spiced Cider: For an adult pairing, a warm mug of mulled wine with its aromatic spices, or a non-alcoholic spiced apple cider, can create a wonderfully festive and cozy atmosphere, perfectly matching the holiday spirit of the cookies.
More Festive Recipes to Explore from Bites with Bri
Looking for more inspiration to fill your holiday table with deliciousness, or simply craving more amazing homemade treats? Explore these other fantastic recipes from Bites with Bri, perfect for any occasion, especially during the bustling and joyful festive season. Each recipe is crafted with care to bring flavor and ease to your kitchen:
Dessert
No-Chill Chocolate Chip Cookies (Easy)
Christmas
20 Sweet Peppermint Recipes for Christmas
Side Dish
What To Serve With Mashed Potatoes (25 Dinner Ideas)
Side Dish
Broccoli Mac and Cheese (Easy & Creamy)
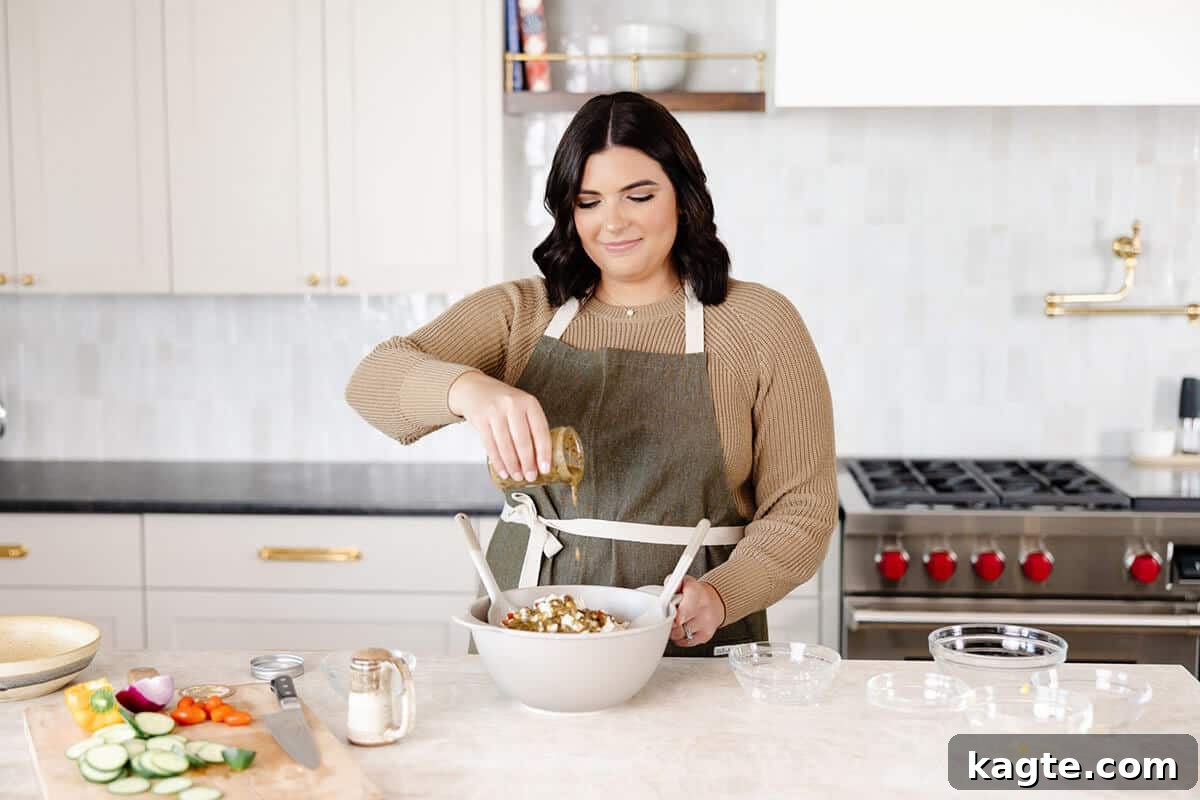
Christmas Chocolate Chip Cookies Recipe Card
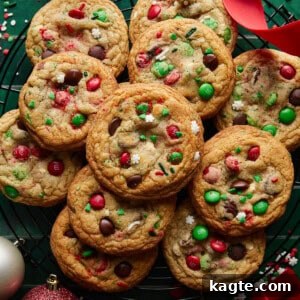
Print Recipe
Save Recipe
Christmas Chocolate Chip Cookies
★★★★★ from 2 votes
These Christmas Chocolate Chip Cookies are the perfect festive treat to bake this holiday season. Loaded with gooey semi-sweet chocolate chips, festive M&Ms, and cheerful sprinkles, they bring joy to your holiday table. Whether you’re baking for a cookie exchange or just a cozy night in, these holiday cookies are a must-make!
Equipment
- Large Cookie Scoop
- Baking Sheets
- Mixing Bowls
- Whisk
- Baking Spatula
Ingredients
- 1 cup (2 sticks; 227 g) unsalted butter
- 1/4 cup (28 g) low fat milk powder
- 2 Tablespoons cold water
- 1 cup (200 g) brown sugar (light or dark)
- 2/3 cup (133 g) granulated sugar
- 1 Tablespoon vanilla extract
- 2 large eggs, plus one extra egg yolk (room temperature)
- 3 cups (390 g) all purpose flour
- 2 teaspoons cornstarch
- 1 teaspoon baking powder
- 1 teaspoon baking soda
- 1 teaspoon Morton kosher salt*
- 1 cup (6 ounces) semi sweet chocolate chips
- 3/4 cup Christmas M&Ms, plus more for topping
- 1/3 cup Christmas sprinkles, plus more for topping
Instructions
- Brown the Butter: Place the butter in a medium saucepan over medium heat. Melt it completely, then whisk in the milk powder until fully combined. Increase the heat slightly and cook, whisking constantly, until the butter turns golden brown and has a nutty aroma (about 5-8 minutes).
- Stir in Water: Remove the pan from heat and pour the browned butter into a large mixing bowl. Stir in the cold water to cool it slightly.
- Mix Sugars & Vanilla: Add the brown sugar, granulated sugar, and vanilla extract to the browned butter. Whisk until smooth and combined. Ensure the mixture is cool enough before proceeding.
- Add Eggs: Add the eggs and egg yolk, one at a time, mixing well after each addition until thoroughly combined and fluffy.
- Prepare Dry Ingredients: In a separate bowl, whisk together the flour, cornstarch, baking powder, baking soda, and salt.
- Combine Wet & Dry: Gradually add the dry ingredients to the wet ingredients, mixing until just combined. Avoid overmixing.
- Fold in Mix-Ins: Stir in the chocolate chips, M&Ms, and Christmas sprinkles until evenly distributed throughout the dough.
- Shape and Chill: Use a 3-tablespoon cookie scoop to portion the dough. Roll each portion into a ball, then shape it slightly taller than it is wide. Place on a parchment-lined baking sheet and freeze for 20-30 minutes, or until firm. (Can be refrigerated for up to 2-3 days or frozen for longer).
- Preheat Oven & Arrange: Preheat your oven to 350°F (175°C). Arrange the chilled cookie dough balls on a parchment-lined baking sheet, spacing them about 2 inches apart. Press extra M&Ms and sprinkles on top for decoration.
- Bake & Enjoy: Bake for 12-14 minutes, or until the edges are set and the centers look slightly underbaked. Let the cookies cool on the baking sheet for at least 5 minutes before transferring them to a wire rack to cool completely.
Notes & Expert Tips
- Kosher Salt: All of my recipes are tested with Morton kosher salt unless noted otherwise. It is the best salt for everyday cooking because of its size and flavor. If using table salt, the amount should be reduced by half. I highly recommend picking up some kosher next time you are at the store!
- Use a Kitchen Scale: For precise measurements, especially for flour, a kitchen scale ensures consistent results every time and prevents over-flouring.
- Let the Butter Mixture Cool: After browning the butter and combining it with the sugars, make sure it cools slightly before adding the eggs. This prevents the eggs from scrambling and ensures a smooth, velvety batter.
- Shape the Dough Balls Taller: This helps create thick, bakery-style cookies that are wonderfully chewy.
- Chill the Dough: Chilling the dough prevents the cookies from spreading too much in the oven and significantly enhances the flavor and texture.
- Rotate Your Baking Sheets: Halfway through baking, rotate the sheets to ensure even cooking and browning across all cookies.
- Press in More Toppings: After shaping the dough balls, add extra M&Ms and festive sprinkles for that perfect holiday look right on top.
- Slightly Underbake for Perfect Texture: Pull the cookies from the oven when the edges are set, but the centers still look soft and slightly gooey. They’ll finish baking as they cool on the sheet, resulting in a perfectly chewy center.
Nutrition (per cookie)
Nutrition information is automatically calculated and should only be used as an approximation. It can vary based on specific ingredients, portion sizes, and preparation methods.
Did you create this recipe?
If you try this delightful recipe, please consider leaving a star rating in the recipe card above and/or sharing your experience in the comments below! Your feedback is always incredibly appreciated and genuinely helps other aspiring bakers in our community.
Connect with us on our social platforms below for more baking inspiration, behind-the-scenes content, and delicious updates.
- TikTok
- YouTube