
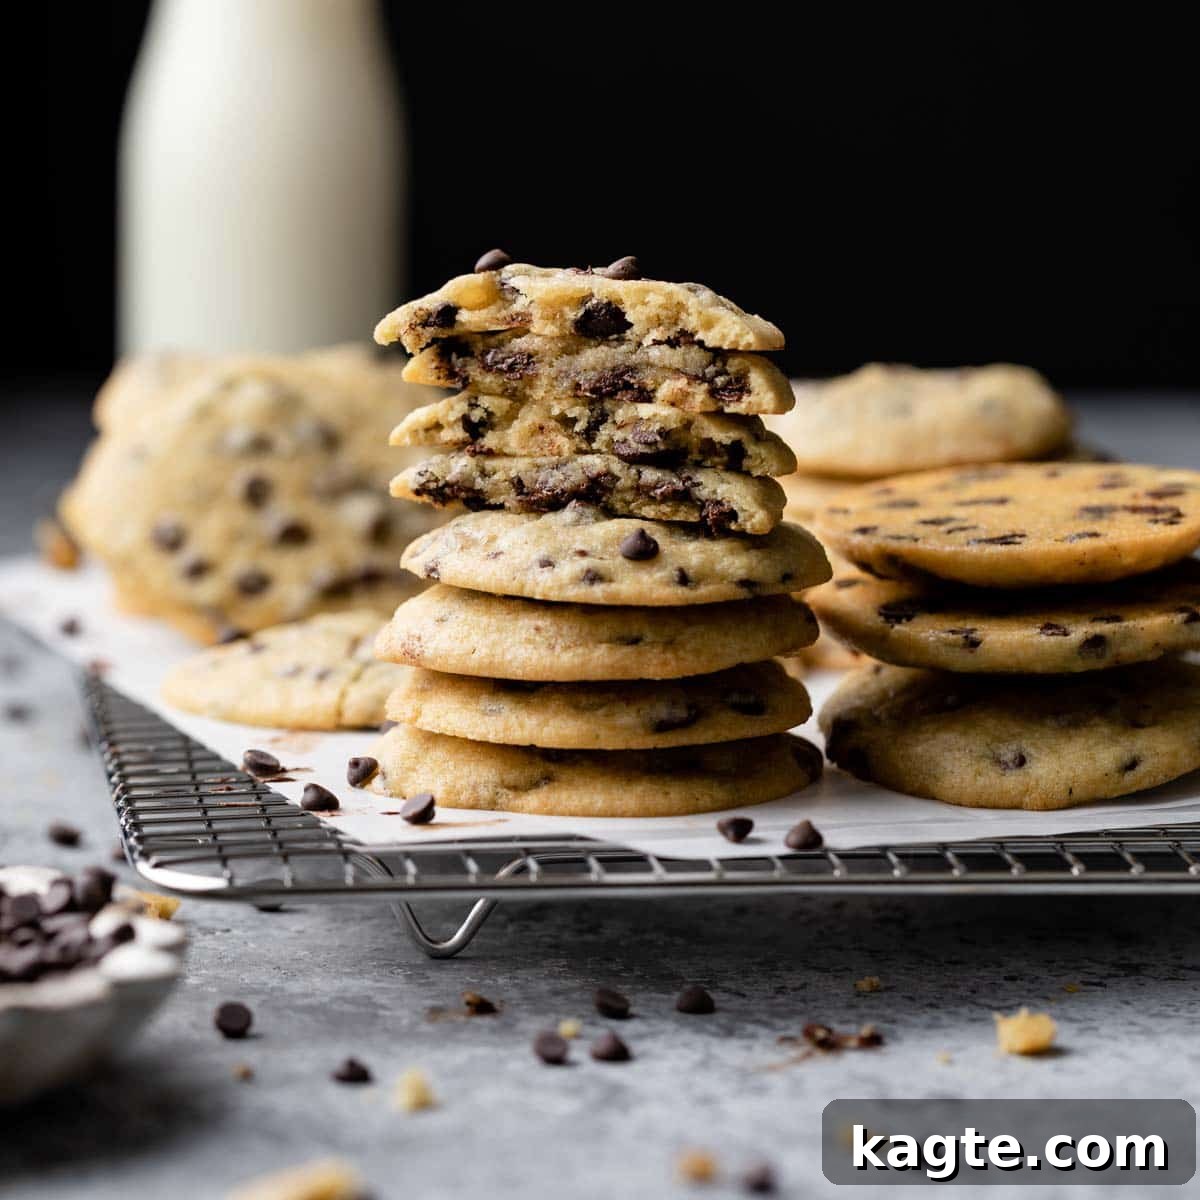
Welcome to the ultimate guide for crafting the most irresistible Chocolate Chip Cookies without Brown Sugar! If you’ve ever found yourself with a craving for warm, gooey chocolate chip cookies but realize your pantry is out of brown sugar, this recipe is your new best friend. Forget complicated substitutions or last-minute trips to the store; these cookies are designed for simplicity and incredible flavor, requiring only 8 basic ingredients you likely already have on hand. What’s more, the dough chilling is completely optional, meaning you can go from craving to cookie in under 30 minutes. This recipe proves that you don’t need brown sugar to achieve a perfectly satisfying, classic chocolate chip cookie experience. Whether you prefer them soft and chewy or with a slight crisp around the edges, this straightforward method guarantees a batch of delicious cookies that will quickly become a household favorite. Get ready to satisfy that sweet tooth with unparalleled ease and a taste that truly hits the spot!
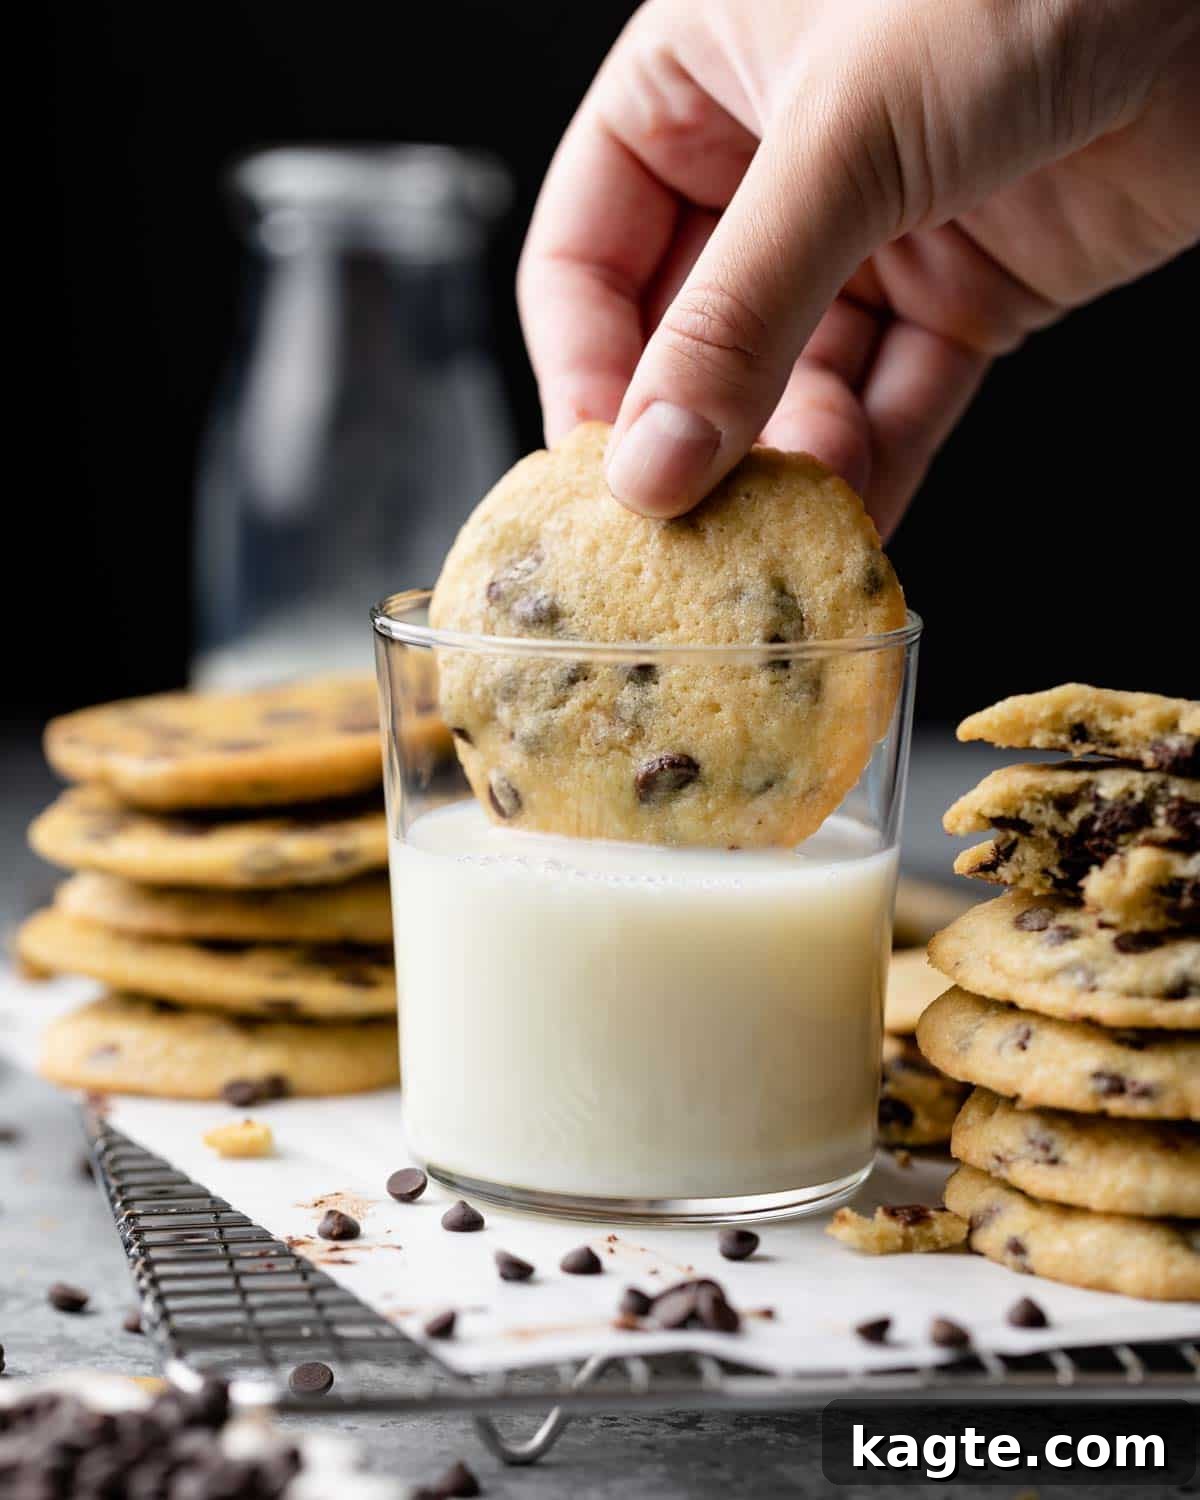
For those times when you’re looking to elevate your cookie game with a more complex flavor profile, I highly recommend exploring my Salted Brown Butter Chocolate Chip Toffee Cookies. They offer a delightful contrast with their rich brown butter notes and a hint of toffee, perfect for a special occasion.
Table of Contents: Your Quick Navigation Guide
- Recipe Highlights: Why You’ll Love These Cookies
- Essential Ingredients for Perfect Cookies
- Step-by-Step Baking Instructions
- Expert Tips & Baker’s Notes for Success
- Frequently Asked Questions (FAQs)
- Discover More Delicious Recipes
- Chocolate Chip Cookies without Brown Sugar Recipe Card
Recipe Highlights: Why You’ll Love These Cookies
- No Brown Sugar Needed: This recipe is specifically formulated to yield delicious chocolate chip cookies using only granulated sugar, making it ideal when brown sugar isn’t available or if you simply prefer its unique texture and flavor profile. You won’t miss a thing!
- Only 8 Simple Ingredients: We focus on pantry staples, ensuring that these cookies are accessible to everyone. With just a few basic components, you can create a truly spectacular treat without fuss.
- Dough Chilling is Optional: While a short chill can enhance thickness, these cookies bake beautifully without it, saving you precious time when a cookie craving strikes. This flexibility makes them perfect for spontaneous baking.
- Versatile Chocolate Choices: Whether you fancy regular or mini chocolate chips, or even chopped chocolate chunks, this recipe accommodates all preferences. You have the freedom to customize your chocolate experience.
- Not Overly Sweet: The balance of ingredients ensures these cookies are perfectly sweet without being cloying. They offer a delightful taste that allows the rich chocolate and vanilla notes to shine through.
- Super Easy to Make: Designed for beginners and seasoned bakers alike, the instructions are clear and straightforward, ensuring a successful batch every time. This is a go-to recipe for quick and satisfying results.
Essential Ingredients for Perfect Cookies
Creating truly exceptional chocolate chip cookies, even without brown sugar, begins with selecting the right ingredients. Each component plays a crucial role in achieving the desired texture and flavor. Here’s a closer look at what you’ll need and why:
- Softened Unsalted Butter: The foundation of any great cookie! Using unsalted butter allows you to control the total salt content in your recipe. It’s critical that the butter is softened to room temperature, around 60-65°F (15-18°C), not melted. This ensures it creams properly with the sugar, incorporating air for a lighter texture. To soften it quickly, leave it on the counter for about an hour. If you’re pressed for time, a quick microwave trick involves placing the butter (still in its wrapper) on a microwave-safe plate and microwaving at 50% power for 8-second intervals, flipping it each time. Be very careful not to overheat it, as melted butter will cause the cookies to spread excessively, resulting in flat, greasy cookies.
- Granulated Sugar: Since we’re omitting brown sugar, granulated sugar (white sugar) is our primary sweetener and contributes significantly to the cookie’s texture. It creates a crispier edge and a slightly chewier center, characteristic of many classic cookie recipes. Ensure your measurements are accurate for the best results.
- Large Egg: The egg acts as a binder, helping to hold the dough together and providing moisture. It also contributes to the richness and structure of the cookie. Using a large egg ensures consistency in the recipe.
- Vanilla Extract: A high-quality vanilla extract is paramount, especially in a recipe where brown sugar isn’t masking other flavors. Vanilla enhances the overall sweetness and adds a warm, aromatic depth that is essential for a truly classic chocolate chip cookie flavor.
- All-Purpose Flour: This forms the main structure of our cookies. Proper measurement is key; too much flour can lead to dry, crumbly cookies, while too little can make them spread too thin. I recommend using a kitchen scale for precision.
- Salt: A small amount of salt balances the sweetness and brings out the flavors of the other ingredients, especially the chocolate. Don’t skip it!
- Baking Soda: This leavening agent reacts with acidic ingredients (even mild ones in butter or flour) and moisture to create carbon dioxide gas, which helps the cookies rise and achieve a soft, slightly chewy texture. It also contributes to browning.
- Semi-Sweet Chocolate: This is where the “chocolate chip” magic happens! Semi-sweet chocolate provides a rich, balanced flavor that isn’t overly sweet, complementing the granulated sugar perfectly. You have the flexibility to use various forms of chocolate:
- Chocolate Chips: The classic choice, they hold their shape well during baking.
- Mini Chocolate Chips: Great for ensuring chocolate in every bite, especially in smaller cookies.
- Chopped Chocolate: Using a high-quality chocolate bar chopped into irregular pieces can create pockets of melted chocolate throughout the cookie for an artisanal touch.
- Chocolate Chunks: Offer larger, more substantial pools of melted chocolate.
You can also experiment with a combination of white and milk chocolate if you prefer, but semi-sweet is often recommended for its harmonious balance in this recipe.
A complete list of ingredients and precise amounts can be found on the recipe card below.
Step-by-Step Baking Instructions
Follow these detailed steps to bake your perfect batch of Chocolate Chip Cookies without Brown Sugar. Precision and attention to detail will ensure amazing results every time.
Before You Begin: Essential Prep Steps
- Soften the Butter: This is a critical step for the right cookie texture. Take your unsalted butter out of the refrigerator and let it sit on your kitchen counter for at least 1 hour, or until it reaches a temperature of about 60-65°F (15-18°C). It should be soft enough to indent easily with your finger but not greasy or melted. If you’re in a hurry, use the microwave trick mentioned in the ingredients section: 8-second bursts at 50% power, flipping after each, until just softened. Overheated butter will cause your cookies to spread too much in the oven.
- Preheat Your Oven: Set your oven to 350 degrees Fahrenheit (175°C) and allow it to preheat fully before placing your cookies inside. A properly preheated oven ensures even baking and consistent results, helping the cookies to set correctly.
Step 1: Cream Butter and Sugar In the bowl of a stand mixer fitted with the paddle attachment, or using a large bowl and a hand mixer, combine the softened unsalted butter and granulated sugar. Cream them together on medium-high speed for 2-3 minutes. This process is vital as it whips air into the mixture, which contributes to the cookies’ light and slightly chewy texture. Scrape down the sides of the bowl midway through to ensure everything is thoroughly incorporated.
Step 2: Incorporate Egg and Vanilla Reduce the mixer speed to medium. Add the large egg and vanilla extract to the creamed butter and sugar mixture. Mix until just well combined, about 30-60 seconds. Be careful not to overmix at this stage; you want everything blended but not overworked. The mixture should be smooth and cohesive.
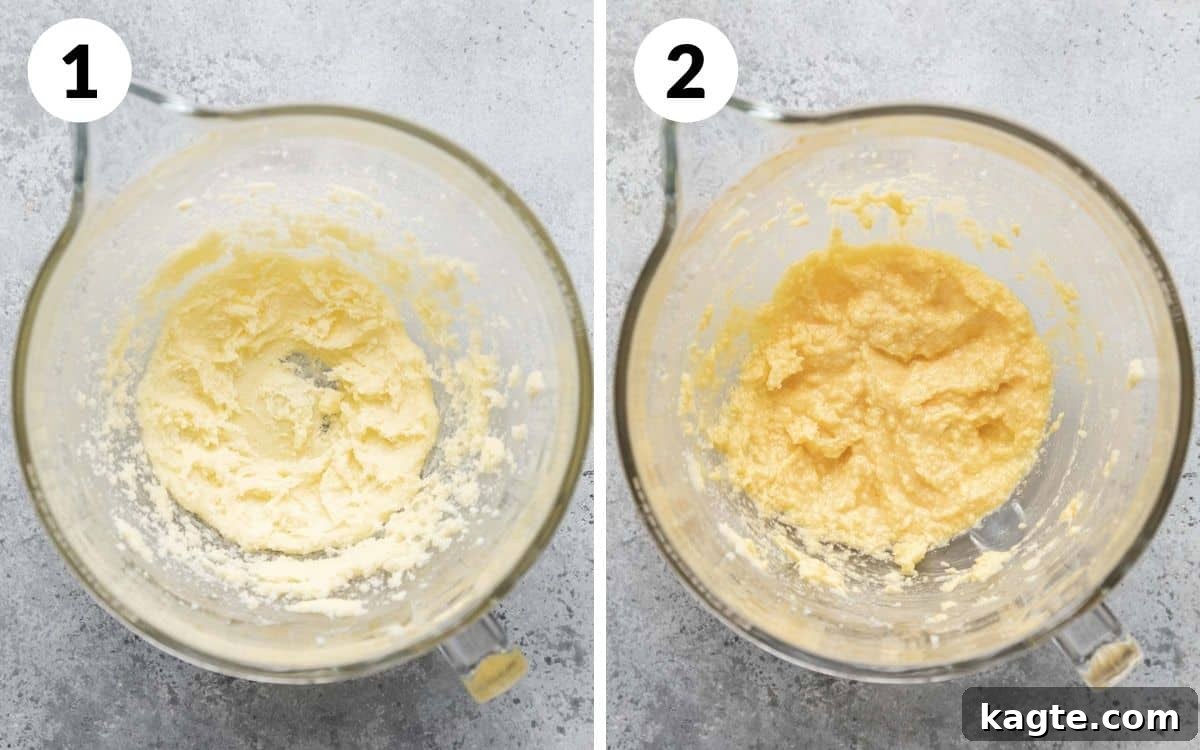
Baking Tip: Always use a rubber spatula to frequently scrape down the sides and bottom of your mixing bowl. This ensures that all ingredients are evenly combined and prevents pockets of unmixed butter or sugar from affecting the cookie’s texture.
Step 3: Add Dry Ingredients In a separate bowl, whisk together your all-purpose flour, salt, and baking soda. Then, gradually add these dry ingredients to the wet mixture in the stand mixer. Mix on the lowest speed possible, or use a spatula to gently fold them in. Stop mixing when about 3/4 of the flour is combined and some streaks of flour are still visible. Overmixing the flour will develop too much gluten, resulting in tough, dense cookies.
Step 4: Fold in Chocolate Chips & Optional Chill Remove the bowl from the mixer (if using) and use a spatula to gently fold in the semi-sweet chocolate chips (or your preferred chocolate). Continue folding just until the remaining flour streaks disappear and the chocolate is evenly distributed. Do not overmix. At this point, the dough is ready to bake. If you desire thicker cookies with a slightly chewier texture and more developed flavor, you can optionally chill the dough. Place the dough in the refrigerator for 1-2 hours or even overnight. For a quicker chill, pop it into the freezer for 30-40 minutes.
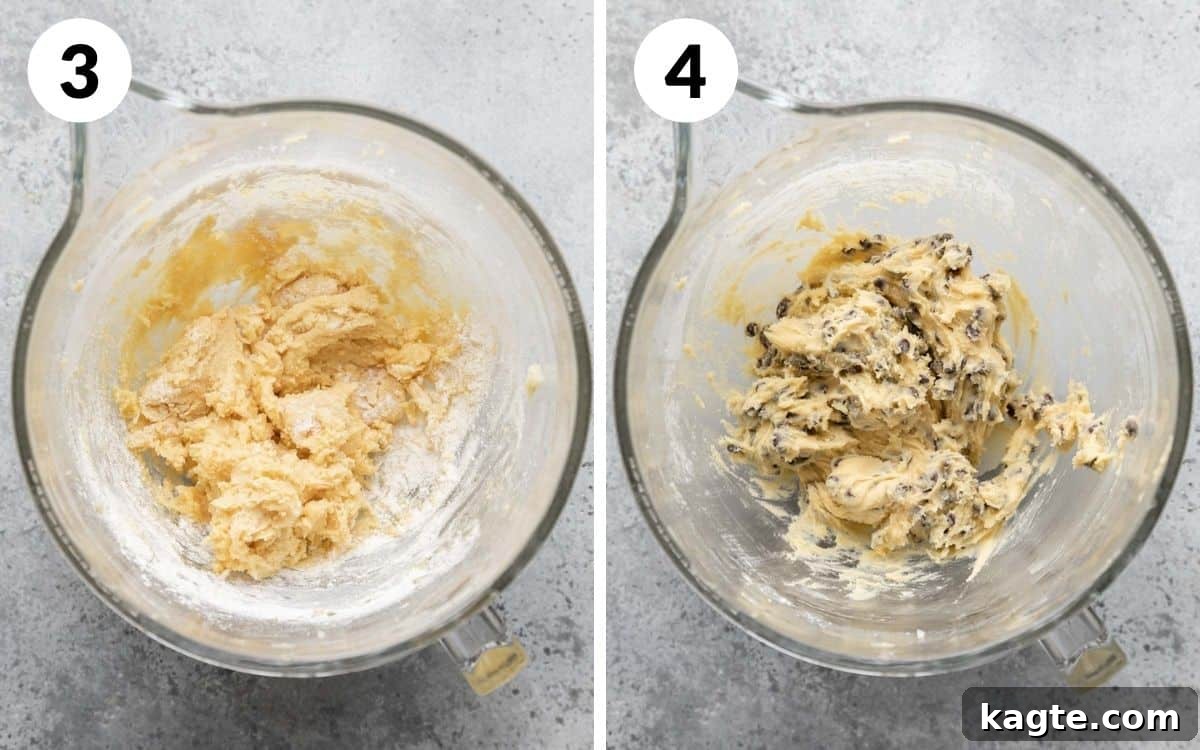
Important Note: It’s perfectly fine, and even desirable, to see some uncombined flour streaks when you stop mixing in Step 3. The final folding of chocolate will help incorporate the last bits of flour without overworking the dough.
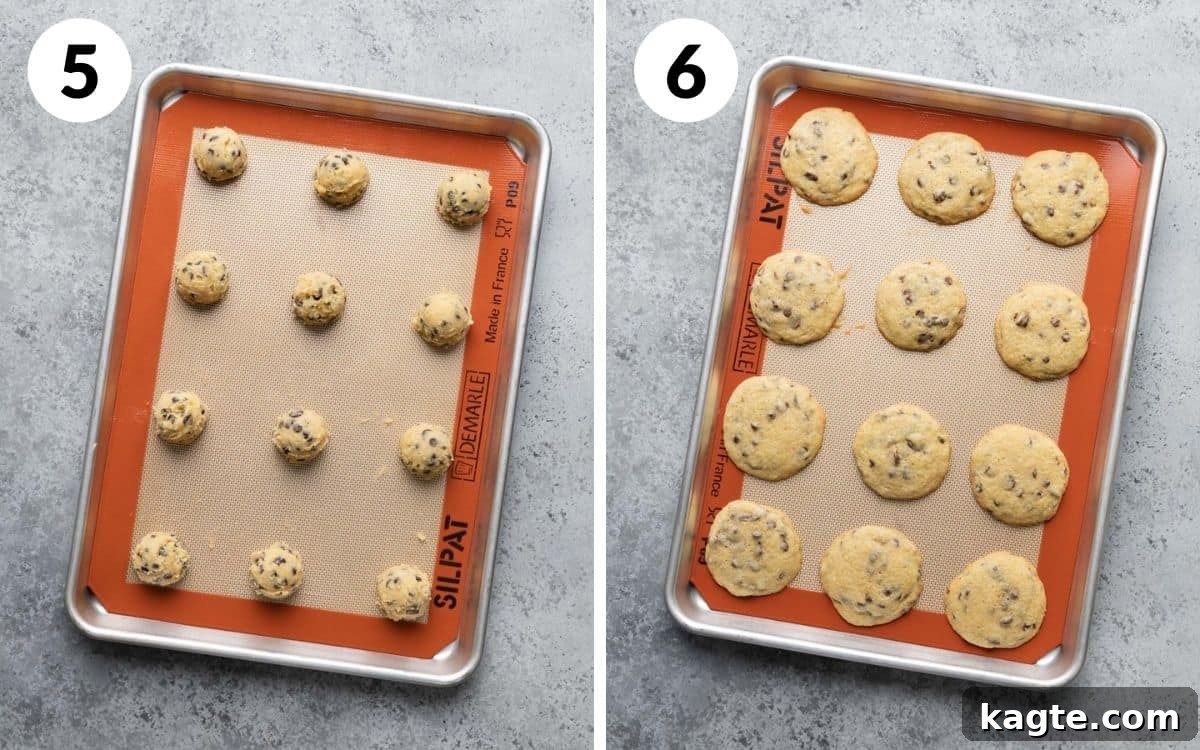
Step 5: Scoop and Arrange Dough Line a baking sheet with parchment paper or a silicone baking mat. Using a 1 1/2 Tablespoon cookie scoop (a #40 scoop works perfectly), portion the dough into even mounds. Arrange 12 dough balls per baking sheet, ensuring they are spaced 2-3 inches apart to allow for proper spreading during baking. This even spacing helps prevent cookies from merging into each other.
Step 6: Bake and Cool Bake the cookies in your preheated oven for approximately 11 minutes. Baking time can vary slightly depending on your oven, so watch for the edges to just begin to turn golden brown. The centers may still look slightly underdone and soft, which is normal. Once baked, remove the baking sheet from the oven. Allow the cookies to cool on the baking sheet for a few minutes (about 5-10 minutes) or until they are firm enough to handle. This carry-over cooking on the hot sheet helps them set properly and prevents them from breaking when transferred. After this initial cooling, transfer them to a wire rack to cool completely, or enjoy them warm!
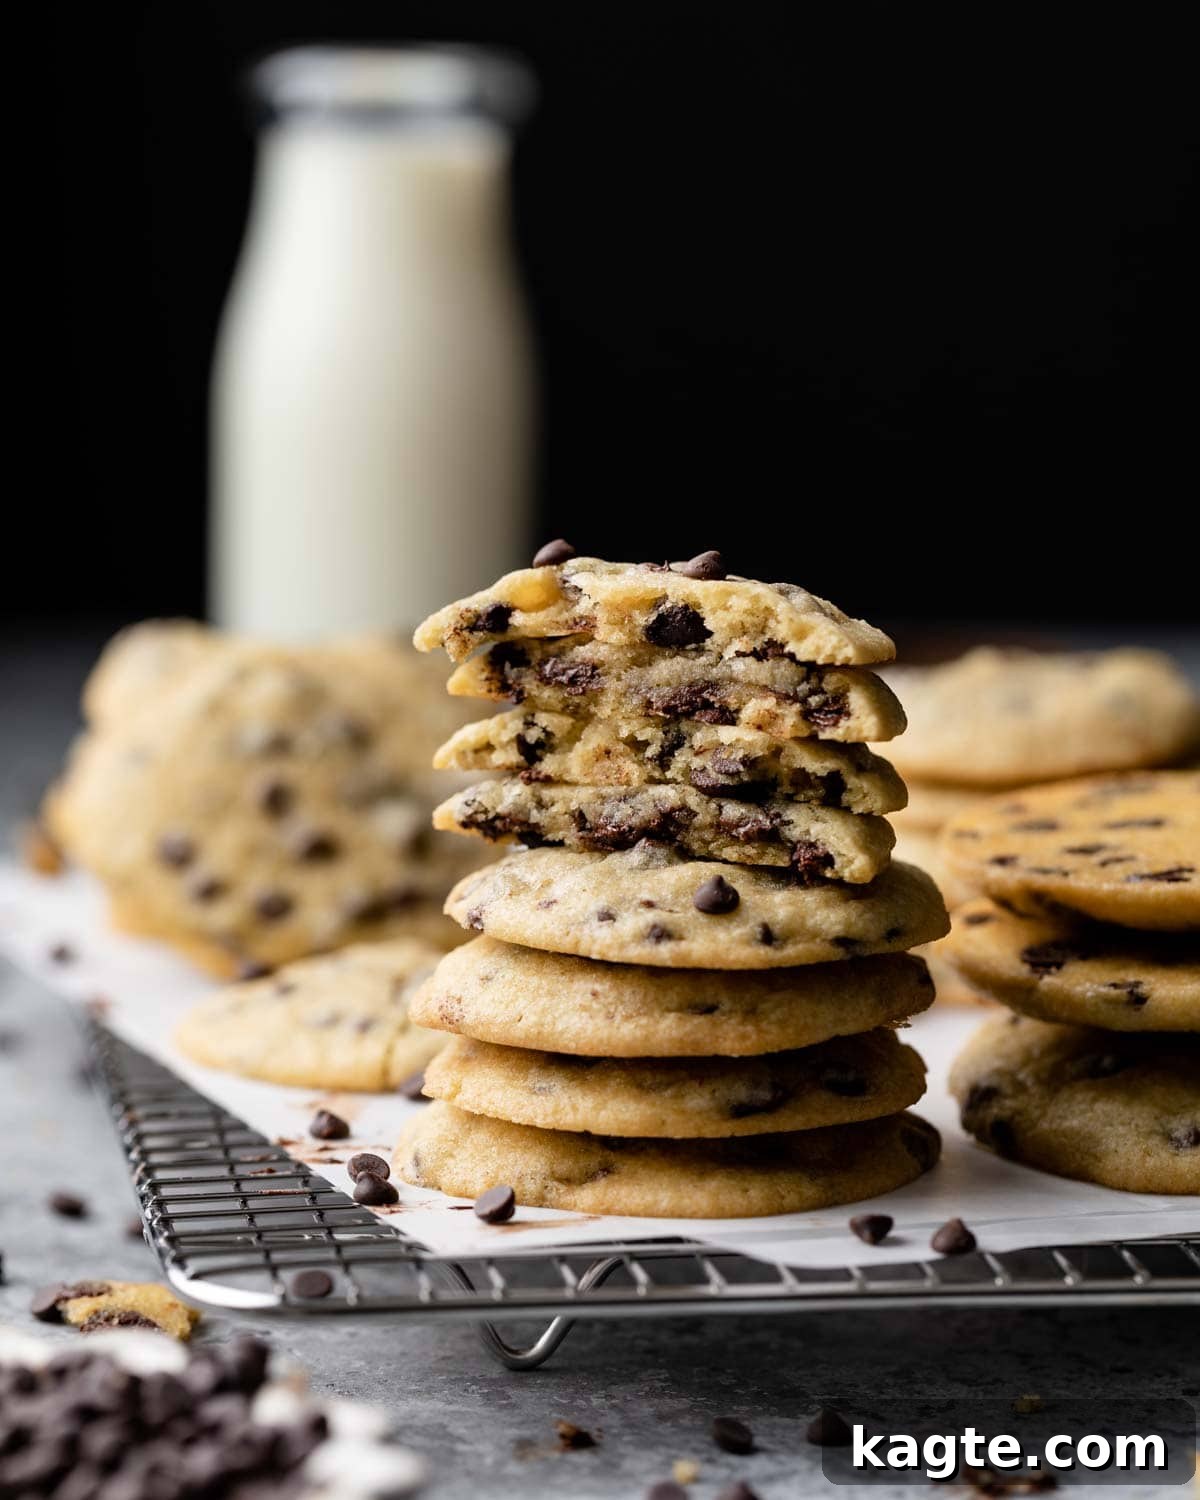
Cooling Tip: It’s common for cookies to appear slightly underbaked or very soft when they first come out of the oven. They continue to cook and firm up as they cool on the hot baking sheet. Resist the urge to overbake them, as this will result in dry, hard cookies.
Expert Tips & Baker’s Notes for Success
Achieving bakery-quality cookies at home is all about understanding a few key techniques and paying attention to details. These expert tips will ensure your chocolate chip cookies without brown sugar turn out perfectly every single time:
- Embrace a Kitchen Scale for Accuracy: In baking, precision is paramount, and a kitchen scale is your secret weapon. Measuring ingredients by weight (grams) rather than volume (cups) provides far more accurate results. For instance, a cup of flour can vary significantly in weight depending on how it’s scooped. If you don’t have a scale, make sure to “spoon and level” your flour: gently spoon flour into your measuring cup until it overflows, then level it off with a straight edge (like a knife) without packing it down. This prevents adding too much flour, which can lead to dry, dense cookies.
- Always Use Room Temperature Butter: This is a non-negotiable step for optimal cookie texture. Room temperature butter, ideally around 60-65°F (15-18°C), is crucial because it creams seamlessly with sugar, creating tiny air pockets. These air pockets are what give cookies their lift and tender crumb. Melted butter, on the other hand, will cause the cookies to spread excessively, resulting in flat, greasy cookies. Since this recipe uses only white granulated sugar (which tends to spread more than brown sugar), using properly softened butter is even more critical to achieve the desired thickness and chewiness.
- Master the Art of Creaming Butter and Sugar: Creaming the softened butter and granulated sugar together with an electric mixer is a fundamental step. This process incorporates air into the mixture, creating a light, fluffy base. Continue creaming on medium-high speed for 2-3 minutes until the mixture is visibly lighter in color and fluffy. This aeration is key to producing perfectly puffy and tender cookies, rather than flat ones.
- Invest in Quality Chocolate & Vanilla: With no brown sugar to contribute depth of flavor, the quality of your other ingredients, especially chocolate and vanilla, becomes even more prominent. Choose a premium semi-sweet chocolate; I personally recommend Ghirardelli Chocolate for its rich, balanced taste. Similarly, a good quality vanilla extract (like pure vanilla extract, not imitation) will make a noticeable difference in the cookie’s aroma and overall flavor profile. These elements truly sing in this simpler cookie base.
- Avoid Overmixing the Dough: Once you add the dry ingredients (flour, salt, baking soda), mix on the lowest speed or fold gently with a spatula only until combined. Overmixing develops the gluten in the flour, which can lead to tough, dense, and less tender cookies. Stop as soon as no dry streaks of flour are visible. A few extra folds can always be done when adding the chocolate chips.
- Timely Removal from the Baking Sheet: While it’s important to let the cookies cool on the baking sheet for a few minutes to set, don’t leave them there indefinitely. The hot baking sheet continues to cook the cookies, potentially leading to overbaked, dry results. Once they are firm enough to transfer (typically 5-10 minutes), move them to a wire cooling rack to cool completely. This stops the cooking process and allows them to achieve their ideal texture.
- Rotate Baking Sheets for Even Baking: If you’re baking two sheets of cookies at the same time, it’s essential to rotate their positions halfway through the baking cycle. Swap the top sheet with the bottom sheet and turn each sheet 180 degrees. Ovens often have hot spots, and this simple rotation ensures that all cookies bake evenly, resulting in a consistent texture and golden-brown edges across the entire batch.
Frequently Asked Questions (FAQs) About No Brown Sugar Cookies
To maintain their freshness and delightful texture, store your baked chocolate chip cookies in an airtight container at room temperature. They will remain wonderfully fresh for 5-7 days. For longer storage, you can freeze them for up to 2-3 months.
No, dough chilling is completely optional for this specific recipe, making it perfect for quick gratification! However, if you have the time, I do recommend a short chill. Dough that has been chilled for 1-2 hours (or even 30-40 minutes in the freezer) tends to spread less, resulting in a slightly thicker, chewier cookie with a more developed flavor. Without chilling, the cookies will still be delicious but might be a bit flatter.
Absolutely! This dough is excellent for making in advance. Follow the recipe instructions through Step 4 (folding in the chocolate chips). Then, cover the dough tightly with plastic wrap and chill it in the refrigerator for up to 1 day. When you’re ready to bake, simply scoop the chilled dough and proceed with baking as per Steps 5 and 6. This is a fantastic strategy for entertaining or for having fresh cookies on demand.
Brown sugar and white granulated sugar are not direct 1:1 substitutes due to differences in moisture content and molasses. Brown sugar contributes moisture and a chewy texture, whereas white sugar results in a crispier cookie. For the best results when a recipe *specifically* calls for brown sugar, it’s best to find a recipe designed without it (like this one!), or look for a specific brown sugar substitute guide that might involve adding a tiny bit of molasses to white sugar if you’re adventurous.
Not typically. Simply swapping white sugar for brown sugar in a recipe not designed for it can significantly alter the outcome. White sugar is generally sweeter and lacks the moisture of brown sugar. This can cause cookies to spread much more, become overly crispy, and lose the chewy texture that brown sugar provides. For consistent results, it’s always best to follow recipes that specifically call for the type of sugar you are using.
Brown sugar is key to the classic chewy, slightly puffy texture of many chocolate chip cookies. The molasses in brown sugar adds moisture, which keeps the cookies soft and chewy, and also contributes to a deeper, more caramel-like flavor. It also helps to limit spreading compared to white sugar.
Several factors can lead to flat cookies. Common culprits include:
- Over-softened or Melted Butter: If your butter is too warm or melted, it will cause the cookies to spread excessively.
- Incorrect Measurements: Too much butter or sugar relative to flour can lead to spreading. Using a kitchen scale helps prevent this.
- Insufficient Creaming: Not properly creaming the butter and sugar means less air is incorporated, leading to a denser dough that spreads more.
- Overmixing Dry Ingredients: Overworking the flour develops gluten, which can cause the cookies to collapse instead of holding their shape.
- Warm Dough: Dough that is too warm when it goes into the oven will spread rapidly before it has a chance to set. Chilling can help.
- Too Much Leavening Agent: An imbalance of baking soda or baking powder can also contribute to excessive spreading.
Discover More Delicious Recipes
Dessert
No-Chill Chocolate Chip Cookies (Easy)
If you love the convenience of quick cookies, this easy no-chill recipe is another fantastic option for instant gratification.
Christmas
20 Sweet Peppermint Recipes for Christmas
Explore a collection of delightful peppermint treats, ideal for adding a refreshing twist to your holiday baking.
Fall
20 Sweet Pumpkin Recipes for Fall (From Breakfast to Dessert)
Dive into the flavors of autumn with these comforting and delicious pumpkin recipes, suitable for any meal of the day.
Breakfast
Blueberry Coffee Cake with Greek Yogurt & Streusel
Start your day with this moist and flavorful coffee cake, featuring juicy blueberries and a delightful streusel crunch.
Print Recipe
Save Recipe
Easy Chocolate Chip Cookies without Brown Sugar
Equipment
-
Kitchen Scale
-
#40 Cookie Scoop
-
Stand Mixer (or Hand Mixer)
-
Silpat Mat (or Parchment Paper)
-
Baking Sheets
Ingredients
- 1/2 cup (8 Tablespoons) unsalted butter, softened to room temperature
- 1/2 cup + 3 Tablespoons (138 g) granulated sugar
- 1 large egg
- 2 teaspoons vanilla extract
- 1 1/4 cups (162 g) all purpose flour
- 1/2 teaspoon salt
- 1/2 teaspoon baking soda
- 1 1/2 – 2 cups (6-8 ounces) semi sweet chocolate chips
Instructions
-
Before starting, carefully review all recipe notes and instructions to ensure a smooth baking process.
-
Preheat your oven to 350 degrees Fahrenheit (175°C).
-
In the bowl of a stand mixer fitted with the paddle attachment, cream the softened butter and granulated sugar together on medium-high speed for 2-3 minutes, until light and fluffy. Scrape down the bowl as needed.
-
Add the large egg and vanilla extract to the creamed mixture. Mix on medium speed until just well combined.
-
In a separate bowl, whisk together the all-purpose flour, salt, and baking soda. Gradually add these dry ingredients to the wet mixture. Mix on the lowest speed or gently fold with a spatula until about 3/4 of the flour is combined, leaving a few streaks of dry flour.
-
Using a spatula, gently fold in the semi-sweet chocolate chips until the flour streaks disappear and the chocolate is evenly distributed. (Optional: For thicker cookies, chill the dough in the refrigerator for 1-2 hours or overnight, or in the freezer for 30-40 minutes).
-
Line a baking sheet with parchment paper or a silicone mat. Scoop the dough into 1 1/2 Tablespoon mounds, placing 12 cookies per sheet, spaced 2-3 inches apart.
-
Bake for approximately 11 minutes, or until the edges are lightly golden brown and the centers are still slightly soft. Allow the cookies to cool on the baking sheet for 5-10 minutes until set, then transfer to a wire rack to cool completely.
Recipe Notes
Semi-Sweet Chocolate: This recipe works wonderfully with various chocolate types – regular chips, mini chips, chopped chocolate bars, or chunks. Semi-sweet is recommended for a balanced sweetness, but feel free to combine with milk or white chocolate for a different flavor profile.
Accurate Measurement is Key: Baking relies on precision. Using a kitchen scale for dry ingredients (especially flour) is highly recommended. If using measuring cups, spoon flour into the cup and level it off with a knife to avoid compaction and too much flour.
Proper Creaming Technique: Creaming the butter and sugar for 2-3 minutes on medium-high speed creates air pockets, contributing to a light, fluffy, and perfectly puffy cookie. Don’t rush this step.
High-Quality Ingredients: Since brown sugar isn’t used, the flavors of other ingredients are more prominent. Opt for a good quality vanilla extract and your favorite semi-sweet chocolate, such as Ghirardelli Chocolate, to enhance the overall taste.
Avoid Overmixing: Once flour is added, mix only until just combined to prevent developing excess gluten, which can lead to dense and flat cookies. Gentle folding is preferred.
Cooling Process: Allow cookies to set on the hot baking sheet for 5-10 minutes before transferring to a wire rack. This prevents them from breaking and ensures they finish cooking to the right texture without becoming dry.
Even Baking: If baking multiple sheets at once, rotate their positions (top to bottom, and front to back) halfway through the baking time to ensure all cookies cook evenly and brown consistently.
Nutrition Information (Approximate)
Nutrition information is automatically calculated, so should only be used as an approximation. It can vary based on specific brands and ingredient variations.