
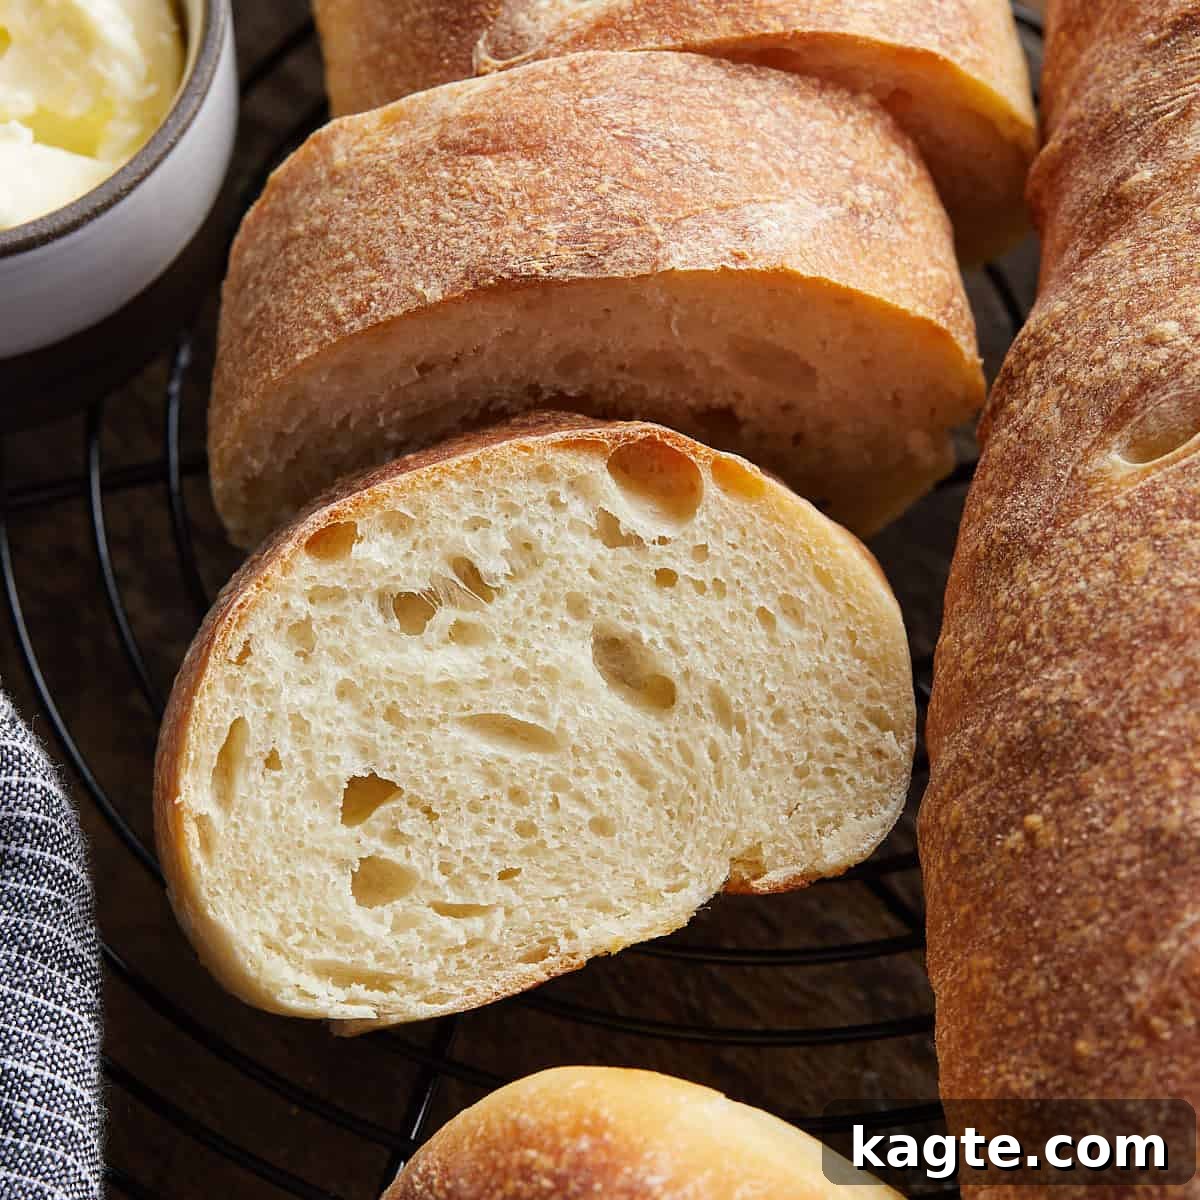
Welcome to the ultimate guide for baking your very own, incredibly delicious French Bread at home! Forget store-bought loaves; this easy recipe delivers professional bakery-quality results with minimal effort and just four fundamental ingredients. Imagine biting into a golden, shatteringly crisp crust that gives way to an airy, soft, and fluffy interior. Perfect for slathering with butter, crafting gourmet sandwiches, pairing with robust garlic, or simply soaking up the rich flavors of your favorite soup, this homemade French bread is more than just a side dish—it’s an experience.
Whether you’re a seasoned baker or taking your first steps into the wonderful world of bread making, this recipe is designed to be approachable and rewarding. No need for intimidating sourdough starters, complicated techniques, or overnight proofing. Our method focuses on simple steps, harnessing the power of a little steam and a hot oven to achieve that signature crackly crust you crave. Get ready to fill your kitchen with the irresistible aroma of freshly baked bread and impress everyone with your culinary prowess!
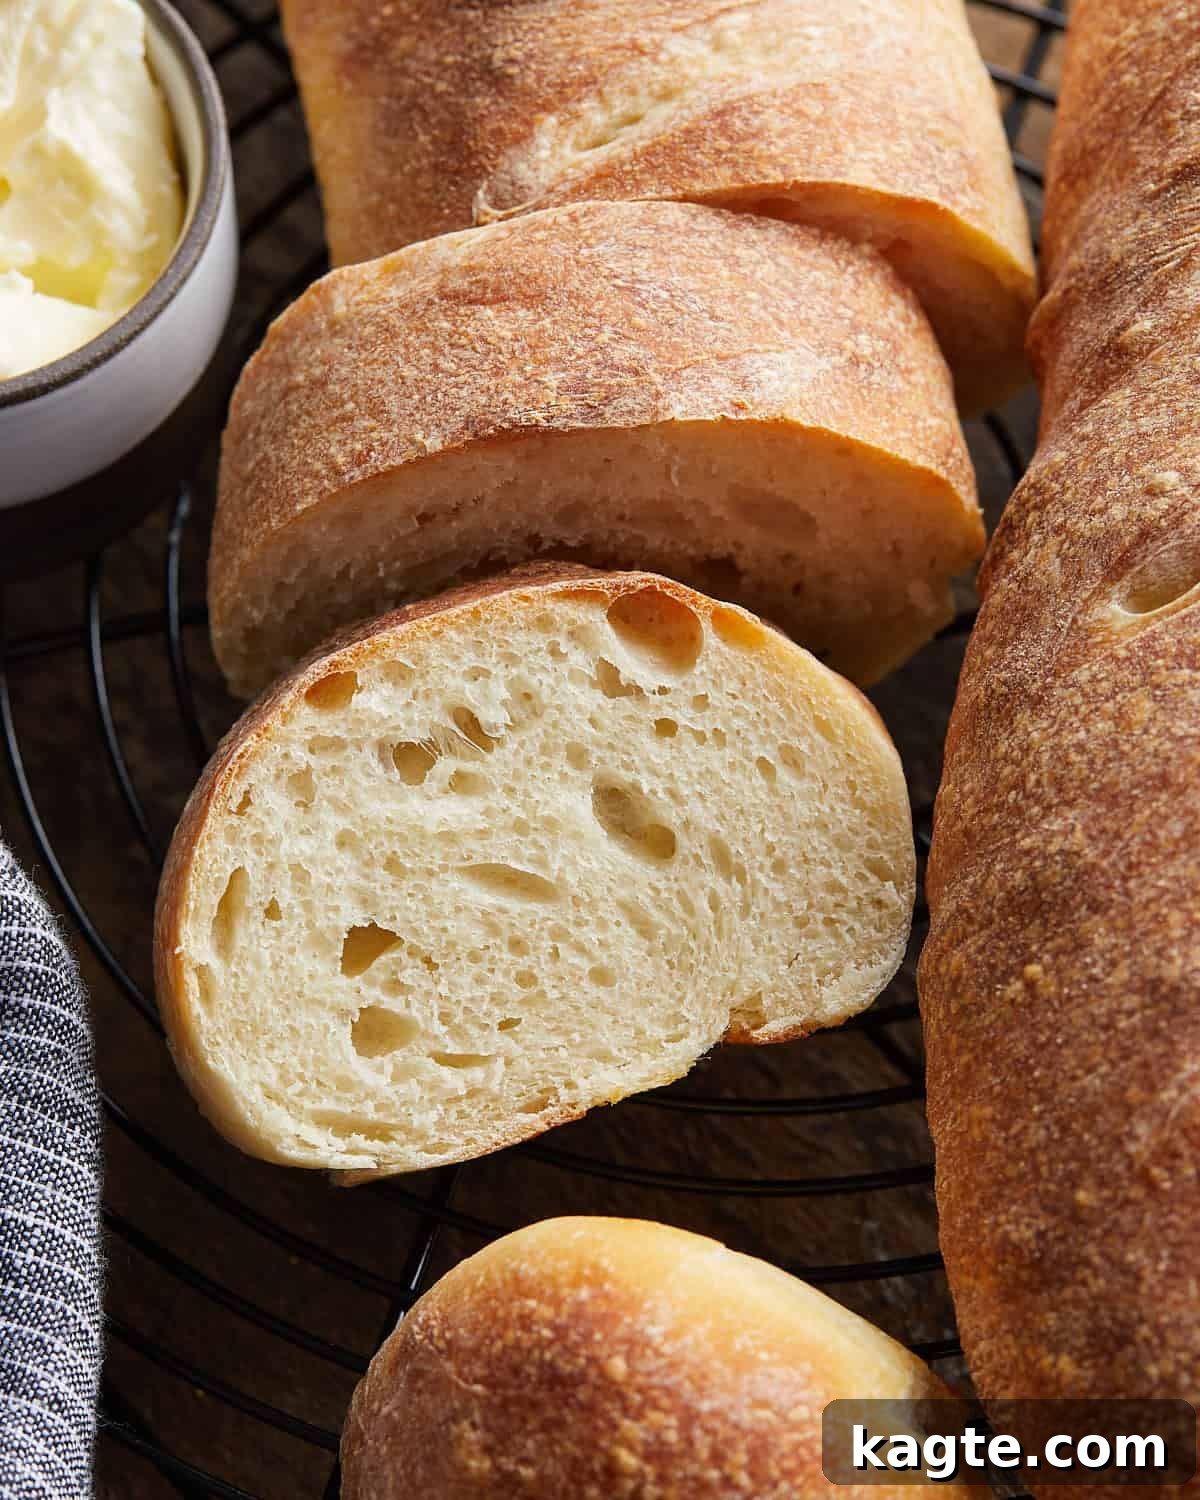
Baking bread is a truly therapeutic and meditative process. The simple act of mixing, kneading, and watching dough transform provides a unique sense of accomplishment and connection to something timeless. Once you master the basics of this French bread, you’ll undoubtedly find yourself reaching for flour and yeast far more often, craving the unparalleled taste and texture of homemade loaves. This recipe is an excellent starting point for any aspiring baker, offering a clear path to success.
If you enjoy the rustic charm of this French bread but are eager to explore other simple baking adventures, you might also love my Rustic Bread Recipe—it’s another fantastic, beginner-friendly loaf with a delightful chew. For those who prefer a softer, richer crumb, my Garlic Bread Rolls or classic Old Fashioned Yeast Rolls are perfect accompaniments to any meal, guaranteed to delight your family and guests.
Table of Contents
- Why You’ll Love This Recipe
- Essential Ingredients & Smart Substitutions
- How to Make Homemade French Bread
- The French Bread Journey: Quick Overview
- Step-by-Step Guide to Perfect French Bread
- Expert Baking Tips for Success
- Recipe Serving Suggestions
- Common French Bread Mistakes & How to Avoid Them
- Creative Additions & Variations
- Frequently Asked Questions
- More Delicious Bread Recipes
- Homemade French Bread Recipe Card
Why You’ll Love This Recipe
There’s nothing quite like the satisfaction of pulling a warm, golden loaf of bread from your own oven. This French bread recipe stands out for many reasons, making it a favorite among beginners and experienced bakers alike:
- Unbelievably Simple & Pure: This recipe calls for just four fundamental ingredients: flour, yeast, salt, and water. That’s it! No butter, no eggs, no dairy—just the essential elements for authentic, rustic French bread. This simplicity highlights the natural flavors and textures, proving that extraordinary results don’t require complicated components.
- Yields Two Generous Loaves: Each batch of dough produces two beautifully sized loaves. This is perfect for enjoying one fresh out of the oven and freezing the second for a quick, homemade treat later. Or, if you’re hosting a gathering (or just really love bread!), you might find both disappearing surprisingly quickly!
- Achieve that Signature Crisp, Golden Crust: The secret to truly great French bread lies in its crust. Our method utilizes steam baking, a technique that may sound fancy but is incredibly easy to execute at home. This steam is crucial for developing that iconic, thin, golden-brown crust that shatters perfectly with each slice, revealing the tender interior.
- Perfectly Beginner-Friendly: Intimidated by bread making? Don’t be! This recipe is designed with the novice in mind. Unlike sourdough that requires a starter and long fermentation, or complex artisanal breads, our French bread is straightforward. The steps are clear, the process is forgiving, and the results are consistently impressive, giving you the confidence to dive deeper into baking.
- Economical & Wholesome: Making bread at home is not only more affordable than buying artisanal loaves but also allows you complete control over the ingredients. You know exactly what’s going into your body—no preservatives or unpronounceable additives, just pure, wholesome goodness.
- The Ultimate Versatility: This bread is a blank canvas for culinary creativity. It’s the ideal foundation for garlic bread, bruschetta, dipping into olive oil, serving alongside rich stews, or making the best homemade sub sandwiches. Its neutral flavor and wonderful texture complement a wide array of dishes.
Essential Ingredients & Smart Substitutions
High-quality ingredients are the foundation of exceptional bread. While this recipe is incredibly simple, understanding each component and its role will elevate your baking experience and ensure the best possible results. Here’s a closer look at what you’ll need and how to handle any substitutions:
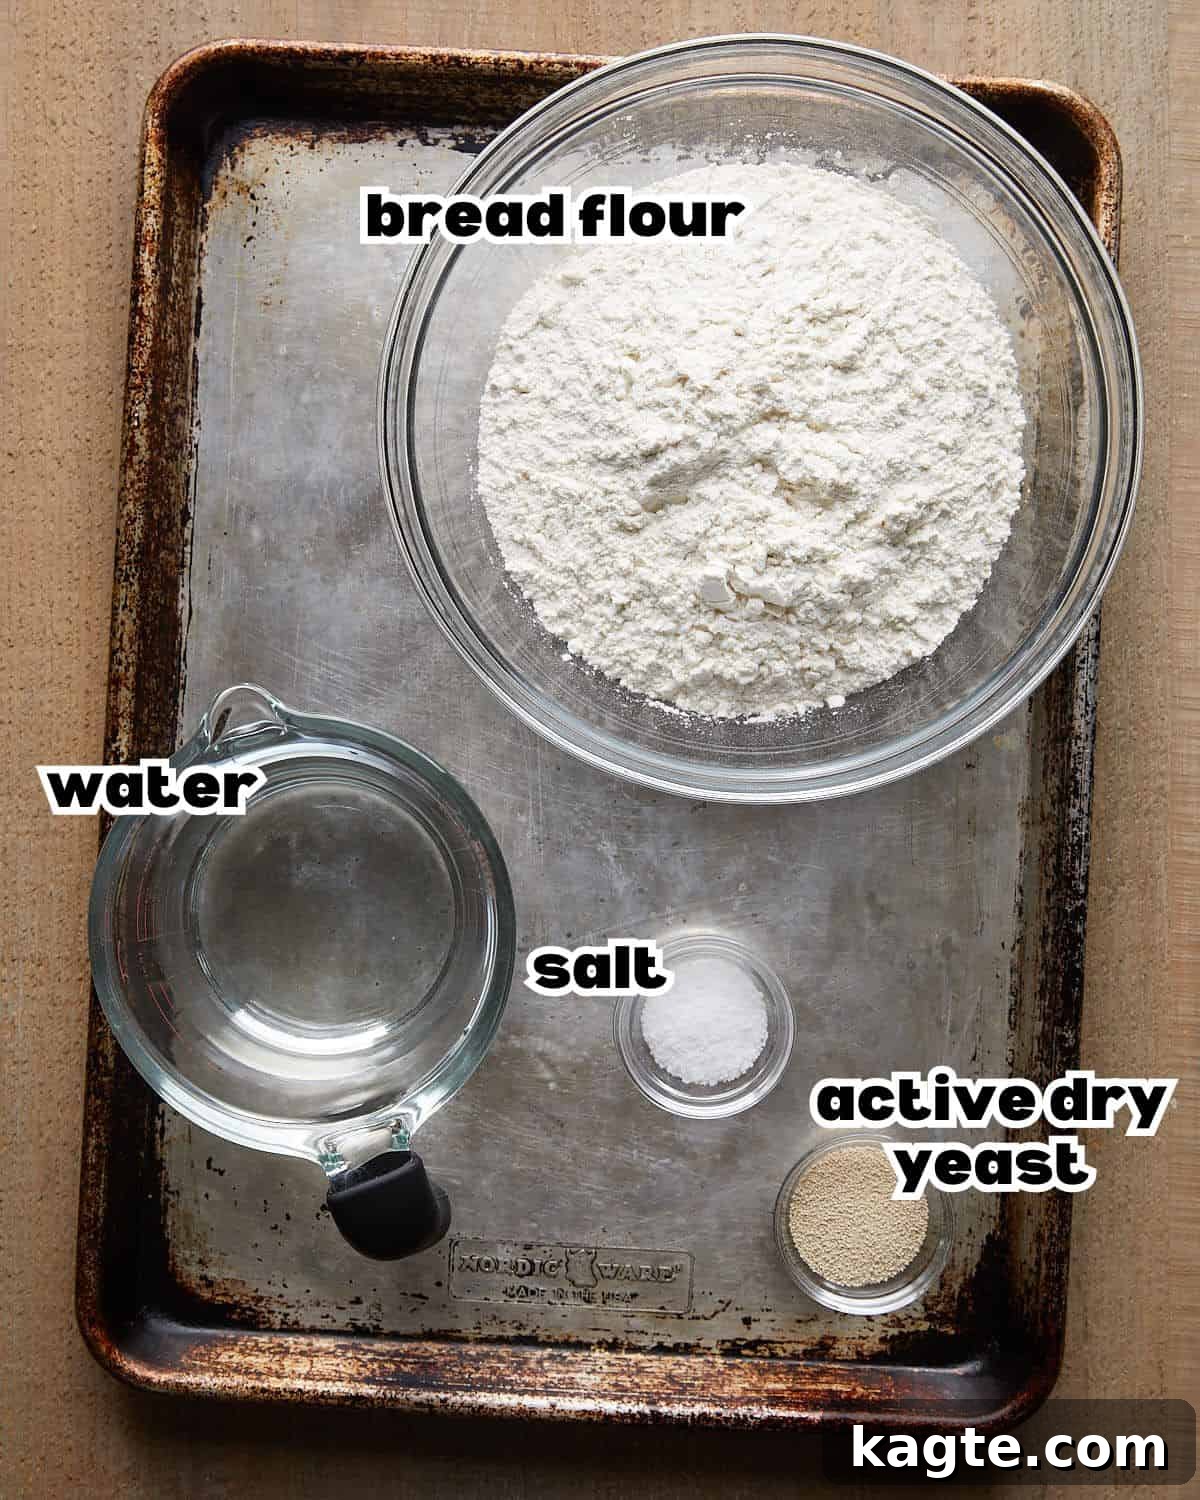
- Bread Flour: This is your secret weapon for that perfect chewy texture and strong structure in your French bread. Bread flour has a higher protein content (typically 12-14%) compared to all-purpose flour, which means it develops more gluten. Gluten is what gives bread its elasticity and allows it to hold those beautiful air pockets. While you can use all-purpose flour (which has a lower protein content of 10-12%), be aware that your crust might be slightly softer and the interior a little less chewy.
- Active Dry Yeast: Yeast is the living organism responsible for making your bread rise. It feeds on sugars and produces carbon dioxide, creating those wonderful airy pockets. Always check the expiration date on your yeast package to ensure it’s fresh and active. Using expired yeast is a common pitfall that can lead to dense, flat loaves.
- Substitution for Instant Yeast: If you have instant yeast, you can absolutely use it! The primary difference is that instant yeast doesn’t require proofing in warm water first. You can simply add it directly to your dry ingredients with the flour and salt, then add the warm water.
- Kosher Salt: Salt isn’t just for flavor; it also plays a crucial role in regulating yeast activity and strengthening the gluten structure. All of my recipes, including this one, are meticulously tested using Morton kosher salt unless otherwise specified. I highly recommend it for everyday cooking due to its larger flake size and balanced flavor profile. If you’re using finer table salt, you’ll need to reduce the amount by about 25-30% as it’s denser and more potent by volume. Picking up a box of kosher salt on your next grocery run is a worthwhile investment for any home cook!
- Warm Water: The temperature of your water is critical for activating the yeast. Aim for a temperature between 105–110°F (40–43°C). This range is warm enough to wake up the yeast without being too hot to kill it or too cold to slow down its activity. If you don’t have a thermometer, aim for water that feels comfortably warm, like a baby’s bath. If it’s too hot to touch, it’s too hot for the yeast.
For a complete list of ingredients with precise measurements, please refer to the recipe card below.
How to Make Homemade French Bread
Creating beautiful, rustic French bread might seem daunting, but it’s a straightforward process that’s incredibly rewarding. By following these simple steps, you’ll soon be enjoying warm, crusty loaves straight from your oven. Let’s break down the journey from simple ingredients to a bakery-worthy masterpiece.
The French Bread Journey: Quick Overview
- Mix the Dough: Combine dry ingredients with warm water to form a shaggy dough, then knead until smooth and elastic.
- First Rise (Bulk Fermentation): Allow the dough to double in size, developing flavor and structure.
- Divide & Pre-Shape: Gently portion the dough and form it into initial rectangles.
- Final Shaping & Scoring: Roll the dough into classic baguette shapes and slash the tops for expansion and visual appeal.
- Second Rise (Final Proof): Let the shaped loaves proof until puffy.
- Bake with Steam: Create a steamy environment in your hot oven for that signature crispy crust.
- Cool & Enjoy: Allow the bread to cool completely for the best texture and flavor.
Step-by-Step Guide to Perfect French Bread
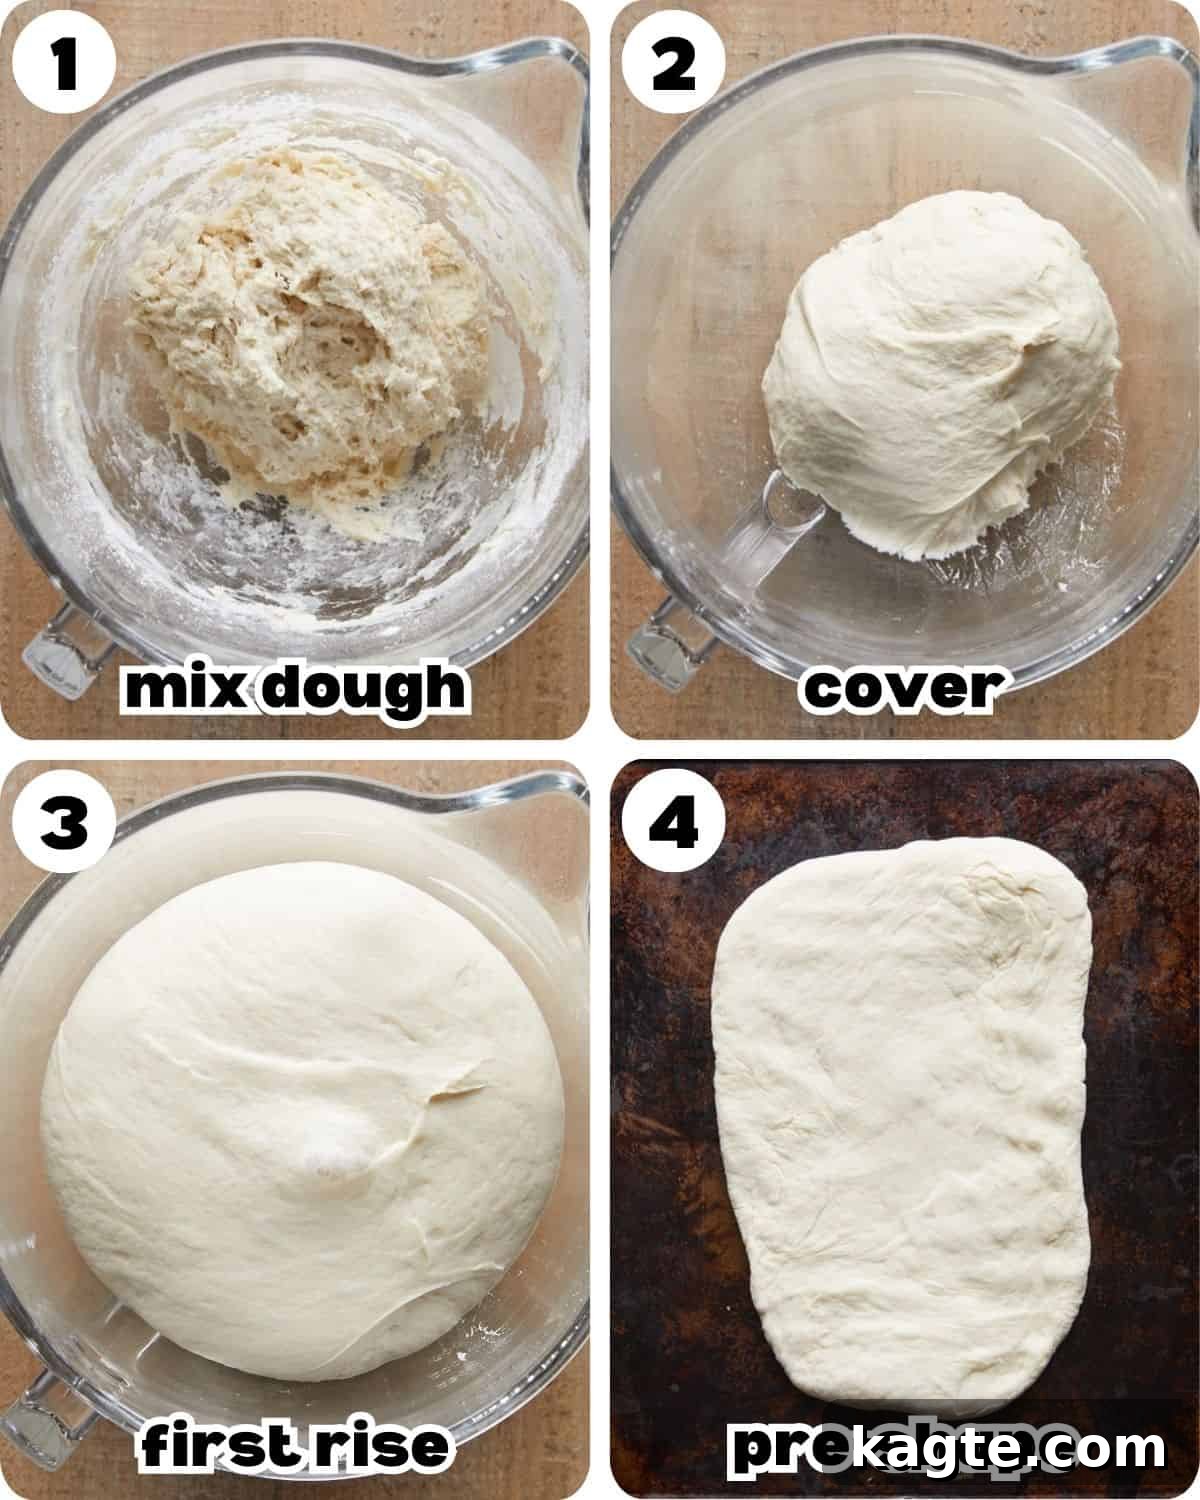
- Mix the Dough: Begin by combining your dry ingredients. In a spacious mixing bowl or the bowl of your stand mixer, thoroughly whisk together the bread flour, active dry yeast, and kosher salt. This ensures even distribution of the yeast and salt. Next, pour in the warm water (remember, 105–110°F is ideal). Stir the mixture with a sturdy wooden spoon or spatula until a rough, shaggy dough begins to form. At this stage, it will look quite sticky and unappealing, but trust the process! If you’re using a stand mixer, attach the dough hook and knead on medium-high speed for 5 to 6 minutes. For hand kneading, transfer the shaggy dough to a lightly floured work surface. Knead diligently for 8 to 10 minutes, using a push-fold-turn technique. You’ll notice the dough transform—it will become progressively smoother, more elastic, and slightly tacky. It should still stick just a bit to your hands but pull away cleanly from the surface, indicating proper gluten development.
- First Rise (Bulk Fermentation): Once your dough is perfectly kneaded, place it back into the clean mixing bowl. Cover the bowl securely with plastic wrap or a damp kitchen towel to prevent it from drying out. Allow the dough to rise at room temperature for approximately 90 minutes, or until it has visibly doubled in size. This crucial step, known as bulk fermentation, allows the yeast to work its magic, developing both the volume and the complex flavors of the bread. To check if it’s sufficiently risen, gently press your fingertip into the dough. If the indentation slowly springs back, your dough is ready for the next stage.
- Divide and Pre-Shape: Carefully turn the risen dough out onto a lightly floured work surface. Gently press it down with your hands to release some of the accumulated air—don’t punch it down aggressively, as this can damage the gluten structure you’ve worked hard to build. Using a dough scraper or sharp knife, divide the dough into two equal pieces. For the best consistency, you can weigh them to ensure even loaves. Gently shape each piece into a rough rectangle, aiming for dimensions of about 12 by 6 inches. This pre-shaping helps to prepare the dough for its final form.
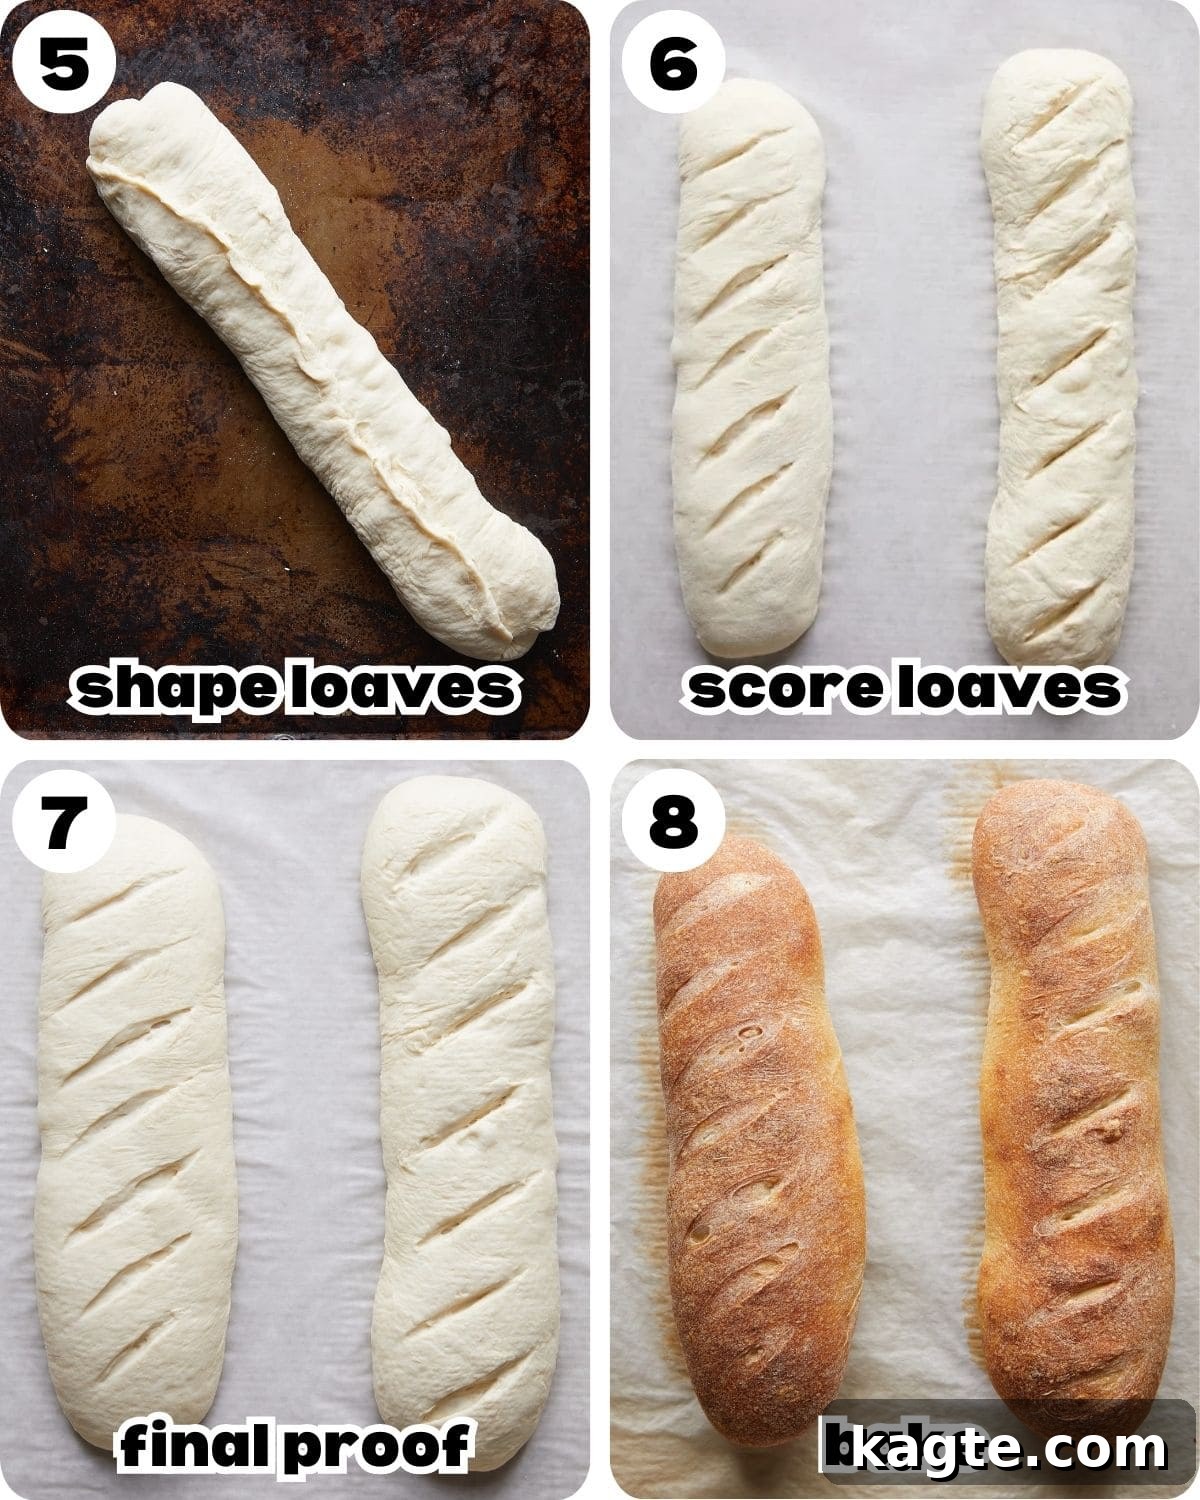
- Shape the First Loaf: Working with one rectangle of dough at a time, begin shaping your first loaf. Starting from one of the long sides, tightly roll the dough into a log. The tighter you roll, the better the structure of your final loaf. Once rolled, pinch the seam firmly along the entire length to seal it completely. A well-sealed seam prevents the loaf from unraveling during baking, ensuring a beautiful, consistent shape. Repeat this process with the second piece of dough.
- Repeat with Second Loaf and Score: Once both loaves are shaped, place them seam-side down onto a baking sheet lined with parchment paper. Ensure there’s adequate space between the loaves to allow for expansion during the final proof and baking. Now, it’s time to score! Using a sharp knife or a specialized bread lame, make 3 to 4 diagonal slashes across the top of each loaf. Scoring is not just for aesthetics; it allows steam to escape in a controlled manner during baking, preventing the crust from cracking unevenly and guiding the loaf’s expansion for a beautiful “ear.”
- Final Proof and Preheat Oven: Loosely cover the shaped loaves with a clean kitchen towel or lightly greased plastic wrap. Let them rise at room temperature for another 30 to 45 minutes, or until they look noticeably puffy but still hold their shape. This second rise, or final proof, is crucial for developing a light, airy crumb. While your loaves are proofing, begin preheating your oven to a scorching 425°F (218°C). Importantly, place an empty metal baking dish or a cast-iron skillet on the bottom rack of the oven during preheating. This pan will be essential for creating steam.
- Bake with Steam: The moment your loaves are perfectly proofed and the oven is preheated, it’s time to create steam! Carefully and quickly pour 1 cup of hot water into the preheated pan on the bottom rack of your oven. Be cautious as steam will immediately billow out. Promptly transfer the baking sheet with your loaves into the oven and shut the door quickly to trap as much steam as possible. This burst of steam is the secret to that glorious, thin, and shattery crust. Bake for 26 to 29 minutes, or until the crust achieves a deep, rich golden brown color and the loaves sound hollow when gently tapped on the bottom. For ultimate precision, an internal thermometer should read around 200°F (93°C) when inserted into the center of a loaf.
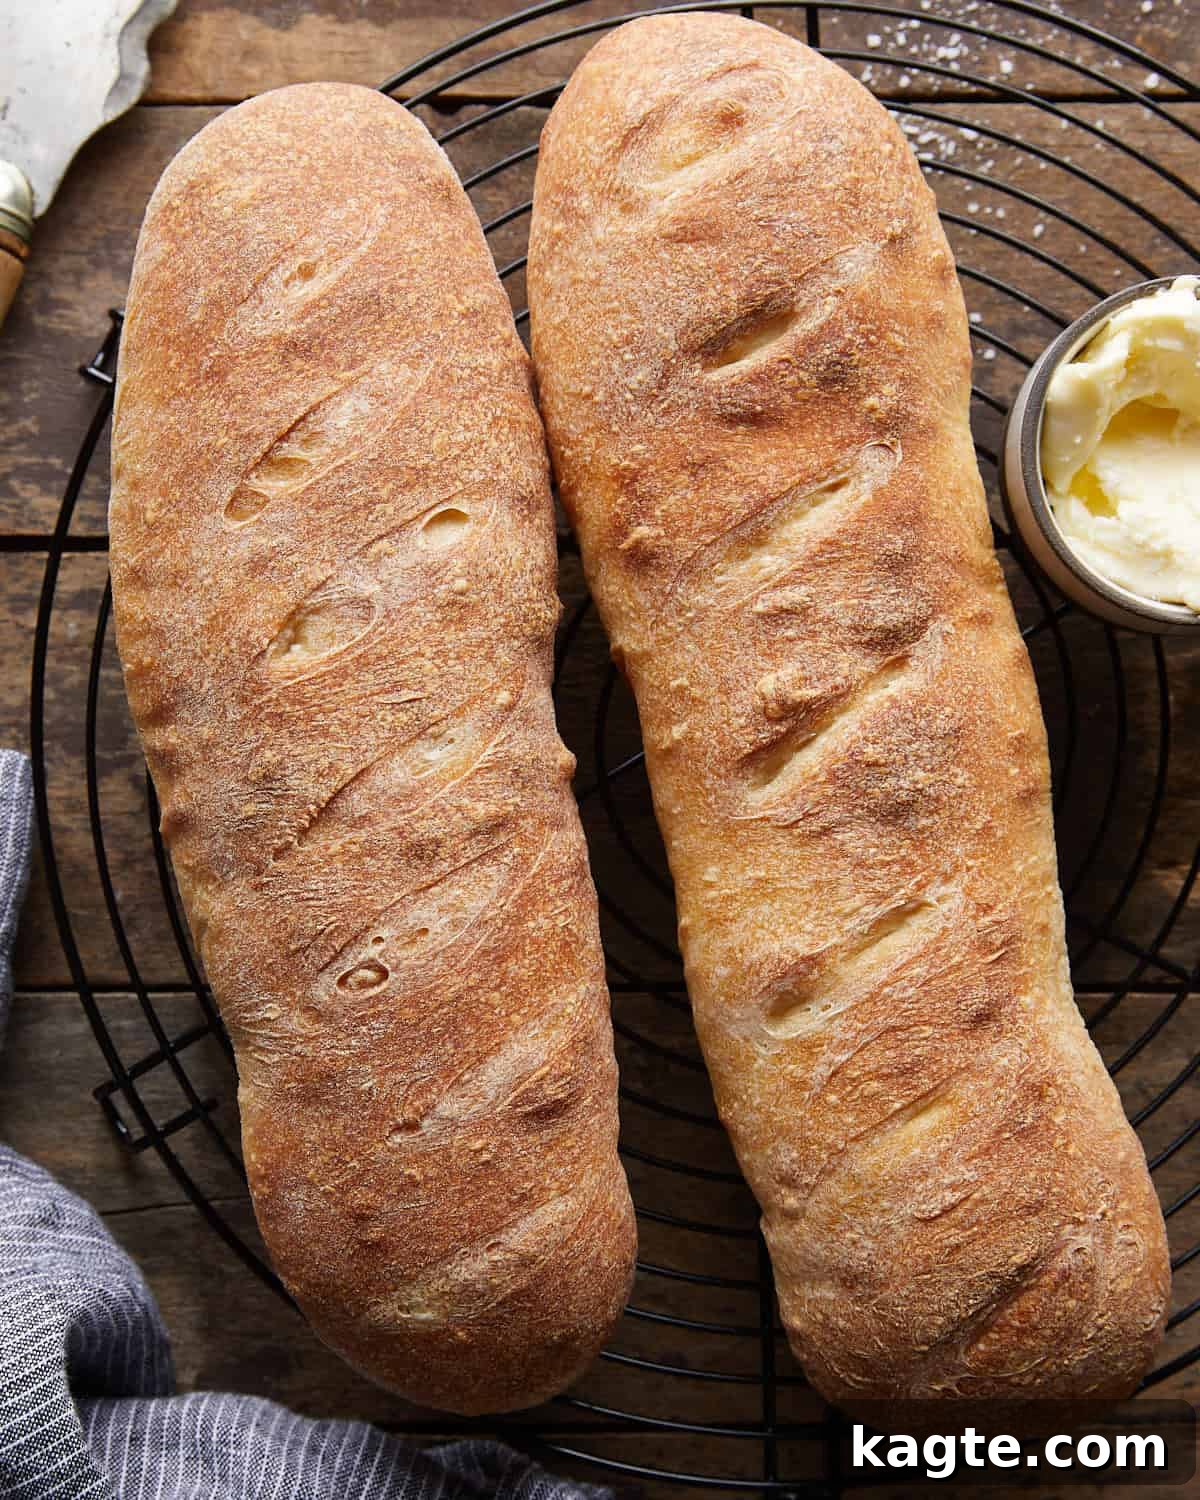
- Transfer & Let Cool: Once baked to perfection, remove the loaves from the oven and immediately transfer them from the baking sheet to a wire rack. This allows air to circulate around all sides, preventing the bottom crust from becoming soggy. The most challenging part begins now: patience! Let the bread cool for at least 1 hour, or ideally longer, before attempting to slice it. Cutting into warm bread too early can result in a gummy, dense interior because the starches haven’t had enough time to set properly. The cooling process is as vital as the baking itself for achieving that ideal French bread texture.
Expert Baking Tips for Success
Achieving bakery-quality French bread at home is within your reach, especially with these insider tips to guide you:
- Weigh Your Ingredients for Precision: The single most impactful tip for consistent baking results is to use a digital kitchen scale. Measuring flour by volume (cups) can vary drastically depending on how it’s scooped and leveled, leading to a dough that’s either too dry and stiff or too wet and sticky. This recipe was meticulously developed and tested using 480 grams of bread flour and 340 grams of water. A scale eliminates guesswork and ensures your dough has the perfect hydration every time.
- Set a Timer While Kneading: Kneading is essential for developing the gluten structure that gives French bread its characteristic chew and texture. Whether you’re using a stand mixer or kneading by hand, it’s crucial not to under-knead. Set a timer and stick to the recommended kneading times (5-6 minutes for a stand mixer, 8-10 minutes by hand). Under-kneaded dough will result in a dense, crumbly loaf, while properly kneaded dough will be smooth, elastic, and pass the “windowpane test.”
- Utilize Steam for an Irresistibly Crisp Crust: Do not skip the steam! This is arguably the most critical step for developing that iconic, thin, golden, and shatteringly crisp crust. Pouring hot water into a preheated metal pan (like a baking dish or cast iron skillet) on the bottom rack of your oven creates a steamy environment. This steam keeps the crust soft and pliable during the initial baking phase, allowing the loaf to expand fully before the crust sets. Once the steam dissipates, the dry heat then crisps the hydrated surface into that beautiful crackle. Always use a metal or cast iron pan; glass can crack from the thermal shock.
- Embrace Patience – Don’t Rush the Rise: Bread making is an exercise in patience. Both the first rise (bulk fermentation) and the second rise (final proof) are vital for flavor development and texture. The dough should double in size during the first rise and become noticeably puffy during the second. Resist the urge to rush these stages by increasing the temperature, as a slow, proper rise contributes significantly to a better open crumb structure and a richer, more complex flavor in your finished bread.
- The “Windowpane Test” for Perfect Kneading: To check if your dough is adequately kneaded, take a small piece of dough (about a golf ball size) and gently stretch it between your fingers. If you can stretch it thin enough to see light pass through without tearing, like a “windowpane,” then your gluten is perfectly developed.
Recipe Serving Suggestions
Once your beautiful French bread emerges from the oven, the possibilities are endless! Its versatile flavor and texture make it a perfect companion for a wide array of dishes. Here are some delightful ways to enjoy your homemade masterpiece:
- Classic Garlic Bread: Slice your French bread lengthwise, spread generously with garlic butter (minced garlic, softened butter, fresh parsley), and bake until golden and fragrant.
- Bruschetta Base: Toast slices lightly, then top with fresh diced tomatoes, basil, garlic, and a drizzle of balsamic glaze for an appetizer that sings of summer.
- Dipping Delight: Serve with a flavorful olive oil for dipping, perhaps infused with herbs, a pinch of red pepper flakes, or a splash of balsamic vinegar.
- The Perfect Sandwich or Sub Roll: Its sturdy yet soft interior is ideal for creating epic sandwiches, from classic ham and cheese to hearty Italian subs.
- Soup & Stew Companion: There’s nothing cozier than pairing warm, crispy bread with a hearty bowl of soup or stew. Here are some of my favorite fall soup recipes that are perfect for soaking up every last drop:
- Chicken Broccoli Cheddar Soup: A protein-packed twist on a comforting classic, ideal for chilly evenings.
- Creamy Italian Sausage Soup: Rich and flavorful, this soup will quickly become a cozy favorite.
- Creamy Lasagna Soup: All the layers of flavor you love from lasagna, transformed into a comforting soup.
- Slow Cooker Creamy Chicken and Corn Soup: Effortless and delicious, perfect for feeding a crowd or for easy meal prep.
- With Cheese & Charcuterie: French bread is a natural partner for a cheese board, offering a neutral base that lets the flavors of various cheeses and cured meats shine.
- For Breakfast or Brunch: A slice of French bread, lightly toasted and topped with jam, honey, or even a poached egg, makes for a simple yet elegant breakfast.
Common French Bread Mistakes & How to Avoid Them
Even with a simple recipe, baking bread can sometimes present challenges. Understanding common pitfalls will help you troubleshoot and achieve consistently perfect loaves:
- Cutting the Loaf Too Early: This is a common mistake that can significantly impact your bread’s texture. Resist the temptation to slice into that warm, aromatic loaf right out of the oven! The internal structure (the crumb) is still setting as it cools. Cutting too early can result in a gummy, dense, or squashed interior. Always allow your French bread to cool on a wire rack for at least 1 hour, or ideally longer, for the crumb to fully set and achieve its perfect airy texture.
- Adding Too Much Flour: Over-flouring is a primary culprit for dry, dense, and tough bread. Flour measurements by volume (cups) can be notoriously inaccurate, as flour can pack down differently. If you’re using measuring cups, make sure to spoon your flour lightly into the cup and then level it off (the “spoon and level” method) rather than scooping directly from the bag. Better yet, as recommended in our expert tips, use a kitchen scale to measure flour by weight (grams) for consistent, accurate results every time.
- Overworking the Dough During Shaping: While kneading is essential, excessive handling or aggressive shaping can “overwork” the dough, making it tough. After the bulk fermentation, handle the dough gently when dividing and pre-shaping. The goal is to create a taut surface during the final shaping without deflating all the precious air bubbles or tearing the delicate gluten structure. Remember, the shape doesn’t have to be absolutely perfect – rustic charm is part of the appeal of homemade bread!
- Skipping the Scoring (Slashing): Not scoring the tops of your loaves before baking is a critical oversight. Scoring (making diagonal slashes with a sharp knife or lame) serves a vital purpose: it provides controlled vents for steam to escape from the dough during its initial expansion in the hot oven. Without these vents, the steam will find the path of least resistance, causing the crust to crack unpredictably, leading to uneven rising, and sometimes even blowing out the sides of your beautiful loaf. Proper scoring ensures a controlled “oven spring” and a beautifully shaped final product.
- Inactive or Expired Yeast: If your dough isn’t rising, the culprit is often inactive yeast. Always check the expiration date on your yeast package. If you’re unsure, you can “proof” active dry yeast by dissolving it in a small amount of warm water (105-110°F) with a pinch of sugar. If it foams and bubbles within 5-10 minutes, it’s active. If not, your yeast is likely dead, and it’s time for a new batch.
Creative Additions & Variations
While this classic French bread recipe is perfect on its own, it also serves as a fantastic base for creativity. Feel free to experiment with these delicious additions and variations to customize your loaves:
- Herb French Bread: For an aromatic twist, mix in 2 teaspoons of your favorite dried herbs, such as fragrant rosemary, savory thyme, or a classic Italian seasoning blend, during step 1 when you combine the dry ingredients. The herbs infuse the dough, creating a wonderfully fragrant and flavorful loaf perfect for pairing with roasted meats or pasta dishes.
- Garlic Lover’s Loaf: Elevate the flavor profile by adding 1–2 teaspoons of garlic powder to the dough during the initial mixing stage. For an even more intense and nuanced garlic flavor, incorporate a tablespoon or two of finely minced roasted garlic into the dough during the last minute of kneading. This will create a moist, flavorful bread ideal for garlic bread or accompanying Italian meals.
- Cheesy Twist: Who can resist a cheesy loaf? Before rolling the dough into its final loaf shapes, gently fold in about ½ cup of shredded sharp cheddar cheese, Parmesan, or a robust Gruyère. The cheese will melt into pockets within the bread, adding a delightful savory dimension and a tender texture. This variation is particularly good for grilled cheese or as a side with chili.
- Sesame Seed Crusted French Bread: For a beautiful finish and an extra layer of nutty flavor, brush your proofed loaves with a little water before baking and generously sprinkle with sesame seeds. The seeds will adhere to the crust and toast nicely in the oven.
- Olive & Herb Bread: Add ½ cup of pitted and chopped Kalamata or green olives along with 1-2 tablespoons of fresh chopped herbs (like oregano or basil) to the dough during the last minute of kneading. The briny olives complement the rich bread flavor beautifully.
- Sun-Dried Tomato & Basil: Mix in ¼ cup of finely chopped oil-packed sun-dried tomatoes (drained) and 2 tablespoons of fresh chopped basil into the dough. This adds a sweet, tangy, and aromatic Mediterranean flair.
Frequently Asked Questions
Here are answers to some common questions about baking French bread at home:
Q: Why is my French bread dense and not airy?
A: A dense loaf can be caused by several factors: inactive yeast (check the expiration date and water temperature), under-kneading (which doesn’t develop enough gluten), or not allowing enough time for the dough to rise (both the first and second proofing stages are crucial). Ensure your yeast is fresh, knead the dough until it’s elastic, and give it ample time to proof in a warm, draft-free environment.
Q: Can I prepare the dough ahead of time?
A: Yes, you can! After the first rise (bulk fermentation), you can punch down the dough lightly, divide it, and then place the shaped loaves in the refrigerator for a slow, cold proof overnight (8-12 hours). This can actually enhance the flavor. When you’re ready to bake, remove them from the fridge about 30-60 minutes before baking to allow them to come closer to room temperature and proof slightly before scoring and baking as usual.
Q: How do I store homemade French bread?
A: French bread is best enjoyed fresh on the day it’s baked. However, you can store it wrapped in a clean kitchen towel at room temperature for up to 1-2 days. For longer storage, allow the bread to cool completely, then wrap it tightly in plastic wrap and then aluminum foil before freezing for up to 1 month. To reheat, thaw completely, then crisp in a 350°F (175°C) oven for 10-15 minutes.
Q: What if I don’t have a bread lame for scoring?
A: A very sharp knife, such as a razor blade or a sharp chef’s knife, can work as a substitute for a bread lame. The key is to use a blade that is thin and sharp enough to make a clean, quick incision without dragging the dough. Angle the blade almost parallel to the dough for the best “ear” effect.
Q: Can I make this recipe in a bread machine?
A: While you can use a bread machine for the dough cycle (mixing and kneading), the baking process with steam is essential for this particular French bread crust. You would still need to shape, proof, and bake the loaves in a conventional oven as directed.
More Delicious Bread Recipes
Breakfast
Blueberry Coffee Cake with Greek Yogurt & Streusel
Bread
Savory Pumpkin Muffins with Parmesan & Herbs
Bread
Easy Cheddar Drop Biscuits
Bread
Savory Zucchini Muffins with Cheddar Cheese
Subscribe for More Delicious Recipes!
Want more easy and mouth-watering recipes delivered straight to your inbox? Join our community and never miss an update from Bites with Bri. Get new posts, exclusive tips, and seasonal favorites sent directly to you!
Did you make this recipe?
If you try this recipe, please leave a star rating and/or comment in the section below! Your feedback is always appreciated and helps others discover great recipes.
Follow me on social media for more culinary inspiration:
- TikTok
- YouTube
Print Recipe
Homemade French Bread Recipe
Equipment
-
Mixing Bowls
-
Stand Mixer (optional, can knead by hand)
-
Wooden Spoon / Spatula
-
Baking Sheets
-
Parchment Paper
-
Sharp Knife or Bread Lame
-
Wire Rack
-
Metal Baking Dish or Cast Iron Skillet (for steam)
Ingredients
- 3 2/3 cups (480g) bread flour
- 2¼ teaspoons (7g) active dry yeast
- 2 teaspoons (10g) Morton kosher salt
- 1½ cups (340g) warm water (about 105–110°F / 40-43°C)
Instructions
-
Mix the Dough: In a large mixing bowl or the bowl of a stand mixer, whisk together the bread flour, yeast, and salt. Add the warm water and stir with a wooden spoon or spatula until a rough, shaggy dough forms. If using a stand mixer, knead with the dough hook on medium-high speed for 5 to 6 minutes. If kneading by hand, transfer the dough to a lightly floured surface and knead for 8 to 10 minutes, until smooth, elastic, and slightly tacky (it should stick just a bit but pull away cleanly).
-
First Rise (Bulk Fermentation): Place the dough back into the mixing bowl and cover with plastic wrap or a damp kitchen towel. Let rise at room temperature for about 90 minutes, or until doubled in size. To check, gently press your fingertip into the dough—if the indentation springs back slowly, it’s ready.
-
Divide and Pre-Shape: Turn the risen dough out onto a lightly floured surface and gently press it down to release some air. Divide into two equal pieces. Shape each into a rough rectangle about 12 by 6 inches.
-
Shape the First Loaf: Starting from a long side, roll one rectangle tightly into a log and pinch the seam well to seal. This prevents unraveling during baking.
-
Repeat with Second Loaf and Score: Place seam-side down on a parchment-lined baking sheet. Repeat the shaping process with the second rectangle of dough and place it on the same baking sheet, leaving space between the loaves. Use a sharp knife or lame to score each loaf with 3 to 4 diagonal slashes across the top.
-
Final Proof and Preheat Oven: Loosely cover the loaves with a kitchen towel or lightly greased plastic wrap. Let rise at room temperature for 30 to 45 minutes, until noticeably puffy but still holding their shape. While the loaves are proofing, preheat the oven to 425°F (218°C). Place an empty metal baking dish or cast iron skillet on the bottom rack of the oven to preheat as well.
-
Bake with Steam: Once the loaves are ready to bake, pour 1 cup of hot water into the preheated pan in the bottom of the oven to create steam. Quickly transfer the baking sheet with the loaves to the oven and close the door immediately to trap the steam. Bake for 26 to 29 minutes, or until the crust is deeply golden brown and the loaves sound hollow when tapped on the bottom. The internal temperature should be around 200°F (93°C).
-
Transfer & Let Cool: Remove the loaves from the baking sheet and transfer to a wire rack. Let cool for at least 1 hour before slicing to allow the interior to set properly. Cutting too early can result in a gummy crumb.
Nutrition
(Approximate values per serving, based on 2 large loaves)
- Calories: 839 kcal
- Carbohydrates: 168g
- Protein: 29g
- Fat: 4g
- Saturated Fat: 1g
- Polyunsaturated Fat: 2g
- Monounsaturated Fat: 0.5g
- Sodium: 2341mg
- Fiber: 6g
- Sugar: 1g
Nutrition information is automatically calculated and should only be used as an approximation. Exact values may vary based on ingredients and preparation methods.