
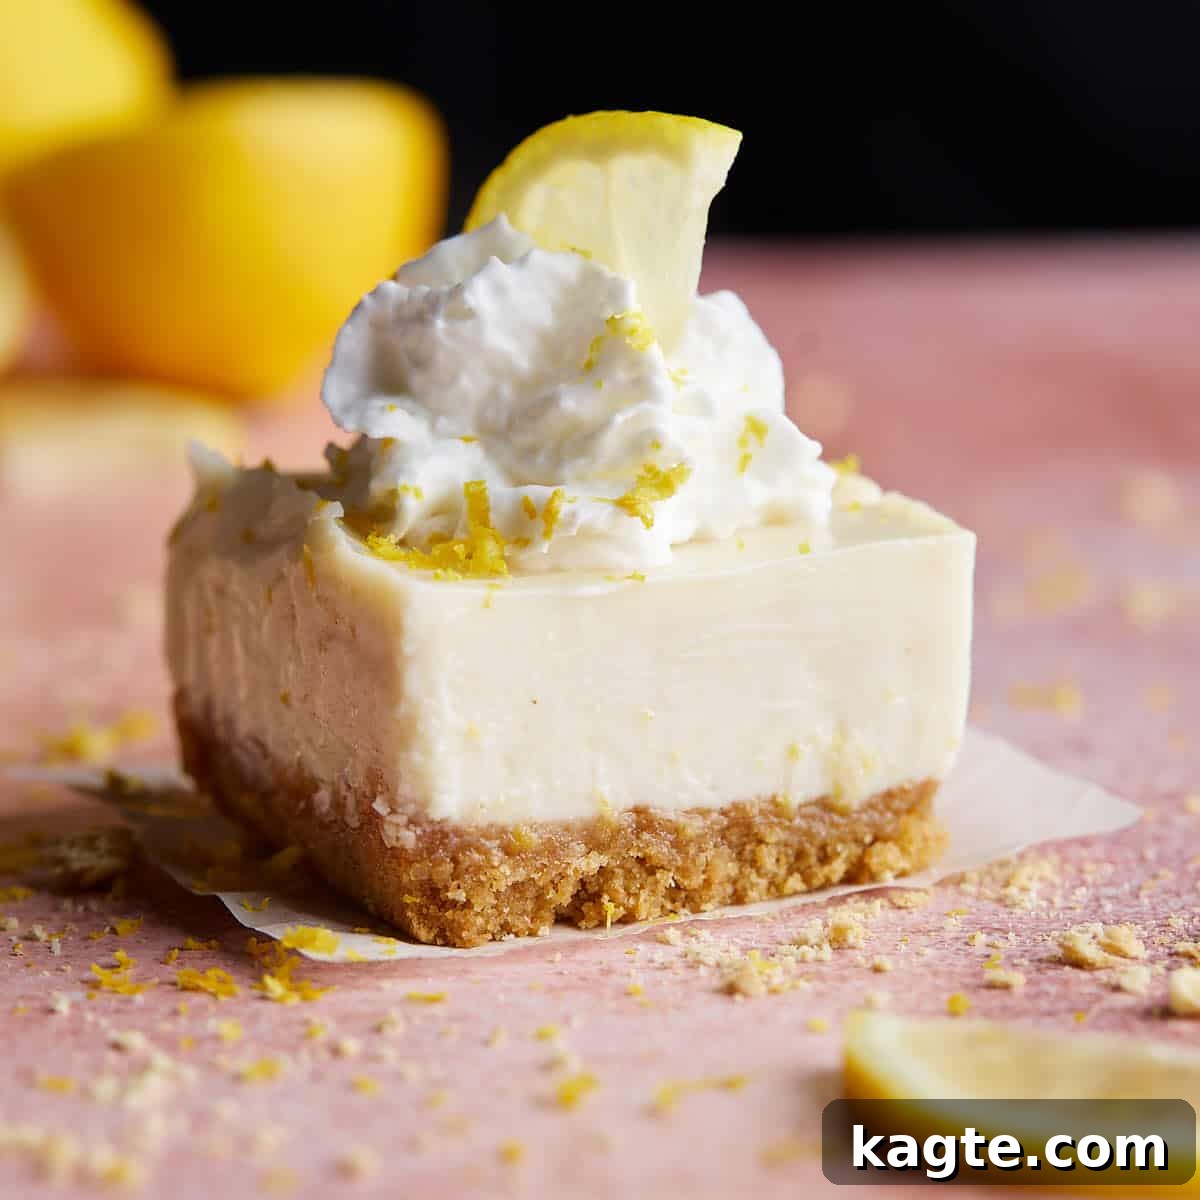
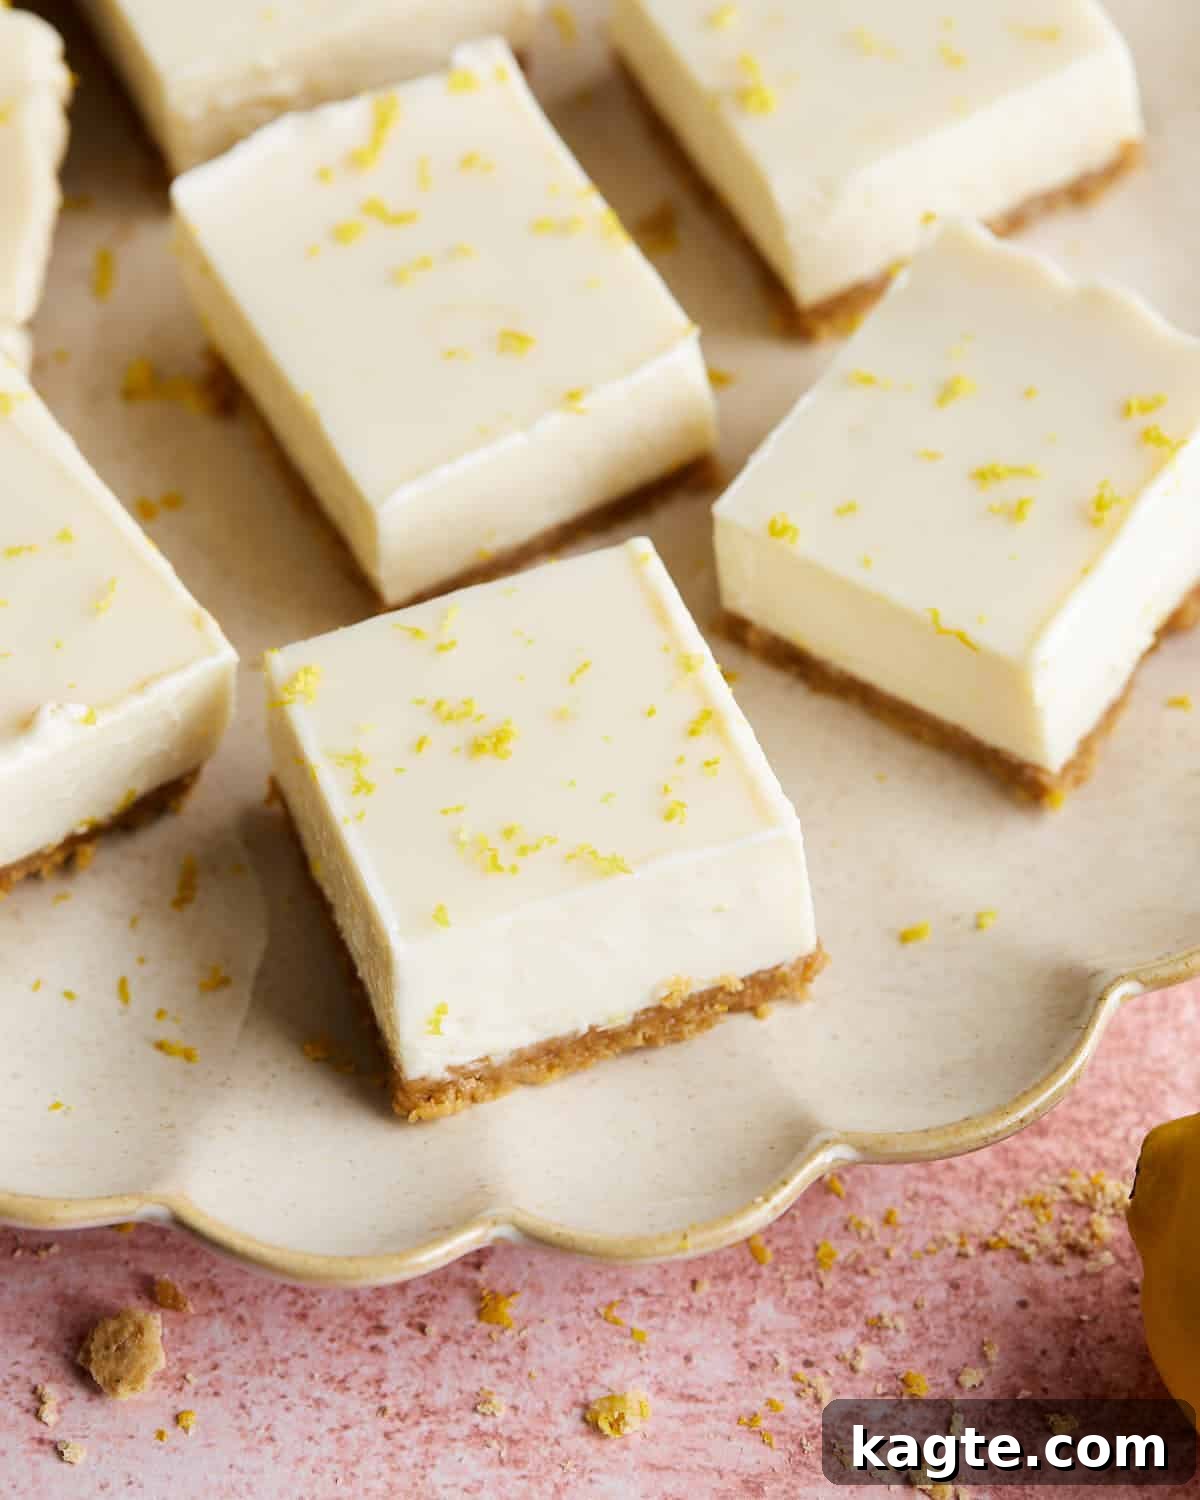
These decadent Lemon Bars with Graham Cracker Crust offer a perfect blend of sweet and tangy, requiring just a handful of simple ingredients. Crafted with a rich, buttery graham cracker crust and topped with a lusciously creamy lemon filling, they are an absolute delight for any lemon lover. This easy-to-follow recipe brings together the bright zest of fresh lemons, the smooth richness of sweetened condensed milk, and the unique addition of Greek yogurt for an unparalleled texture.
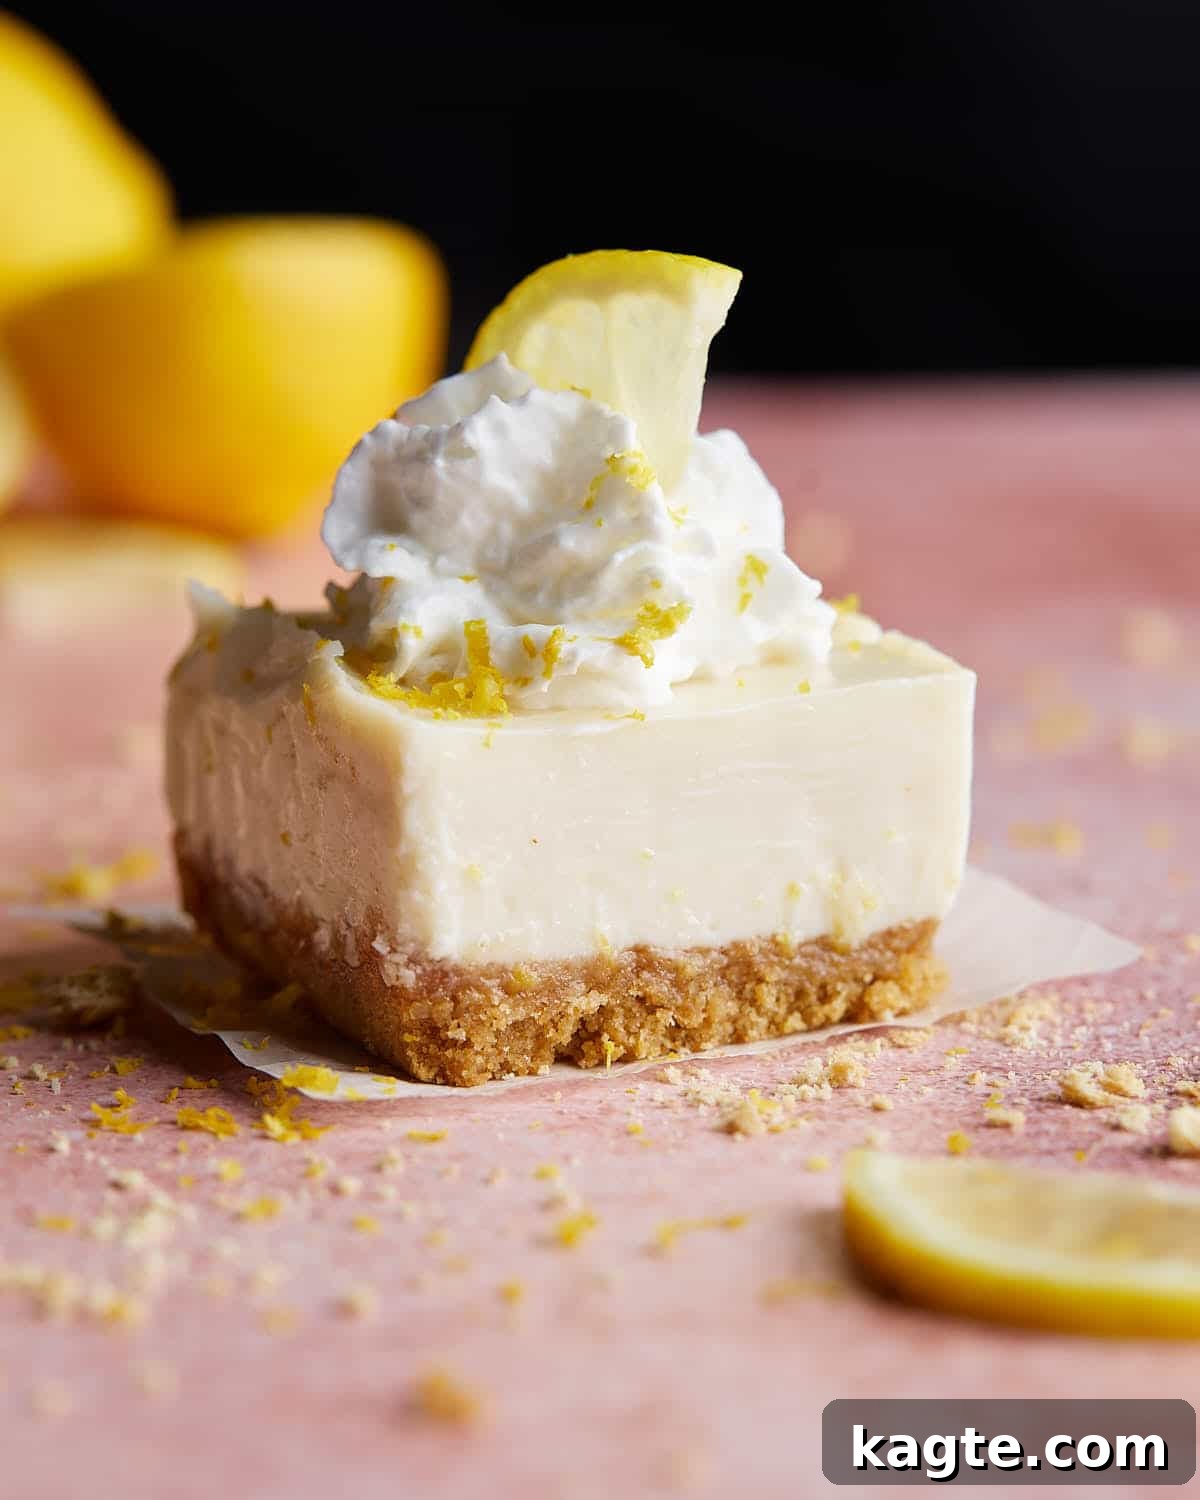
When a craving for a refreshing, sweet, and perfectly summery treat strikes, these easy lemon bars with their classic graham cracker crust are my absolute go-to. The harmonious combination of a subtly sweet, crunchy crust and a vibrantly creamy lemon filling creates a dessert that’s sure to impress everyone, especially those who adore the bright, zesty flavor of lemon. Whether you’re planning a gathering, seeking a delightful homemade dessert, or looking for a thoughtful gift, these lemon bars are an ideal choice. Their irresistible appeal makes them a standout at any occasion, offering a burst of sunshine in every bite.
If your sweet tooth is still calling, be sure to explore my other delightful dessert bar recipes: Pumpkin Snickerdoodle Bars with Cream Cheese Glaze for a cozy fall treat, or the satisfying Peanut Butter Banana Bars for a comforting, nutty indulgence.
Table of Contents
- Why You’ll Love These Lemon Bars
- Essential Ingredients & Clever Substitutions
- How to Bake Perfect Lemon Bars with Graham Cracker Crust
- Serving Suggestions for Your Lemon Bars
- Pro Tips for Flawless Lemon Bars
- Creative Additions & Variations
- Frequently Asked Questions About Lemon Bars
- More Irresistible Dessert Recipes
- Complete Lemon Bar Recipe Card
Why You’ll Love These Lemon Bars
These lemon bars aren’t just a dessert; they’re a revelation. Here’s why this particular recipe for lemon bars with a graham cracker crust stands out and is destined to become a staple in your kitchen:
- No Eggs Required: One of the most common concerns with lemon bar recipes is the potential for an “eggy” taste or texture. This recipe completely eliminates that worry as it doesn’t use egg yolks or whites. This simplifies the baking process and results in a clean, pure lemon flavor and a wonderfully smooth, non-custardy filling that’s perfect for those with egg allergies or preferences.
- Sweetened Condensed Milk Magic: Forget granulated sugar! Our recipe harnesses the power of sweetened condensed milk, which is truly a game-changer for the lemon layer. It not only provides the ideal sweetness but also imparts an incredible richness and a velvety texture that simply melts in your mouth. This ingredient is key to achieving that signature creamy consistency without any fuss.
- Unbelievably Creamy Filling: Unlike traditional lemon bars that often feature a more gelatinous or firm lemon curd, my version incorporates Greek yogurt into the filling. This unexpected addition is the secret to an extra creamy, almost cheesecake-like texture that’s incredibly satisfying. It adds a subtle tang that complements the lemon beautifully, elevating the overall indulgence.
- Only 7 Core Ingredients: Simplicity is key! This recipe is refreshingly straightforward, calling for just seven primary ingredients. Chances are, most of these are already stocked in your fridge or pantry. This means less shopping, less fuss, and more time enjoying your delicious homemade dessert. It’s perfect for impromptu baking sessions or when you need a quick, impressive treat.
- A Healthier Twist with Higher Protein: Thanks to the inclusion of Greek yogurt, these lemon desserts boast a slightly higher protein content compared to conventional recipes. While still a delightful treat, this subtle nutritional boost makes them a slightly more wholesome indulgence, allowing you to enjoy your dessert with a little less guilt.
- The Ultimate Summery Treat: With their vibrant citrus flavor and cool, creamy texture, these lemon bars perfectly capture the essence of summer. They are tangy, refreshing, and incredibly satisfying on a warm day, making them a seasonal favorite that you’ll want to make all year round.
- Perfect for Any Gathering: Each batch yields a generous 16 perfectly portioned bars, making this dessert an excellent choice for potlucks, family get-togethers, holiday celebrations, or simply for feeding a large family. They’re easy to transport and always a crowd-pleaser, ensuring everyone gets a taste of their bright, zesty goodness.
Essential Ingredients & Clever Substitutions
Creating these delightful lemon bars requires a precise blend of ingredients for both the irresistible graham cracker crust and the vibrant, creamy lemon filling. Here’s a breakdown of what you’ll need, along with some helpful notes and substitution ideas to ensure your baking success.
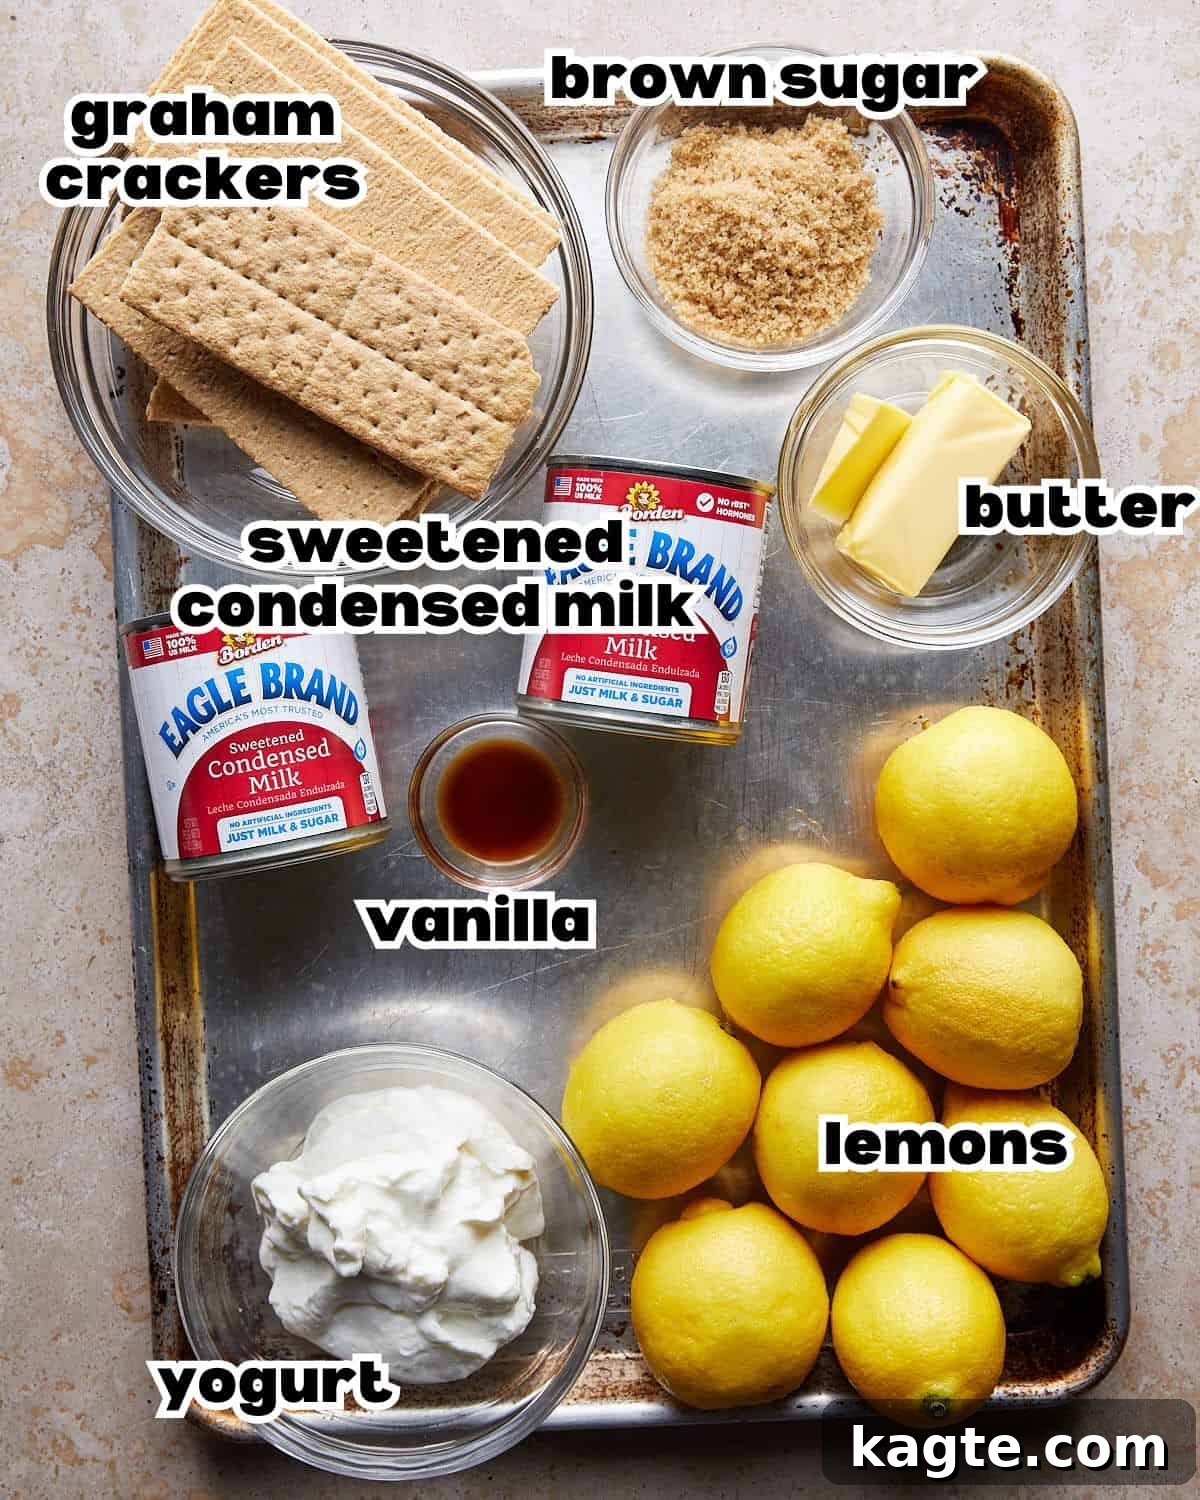
- Graham Crackers: You’ll need about 12 full graham cracker sheets to create the perfect crumb base. Ensure they are finely crushed for a cohesive crust.
- Salted Butter, Melted: The butter is crucial for binding the crust ingredients and adding a rich, buttery flavor. If you only have unsalted butter, simply add a pinch of salt to the crust mixture to enhance the flavor.
- Brown Sugar: A touch of brown sugar in the crust adds a subtle sweetness and a hint of caramel note that complements the graham crackers beautifully.
- Large Lemons (Zested and Juiced): Fresh is always best! You’ll need about 2 large lemons to get both the vibrant zest and the tart, fresh juice. Lemon zest contains essential oils that provide an intense lemon flavor, so don’t skip it! Freshly squeezed lemon juice ensures the brightest, most authentic lemon taste. Bottled lemon juice can be used in a pinch, but the flavor won’t be as bright or complex.
- Sweetened Condensed Milk: This is the star of the creamy lemon filling, providing both sweetness and a luxurious, thick texture without the need for eggs. Ensure you’re using sweetened condensed milk, not evaporated milk, as they are very different!
- Greek Yogurt: I recommend using nonfat Greek yogurt to keep the recipe slightly lighter, but any unsweetened Greek yogurt will work perfectly. The yogurt is what gives these bars their unique, extra-creamy texture and a pleasant tang that balances the sweetness. If Greek yogurt isn’t available or preferred, you can substitute it with sour cream in a 1:1 ratio. It’s crucial to use unsweetened yogurt; otherwise, your lemon bars will turn out excessively sweet.
- Vanilla Extract: A hint of vanilla extract enhances the overall flavor profile, adding warmth and depth that beautifully complements the bright lemon.
- Whipped Cream (Optional for Serving): A dollop of freshly whipped cream can elevate these lemon bars, adding an extra layer of creaminess and visual appeal.
For a precise list of ingredients and their exact quantities, please refer to the recipe card below.
How to Bake Perfect Lemon Bars with Graham Cracker Crust
Crafting these delicious lemon bars is simpler than you might think. Follow these straightforward steps to achieve a perfectly balanced, tangy, and sweet dessert with a delightful graham cracker crust.
Quick Overview
- Preheat your oven to the correct temperature.
- Prepare the irresistible graham cracker crust.
- Whip up the luscious lemon filling.
- Layer the filling over the baked crust.
- Bake to golden perfection and chill thoroughly.
Step by Step Instructions
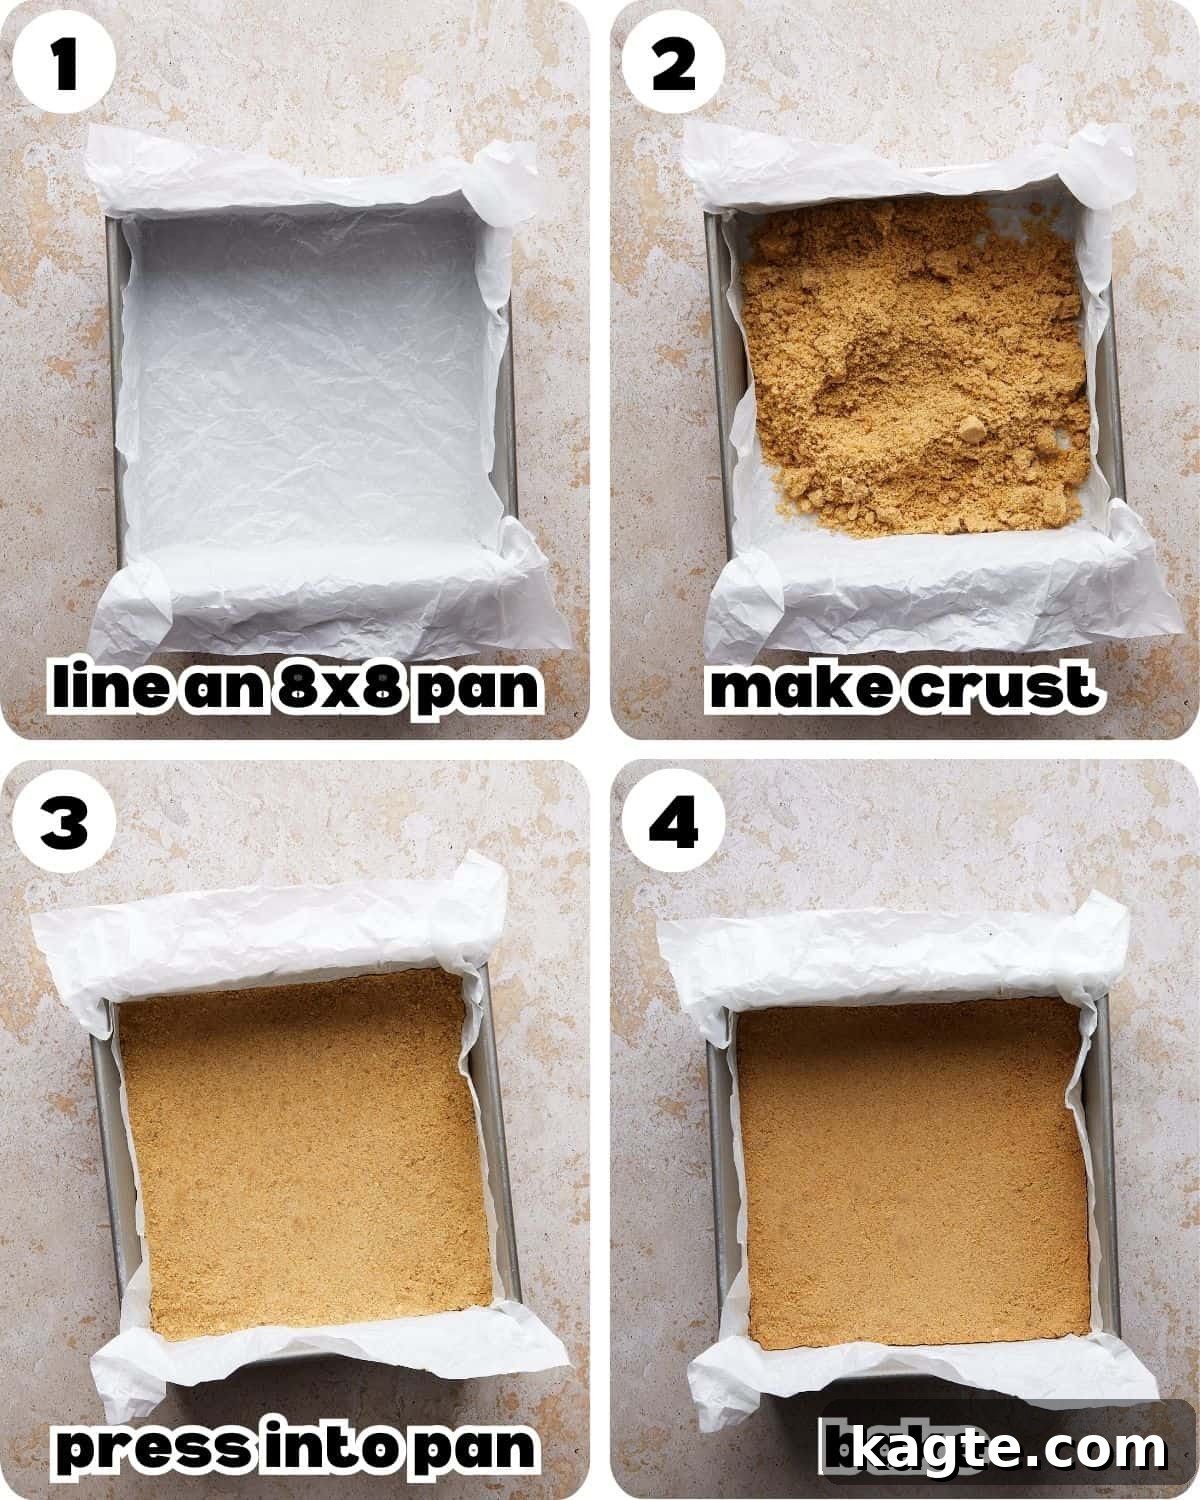
Pro Tip: Always use parchment paper in the bottom of your baking pan. It makes lifting the fully cooled bars out incredibly easy and ensures a clean cut every time.
Step 1: Prepare Your Oven and Pan. Begin by preheating your oven to 350°F (175°C). Next, line an 8×8-inch baking pan with parchment paper. Be sure to leave a generous overhang on the sides – this will act as handles, allowing you to easily lift the entire batch of bars out of the pan once they’ve cooled and set. This simple step prevents sticking and makes slicing a breeze.
Step 2: Create the Graham Cracker Crumbs. In a food processor, pulse the graham crackers until they are transformed into very fine, uniform crumbs. The finer the crumbs, the more cohesive your crust will be. Add the melted butter and brown sugar to the crumbs, then pulse again until all ingredients are thoroughly combined and the mixture resembles wet sand. This ensures the crust holds together perfectly.
Step 3: Press the Crust into the Pan. Transfer the graham cracker crumb mixture into your prepared baking pan. Using your hands or the flat bottom of a cup, firmly press the mixture into an even, compact layer across the bottom of the pan. It’s important to create a solid base, but avoid pressing it up the sides of the pan, as we want a flat, even bar.
Step 4: Pre-bake the Crust. Bake the pressed graham cracker crust for 12 minutes, or until it turns a beautiful golden brown and smells fragrant. This pre-baking step is crucial as it helps to set the crust, preventing it from becoming soggy once the lemon filling is added. Once baked, remove the pan from the oven and place it on a cooling rack to cool slightly while you prepare the creamy lemon filling.
Essential Tip: Patience is key! Allow the lemon bars to fully set and chill before attempting to cut them. Cutting them too soon will result in a runny, messy lemon layer.
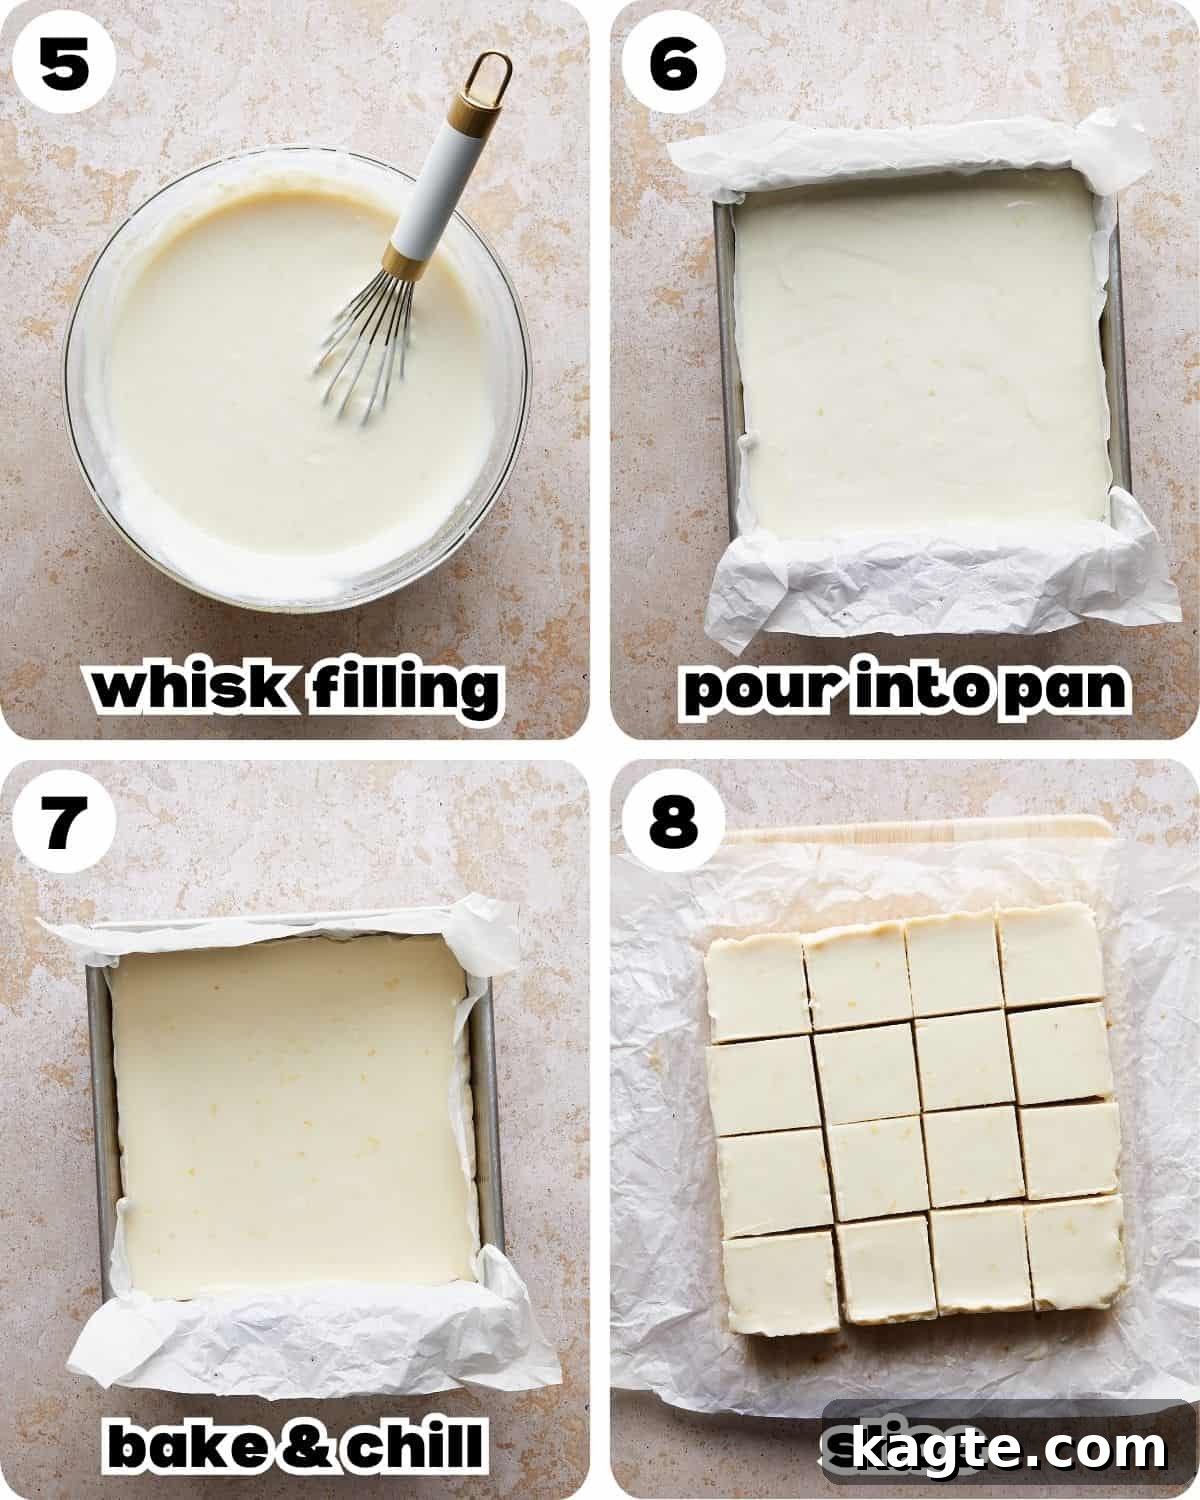
Step 5: Prepare the Creamy Lemon Filling. In a large mixing bowl, combine the fresh lemon zest, freshly squeezed lemon juice, sweetened condensed milk, Greek yogurt, and vanilla extract. Whisk all the ingredients together thoroughly until the mixture is completely smooth and well combined. This ensures an even distribution of flavors and a consistent texture in your filling.
Step 6: Pour the Filling Over the Crust. Carefully pour the prepared lemon filling evenly over the semi-cooled graham cracker crust in the baking pan. The crust doesn’t need to be completely cold, just cool enough to prevent the filling from seeping through.
Step 7: Bake and Chill to Perfection. Return the pan to the preheated oven and bake for 18-20 minutes. The filling will still appear somewhat wobbly in the center, which is perfectly normal. It will continue to set as the bars cool. Once baked, remove the pan from the oven and allow the bars to cool completely on a cooling rack at room temperature for about 1 hour. This initial cooling helps prevent condensation. After cooling, transfer the pan to the refrigerator and chill for at least 4 hours, or ideally overnight, until the lemon filling is completely set and firm. This chilling step is vital for the bars to achieve their proper texture and makes them much easier to slice.
Step 8: Slice and Serve. Once fully chilled and set, use the parchment paper overhang to gently lift the entire slab of lemon bars out of the pan and onto a cutting board. Using a sharp knife, carefully slice the bars into 16 equal portions. For the cleanest cuts, wipe your knife clean between slices. Serve these exquisite lemon bars as is, or with a dollop of fresh whipped cream for an added touch of indulgence. Enjoy the bright, zesty flavors!
Serving Suggestions for Your Lemon Bars
These delightful lemon bars with their graham cracker crust are fantastic on their own, but a few simple garnishes and pairing ideas can elevate the experience even further. Their bright, refreshing flavor makes them a versatile dessert that complements a variety of meals and occasions.
For an elegant presentation, consider dusting these lemon bars with a light sprinkle of powdered sugar just before serving. A thin slice of fresh lemon, a delicate curl of lemon zest, or even a few fresh mint leaves can add a pop of color and an extra layer of aromatic appeal. For an added touch of luxury, serve them with a generous dollop of homemade whipped cream or a scoop of vanilla bean ice cream.
I find these easy lemon bars to be the perfect palate cleanser after hearty mains and savory sides, especially those with a rich or smoky profile, like BBQ dishes. Here are a few main course ideas that would pair wonderfully with these zesty dessert bars:
- Sticky BBQ Chicken Wings: The tanginess of the lemon bars beautifully cuts through the richness of BBQ wings.
- BBQ St. Louis Ribs in the Oven: A classic comfort meal that finds its perfect sweet counterpart in these lemon bars.
- Dutch Oven Mac and Cheese: After a creamy and cheesy main, a light and zesty dessert is just what’s needed.
- Cornbread Recipe Without Buttermilk: A simple, rustic side that pairs well with the overall comfort food vibe.
These bars are also ideal for afternoon tea, picnics, or simply as a refreshing treat enjoyed with a cup of coffee or herbal tea.
Pro Tips for Flawless Lemon Bars
Achieving perfectly set, deliciously tangy lemon bars is easy when you keep a few expert tips in mind. These simple guidelines will help you avoid common pitfalls and ensure your dessert turns out fantastic every time.
- Embrace Fresh Lemon Juice & Zest: For truly exceptional creamy lemon bars, prioritize using fresh lemons. The difference between fresh and bottled lemon juice is stark; fresh lemons provide a brighter, more complex tartness that is simply unmatched. Furthermore, the zest contains potent essential oils that infuse the filling with an intense, aromatic lemon flavor that you cannot get from juice alone. Always zest your lemons before juicing them for maximum flavor extraction.
- The Magic of Parchment Paper: This simple kitchen staple is your best friend when baking bars. Lining your baking pan with parchment paper, ensuring a slight overhang on all sides, makes removing the entire slab of cooked and cooled bars incredibly easy. You can then effortlessly transfer them to a cutting board for clean, precise slices. Without parchment paper, you risk bars sticking to the pan or breaking apart during removal, making cleanup harder too.
- Patience is a Virtue: Allow for Complete Cooling: This is arguably the most crucial tip for perfectly set lemon bars. If you attempt to cut the bars while they are still warm, the lemon filling will be runny and sticky, resulting in a messy, “goopy” consistency that won’t hold its shape. Instead, allow the bars to cool undisturbed on a cooling rack at room temperature for at least an hour. This initial cooling allows the warmth to dissipate. Following this, transfer the pan to the refrigerator and chill for a minimum of four hours, or preferably overnight. This extended chilling time is essential for the filling to fully set and firm up, ensuring neat, beautiful slices and a delightful texture. Resist the temptation to cut early!
Creative Additions & Variations
While these lemon bars are delicious in their classic form, don’t hesitate to get creative! Here are some fantastic ideas to adapt the recipe and cater to different tastes or dietary needs, adding new dimensions to this beloved dessert.
- Substitute Limes for Lemons: If you’re a fan of a slightly different citrus kick, or simply have an abundance of limes, feel free to swap them for lemons. This yummy recipe works just as well with lime juice and zest, providing a similar vibrant, tangy flavor. The primary difference will be the color of the bars, which will take on a lovely subtle green hue instead of yellow. You’ll still need approximately ¾ cup of juice, which typically comes from about 3-4 large limes.
- Make Them Gluten-Free: Adapting these lemon bars to be gluten-free is incredibly straightforward, requiring only one main ingredient swap. Instead of regular graham crackers, simply use certified gluten-free graham crackers for the crust. Additionally, it’s always a good practice to double-check the label of your sweetened condensed milk, as while most brands are naturally gluten-free, some may contain additives or cross-contamination warnings. Read labels carefully to ensure a truly gluten-free treat.
- Craft a Buttery Shortbread Crust: For those who prefer a more European-style dessert, or if you simply have a few extra minutes, consider making a rich shortbread crust instead of the graham cracker base. This variation gives the lemon squares a denser, more buttery, and chewy foundation that is incredibly satisfying. To make it, you’ll need 1 cup of salted melted butter, ½ cup of granulated sugar, 2 teaspoons of vanilla extract, and 2 cups of all-purpose flour. Combine these ingredients until they form a dough. Press this dough evenly into your prepared 8×8-inch pan and bake for 15-20 minutes at 350°F (175°C), or until the edges just begin to turn golden. Once baked, let it cool slightly, then proceed with step five of my original recipe card to add the lemon filling. This shortbread base offers a delightful textural contrast and a different flavor profile that lemon dessert enthusiasts will adore.
Frequently Asked Questions About Lemon Bars
Yes, absolutely! I highly recommend pre-baking a graham cracker crust before adding any wet filling, especially for recipes like these lemon bars. Pre-baking for a short period helps to set the crust and creates a barrier, which significantly prevents it from becoming soggy once the moist lemon mixture is poured on top. This crucial step ensures your crust stays delightfully crisp and firm.
The most effective way to prevent a graham cracker crust from getting soggy in recipes, including these luscious lemon bars, is to pre-bake it. By baking the crust for a few minutes before adding the filling, you allow the butter to solidify and bind the crumbs, creating a protective layer that resists moisture from the filling. Additionally, ensure your crust is firmly pressed into the pan to eliminate any gaps where moisture could collect.
There are a few common reasons why a graham cracker crust might crumble or fall apart. Firstly, the graham crackers may not have been crushed finely enough. If the pieces are too large, they won’t bind together properly. Secondly, and most commonly, the crust mixture might not contain enough melted butter. Butter acts as the binder, so if there isn’t sufficient butter to coat and hold all the crumbs together, the mixture will be too dry and won’t form a cohesive crust. Ensure your crumbs are very fine and thoroughly combined with the melted butter to achieve a sturdy base.
Lemon bars, especially those with a creamy filling, should always be stored in the refrigerator. Place them in an airtight container or cover them tightly with plastic wrap to prevent them from drying out or absorbing other odors. Stored correctly, they will remain fresh and delicious for 3-5 days.
Yes, lemon bars can be frozen! Once fully chilled and set, cut them into individual bars. Arrange them in a single layer on a baking sheet and freeze until solid. Once frozen, transfer the bars to an airtight freezer-safe container, separating layers with parchment paper to prevent sticking. They can be stored in the freezer for up to 1-2 months. Thaw them in the refrigerator for a few hours before serving.
More Irresistible Dessert Recipes
If you have a passion for baking and a sweet tooth that’s always eager for new treats, you’re in the right place! Explore these other fantastic dessert recipes that are sure to satisfy any craving, from classic cookies to seasonal delights.
Dessert
No-Chill Chocolate Chip Cookies (Easy)
Christmas
20 Sweet Peppermint Recipes for Christmas
Fall
20 Sweet Pumpkin Recipes for Fall (From Breakfast to Dessert)
Breakfast
Blueberry Coffee Cake with Greek Yogurt & Streusel
Shop my Amazon Storefront for recommended baking tools and ingredients!
If you try this delightful recipe, please leave a star rating in the recipe card below and/or share your thoughts in the comments! Your feedback is always valued. Follow me on Pinterest, Facebook & Instagram for more delicious recipes and baking inspiration.
Complete Lemon Bar Recipe Card
Here’s the full, easy-to-follow recipe for these irresistible Lemon Bars with Graham Cracker Crust, designed to make your baking experience enjoyable and successful.

Lemon Bars with Graham Cracker Crust
Author: Brianna May
These Lemon Bars with Graham Cracker Crust are utterly delicious and incredibly simple, requiring only seven ingredients! They feature a buttery graham cracker crust, a vibrant and tangy lemon zest, fresh lemon juice, rich sweetened condensed milk, and a few other simple ingredients for a perfectly creamy finish.
Print Recipe
Prep Time: 10 minutes
Cook Time: 30 minutes
Total Time: 40 minutes
Servings: 16 bars
Equipment
- 8×8 inch baking pan
- Microplane Grater
- Lemon Squeezer
- Food Processor
- Large Mixing Bowl
- Whisk
- Cooling Rack
Ingredients
Graham Cracker Crust
- 12 full sheets graham crackers
- 5 Tablespoons salted butter, melted
- 1/4 cup brown sugar
Lemon Filling
- Zest of 2 large lemons
- 3/4 cup freshly squeezed lemon juice (from approximately 2 large lemons)
- 2 (14-ounce) cans sweetened condensed milk
- 1 cup plain unsweetened Greek yogurt*
- 1/2 teaspoon vanilla extract
- Whipped cream, optional for serving
Instructions
- Prepare Oven & Pan: Preheat your oven to 350°F (175°C). Line an 8×8-inch baking pan with parchment paper, ensuring an overhang on the sides for easy lifting after baking.
- Make the Crust: In a food processor, pulse the graham crackers until they form very fine crumbs. Add the melted butter and brown sugar, and pulse until well combined and the mixture resembles wet sand. Transfer the crumb mixture to the prepared baking pan.
- Press the Crust: Using your hands and the bottom of a flat cup, firmly press the mixture into an even, compact layer on the bottom of the pan. Do not press it up the sides.
- Pre-bake Crust: Bake for 12 minutes, or until the crust is golden brown. Remove from the oven and let it cool on a cooling rack while you prepare the filling.
- Prepare Filling: In a large bowl, whisk together the lemon zest, lemon juice, sweetened condensed milk, Greek yogurt, and vanilla extract until smooth and well combined.
- Pour Filling: Carefully pour the lemon filling evenly over the semi-cooled crust.
- Bake & Chill: Bake for 18-20 minutes. The filling will still be slightly wobbly in the center but will set as it cools. Allow the bars to cool on a cooling rack for 1 hour at room temperature. Then, transfer the pan to the refrigerator and chill for at least 4 hours, or preferably overnight, until fully set.
- Slice & Serve: Once completely cooled and set, use the parchment paper overhang to lift the bars out of the pan and onto a cutting board. Using a sharp knife, slice into 16 uniform bars. Serve plain, or with a dollop of whipped cream if desired.
Notes
- Greek Yogurt: I used nonfat Greek yogurt to keep the recipe slightly lighter, but any unsweetened Greek yogurt will work. Sour cream can be used as a 1:1 substitute. Remember to use unsweetened yogurt to avoid overly sweet bars.
- Fresh Ingredients: For the best flavor, always use fresh lemon juice and zest.
- Parchment Paper: Essential for easy removal and clean slicing of the bars.
- Cooling Time: Do not skip the chilling! It is crucial for the bars to set properly and slice cleanly.
- Lime Variation: Limes can replace lemons (¾ cup juice needed) for a similar tangy flavor and a green hue.
- Gluten-Free Option: Use certified gluten-free graham crackers and check sweetened condensed milk labels for a GF version.
- Shortbread Crust: For a denser base, use 1 cup melted salted butter, ½ cup granulated sugar, 2 tsp vanilla extract, and 2 cups all-purpose flour. Combine, press into the pan, and pre-bake for 15-20 minutes at 350°F (175°C) before adding the lemon filling.
Nutrition
Nutrition information is automatically calculated, so should only be used as an approximation.
Calories: 194kcal | Carbohydrates: 29g | Protein: 4g | Fat: 7g | Saturated Fat: 4g | Polyunsaturated Fat: 0.3g | Monounsaturated Fat: 2g | Trans Fat: 0.1g | Cholesterol: 20mg | Sodium: 139mg | Fiber: 1g | Sugar: 22g