

Welcome to the ultimate guide for creating a truly unforgettable and comforting meal: the **Dutch Oven Chicken Pot Pie**! Forget soggy crusts and bland fillings; this recipe elevates the classic comfort food with a rich, savory filling, smoky bacon, fragrant herbs, and a crown of tender, cheesy homemade cheddar biscuits. Cooked to perfection in a Dutch oven, this hearty dish promises warmth, flavor, and a touch of homemade luxury that will have everyone asking for seconds. Get ready to transform your dinner table with a dish that’s both deeply satisfying and surprisingly simple to master.

Our Dutch oven chicken pot pie offers a delightful twist on the traditional: instead of a conventional pie crust, we top it with fluffy, cheesy homemade cheddar biscuits. This innovative topping not only adds incredible texture and flavor but also makes the dish feel even more decadent and uniquely comforting. The creamy chicken filling, brimming with tender vegetables and savory notes, perfectly complements the flaky, buttery biscuits, creating a culinary experience you won’t soon forget.
If you’re looking to expand your repertoire of savory pies, consider these other delicious options: Beef Pot Pie with Puff Pastry and Dutch Oven Shepherd’s Pie. Each offers its own unique charm, but our Dutch Oven Chicken Pot Pie with cheddar biscuits stands out as a true crowd-pleaser.
Table of Contents
- Why You’ll Love This Recipe
- Essential Ingredients & Clever Substitutions
- How to Make Dutch Oven Chicken Pot Pie
- Serving Suggestions and Perfect Pairings
- Pro Tips for a Perfect Pot Pie
- Creative Additions & Variations
- Recipe FAQs
- Related Recipes
- Dutch Oven Chicken Pot Pie Recipe
Why You’ll Love This Hearty Dutch Oven Chicken Pot Pie
This isn’t just another chicken pot pie recipe; it’s an elevated comfort food experience designed to delight your senses and warm your soul. Here’s why this Dutch oven chicken pot pie will quickly become a cherished favorite in your kitchen:
- Homemade Cheesy Biscuit Topping: Our signature cheddar biscuits aren’t just a topping; they’re an integral part of what makes this Dutch oven chicken pot pie truly special. The rich, buttery, and slightly tangy cheddar biscuits add an incredible texture and an extra layer of savory flavor that transforms each bite into a comforting embrace. This homemade touch distinguishes it from traditional pie crust versions, offering a more rustic and satisfying feel.
- Unmatched Comfort in Every Spoonful: Imagine a cold evening, and then imagine diving into a bowl of this chicken pot pie. With crispy bacon, a luxuriously creamy filling, and that golden, cheesy biscuit topping, this dish is the epitome of cozy, hearty comfort food. It’s designed to provide warmth and satisfaction, making it ideal for family dinners or gatherings with friends.
- Bursting with Fresh Herb Flavors: We believe in the power of fresh herbs to elevate a dish. A carefully selected blend of fresh herbs infuses the creamy chicken filling with vibrant, aromatic notes, providing a depth of flavor that dried herbs simply cannot match. This herbaceous essence cuts through the richness, creating a perfectly balanced and incredibly delicious pot pie.
- Time-Saving Rotisserie Chicken: Life is busy, and we understand that. That’s why this recipe cleverly incorporates shredded rotisserie chicken, significantly reducing your prep time without compromising on flavor. Using pre-cooked chicken means you can get this incredible Dutch oven chicken pot pie on the table faster, allowing you more time to relax and enjoy your meal.
- Indulgent and Rich Filling: The creamy filling is meticulously crafted to be incredibly rich and flavorful. It’s a harmonious blend of tender chicken, sweet carrots, crisp celery, savory onions, and a luscious sauce that perfectly coats every ingredient. The richness is balanced by the fresh herbs, ensuring a deeply satisfying experience without being overly heavy.
- Feeds a Hungry Crowd: Whether you’re hosting a dinner party or simply looking for a meal that yields plenty of leftovers, this baked chicken pot pie is perfect. Making eight generous servings, it’s an excellent choice for larger families or when you want to impress a group with a homemade, heartwarming dish.
- A Rewarding Labor of Love: While crafting the homemade biscuits and the rich filling takes a little time and effort, we promise the end result is more than worth it. This Dutch oven chicken pot pie is a true labor of love, and every bite will remind you of the care and quality put into its creation. The process itself can be a joyful culinary journey.
- Conveniently Freezable: Don’t let leftovers go to waste! This Dutch oven chicken pot pie freezes beautifully for up to three months, making it an excellent meal prep option. You can even double or triple the recipe and freeze extra pies for quick, delicious meals on busy weeknights, ensuring a homemade dinner is always within reach.
Essential Ingredients & Clever Substitutions for Your Pot Pie
Crafting the perfect Dutch Oven Chicken Pot Pie begins with selecting high-quality ingredients. Here’s a detailed look at what you’ll need for both the luscious filling and our signature cheddar biscuits, along with smart substitutions to suit your pantry and preferences.
For the Savory Chicken Pot Pie Filling
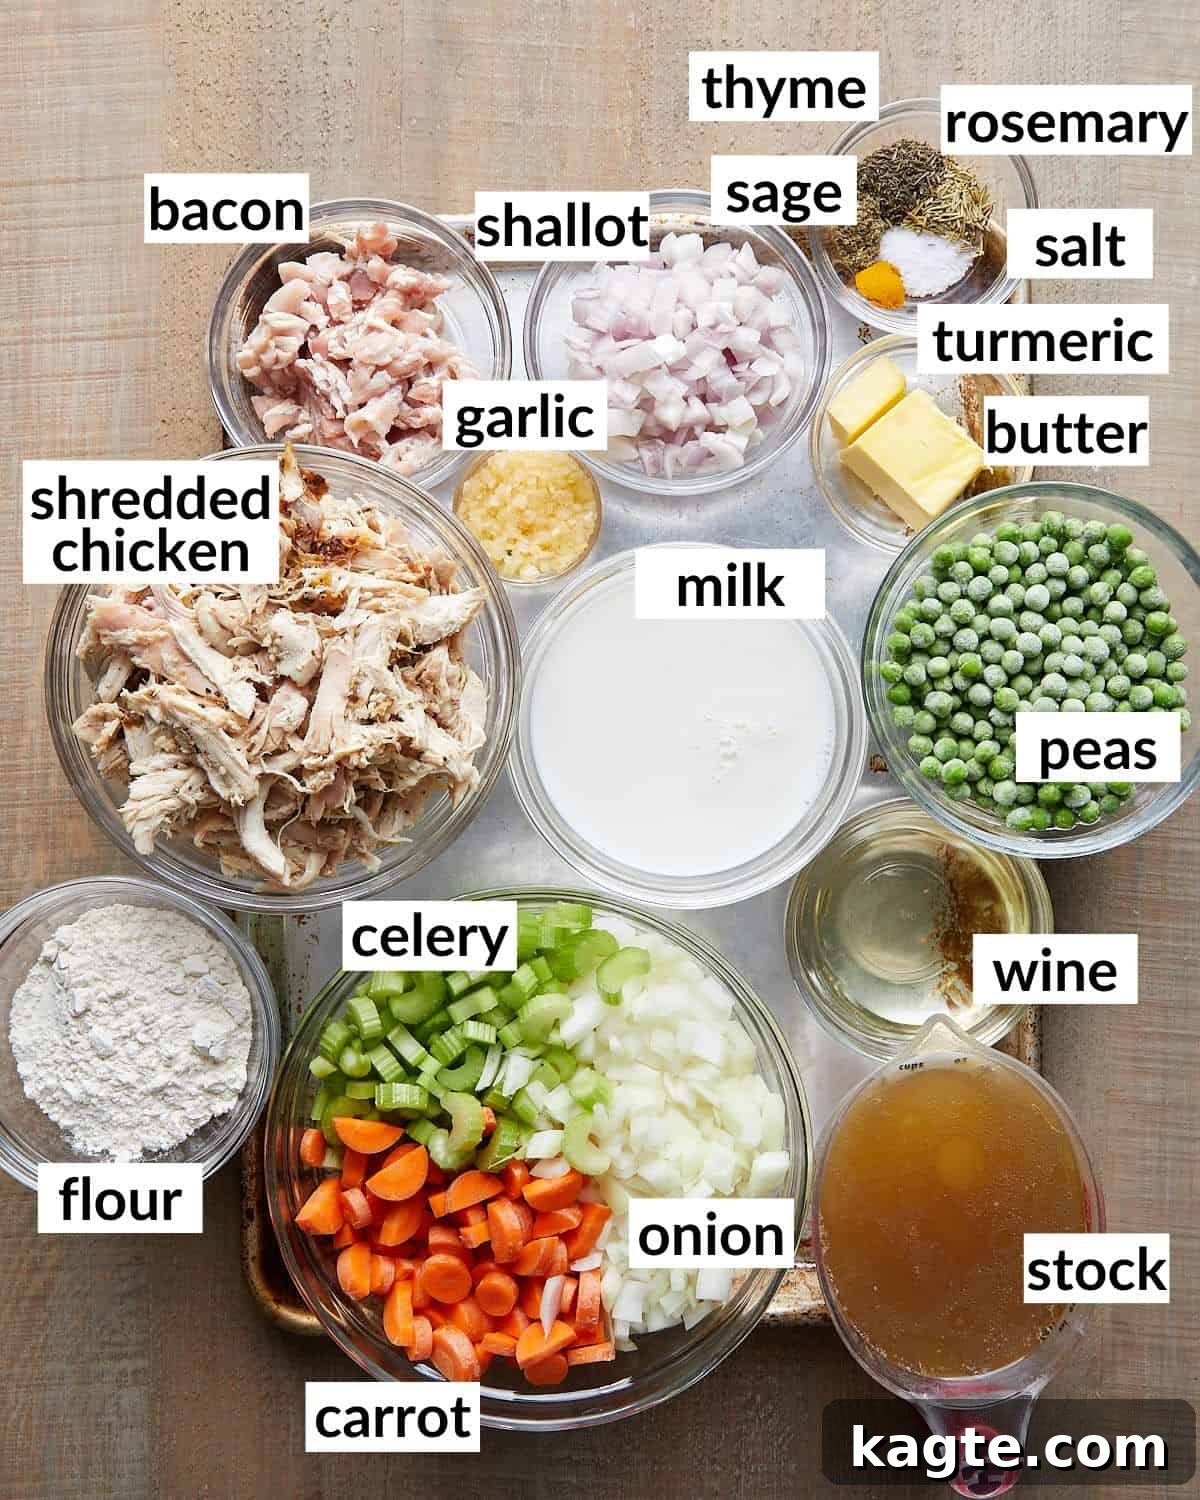
The heart of our Dutch oven chicken pot pie lies in its rich and flavorful filling. Each component plays a crucial role in building layers of taste and texture.
For the Irresistible Cheddar Biscuits
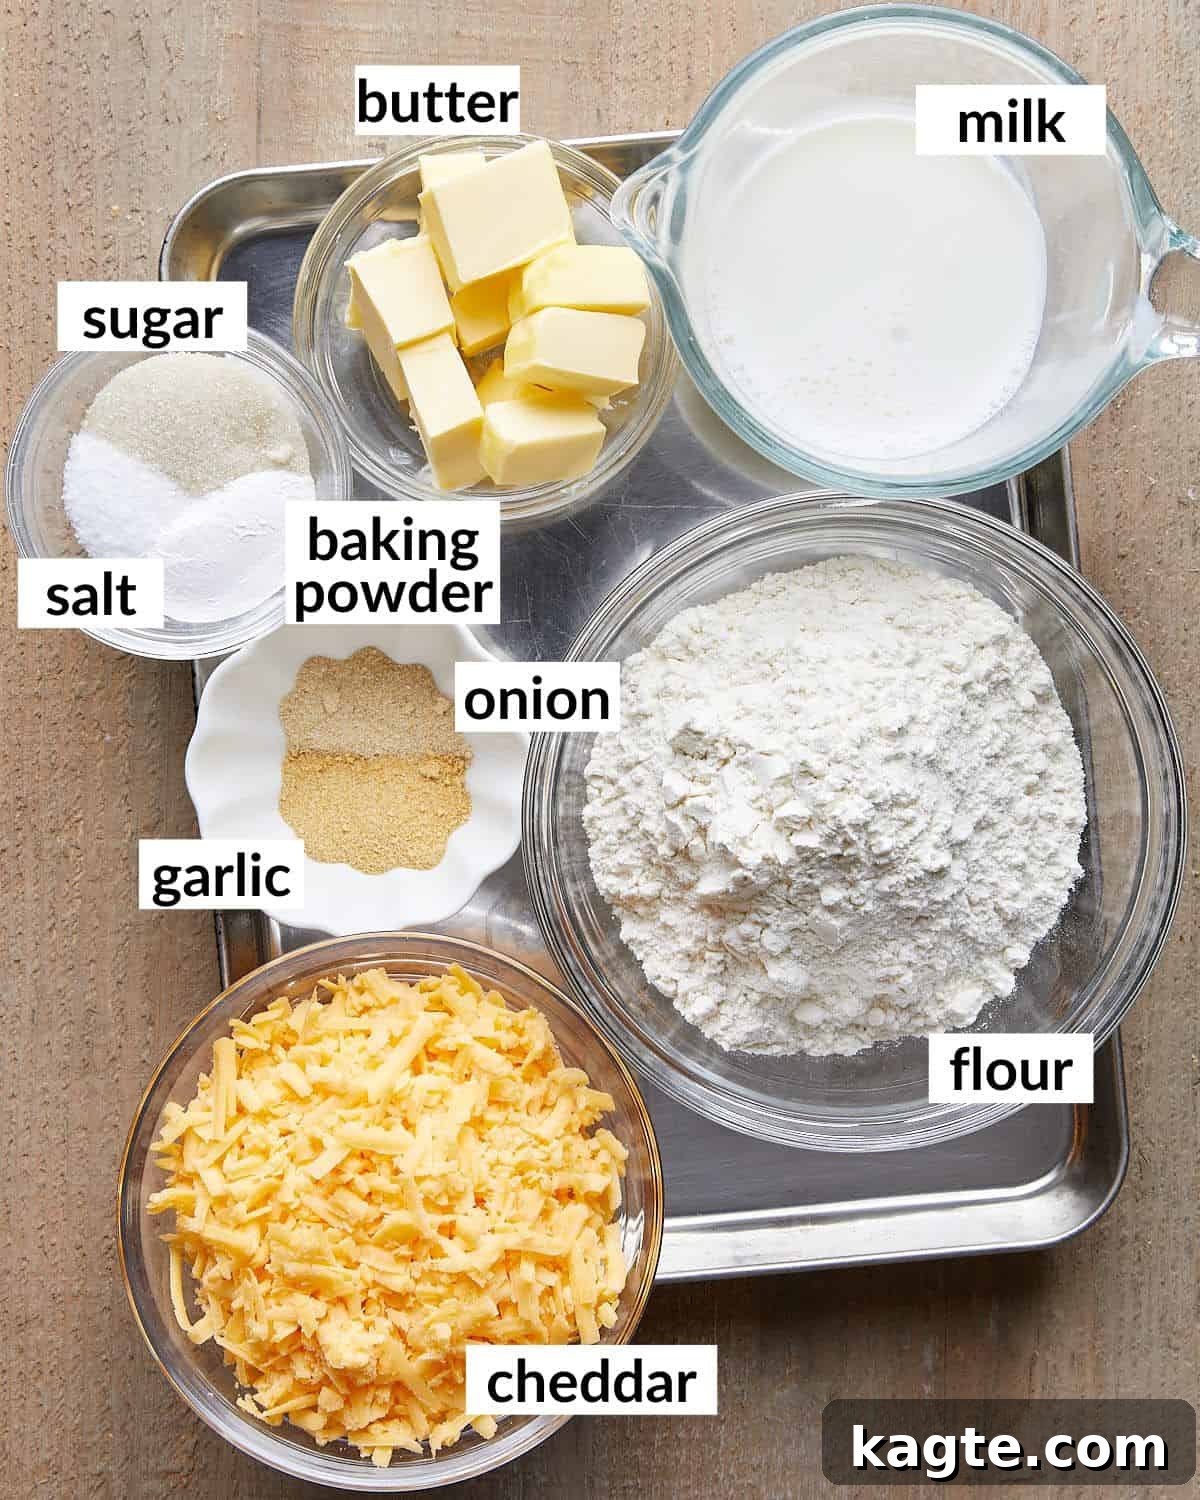
These cheesy biscuits are what make our Dutch oven chicken pot pie truly unique and delightfully comforting.
- Kosher Salt: In all our recipes, we meticulously test with Morton kosher salt, known for its consistent size and clean flavor, making it our top recommendation for everyday cooking. If you opt for regular table salt, remember its finer grain means you’ll need to reduce the quantity by about half to achieve the same salinity. Investing in a good box of kosher salt will elevate your cooking experience!
- Chicken Breast: While shredded rotisserie chicken breast is a fantastic shortcut for this Dutch oven chicken pot pie, feel free to use any leftover cooked chicken you have on hand. For those preferring to cook fresh chicken, you’ll need approximately 1.5 pounds of raw, boneless, skinless chicken breast or thighs. Season the raw chicken with 1 1/2 teaspoons Morton kosher salt, 1 teaspoon smoked paprika, and 1/2 teaspoon each of granulated garlic, onion powder, and black pepper. Bake it at 425 degrees Fahrenheit for 30-35 minutes, or until cooked through. You can efficiently cook your fresh chicken while preparing the pot pie filling. Once cooked, easily shred the chicken using two forks. In a pinch, leftover shredded turkey also makes an excellent and delicious substitute for a unique twist on this comforting dish.
- Vegetables: The classic trio of carrots, celery, and onion forms the aromatic base for our filling. Feel free to add other root vegetables like diced potatoes or parsnips for extra heartiness. Frozen mixed vegetables can also be used for convenience, just add them with the peas.
- Herbs: Dried thyme, rosemary, and sage lend a beautiful aromatic profile. If using fresh herbs, double the quantity for a more potent flavor, chopping them finely before adding.
- White Wine: A dry white wine, such as Sauvignon Blanc or Pinot Grigio, adds a wonderful depth by deglazing the pan. If you prefer to cook without alcohol, an equal amount of chicken broth or vegetable broth can be used as a substitute.
- Dairy: Whole milk or buttermilk is recommended for the biscuits, contributing to their tenderness. For the filling, a combination of chicken stock and milk creates the creamy consistency. Heavy cream can be used for an even richer filling.
- Cheese: Extra sharp cheddar cheese is key for the biscuit’s flavor. For best results and melt, always grate your own cheese from a block. Pre-shredded varieties often contain anti-caking agents that can hinder proper melting.
A complete list of ingredients and precise amounts can be found on the recipe card below.
How to Make This Comforting Dutch Oven Chicken Pot Pie
Creating this delicious Dutch oven chicken pot pie is a rewarding culinary journey. Follow these detailed steps to bring this comforting dish to life in your kitchen.
Quick Overview of the Process
For those who like a snapshot of the process, here’s a brief outline:
- First, prepare your biscuit dough and allow it to chill.
- Next, create the rich and creamy chicken pot pie filling in your Dutch oven.
- Layer the filling with the prepared biscuit dough.
- Finally, bake until golden and bubbly, then let it rest before serving.
Detailed Step-by-Step Instructions
Pro Tip for Perfect Biscuits: Allowing the biscuit dough to rest in the fridge is a crucial step. This firms up the butter, which will create those desirable flaky layers as it bakes, contributing to the ultimate texture of your cheddar biscuit topping.
Step 1: Prepare the Dry Biscuit Ingredients. In a large mixing bowl, thoroughly whisk together the all-purpose flour, baking powder, sugar, garlic powder, onion powder, and kosher salt. Ensure all dry ingredients are well combined for an even distribution of flavor and leavening.
Step 2: Incorporate the Cold Butter. Using a pastry cutter, methodically cut the cold, cubed unsalted butter into the dry ingredients. Continue this process until the butter pieces resemble small peas. This technique is essential for creating flaky biscuits.
Step 3: Form the Biscuit Dough. Gently stir in the whole milk (or buttermilk) and shredded cheddar cheese until a cohesive dough forms and all the flour is fully absorbed. Avoid overworking the dough to keep it tender. Place the bowl of biscuit dough into the refrigerator to chill while you prepare the filling. This chilling step is vital for the biscuit’s final texture.
Step 4: Cook the Bacon. Preheat your oven to 400 degrees Fahrenheit (200°C). In a 3.5-quart shallow Dutch oven or an extra-large oven-safe skillet, sauté the diced bacon over medium-low heat. Cook until the bacon is beautifully browned and most of its fat has rendered. It’s important not to drain the grease or wipe out the pan, as this flavorful bacon fat will form the base for your pot pie filling.
Visual Cue for Doneness: The Dutch oven chicken pot pie is perfectly cooked when the biscuit layer on top is puffed, golden-brown, and visibly flakey. This indicates a crispy exterior and a tender interior.
Step 5: Sauté the Aromatics. Add the unsalted butter to the rendered bacon fat in the Dutch oven and stir until it’s completely melted. Next, add the sliced carrots, celery, and diced yellow onion. Increase the heat to medium and sauté these vegetables for approximately 10-15 minutes, or until they have softened beautifully and started to release their sweet aromas.
Step 6: Add Shallot and Garlic. Stir in the diced shallot and minced garlic. Continue to sauté for another 2-3 minutes, just until they become fragrant, being careful not to burn the garlic.
Step 7: Season with Herbs and Spices. Add the kosher salt, dried thyme, rosemary, sage, turmeric, and a generous amount of fresh cracked black pepper to the vegetables. Sauté for an additional 2 minutes, allowing the herbs and spices to toast lightly and release their full flavors into the mixture.
Step 8: Deglaze with White Wine. Pour in the dry white wine to deglaze the pan. Use a wooden spoon to scrape up any delicious browned bits from the bottom of the Dutch oven. Let the wine simmer and reduce until it has nearly evaporated, concentrating its flavor.
Step 9: Create the Roux. Sprinkle the all-purpose flour over the vegetable mixture. Cook for 2-3 minutes, stirring constantly. The mixture will thicken and form a paste, known as a roux, which will serve as the thickener for your creamy sauce. Reduce the heat to medium-low.
Step 10: Slowly Whisk in Chicken Broth. While stirring continuously to prevent lumps, slowly pour in the chicken stock or broth until it is completely combined and absorbed by the roux, forming a smooth base.
Step 11: Add the Milk. Repeat the process from Step 10, slowly pouring in the milk while stirring continuously until it is fully incorporated and the sauce begins to thicken to a luscious consistency.
Step 12: Finish the Filling. Stir in the frozen peas and the shredded rotisserie chicken. Bring the mixture to a light boil, then immediately turn off the heat. The filling is now ready.
Step 13: Prepare for Baking. Smooth the chicken pot pie filling into an even layer in your Dutch oven. If your skillet or Dutch oven is not oven-safe, transfer the filling to a large 9×13 inch baking dish. If your dish is filled to the very top, place it on a baking sheet to catch any potential bubbling over during baking, keeping your oven clean.
Step 14: Top with Cheddar Biscuits. Retrieve your chilled biscuit dough. Using a 4-tablespoon cookie scoop or a measuring cup, drop about 15 portions of the biscuit dough evenly across the surface of the filling. Arrange them so they cover most of the filling. Lightly sprinkle each biscuit with a pinch of flaky salt for added texture and flavor.
Step 15: Bake and Rest. Bake the Dutch oven chicken pot pie in the preheated 400°F (200°C) oven for 15-20 minutes, or until the cheddar biscuits are beautifully golden-brown and appear flakey. Once baked, remove the pot pie from the oven and allow it to rest for about 10 minutes before serving. This resting period is crucial as it allows the filling to set and thicken, preventing it from being too runny when you cut into it.
Serving Suggestions and Perfect Pairings
Our Dutch Oven Chicken Pot Pie is a hearty and complete meal on its own, but a few thoughtful garnishes and side dishes can elevate the experience even further. Consider these delightful additions to complement your cozy dinner:
Garnish Ideas:
- Fresh Parsley: A sprinkle of freshly chopped parsley adds a touch of color and a burst of fresh, herbaceous flavor that brightens the rich pie.
- Flaky Sea Salt: (Before Baking) As mentioned in the recipe, a touch of flaky salt on the biscuits before baking enhances their texture and brings out their savory notes.
- Crispy Chicken Skin: If you used fresh chicken and crisped up its skin, crumble a little over the top for an extra layer of texture and rich flavor.
For those who love to round out their meal with warm, comforting vegetable sides, this easy Dutch oven chicken pot pie pairs wonderfully. Here are a few favorite ideas:
- Smoked Sausage and Fried Cabbage: The slight tang and savory depth of this dish would provide a lovely contrast to the creamy pot pie.
- Green Beans and Potatoes: A classic, comforting side that offers a fresh, earthy balance.
- Easy Glazed Stovetop Carrots: Sweet and tender carrots can echo the flavors within the pot pie while adding a touch of sweetness.
Don’t forget a simple green salad with a light vinaigrette to add a refreshing crunch and balance the richness of the pie.
Pro Tips for a Perfect Dutch Oven Chicken Pot Pie
Achieving a truly exceptional Dutch Oven Chicken Pot Pie is all about the details. Keep these expert tips in mind to ensure your pot pie is nothing short of perfection:
- Grate Fresh Cheese for Superior Melting: This is a game-changer for your cheddar biscuits. Always, always use freshly grated cheese from a block when preparing this Dutch oven chicken pot pie. Pre-shredded cheeses are often coated with cellulose or other anti-caking agents that prevent them from melting smoothly and incorporating properly into your dough or filling. Freshly grated cheese, however, will melt into a beautifully creamy, gooey texture, making your biscuits incredibly delicious.
- Prepare the Filling in Advance for Convenience: If you’re looking to save time on the day you plan to bake, the chicken pot pie filling can be prepared one day ahead. Simply follow all the steps outlined for creating the filling. Once it’s complete, allow it to cool completely before transferring it to an airtight container. Store the cooled filling in the refrigerator. When you’re ready to assemble and bake your Dutch oven pot pie, layer the cold filling into your Dutch oven (or baking dish), then prepare your biscuit dough and top the filling as directed. Keep in mind that a cold filling may slightly extend the baking time by a few minutes, so adjust accordingly until the biscuits are golden and the filling is bubbly and heated through.
- Crucial Resting Time Before Serving: Patience is a virtue, especially with this Dutch oven chicken pot pie! Allowing the pie to rest for at least 10-15 minutes after it comes out of the oven is an absolutely essential step. During this resting period, the hot, bubbly filling will cool down slightly and, more importantly, continue to thicken and set. If you cut into the pot pie too soon, the filling might be too runny. The rest time ensures a perfect, luscious consistency that holds its shape and prevents culinary mishaps. Plus, it gives the internal temperature a chance to equalize, preventing you from burning your tongue or the roof of your mouth as you savor that first, delightful bite.
Creative Additions & Variations to Your Dutch Oven Chicken Pot Pie
While our Dutch Oven Chicken Pot Pie with cheddar biscuits is fantastic as is, feel free to get creative and customize it to your taste or dietary needs. Here are some inspiring additions and variations to try:
- Traditional Pie Crust Topping: For those who prefer a more classic chicken pot pie, a store-bought or homemade pie crust can be used as the topping. Simply place the pie crust over the filling, crimp the edges to seal, and cut a few vents in the top to allow steam to escape. Bake until the crust is golden brown, typically around 15-20 minutes, or longer if starting from a cold filling. You can also add a bottom crust, but remember to blind-bake it first to prevent sogginess.
- Fluffy Puff Pastry Alternative: If you love a light and airy topping, consider using puff pastry. It bakes up beautifully golden and incredibly flaky, providing a different textural contrast to the creamy filling. For a dedicated puff pastry version, check out our Chicken Pot Pie with Puff Pastry recipe for specific instructions.
- Individual Pot Pies for Portion Control: This recipe adapts wonderfully to individual servings, perfect for portion control or elegant plating. Divide the prepared chicken pot pie filling evenly among eight oven-safe ramekins. Top each ramekin with a portion of the biscuit dough. Individual pot pies will bake faster, usually needing about 15 minutes, or until the biscuits are golden-brown and deliciously flaky.
- Speedy Pre-Made Biscuits: In a genuine time crunch? You can still enjoy this Dutch oven chicken pot pie! Opt for pre-made cheesy biscuits from the refrigerated section of your grocery store. Simply arrange about two cans’ worth of biscuits (ensuring minimal overlap) over the filling. Baking time will be similar, but always follow the package directions for the biscuits for optimal results.
- Add Extra Vegetables: Enhance the nutritional value and texture by incorporating additional vegetables into the filling. Diced potatoes, green beans, corn, mushrooms, or sweet potatoes are all excellent choices. Add heartier vegetables like potatoes or mushrooms when you sauté the initial aromatics, and softer ones like corn or green beans with the peas.
- Spicy Kick: For a touch of heat, add a pinch of cayenne pepper or red pepper flakes to the filling along with the other spices.
- Different Cheeses: Experiment with other cheese varieties for the biscuits. Sharp white cheddar, Gruyere, or even a blend of Parmesan and cheddar can offer unique flavor profiles.

Frequently Asked Questions About Dutch Oven Chicken Pot Pie
Here are some common questions about making chicken pot pie, especially when using a Dutch oven and our unique biscuit topping:
Many recipes, including this Dutch oven chicken pot pie, intentionally omit a bottom crust. The primary reason is to prevent the crust from becoming soggy, a common issue when a wet filling bakes directly on dough. The juices from the filling can seep into the bottom crust, making it soft and unappealing. If you strongly prefer a bottom crust, it’s highly recommended to blind-bake it (par-bake it without the filling) before adding the chicken pot pie filling. This extra step helps create a crisper barrier, making it less prone to sogginess once the filling is added.
There are a few common reasons why your chicken pot pie filling might not be thickening as expected. The key to a thick, luscious filling lies in several factors:
1. Sufficient Roux: Ensure you use the correct amount of flour and cook it long enough with the butter (or bacon fat) to create a proper roux. This flour-fat mixture is what thickens the liquid.
2. Cooking Vegetables: Make sure your vegetables are adequately pre-cooked. Vegetables release moisture as they cook, and if they release too much into the sauce, it can thin out your filling. Sautéing them until tender helps them release some moisture upfront.
3. Proper Reduction: When you add the liquids (wine, broth, milk), allow the sauce to simmer gently. This process helps the starches in the flour activate and the liquid to reduce, resulting in a thicker consistency.
4. Resting Time: The filling continues to thicken as it cools. Always allow the pot pie to rest for at least 10-15 minutes after baking before serving. This crucial step helps the sauce set up perfectly.
Preventing a soggy bottom crust in chicken pot pie is a common challenge, but it’s entirely achievable with the right technique. If you choose to include a bottom crust in your chicken pot pie, the most effective method is to blind-bake it before adding any filling. To do this, prick the bottom and sides of the pie crust with a fork, line it with parchment paper, and fill it with pie weights or dried beans. Bake it for about 10-15 minutes until it’s partially cooked and slightly golden. This pre-baking process helps to set the crust, creating a barrier that is less likely to absorb moisture from the filling and thus stay firm and flaky.
More Comforting Recipes to Explore
Pasta
Baked Stuffed Shells with Meat Sauce
Soup & Chili
Creamy White Lasagna Soup with Italian Sausage
30 Minute Meals
One Pan Shrimp Orzo with Lemon Recipe
Sauce
Basil Pesto without Pine Nuts
Shop my Amazon Storefront for recommended kitchen tools!
If you try this Dutch Oven Chicken Pot Pie recipe, please leave a star rating in the recipe card below and/or a comment! We always appreciate your feedback. Follow us on Pinterest, Facebook & Instagram for more delicious inspiration.

Dutch Oven Chicken Pot Pie
Equipment
-
Shallow Dutch Oven
-
Pastry Cutter
-
4 Tablespoon Cookie Scoop
Ingredients
Filling
- 4 slices bacon, diced
- 4 Tablespoons unsalted butter
- 1 1/2 cups EACH sliced carrots & celery
- 1 medium yellow onion, diced
- 1 shallot, diced
- 8-10 cloves garlic, minced
- 1 teaspoon Morton kosher salt*
- 1 teaspoon EACH dried thyme, rosemary, & sage
- 1/4 teaspoon turmeric
- fresh cracked black pepper
- 1/2 cup dry white wine
- 1/2 scant cup all purpose flour
- 2 1/2 cups chicken stock or broth
- 1 cup milk
- 3 1/2 cups shredded rotisserie chicken breast*
- 1 heaping cup frozen peas
Cheddar Biscuits
- 2 cups (260 g) all purpose flour
- 1 Tablespoon baking powder
- 1 Tablespoon sugar
- 2 teaspoons garlic powder
- 1 teaspoon onion powder
- 1 teaspoon Morton kosher salt*
- 1 stick (113 g or 8 Tablespoons) cold unsalted butter, cubed
- 1 cup (237 ml) whole milk or buttermilk
- 6 ounces (1 1/2 cups) extra sharp cheddar cheese, shredded
- flaky salt, for topping
Instructions
-
In a large bowl, whisk together the flour, baking powder, sugar, garlic powder, onion powder, and salt until combined.
-
Using a pastry cutter, cut the cold butter into the dry ingredients until it is in pea-sized pieces.
-
Stir in the milk and cheese until the dough comes together and all of the flour is absorbed. Place the bowl of dough in the fridge while you prepare the filling.
-
Preheat the oven to 400 degrees. In a 3.5 quart shallow Dutch oven or extra-large oven-safe skillet, sauté the bacon over medium low heat, until most of the fat has rendered and the bacon is brown. Do not drain the grease or wipe out the pan.
-
Add the butter and stir until melted. Add the carrots, celery, and onion. Increase the heat to medium and sauté for about 10-15 minutes or until the vegetables have softened.
-
Add the shallot and garlic. Sauté for 2-3 minutes or until fragrant.
-
Add the salt, thyme, rosemary, sage, pepper, and turmeric. Sauté for 2 minutes.
-
Deglaze the pan with the wine, scraping any brown bits off the bottom of the pan. Reduce until the wine has evaporated.
-
Add the flour and cook for 2-3 minutes. The mixture will clump and turn into a paste. Reduce the heat to medium low.
-
While stirring continuously, pour in the chicken broth slowly until completely combined.
-
Repeat this process with the milk until it is completely combined as well.
-
Stir in the frozen peas and the shredded chicken. Bring to a light boil and then immediately turn off the heat.
-
Smooth the mixture into an even layer. (If the pan is not oven-safe, transfer to a large 9 x 13 inch baking dish.) Place the skillet/dish on a baking sheet if it is filled to the top, as it can bubble over while baking.
-
Using a 4 Tablespoon cookie scoop or measuring cup, drop about 15 biscuits evenly across the surface of the filling. They should cover most of the surface. Sprinkle each biscuit with flaky salt.
-
Bake for 15-20 minutes, or until the biscuits are golden. Let the pot pie rest for about 10 minutes before serving.
Notes
- Kosher Salt: All of my recipes are tested with Morton kosher salt unless noted otherwise. It is the best salt for everyday cooking because of its size and flavor. If using table salt, the amount should be reduced. I highly recommend picking up some kosher next time you are at the store!
- Chicken Breast: You can also use leftover cooked chicken or fresh chicken instead of rotisserie chicken. If using fresh chicken, you will need about 1.5 pounds of raw, boneless, skinless chicken breast or thighs. Season with 1 1/2 teaspoons Morton kosher salt, 1 teaspoon smoked paprika, 1/2 teaspoon of EACH granulated garlic, onion powder, & pepper. Then, bake the chicken for 30-35 minutes at 425 degrees. You can cook the fresh chicken while the filling is made. Shred the cooked chicken using 2 forks. You can even use leftover shredded turkey for this Dutch oven chicken pot pie.
- Grate fresh cheese. Always use freshly grated cheese when making this Dutch oven chicken pot pie. Pre-shredded cheese has an anti-stick coating that prevents it from properly melting.
- Prepare the filling one day in advance if needed. Follow the steps noted above to create the chicken pot pie filling. Allow it to cool, then keep it in an airtight container in the fridge. When you’re ready to make the Dutch oven pot pie, layer the filling in a Dutch oven, make biscuit dough, and top the filling with the dough. It may take a few extra minutes for the pot pie to cook since the filling is cold.
- Allow the pie to cool before serving. This step is essential, as it allows the filling to thicken. Additionally, letting the homemade chicken pot pie cool before digging in means you won’t have to worry about burning your tongue/roof of your mouth as you eat.
Nutrition
Nutrition information is automatically calculated, so should only be used as an approximation.
Sign up for our weekly newsletter!
Get new recipes sent straight to your inbox every week, including more delicious Dutch oven meals and comfort food classics.