
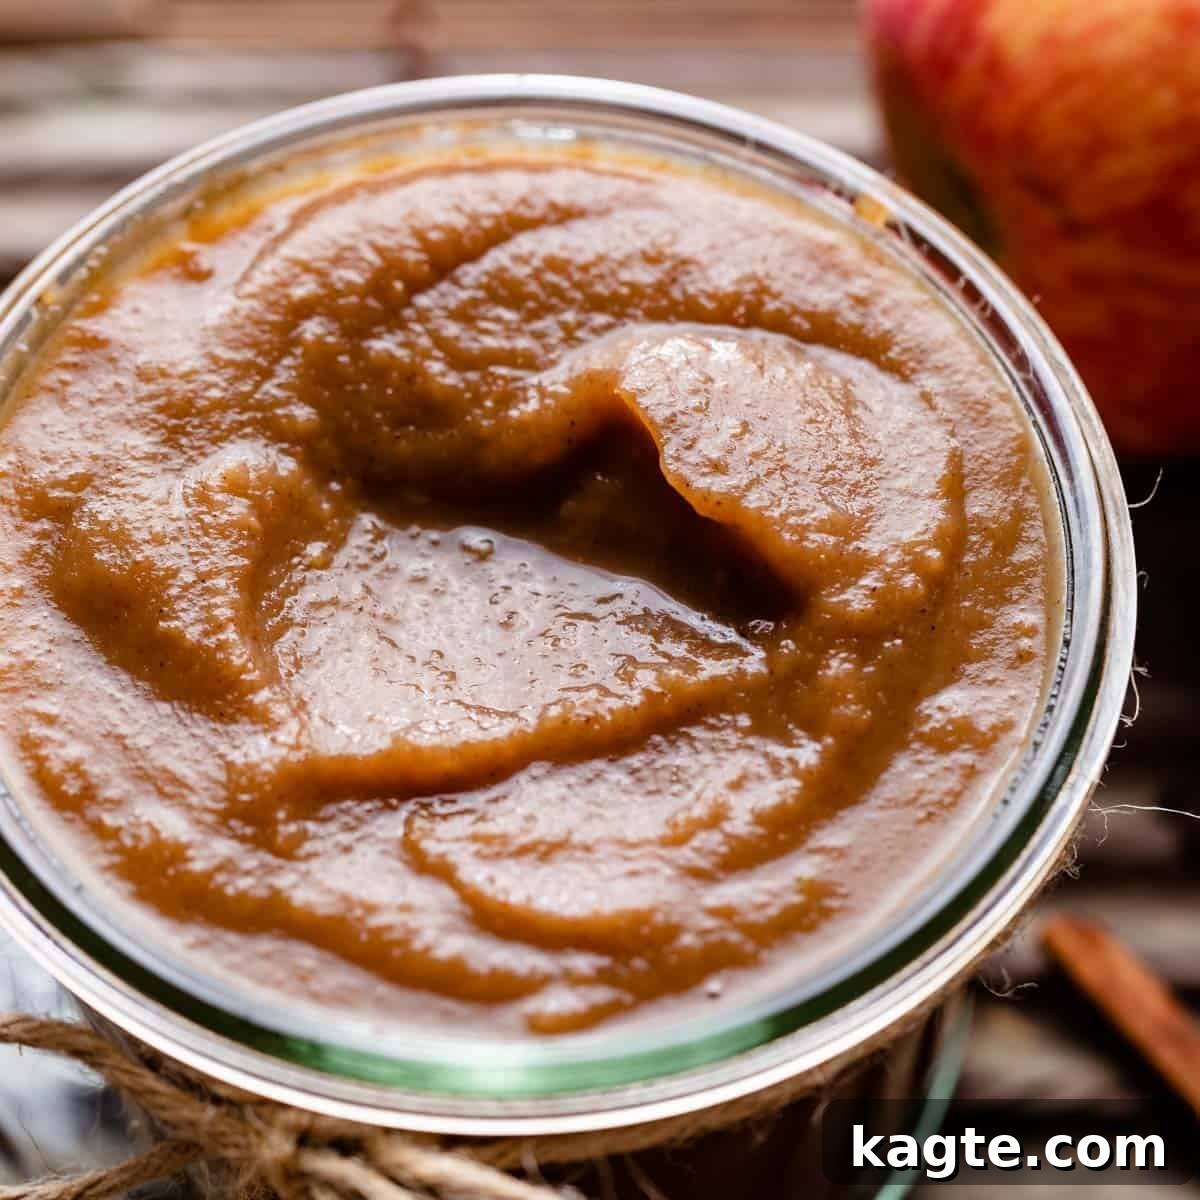
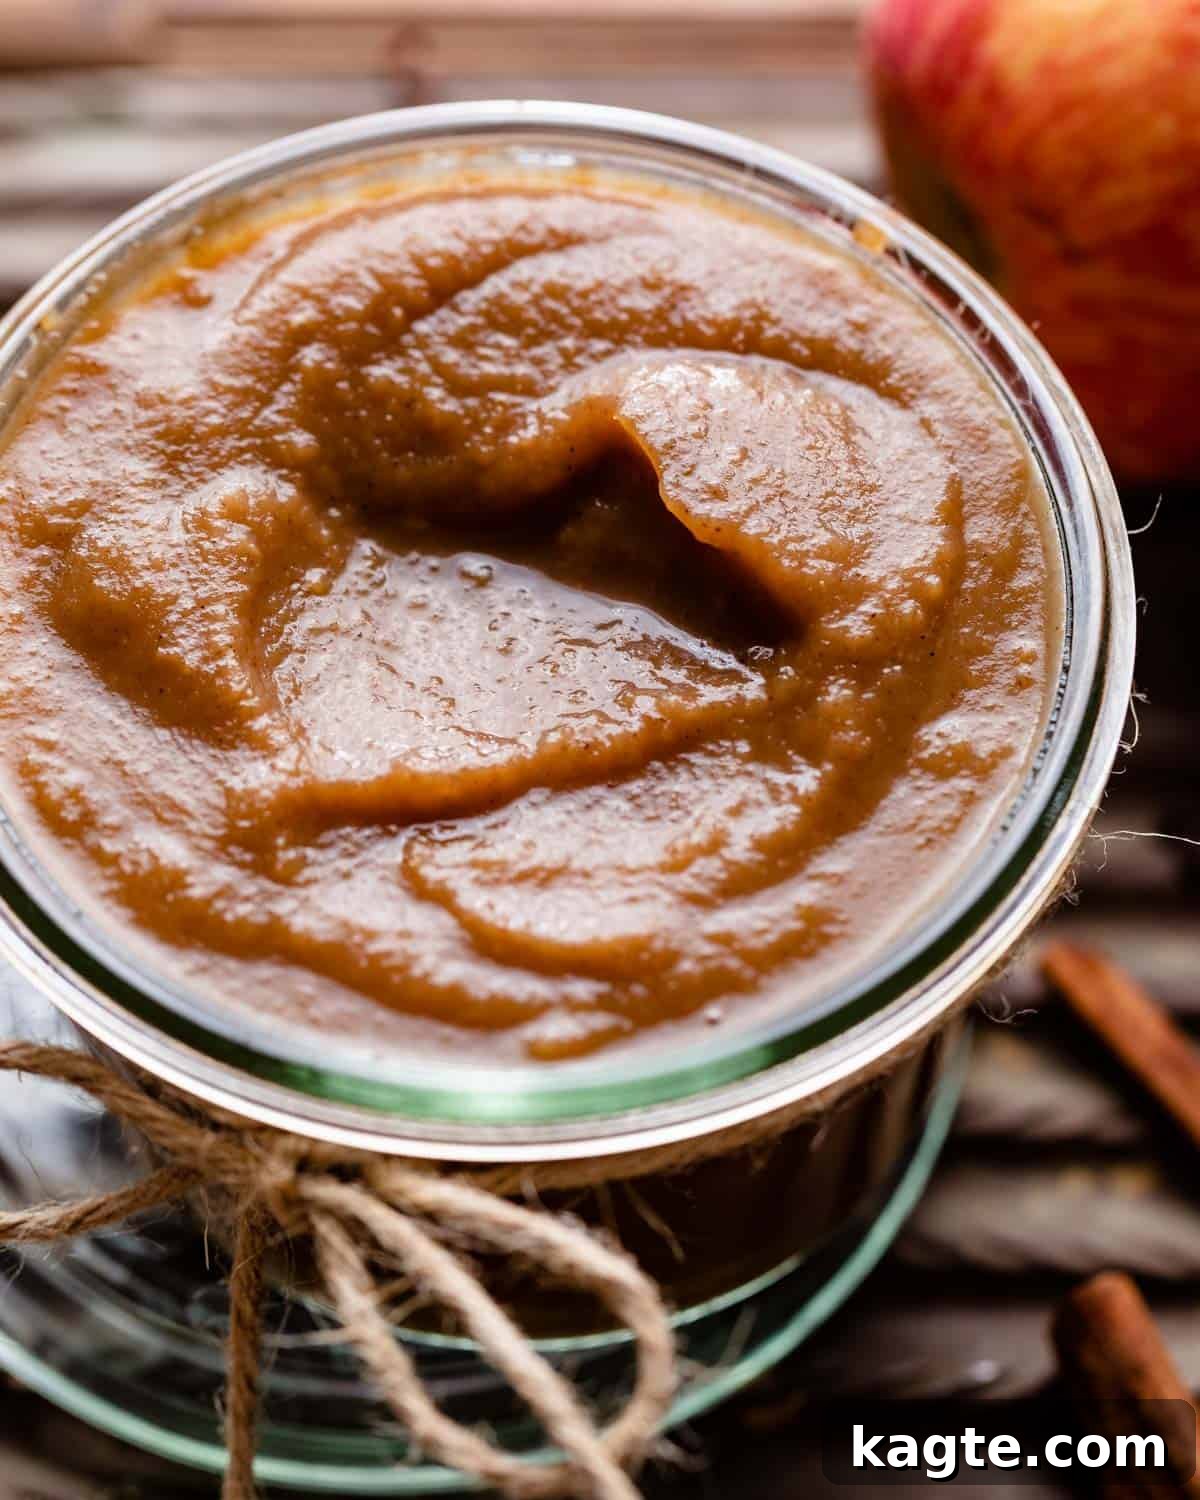
Craving a sweet, tangy, and wonderfully spiced spread that captures the essence of autumn? This easy, **egg-free apple curd** is an absolute game-changer. Imagine a luxuriously smooth, buttery, and aromatic spread infused with warm spices like cinnamon, ready to elevate your breakfast, desserts, or even serve as a thoughtful homemade gift. Whether you’re an Instant Pot enthusiast or prefer the traditional stovetop method, this recipe makes using up that bountiful apple harvest from your fall apple picking adventures delightfully simple and incredibly rewarding.
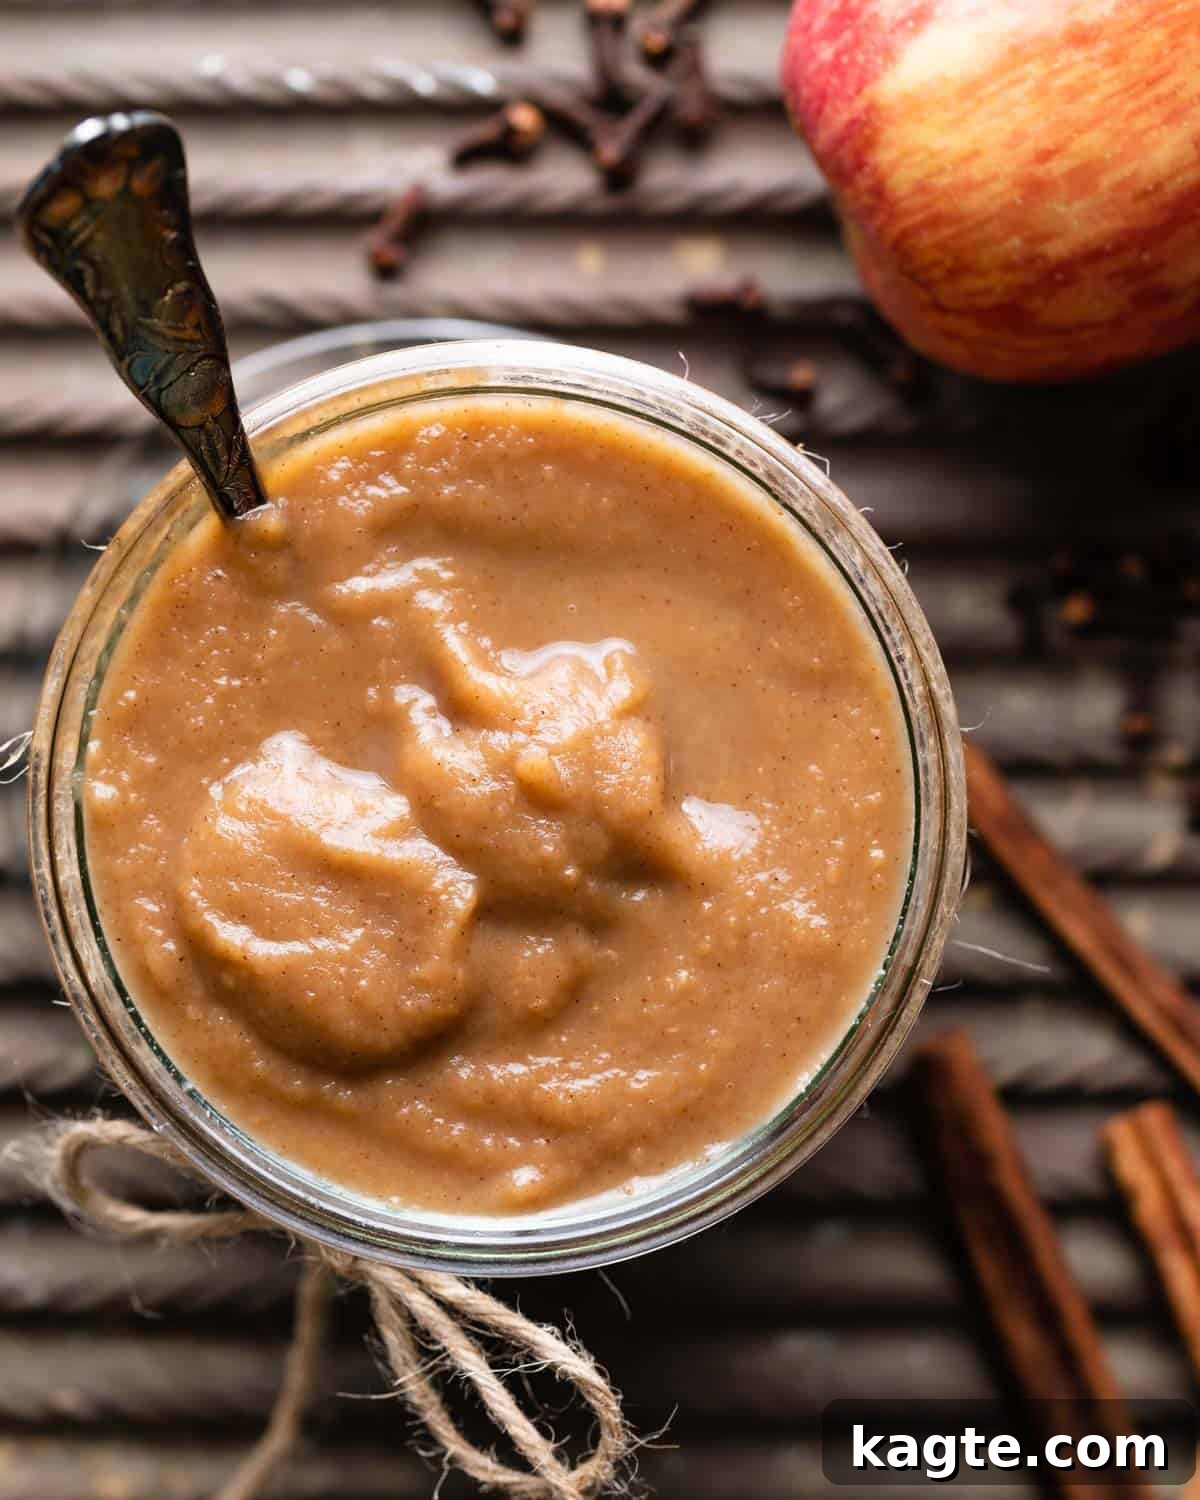
While I often find myself creating delectable savory sauces and spreads, like my zesty Jalapeño Lime Crema or the intensely flavorful Smokey Chipotle Sauce, there’s something truly special about a homemade sweet spread. This apple curd fulfills that craving beautifully, offering a unique twist on classic fruit curds. Its vibrant flavor and silky texture make it an irresistible addition to any culinary repertoire, especially for those seeking delicious, diet-friendly options.
This versatile, eggless apple curd is a dream come true for topping a stack of fluffy Sourdough French Toast, adding a gourmet touch to your morning Cuisinart Ice Cream Maker Recipes, or as a decadent filling for homemade cinnamon rolls. If you’re fortunate enough to have an abundance of apples, don’t stop here! Be sure to also try my comforting Apple Bread Pudding for another delightful way to enjoy this seasonal fruit.
Table of Contents
- Why You’ll Adore This Egg-Free Apple Curd
- Understanding Apple Curd: A Delicious Fall Treat
- Ingredient Insights & Smart Substitutions
- Essential Equipment for Crafting Perfect Apple Curd
- Step-by-Step Apple Preparation for Curd
- How to Make Apple Curd: Instant Pot & Stovetop Methods
- Make-Ahead Tips & Storage Solutions
- Expert Tips for the Best Apple Curd
- Important Recipe Notes
- Creative Variations to Try
- Frequently Asked Questions About Apple Curd
- Related Sweet & Savory Recipes
- Watch the How-To Video
- Apple Curd (No Peel) Full Recipe
Why You’ll Adore This Egg-Free Apple Curd
This recipe isn’t just another spread; it’s a culinary revelation that brings together comfort and gourmet flair. Here’s why this apple curd is destined to become a staple in your kitchen:
- Unmatched Flavor & Texture: Experience a smooth, sweet, and perfectly buttery curd, generously infused with the warming notes of ground cinnamon and other delightful spices. The addition of apple cider vinegar provides a crucial touch of tartness, expertly balancing the sweetness, while vanilla deepens the overall flavor profile.
- Effortless Preparation: Say goodbye to tedious peeling! This recipe cleverly utilizes unpeeled apples, saving you significant prep time without compromising on texture or taste.
- Incredibly Versatile: From a simple spread on your morning toast or fluffy pancakes to an elegant filling for pastries, tarts, and cinnamon rolls, the uses for this apple curd are endless. It’s also fantastic stirred into yogurt or oatmeal.
- Dietary Friendly: This recipe is naturally gluten-free and egg-free, making it suitable for those with specific dietary needs. With a simple swap for vegan butter, it can also be easily adapted to be completely vegan. No need for large eggs or separated egg yolks to achieve a rich, creamy consistency!
- Convenience is Key: Whether you own an Instant Pot for a hands-off approach or prefer the traditional stovetop method, I’ll guide you through both options, ensuring success regardless of your preferred cooking style.
- The Perfect Fall Project & Gift: It’s an ideal way to utilize an abundance of apples, transforming them into something truly special. Poured into charming jars, it makes for a fantastic and heartfelt homemade holiday gift that friends and family will cherish.
Understanding Apple Curd: A Delicious Fall Treat
At its heart, apple curd is a luscious, creamy sauce or spread made from a blend of apples, sugar, butter, and spices. Traditional fruit curds, particularly popular in British cuisine, are typically made with citrus fruits like lemons and rely heavily on egg yolks for their thick, velvety texture. However, this innovative recipe breaks from tradition by offering a completely egg-free version.
My egg-free approach ensures that this apple curd is accessible to vegans and those with egg allergies, while still delivering an incredibly rich and smooth result. Unlike jams or jellies, which focus on preserving whole fruit pieces, curd emphasizes a vibrant, intense fruit flavor with a thick, custard-like consistency. It’s similar in concept to apple butter but often has a brighter, more pronounced tartness thanks to the addition of apple cider vinegar or lemon juice, and a silkier mouthfeel due to the butter content.
This autumn-inspired variation offers a delightful alternative to classic citrus curds, bringing the comforting flavors of fall—sweet apples and warm spices—to the forefront. It’s a wonderful way to enjoy the seasonal bounty of apples in a sophisticated and incredibly flavorful form.
Ingredient Insights & Smart Substitutions
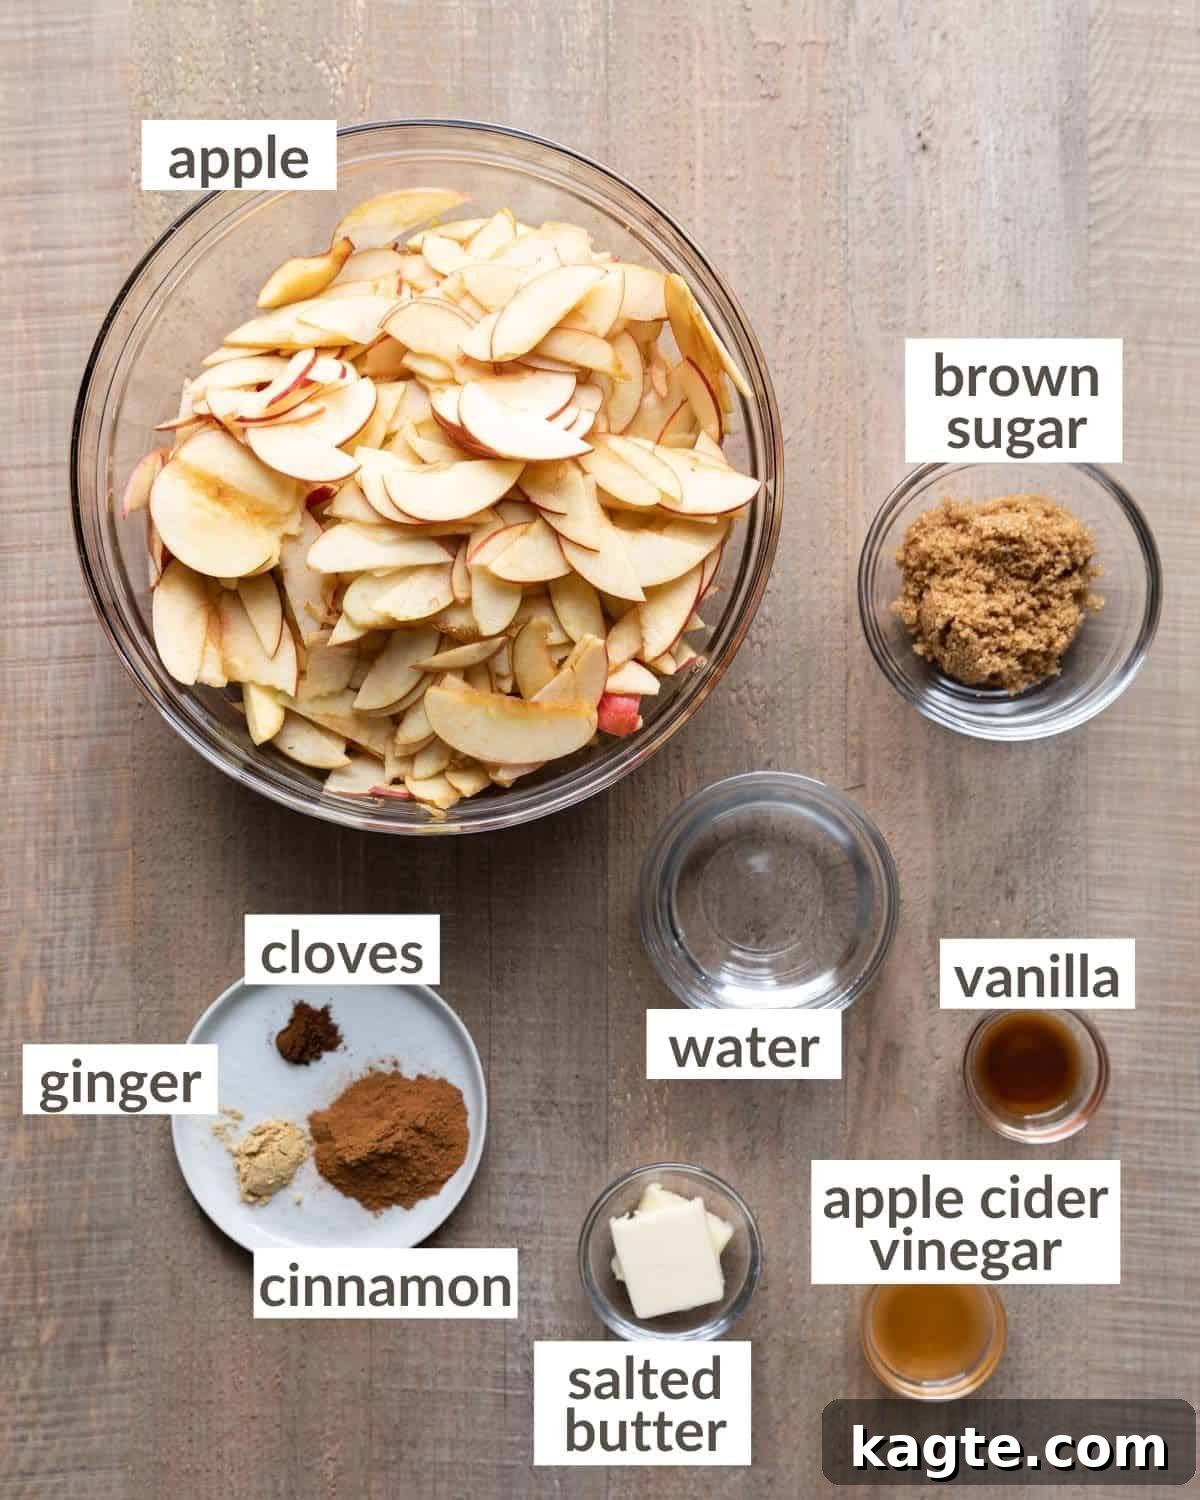
Achieving the perfect apple curd relies on a few key ingredients, each playing an important role. Here’s a detailed look at what you’ll need and how you can adapt the recipe to your pantry or dietary preferences:
- Apple Cider Vinegar: This ingredient is essential for providing that delightful hint of tartness that cuts through the sweetness and brightens the apple flavor. If you don’t have apple cider vinegar on hand, you can confidently swap it for 2 teaspoons of fresh lemon juice. Both provide the necessary acidity. Want to learn more about the best substitutes for apple cider vinegar? Check out my detailed guide!
- Apples: For this recipe, I highly recommend using sweet, crisp, and juicy apples that hold their shape well during cooking. Fuji apples are my top choice due to their excellent balance of sweetness and texture, making them ideal for baking and curds. Other fantastic options include McIntosh, Red Delicious, Golden Delicious, or Gala apples. These varieties tend to break down beautifully into a smooth consistency. Avoid firmer, more tart apples like Granny Smith, as they can result in a curd that’s too sour or requires more sugar, and their texture might not become as smooth without significant blending. Remember, there’s no need to peel the apples, which saves a lot of time!
- Brown Sugar: This adds a lovely depth of flavor compared to white sugar, with subtle caramel notes that complement the apples and spices. The recipe calls for 2/3 cup, but feel free to adjust to your personal preference. For a less sweet curd, reduce the amount to 1/2 cup. If you prefer a sweeter profile, increase it to 3/4 cup. You could also experiment with coconut sugar for a slightly different flavor and lower glycemic option, though it might alter the color slightly.
- Salted Butter: Butter is what gives this curd its rich, creamy, and undeniably luscious texture. The touch of salt in salted butter enhances all the other flavors. If you only have unsalted butter, simply use the same amount and add about 1/4 teaspoon of fine sea salt to the mixture. For a vegan version, a high-quality vegan butter substitute works perfectly here. Ensure your butter is at room temperature before adding it for easier blending into a smooth consistency.
- Ground Cinnamon: This is the star spice, bringing classic fall warmth to the apple curd. Don’t skimp on it! For an even richer, more complex flavor, consider adding a pinch of other warming spices like ground ginger, cloves, or nutmeg, as outlined in the “Optional Spices” section of the recipe card.
- Vanilla Extract: A good quality vanilla extract rounds out all the flavors, adding a comforting aroma and enhancing the overall sweetness. Add it at the end to preserve its delicate flavor.
The complete list of ingredients and precise amounts can be found on the recipe card below.
Essential Equipment for Crafting Perfect Apple Curd
While this recipe is designed to be straightforward, having a few key tools can make the process even smoother and more enjoyable, ensuring you achieve that perfect silky-smooth texture:
- Apple Corer: This tool makes quick work of removing the apple cores, significantly speeding up your prep time and ensuring a clean cut.
- Mandoline Slicer: While not strictly necessary, a mandoline slicer is incredibly helpful for creating uniformly thin apple slices. This ensures that all apple pieces cook evenly and soften simultaneously, which is crucial for achieving a consistently smooth curd. If you don’t have one, a sharp knife and a steady hand will also work, just aim for consistent thickness.
- Cuisinart 14-Cup Food Processor (or similar high-speed blender): A powerful food processor or high-speed blender is key for achieving the ultra-smooth consistency we want for our apple curd. It will effortlessly blend the cooked apples and butter into a velvety spread.
- Instant Pot (for pressure cooking method): If opting for the Instant Pot, you’ll need your trusty pressure cooker. It makes the apple softening process incredibly fast and hands-off.
- Heavy-Bottomed Pot (for stovetop method): For the stovetop version, a sturdy, heavy-bottomed pot or Dutch oven is ideal. It helps distribute heat evenly and prevents sticking and burning, which is essential for simmering the apples until tender.
- Slotted Spoon or Colander: Useful for easily separating the cooked apples from any excess liquid before blending.
Step-by-Step Apple Preparation for Curd
Proper apple preparation is the first step to a perfectly smooth curd. Remember, there’s no need to peel your apples for this recipe, which saves valuable time! The skins will soften beautifully during cooking and blend seamlessly into the curd, adding extra nutrients and flavor.
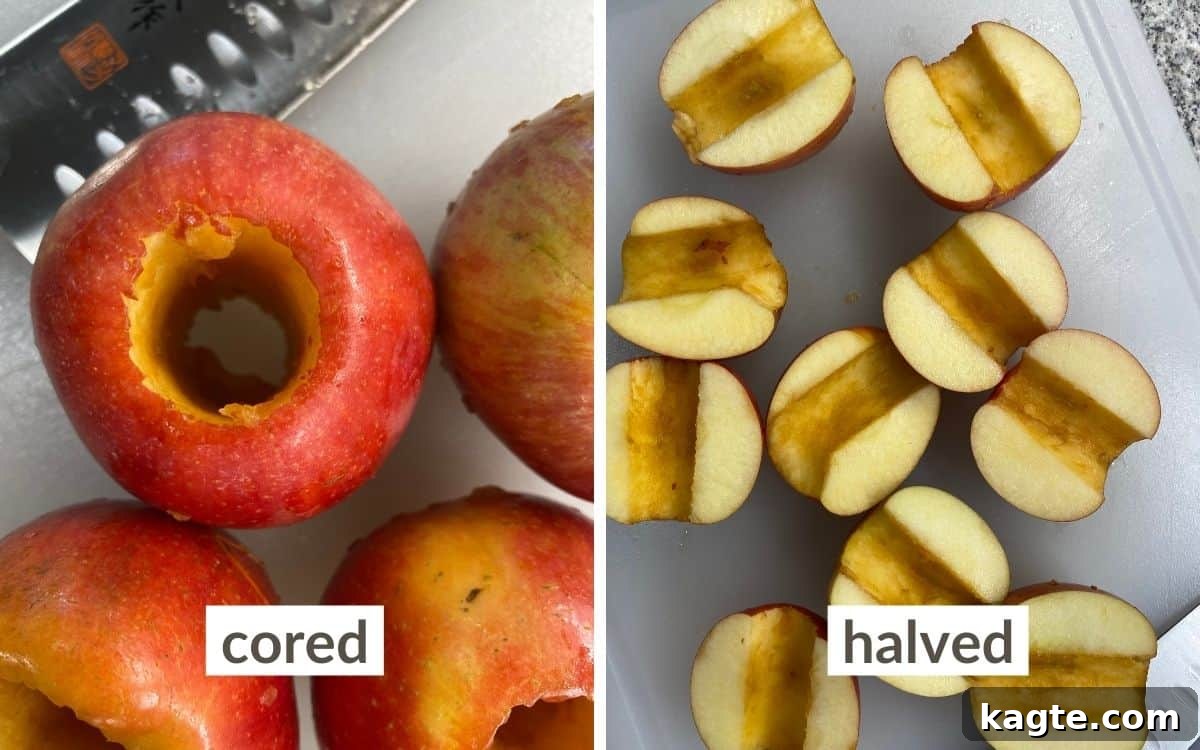
Begin by washing your apples thoroughly. Then, use an apple corer to neatly remove the core from each apple. Once cored, slice each apple in half. This makes them easier to handle for the next step.
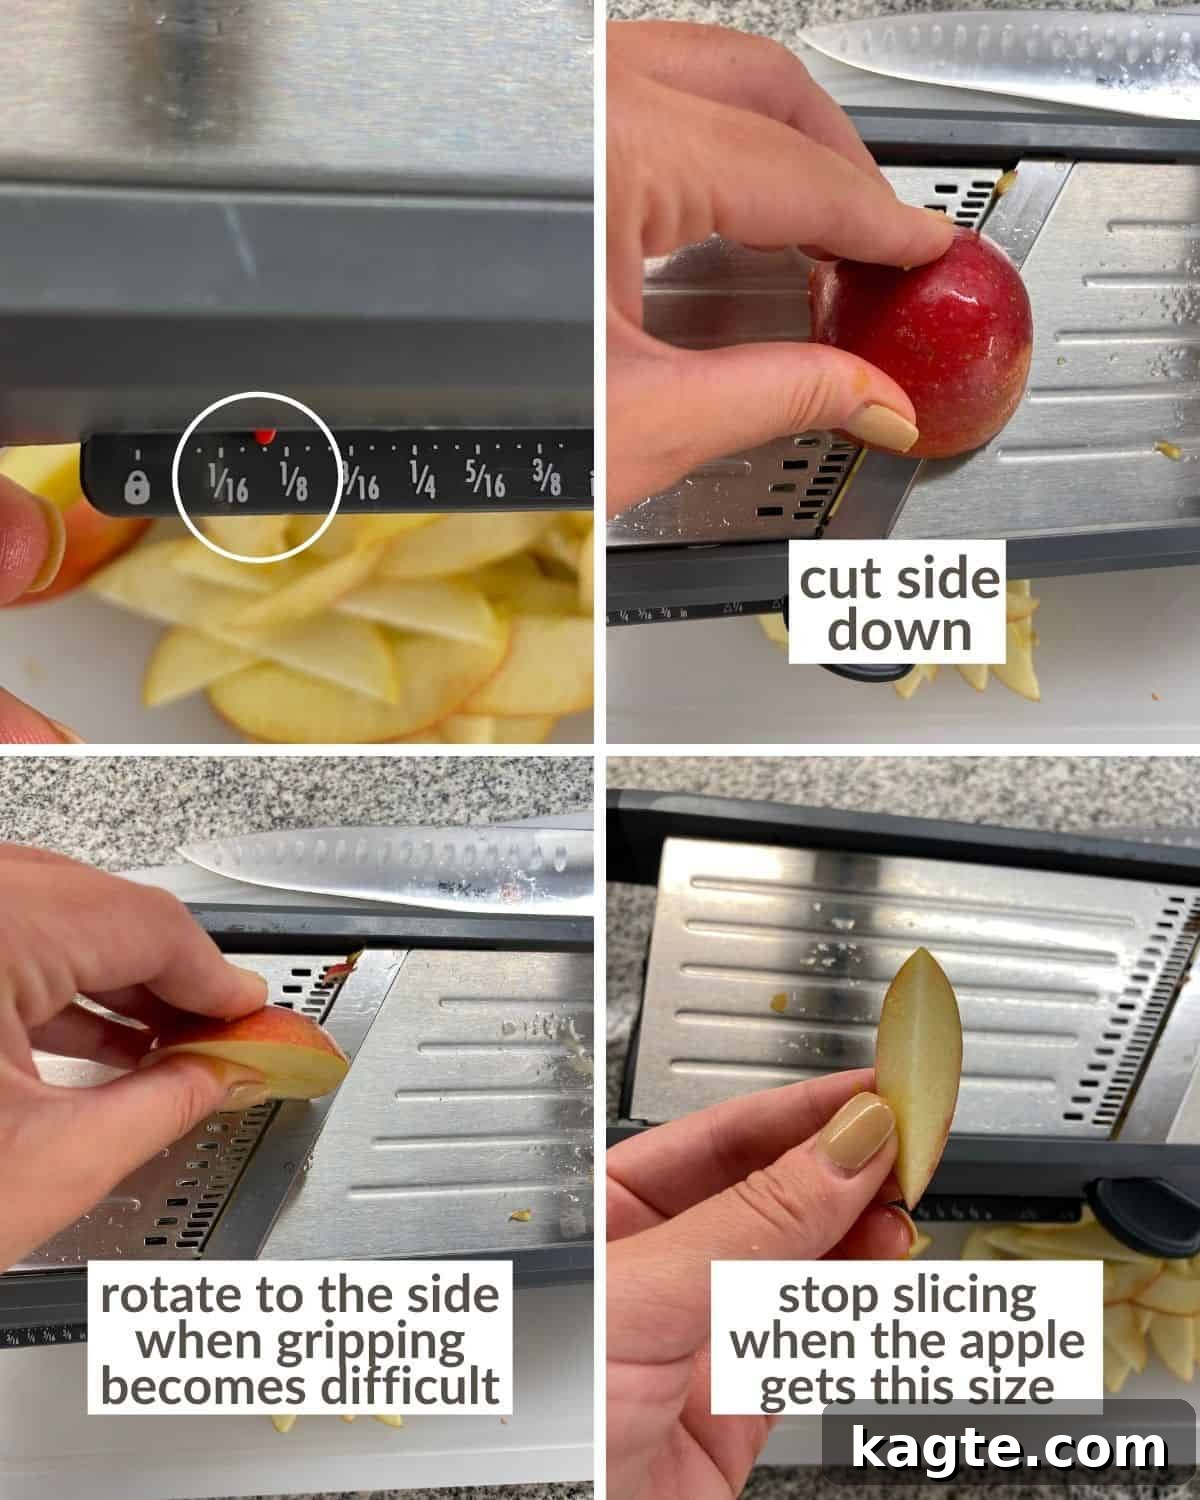
Next, use a mandoline slicer to slice the cored apple halves thinly, aiming for a thickness of about 1/8 to 1/6 of an inch. Start by placing the apple cut-side down on the mandoline for stability. Continue slicing until the apple becomes too small to safely slice. If you don’t have a mandoline, use a sharp knife to achieve consistently thin slices; thinner slices will soften much faster during cooking.
How to Make Apple Curd: Instant Pot & Stovetop Methods
Whether you opt for the speed and convenience of an Instant Pot or the traditional charm of stovetop simmering, this egg-free apple curd comes together with ease. Below, you’ll find a quick overview followed by detailed step-by-step instructions for both methods.
Quick Overview
- Combine water, apple cider vinegar, prepared apples, brown sugar, and spices in your chosen pot.
- Cook until the apples are incredibly soft, either by pressure cooking or simmering.
- Stir in vanilla extract for aromatic depth.
- Transfer the cooked apple mixture to a food processor, add butter, and blend until perfectly smooth.
- Allow the curd to chill and thicken in the refrigerator to reach its ideal consistency.
Step-by-Step Instructions
Instant Pot Method
The Instant Pot offers a remarkably quick and hands-off way to achieve perfectly tender apples, ideal for a smooth curd.
- Step 1: Begin by adding the liquids first: water and apple cider vinegar. Then, layer in the prepared apple slices. Finally, sprinkle the brown sugar and ground cinnamon (and any other optional spices like ginger or cloves, if using) over the apples. This specific layering prevents the sugar from settling at the bottom of the pot, which can cause sticking or burning.
- Step 2: Secure the Instant Pot lid and set the valve to the “Sealing” position. Select the “Pressure Cook” function (or “Manual” on older models) and set it to “High Pressure” for 30 minutes. The Instant Pot display will show “On” as it preheats and comes to pressure, then it will begin the 30-minute countdown.
- Step 3: Once the 30-minute cooking cycle is complete, the Instant Pot will beep. Carefully and quickly release the pressure by switching the valve to the “Venting” position. Stand clear of the steam as it releases. Once all the pressure has released and the float valve has dropped, you can safely open the lid.
- Step 4: You’ll notice a fair amount of liquid in the pot. Stir in the vanilla extract, incorporating it evenly into the cooked apples.
- Step 5: Using a slotted spoon or a colander, carefully remove the softened apple pieces from the excess cooking liquid. Transfer the apples to a large food processor. Add the room-temperature butter to the food processor with the apples. Discard or save the remaining liquid for another use, like thinning the curd if needed.
- Step 6: Pulse the apple and butter mixture in the food processor until it reaches a perfectly smooth and creamy consistency. Blend until no apple chunks remain. If the mixture appears too thick to blend properly, add a tablespoon or two of the reserved cooking liquid at a time until it reaches a smooth, pourable consistency. Remember, the curd will thicken significantly as it cools. Serve your delicious apple curd warm for an immediate treat, or chill it for several hours to achieve a firmer spreadable texture.
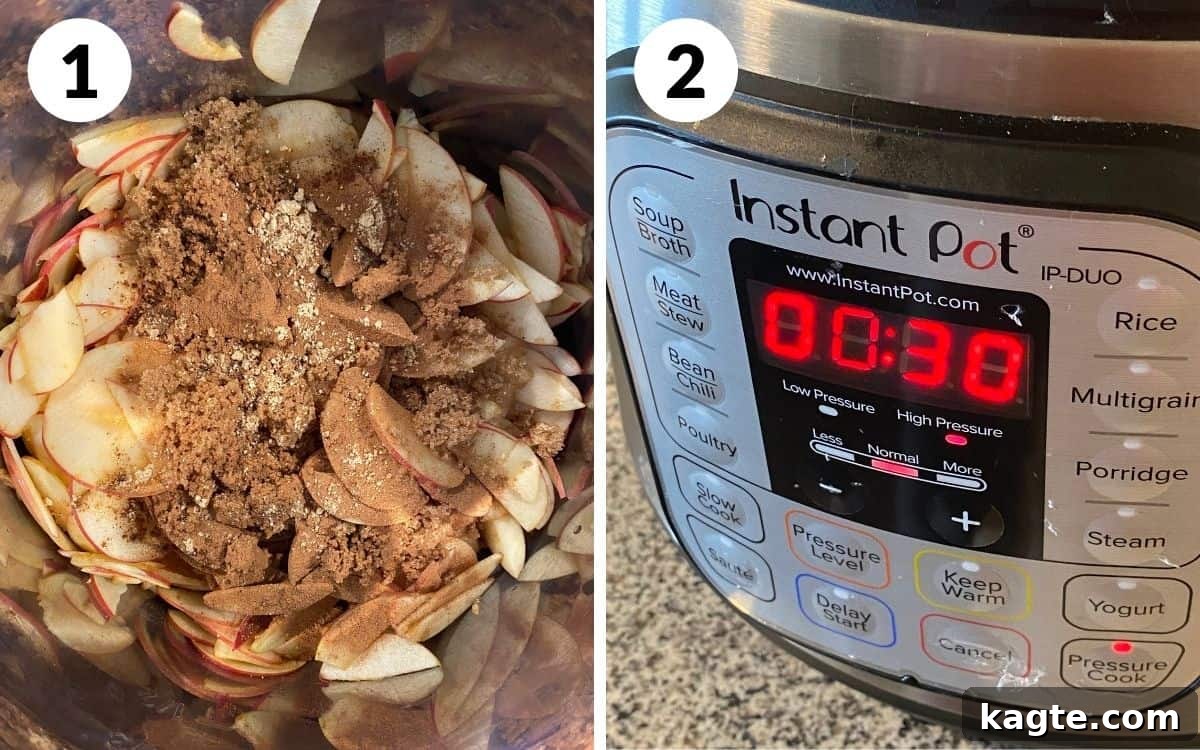
Remember to layer the water and vinegar at the bottom, then apples, followed by sugar and cinnamon on top. This crucial step prevents the sugar from sticking and potentially scorching the bottom of your pot during pressure cooking.
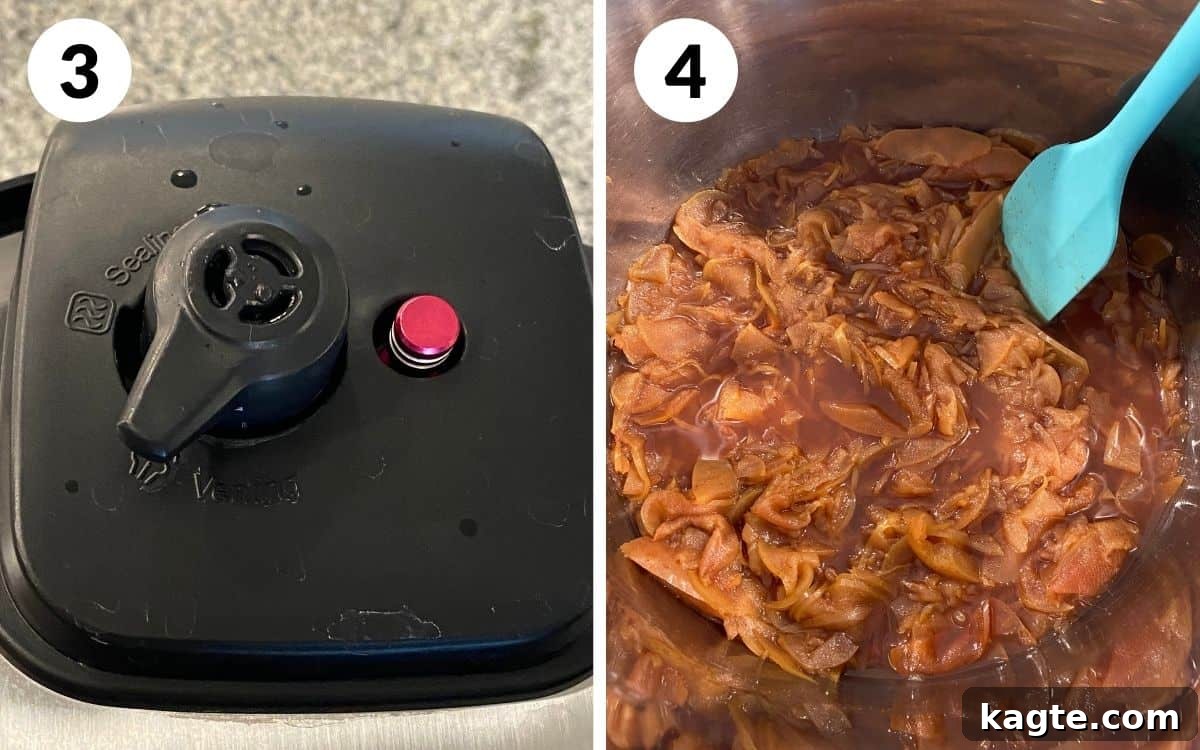
It’s completely normal to have a good amount of excess liquid in the pot after the apples have cooked down. Don’t worry, we’ll address this in the next step to ensure a thick curd.
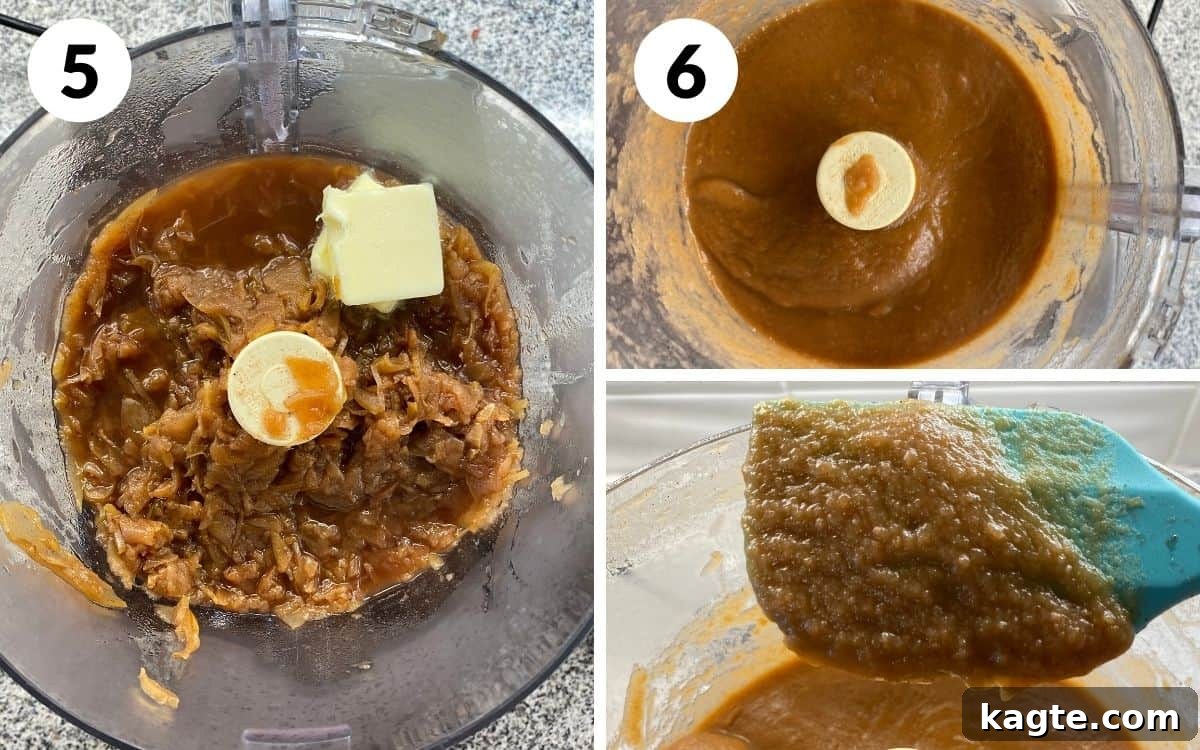
When checking for ideal consistency, lift a spoonful of the blended curd. It should be thick enough to cling to the spoon and not run off immediately. This indicates it will firm up perfectly once chilled.
Stovetop Method
For those who prefer a more traditional approach, making apple curd on the stovetop is equally rewarding, requiring a bit more stirring but yielding the same fantastic results.
- Step 1: In a large, heavy-bottomed pot or Dutch oven, combine the water, apple cider vinegar, prepared apple slices, brown sugar, ground cinnamon, and any other optional spices you choose to add. Give it a good stir to combine all ingredients.
- Step 2: Place the pot over medium-high heat and bring the mixture to a gentle boil, stirring occasionally. Once boiling, reduce the heat to medium-low, cover the pot, and let the apples simmer. The goal is to cook the apples until they are very soft and easily mashable.
- Step 3: Continue to simmer for about 45 minutes to 1 hour, stirring frequently to prevent sticking and ensure even cooking. During this time, the water will gradually evaporate. As the liquid reduces and the apples soften, add an additional 1/4 to 1/2 cup of water as needed to maintain enough moisture for the apples to cook without drying out or burning. The total cooking time will depend on the apple variety and how thinly they were sliced; thinner slices will cook faster.
- Step 4: Once the apples are tender and easily crushed, remove the pot from the heat and stir in the vanilla extract.
- Step 5: Use a slotted spoon or colander to separate the softened apples from any excess liquid in the pot. Transfer the cooked apples to a large food processor. Add the room-temperature butter.
- Step 6: Pulse the mixture until it becomes completely smooth and creamy, with no discernible apple chunks. If the curd appears too thick to blend properly, gradually add small amounts of the reserved cooking liquid (from Step 5) until you achieve your desired smooth consistency. Remember that the curd will continue to thicken considerably as it chills. Serve warm or refrigerate until firm and chilled.
Make-Ahead Tips & Storage Solutions
This homemade apple curd is fantastic for meal prepping or making ahead of time, ensuring you always have a delightful treat on hand. Here’s how to store it to maintain its freshness and flavor:
- Make Ahead (Prep): Unfortunately, apples brown quickly once cut. For the best results, I recommend preparing and slicing your apples right before you plan to cook them. This ensures their fresh flavor and appearance are preserved.
- Refrigerator Storage: Leftover apple curd can be stored in an airtight container in the refrigerator for an impressive 1 to 2 weeks. Ensure the container is sealed tightly to prevent any absorption of refrigerator odors and to maintain freshness.
- Freezer Storage: For longer preservation, apple curd freezes beautifully. Allow the curd to cool completely in the refrigerator overnight. Once thoroughly chilled, transfer it to a freezer-safe, airtight container. It can be safely stored in the freezer for up to 2 months. You can also freeze it in smaller portions for convenient single servings.
- Thawing: To thaw frozen apple curd, simply transfer it from the freezer to the refrigerator one day before you plan to use it. Allow it to slowly thaw. Once thawed, it will retain its quality and can be kept in the refrigerator for another 1 to 2 weeks. Give it a good stir before serving to restore its smooth consistency.
Expert Tips for the Best Apple Curd
Achieving a truly exceptional apple curd is easy with these insider tips and tricks:
- Slice the Apples Thinly and Uniformly: This is a crucial step for even cooking. Thinner, consistent slices will cook down and soften much quicker, whether you’re using the Instant Pot or the stovetop. A mandoline slicer is a fantastic tool for this, but a sharp knife and careful technique will also yield great results.
- Layer Ingredients Correctly in the Instant Pot: When using the pressure cooker, always add the liquids (water, vinegar) to the bottom first, followed by the apples, and then sprinkle the sugar and spices on top. This layering technique is essential to prevent the sugar from settling at the bottom and potentially burning, which can affect the flavor and texture of your curd.
- Harness the Power of a Pressure Cooker: The Instant Pot cooking method is significantly easier and more hands-off compared to continuous stirring on the stovetop. It also excels at breaking down the apples more thoroughly, resulting in an incredibly soft texture that’s perfect for blending into a smooth curd.
- Manage Excess Liquid Wisely: After cooking, you’ll find a fair amount of liquid in the pot. It’s important to remove the apples from this liquid before blending. Blending the apples with too much liquid will result in a runny curd that won’t set properly. You can reserve a little of the liquid to thin the curd later if it becomes too thick after chilling.
- Be Patient with Blending: For that signature smooth, velvety texture, don’t rush the blending process. Pulse the apple mixture in your food processor or blender until it’s completely free of any chunks or grainy bits. The smoother you get it, the more luxurious your curd will be.
- Allow Adequate Chilling Time: Fruit curds thicken significantly as they cool. While tempting to dig in immediately, refrigerating your apple curd for at least a few hours (or preferably overnight) will allow it to set to its ideal thick, spreadable consistency.
- Transform it into a Thoughtful Holiday Gift: Homemade apple curd makes for an incredibly simple, yet deeply appreciated, holiday gift. Fill small mason jars with the cooled curd, tie a festive ribbon around the lid, and add a cute, personalized tag. It’s a delicious and memorable present that showcases your culinary skills!
Important Recipe Notes
- Embracing the Egg-Free Approach: It’s important to note that this is not a traditional fruit curd recipe because it deliberately omits eggs. Traditional curds use egg yolks for their emulsifying and thickening properties. However, I’ve found that you can achieve a wonderfully rich, creamy texture and fantastic flavor without them. This adaptation makes the recipe naturally vegan-friendly (with a simple butter swap) and simplifies the cooking process, making it accessible to more people. The butter provides the necessary richness and contributes significantly to the smooth mouthfeel.
- The No-Peel Advantage: The decision to leave the apple skins on not only saves time but also adds a subtle depth of flavor and a touch of natural pectin, which aids in thickening. Rest assured, with proper cooking and blending, the skins will fully incorporate, leaving no noticeable texture.
Creative Variations to Try
This egg-free apple curd recipe is wonderfully adaptable! Once you master the base, feel free to experiment with these delicious variations:
- Vegan Apple Curd: To make this recipe completely vegan, simply swap the regular salted butter for an equal amount of your favorite high-quality vegan butter substitute. Ensure it’s at room temperature for optimal blending.
- Spice it Up: Enhance the classic cinnamon flavor by adding other warming spices. Consider 1/2 teaspoon of ground ginger, 1/4 teaspoon of ground cloves, or a pinch of ground nutmeg or allspice for a truly autumnal, “apple pie spice” profile.
- Citrus Boost: For an extra layer of brightness, add the zest of one lemon or orange along with the apple cider vinegar. This can significantly lift the overall flavor.
- Bourbon or Rum Infusion: For an adult twist, stir in 1-2 tablespoons of bourbon or dark rum after the apples have cooked and before blending. The alcohol will cook off, leaving behind a subtle, sophisticated flavor.
- Maple Apple Curd: Substitute a portion of the brown sugar with pure maple syrup for a different kind of sweetness and a deeper, earthier flavor profile. Adjust to taste, as maple syrup is often sweeter than brown sugar.
- Ginger Apple Curd: If you love ginger, consider adding 1-2 teaspoons of freshly grated ginger along with the other spices for a zesty, spicy kick.
Frequently Asked Questions About Apple Curd
Fruit curd, especially this delightful no-peel apple curd, is incredibly versatile! It’s frequently incorporated into baking for cakes, cupcakes, pastries, tarts, sweet rolls, or thumbprint cookies. It also shines as a spread on breakfast favorites like toast, biscuits, scones, sweet breads, pancakes, waffles, or French toast. Don’t forget to try it swirled into yogurt, layered in parfaits, or as a luxurious topping for vanilla ice cream or even on a caramel apple!
Having a surplus of apples is a wonderful problem to have! Making apple curd or apple butter is one of the most delicious and effective ways to use a large batch of fresh apples. This easy apple curd recipe is specifically designed to transform a generous haul of apples into a delightful and storable treat.
Beyond spreading it on baked goods, apple curd can be used in numerous creative ways. It’s a fantastic filling for crepes, donuts, or layered cakes. You can swirl it into frosting for cupcakes, mix it into oatmeal for a gourmet breakfast, or even use it as a base for a unique vinaigrette in savory dishes that benefit from a touch of sweet and tangy apple. Try pairing it with sharp cheddar cheese on a cracker for an unexpected delight!
If your apple curd turns out too runny after chilling, don’t worry! You can easily fix it. Pour the curd into a saucepan and gently simmer it over low heat, stirring constantly, until it reduces and thickens to your desired consistency. Be patient and stir continuously to prevent sticking. Remember it will thicken more as it cools again.
While both apple curd and apple butter are concentrated apple spreads, they have distinct differences. Apple butter is typically cooked down for a longer time until it reaches a very thick, intensely spiced, and caramelized consistency. It often contains no butter and is usually darker in color. Apple curd, on the other hand, is richer due to the butter, often brighter in flavor with a pronounced tartness from the added acid, and has a smoother, more velvety, custard-like texture, akin to lemon curd but with apples.
Yes, you can use frozen apple slices for this curd. Thaw them first, then proceed with the recipe. Keep in mind that frozen apples might release more liquid during cooking, so you might need to simmer them slightly longer or adjust the amount of added water in the stovetop method. For the Instant Pot, the liquid amount should remain consistent.
Related Sweet & Savory Recipes
If you love homemade sauces and spreads, or if you’re looking for more delicious ways to use seasonal ingredients, explore these other fantastic recipes:
More Homemade Spreads & Dips You’ll Love
Appetizers
Homemade Caramelized French Onion Dip
Sauce
Creamy Balsamic Vinaigrette Dressing
Sauce
Homemade Pineapple Teriyaki Sauce Recipe
Sauce
Homemade Greek Yogurt Ranch Dressing
Watch the How-To Video
(Video coming soon! In the meantime, follow the detailed instructions below for perfect results.)
Print Recipe
Apple Curd (No Peel)
★★★★★
5 from 26 votes
This easy, egg-free apple curd is wonderfully smooth, buttery, and brimming with warm spices. Perfect for using up fall apples, it can be made in your Instant Pot or on the stovetop and makes a delightful homemade gift.
Equipment
- Mandoline Slicer
- Instant Pot
- Apple Corer
- Large food processor or high-speed blender
- Heavy-bottomed pot (for stovetop method)
Ingredients
- 1/4 cup water
- 2 teaspoons apple cider vinegar* (or lemon juice)
- 3 pounds unpeeled whole Fuji apples, cored & thinly sliced (about 1/16-1/8 inch thick)*
- 2/3 cup brown sugar*
- 1 Tablespoon ground cinnamon
- 2 teaspoons vanilla extract
- 2 Tablespoons salted butter, room temperature*
Optional Spices
- 1/2 teaspoon ground ginger
- 1/4 teaspoon ground cloves
- Pinch of ground nutmeg or allspice
Instructions
Instant Pot Method:
- Add the water, vinegar, prepared apple slices, brown sugar, cinnamon, and other optional spices (if using) to the Instant Pot in this exact order to prevent sticking.
- Secure the lid, set the valve to “Sealing”, and select “Pressure Cook” on “High Pressure” for 30 minutes.
- Once the timer goes off, carefully perform a quick pressure release by switching the valve to “Venting”.
- Stir in the vanilla extract.
- Using a slotted spoon or colander, remove the cooked apples from the excess liquid and transfer them to a large food processor. Add the room-temperature butter.
- Pulse until the mixture is perfectly smooth or your desired consistency is reached. If it’s too thick to blend, add a tablespoon or two of the reserved cooking liquid at a time. The curd will thicken considerably after it cools. Serve warm or chilled.
Stovetop Method:
- Combine the water, vinegar, prepared apple slices, brown sugar, cinnamon, and other optional spices (if using) in a large, heavy-bottomed pot.
- Bring the mixture to a boil over medium-high heat, stirring occasionally. Once boiling, reduce the heat to medium-low, cover, and let simmer.
- Continue simmering for approximately 45 minutes to 1 hour, stirring frequently to prevent sticking. Add 1/4 to 1/2 cup of water as needed if the liquid evaporates too quickly and the apples risk drying out or burning. Cook until the apples are very soft and easily mashed.
- Remove from heat and stir in the vanilla extract.
- Using a slotted spoon or colander, remove the cooked apples from the excess liquid and place them in a large food processor. Add the room-temperature butter.
- Pulse until smooth. If the curd is too thick, gradually add some of the reserved cooking liquid until the desired consistency is achieved. Keep in mind it will thicken further upon cooling. Serve warm or chilled.
Did you make this recipe? Leave a comment below!
Notes
Apple Cider Vinegar: If unavailable, 2 teaspoons of lemon juice can be used as a substitute for the apple cider vinegar.
Fuji Apples: Sweet, crisp, and juicy Fuji apples are ideal for their baking qualities. McIntosh, Red Delicious, Golden Delicious, or Gala are also good options. Avoid tart and firm Granny Smith apples for this recipe.
Brown Sugar: Adjust sweetness to your preference. Use 1/2 cup for a less sweet curd or 3/4 cup for a sweeter one.
Salted Butter: If using unsalted butter, add 1/4 teaspoon of salt to the recipe.
Egg-Free: This recipe is intentionally egg-free, offering a delicious alternative to traditional curds while keeping it simple and diet-friendly.
Storage: Store leftover apple curd in an airtight container in the refrigerator for 1-2 weeks, or freeze for up to 2 months. Thaw in the refrigerator.
Thin Slices: Ensuring apples are sliced thinly and uniformly aids in quicker and more even cooking, especially on the stovetop.
Layering for Instant Pot: Always add liquids first, then apples, followed by sugar and cinnamon on top to prevent burning in the Instant Pot.
Pressure Cooker Advantage: The Instant Pot method offers an easier, hands-off approach and superior apple softening compared to stovetop cooking.
Liquid Management: Remove excess liquid from cooked apples before blending to prevent a runny curd. You can add some back if the curd becomes too thick after chilling.
Gift Idea: Homemade apple curd in mason jars with a ribbon makes a thoughtful and simple holiday gift.
Nutrition
Nutrition information is automatically calculated and should be used as an approximation only.