
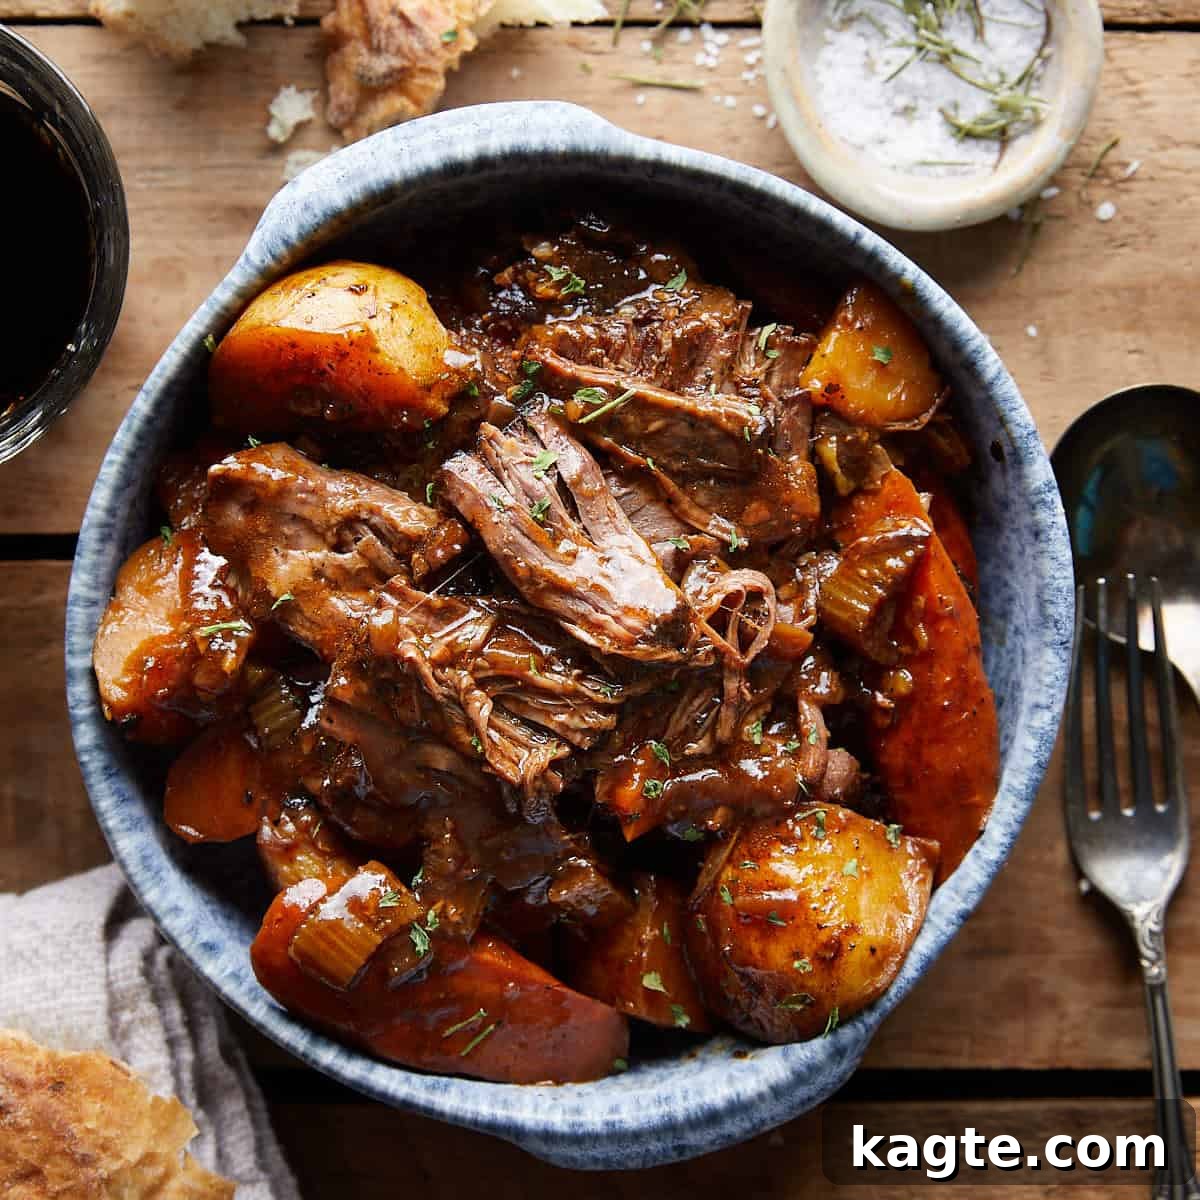
Welcome to the ultimate guide for crafting the most delectable
Dutch Oven Pot Roast. This isn’t just any dinner; it’s a
hearty, slow-cooked masterpiece featuring succulent, fall-apart tender
beef, beautifully braised in a rich, savory red wine gravy. Accompanying
the star of the show are perfectly cooked carrots, celery, onions, and
potatoes, all harmoniously mingling in one pot. This classic comfort food
is the epitome of a hands-off, flavor-packed meal, making it an ideal
choice for a cherished Sunday supper or a satisfying weeknight dinner
that practically cooks itself.
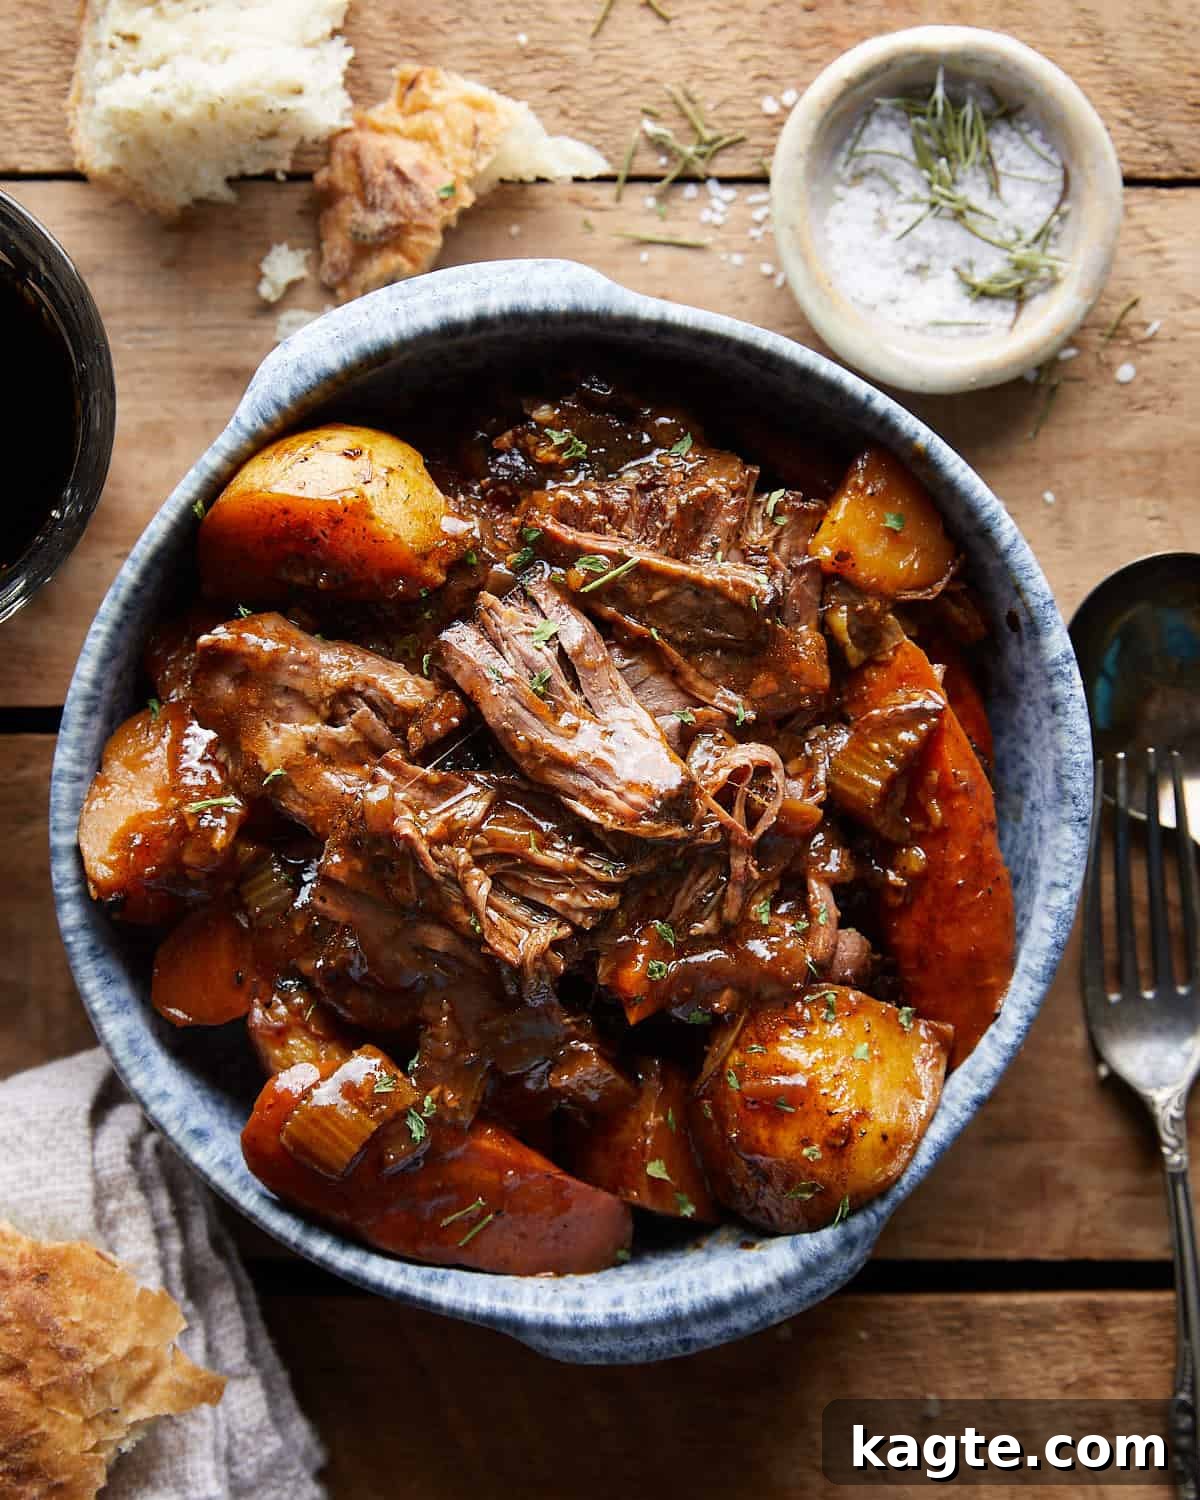
🔍 At a Glance
- ⏱️ Ready in: 5 hours (30 min. prep, 4 1/2 hour cook)
- 👥 Serves: 8
- 📌 Main Ingredients: Beef chuck roast, potatoes, & carrots
- 🔥 Cook Method: Slow-cooked/braised in oven
- 😋 Flavor Profile: Rich, savory, umami-rich
- 📝 Great For: Busy weeknights, cozy Sunday supper, memorable family dinners
Table of Contents
- 🔍 At a Glance
- Why This Dutch Oven Pot Roast Recipe Works
- Key Ingredients & Their Impact
- Dutch Oven Pot Roast Step-by-Step Guide
- Pro Tips for Achieving the Perfect Pot Roast
- Common Mistakes to Avoid
- Swap It Up: Delicious Variations to Try
- Stovetop Dutch Oven Cooking Method
- Slow Cooker Method
- What to Serve with This Hearty Meal
- Dutch Oven Pot Roast Recipe Card
- Recipe FAQs
- More Delightful Beef Recipes
Why This Dutch Oven Pot Roast Recipe Works
This Dutch Oven Pot Roast isn’t just a meal; it’s an experience built on
tried-and-true techniques that guarantee exceptional flavor and texture.
Here’s why this recipe will become your go-to for an incredibly tender
and flavorful pot roast:
-
Superior Braising with an Enameled Cast Iron Dutch Oven:
The heavy, enameled cast iron Dutch oven is the secret weapon for this
recipe. Its exceptional heat retention and even distribution create
the perfect environment for slow braising. This consistent, gentle
heat ensures that the beef chuck roast breaks down beautifully,
transforming from a tough cut into a melt-in-your-mouth, fall-apart
tender delight. The tight-fitting lid locks in moisture and flavors,
preventing dryness and allowing the meat to luxuriate in the rich
braising liquid. -
A Gravy Rich in Flavor and Depth: The foundation of
this pot roast’s incredible taste lies in its deeply flavorful gravy.
We start by searing the beef to create a caramelized crust, which
develops irresistible browned bits (fond) at the bottom of the pot.
These bits, combined with the savory beef drippings, a generous pour
of dry red wine, and a medley of aromatic herbs, are deglazed and
simmered to create a gravy that is complex, savory, and incredibly
rich. Every spoonful is a testament to the layers of flavor built
during the cooking process. -
Vegetables Infused with Every Flavorful Note: Unlike
recipes where vegetables might taste bland, here, the carrots, celery,
onions, and potatoes are cooked directly in the flavorful pan sauce.
This allows them to slowly absorb all the delicious aromas and savory
notes from the braising liquid. The vegetables emerge tender, sweet,
and deeply infused with the umami-rich gravy, making them an integral
part of the dish’s overall deliciousness rather than just an
afterthought. They contribute to the complete, wholesome nature of
this ultimate comfort meal.
Key Ingredients & Their Impact
Crafting a truly exceptional Dutch oven pot roast begins with selecting
the right ingredients and understanding how each one contributes to the
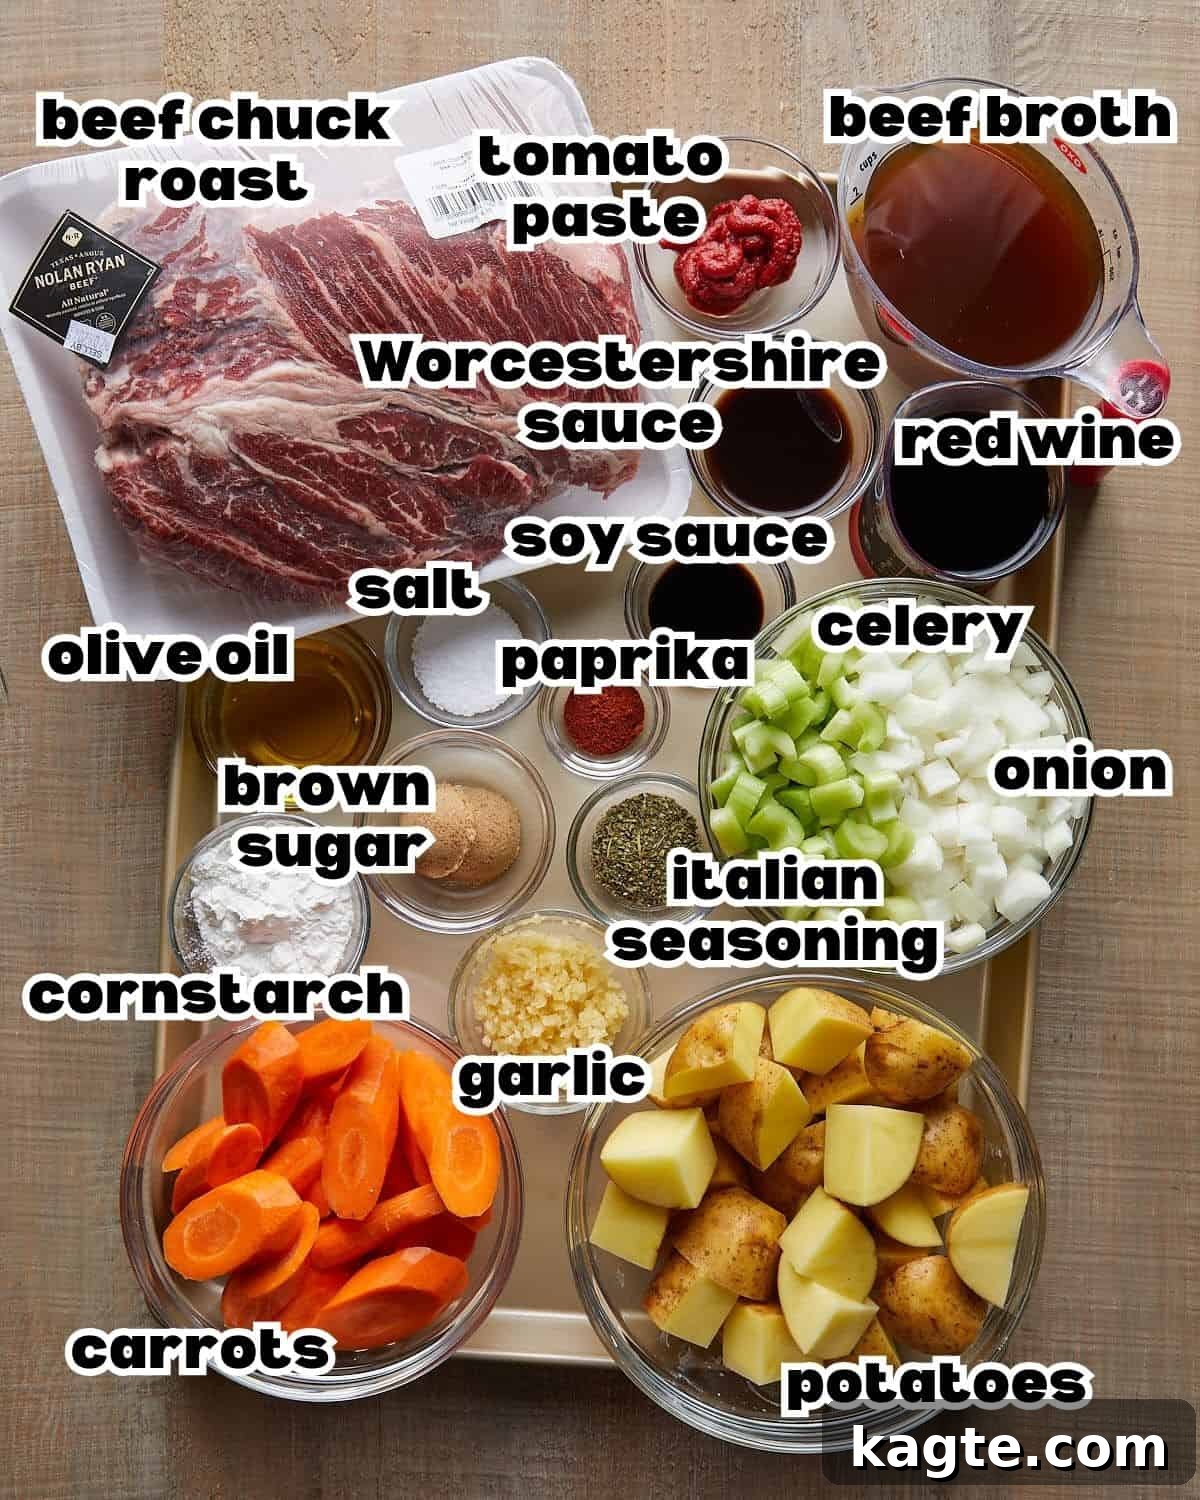
final, glorious dish. Here’s a closer look at the stars of this recipe:
-
Chuck Roast: This is the prime cut for pot roast due
to its marbling and connective tissues. When slow-braised, these
tissues break down into gelatin, resulting in incredibly tender,
flavorful beef that literally falls apart. For best results, look for
a well-marbled cut. Alternative cuts like beef brisket, shoulder, or
bottom round can also be used, but chuck roast remains the top choice
for its optimal balance of fat and collagen. -
Morton Kosher Salt: Our recipes are rigorously tested
with Morton kosher salt unless otherwise specified. Its coarse texture
and pure flavor make it superior for everyday cooking, providing a
more controlled seasoning experience compared to finer table salt. If
you’re using table salt, remember to reduce the quantity by about half
to prevent over-salting. We highly recommend adding kosher salt to
your pantry essentials! -
Brown Sugar: This ingredient plays a dual role: it
expertly balances the savory and salty notes in the seasoning and
assists in achieving a beautiful, caramelized crust during the searing
process. If brown sugar isn’t available, granulated (white) sugar can
be substituted. Alternatively, for a touch of natural sweetness, add 1
tablespoon of honey when incorporating the other liquids into the pot. -
Black Pepper: Freshly cracked black pepper is
essential, lending a nuanced depth and a subtle, aromatic heat that
enhances the overall flavor profile of the beef. -
Olive Oil: Used for searing the beef, olive oil helps
create that crucial browned crust that forms the flavor base of the
entire dish. Any high-heat cooking oil, such as canola, vegetable, or
grapeseed oil, can be used as a suitable substitute. -
Onion: A fundamental aromatic, the onion provides a
natural sweetness and forms a robust flavor base for the rich gravy.
Yellow onions are preferred for their balanced flavor, but white or
sweet onions also work well. -
Celery: As part of the classic “mirepoix,” celery
contributes an essential aromatic element, adding a fresh, earthy
note that deepens the complexity of the braising liquid. -
Garlic: Fresh garlic is non-negotiable for its pungent,
aromatic punch. Avoid pre-minced jarred garlic, as its flavor is often
muted. If absolutely necessary, you can substitute with 2½ teaspoons
of granulated garlic powder. -
Tomato Paste: This concentrated ingredient is a secret
weapon for boosting umami flavors and adding a subtle richness. When
sautéed, it caramelizes slightly, further enhancing the depth and
helping to naturally thicken the sauce. -
Italian Seasoning: A versatile blend of dried herbs
like oregano, basil, thyme, and rosemary, Italian seasoning infuses
the pot roast with a fragrant, aromatic, and savory profile. If you
don’t have it on hand, create your own blend by using 1 teaspoon EACH
of dried basil, thyme, and oregano. -
Smoked Paprika: This spice adds a beautiful color and a
distinctive, subtle smokiness that complements the beef perfectly. If
you prefer, regular sweet paprika can be used as a milder alternative. -
Red Wine: Crucial for deglazing the pot, red wine
scrapes up all those delicious browned bits from the bottom,
incorporating them into the sauce. It also adds significant richness
and complexity to the gravy. Dry red wines like Cabernet Sauvignon or
Merlot are ideal, but sweeter reds or red blends can also work,
imparting a slightly different flavor profile. If you prefer to avoid
alcohol, substitute with an equal amount of beef broth and 1
tablespoon of balsamic vinegar for acidity and depth. -
Worcestershire Sauce: A powerhouse of savory, umami
flavor, Worcestershire sauce enhances the beefiness of the dish and
adds a tangy, fermented depth that is truly irresistible. -
Soy Sauce: Another umami booster, soy sauce brings a
salty, savory complexity that rounds out the flavor profile. Tamari (for
gluten-free) or coconut aminos (for soy-free) are excellent substitutes. -
Beef Broth: This forms the essential liquid base for
braising, infusing the meat and vegetables with rich, beefy flavor as
they slowly cook. There’s no need to opt for low-sodium broth unless
you’re carefully monitoring salt intake, as the overall seasoning will
be adjusted accordingly. -
Cornstarch: Used to create a smooth slurry, cornstarch
is vital for thickening the braising liquid into a luscious gravy. It
ensures the sauce clings beautifully to the tender meat and soft
vegetables, preventing a watery consistency without making it too heavy. -
Yellow Potatoes: Our preferred potato variety for their
creamy texture and buttery flavor, which holds up well to slow
cooking. Russet potatoes are also a good option, especially if you
enjoy a fluffier texture. Cut them into 1½-inch pieces for even cooking. -
Carrots: Sweet and vibrant, carrots add a touch of natural
sweetness and essential texture to the pot roast. Peeled and cut on a bias
into 2–3-inch pieces, they become tender yet retain a slight bite, soaking
up all the magnificent flavors of the gravy.
Find the full ingredient list and exact measurements in the
recipe card below.
Dutch Oven Pot Roast Step-by-Step Guide
Follow these detailed steps to create a truly unforgettable Dutch Oven Pot Roast,
ensuring every element is perfectly cooked and bursting with flavor.
-
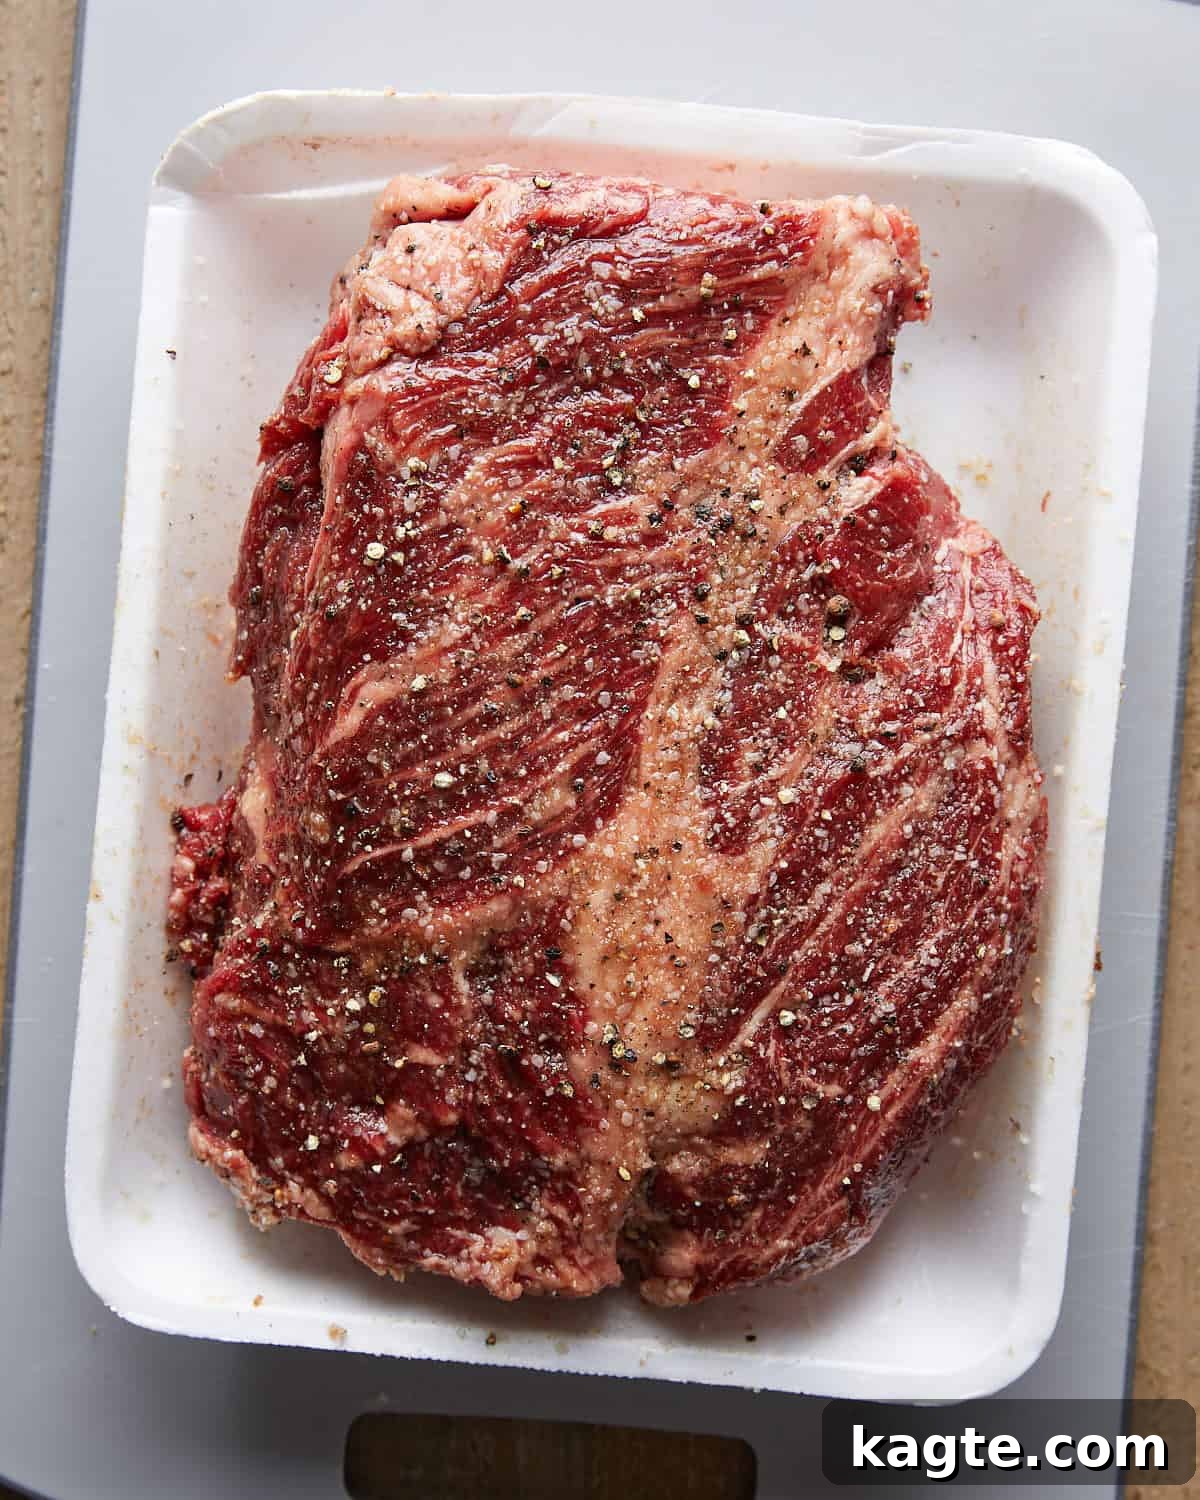
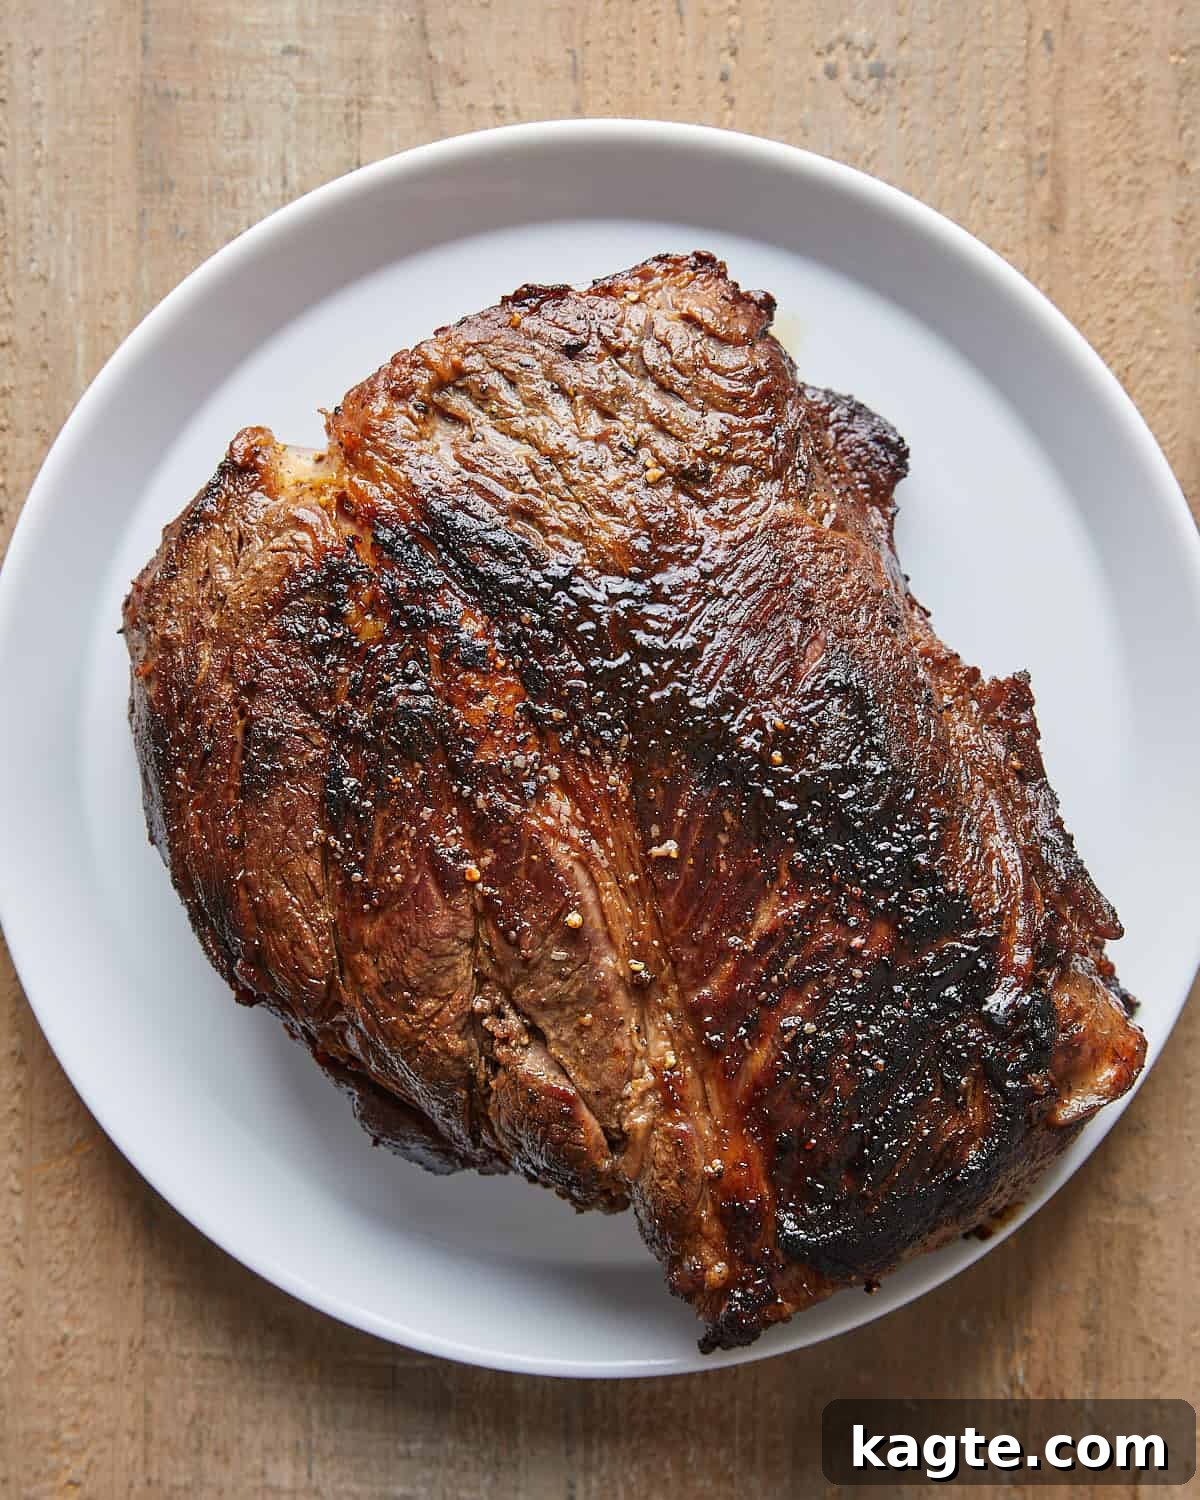
Prepare the Beef for Maximum Flavor: Begin by preheating
your oven to a steady 325°F (160°C). This ensures your
oven is at the ideal temperature when the roast is ready to go in. Take
your beef chuck roast and pat it thoroughly dry with paper towels. Removing
excess moisture is crucial for achieving a beautiful, even sear. In a small
bowl, combine the Morton kosher salt and brown sugar, mixing them well.
Generously season all sides of the roast with this mixture, pressing the
seasoning firmly into the meat. Don’t forget a liberal amount of freshly
cracked black pepper for added depth. This initial seasoning penetrates the
meat, building flavor from the inside out. -
Sear the Roast for a Golden Crust: Heat the olive oil in
a large, heavy-bottomed 6-quart Dutch oven over
medium-high heat. Wait until the oil is hot and shimmering, indicating it’s
ready for searing. Carefully place the seasoned roast into the hot oil. Sear
each side for 3–4 minutes, allowing it to develop a deep,
golden-brown crust. This searing step is paramount; it caramelizes the
exterior of the beef, locking in juices and creating those essential browned
bits (fond) at the bottom of the pot, which will become the foundation of
your rich gravy. Once seared, transfer the roast to a clean plate and set
it aside.
💡Tip
Allow the beef to sear undisturbed on each side. Uninterrupted contact
with the hot pan is key to forming a dark, flavorful crust and
preventing the meat from steaming, which would hinder browning. This
crust is essential for locking in the savory juices.
-
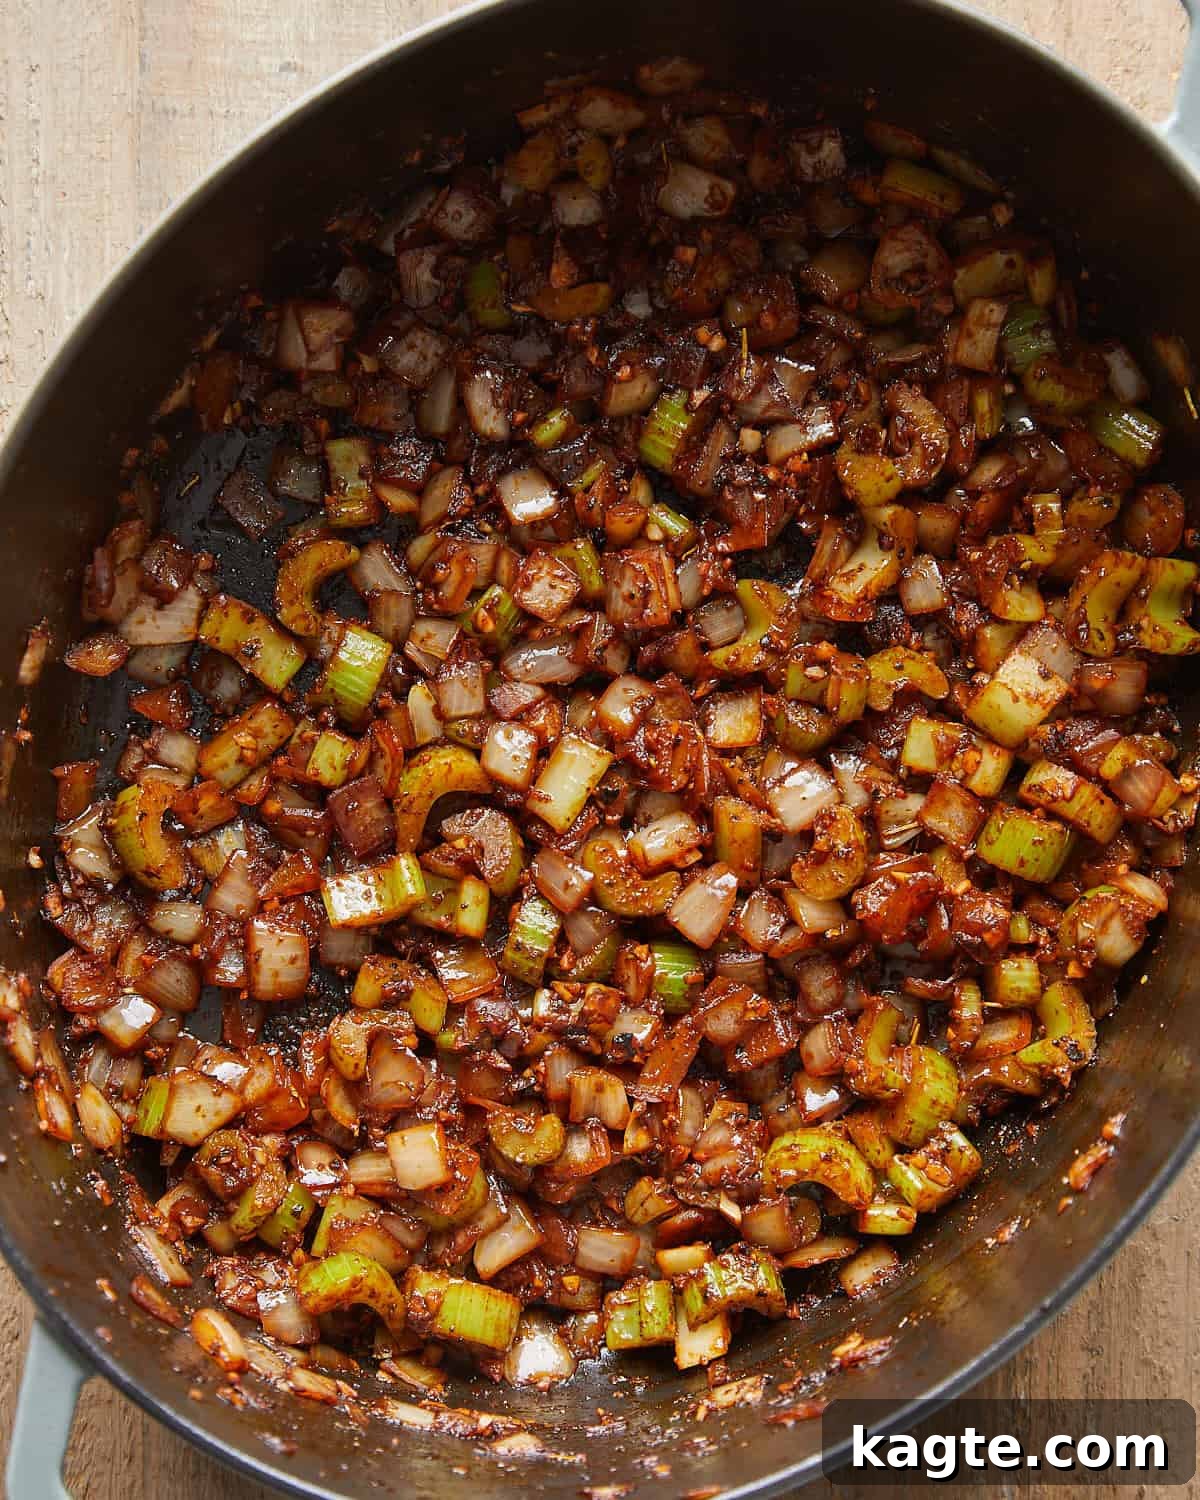
Sauté Aromatics and Build the Flavor Base: Reduce the heat
in the Dutch oven to medium. Add the diced onion and sliced celery to the pot
and sauté them for 5–6 minutes. Stir frequently until they
soften and turn a light golden color. This step extracts their natural sugars
and aromas, creating a sweet and savory base. Next, stir in the minced garlic,
tomato paste, Italian seasoning, and smoked paprika. Continue to cook for
another 1–2 minutes, stirring constantly, until the mixture
is wonderfully fragrant and the tomato paste deepens in color slightly. Cooking
the tomato paste briefly caramelizes it, amplifying its umami notes. -
Deglaze the Pot with Red Wine: Carefully pour the red wine
into the pot. Immediately use a wooden spoon to vigorously scrape up any
browned bits (fond) from the bottom of the pot. These bits are pure flavor
gold, and incorporating them into the liquid is crucial for a rich gravy.
Allow the wine to simmer for 3–4 minutes, letting it reduce
slightly. This step not only captures flavor but also cooks off some of the
alcohol, leaving behind a concentrated, complex essence.
💡Tip
When deglazing, don’t be shy! Press firmly with your wooden spoon to
release every flavorful brown bit from the bottom of the pan. These
“fond” particles will dissolve into the braising liquid, creating an
unrivaled richness and depth of flavor in your final gravy.
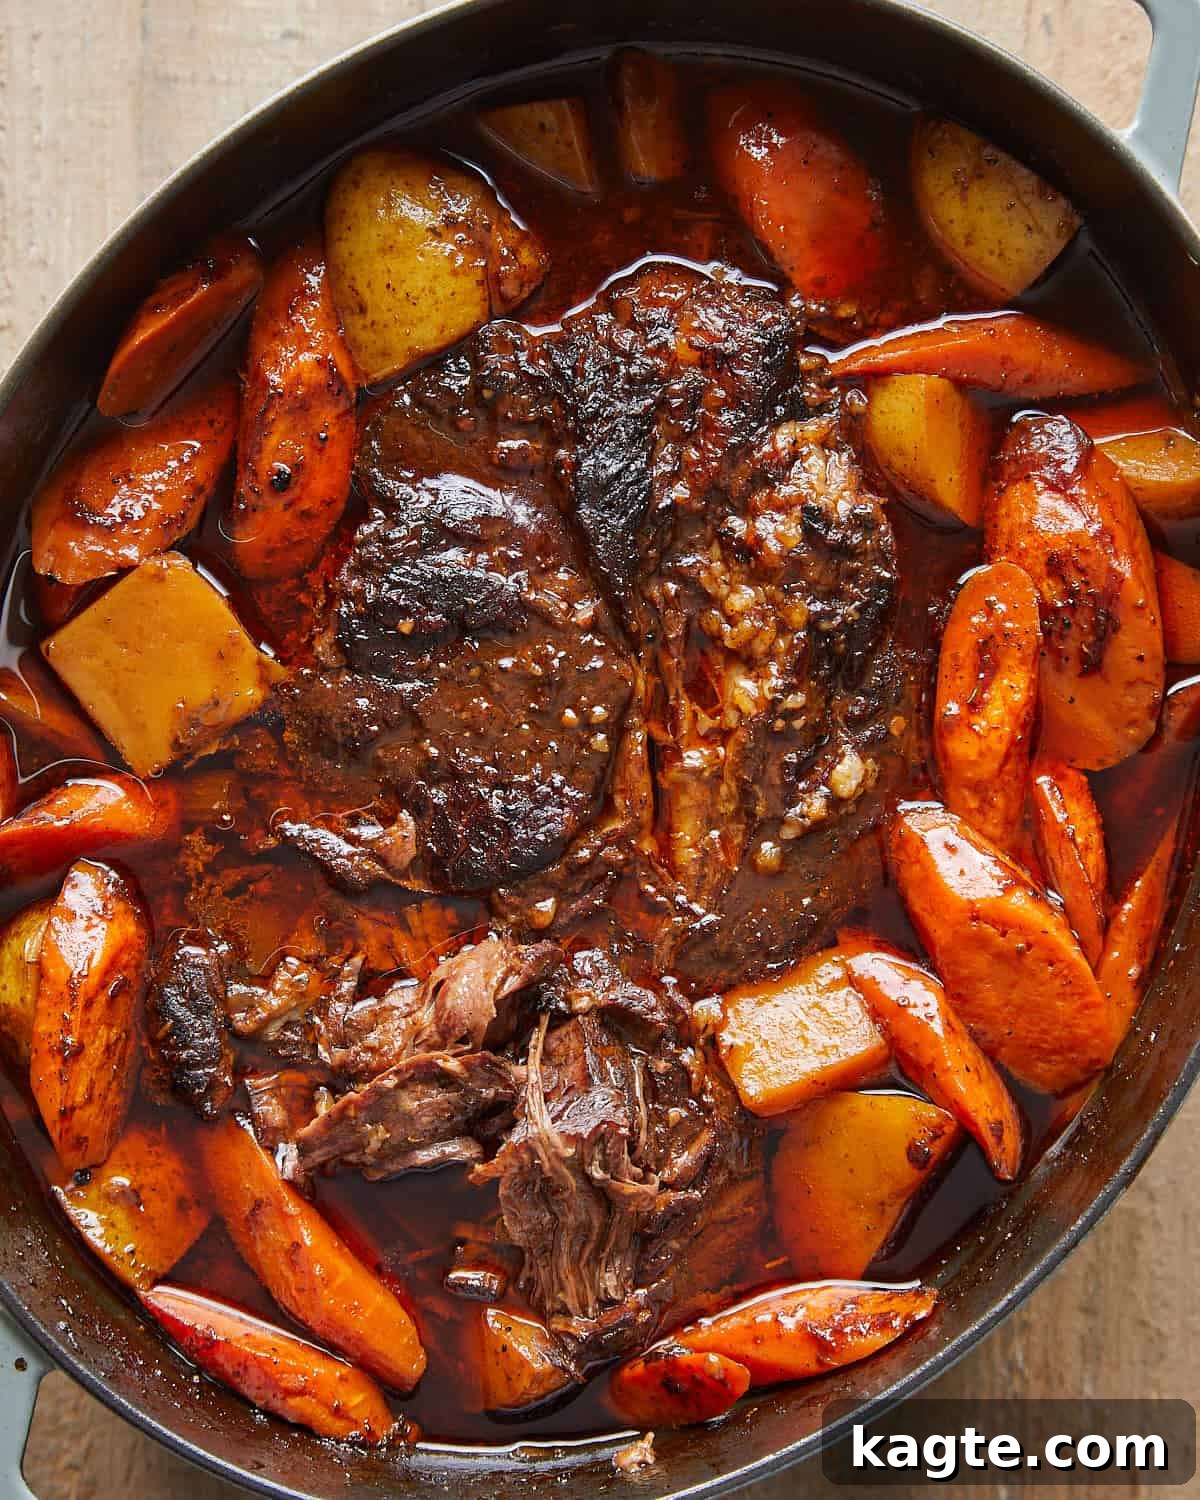
-
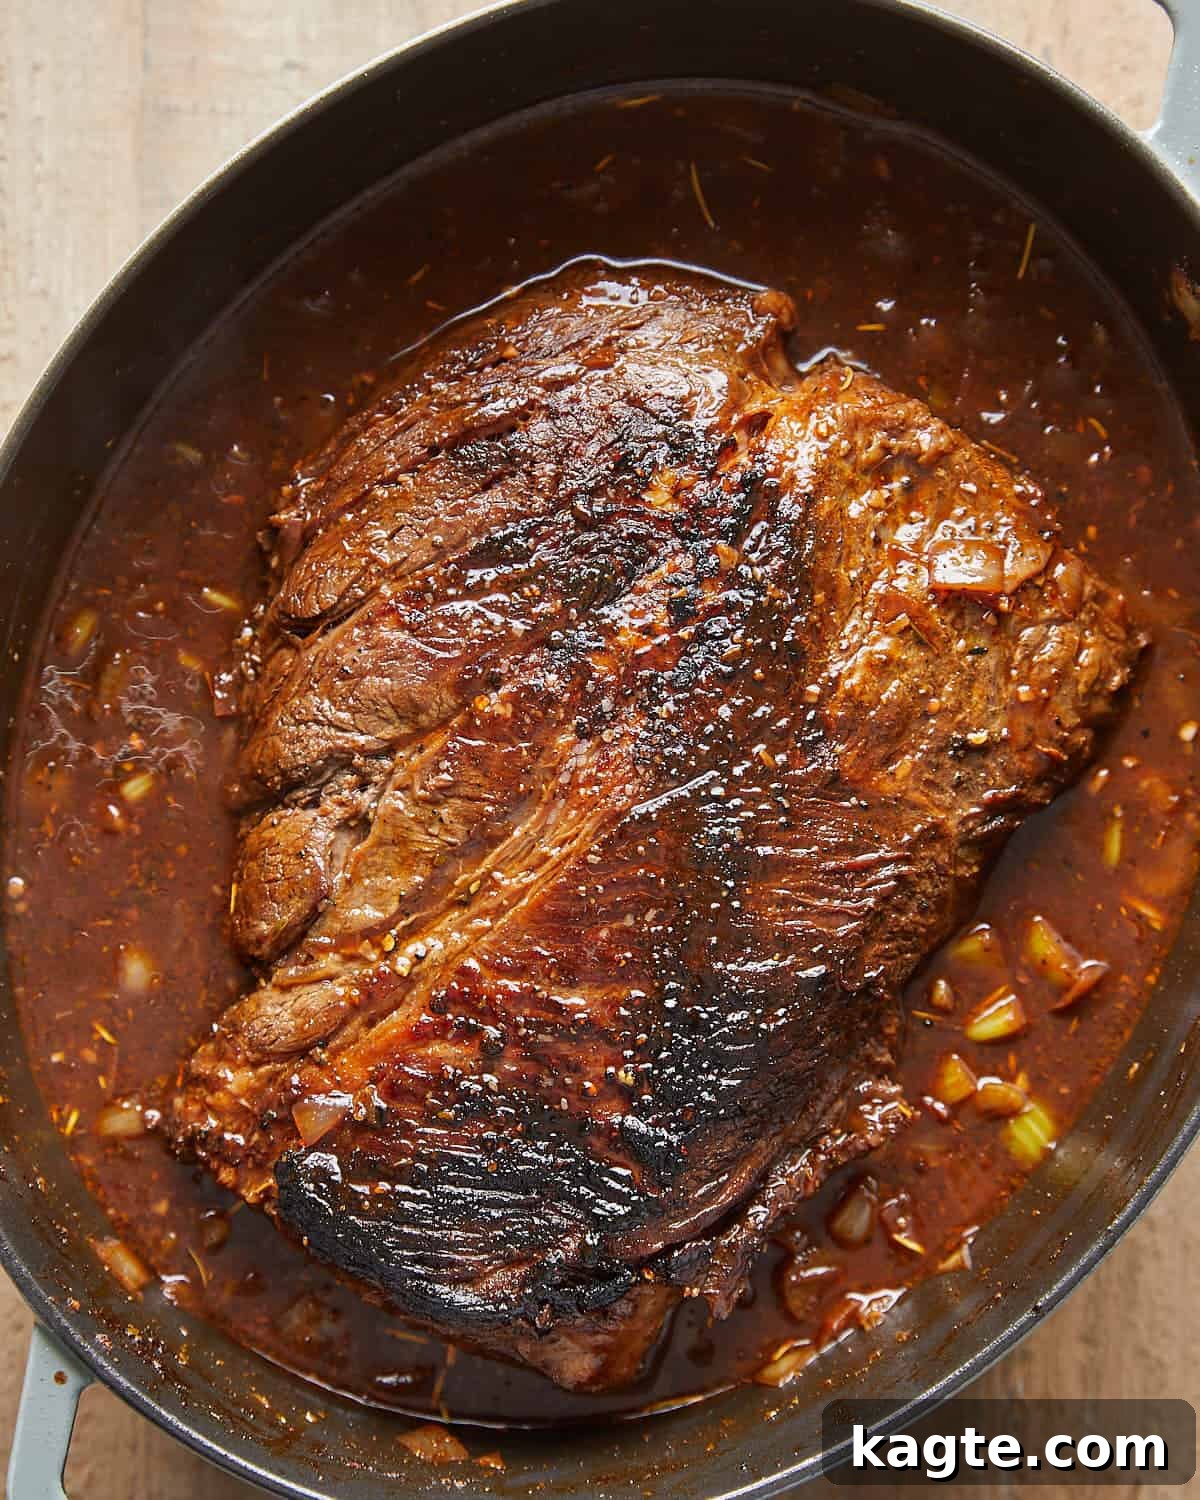
Combine Liquids and Begin Braising: Stir in the
Worcestershire sauce, soy sauce, and beef broth, ensuring all ingredients
are well combined. In a separate small bowl, whisk together the cornstarch
and cold water to create a smooth slurry. Pour this slurry into the pot
and stir continuously until the liquid begins to thicken slightly. Return
the seared roast and any accumulated meat juices from the plate to the
Dutch oven, nestling it into the liquid. Bring the liquid to a gentle
simmer, then cover the pot tightly with its lid and carefully transfer
it to your preheated oven. Bake for the first phase of braising, which
will be approximately 2–2½ hours. During this time, the
beef will start to tenderize and absorb the incredible flavors. -
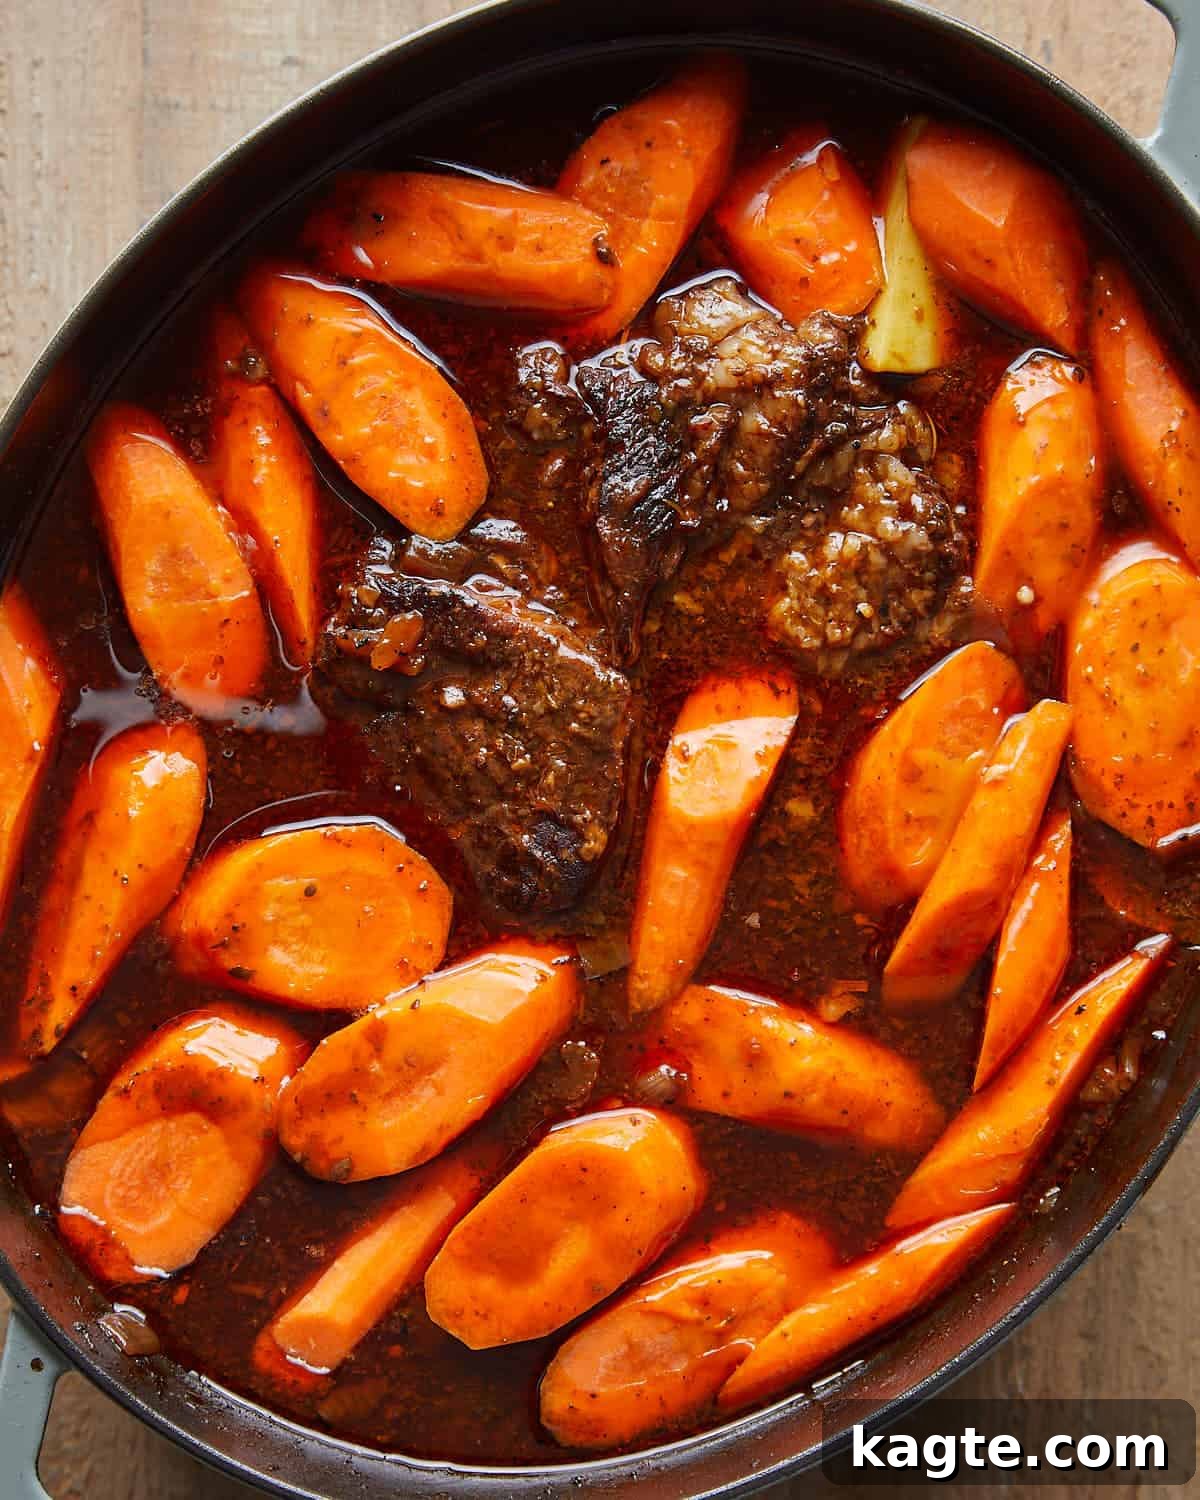
Add Vegetables and Finish Braising: After the initial
braising period, carefully remove the hot pot from the oven. Gently add
the cut yellow potatoes and carrots, nestling them around the beef roast
in the savory liquid. Make sure they are partially submerged to cook
evenly and absorb maximum flavor. Cover the pot once more and return it
to the oven for an additional 1½–2 hours. Continue
baking until the beef is incredibly fork-tender and the vegetables are
soft and cooked through. The exact timing can vary, so check for
doneness: the beef should shred easily with a fork, and the vegetables
should yield without resistance. Once done, remove from the oven and let
it rest briefly before serving, allowing the flavors to meld beautifully.
Pro Tips for Achieving the Perfect Pot Roast
Mastering the art of pot roast involves a few key techniques that elevate
a good dish to an unforgettable one. Keep these pro tips in mind for a
consistently perfect result:
-
Always Pat the Roast Dry (and Season Generously!):
This seemingly small step makes a world of difference. Before
seasoning, ensure your beef chuck roast is completely dry using paper
towels. Moisture on the surface inhibits browning, leading to a steamed
exterior rather than a crisp, flavorful crust. Once dry, don’t just
sprinkle the salt, pepper, and brown sugar; actively press the
seasoning into the meat on all sides. This creates a flavorful bark
that caramelizes beautifully during searing and helps to tenderize the
meat. -
Properly Reduce the Wine: When you add the red wine to
deglaze the pot, allow it to simmer for a full few minutes. This isn’t
just about scraping up the fond; it’s also crucial for cooking off the
alcohol and concentrating the wine’s rich, fruity, and savory flavors.
Reducing the wine ensures your gravy has a deeper, more complex taste
without any raw alcoholic notes, contributing significantly to a richer,
more robust sauce. -
Master the Cornstarch Slurry for a Smooth Gravy: To
achieve a silky-smooth, lump-free gravy, always create a cornstarch
slurry. Whisk the cornstarch with an equal amount of cold water in a
separate bowl until it forms a uniform, milky liquid before adding it
to the hot braising liquid. Adding dry cornstarch directly to a hot
liquid will cause it to clump instantly. This simple slurry technique
guarantees an even thickening, giving you a beautifully smooth and
glistening sauce that perfectly coats the meat and vegetables. -
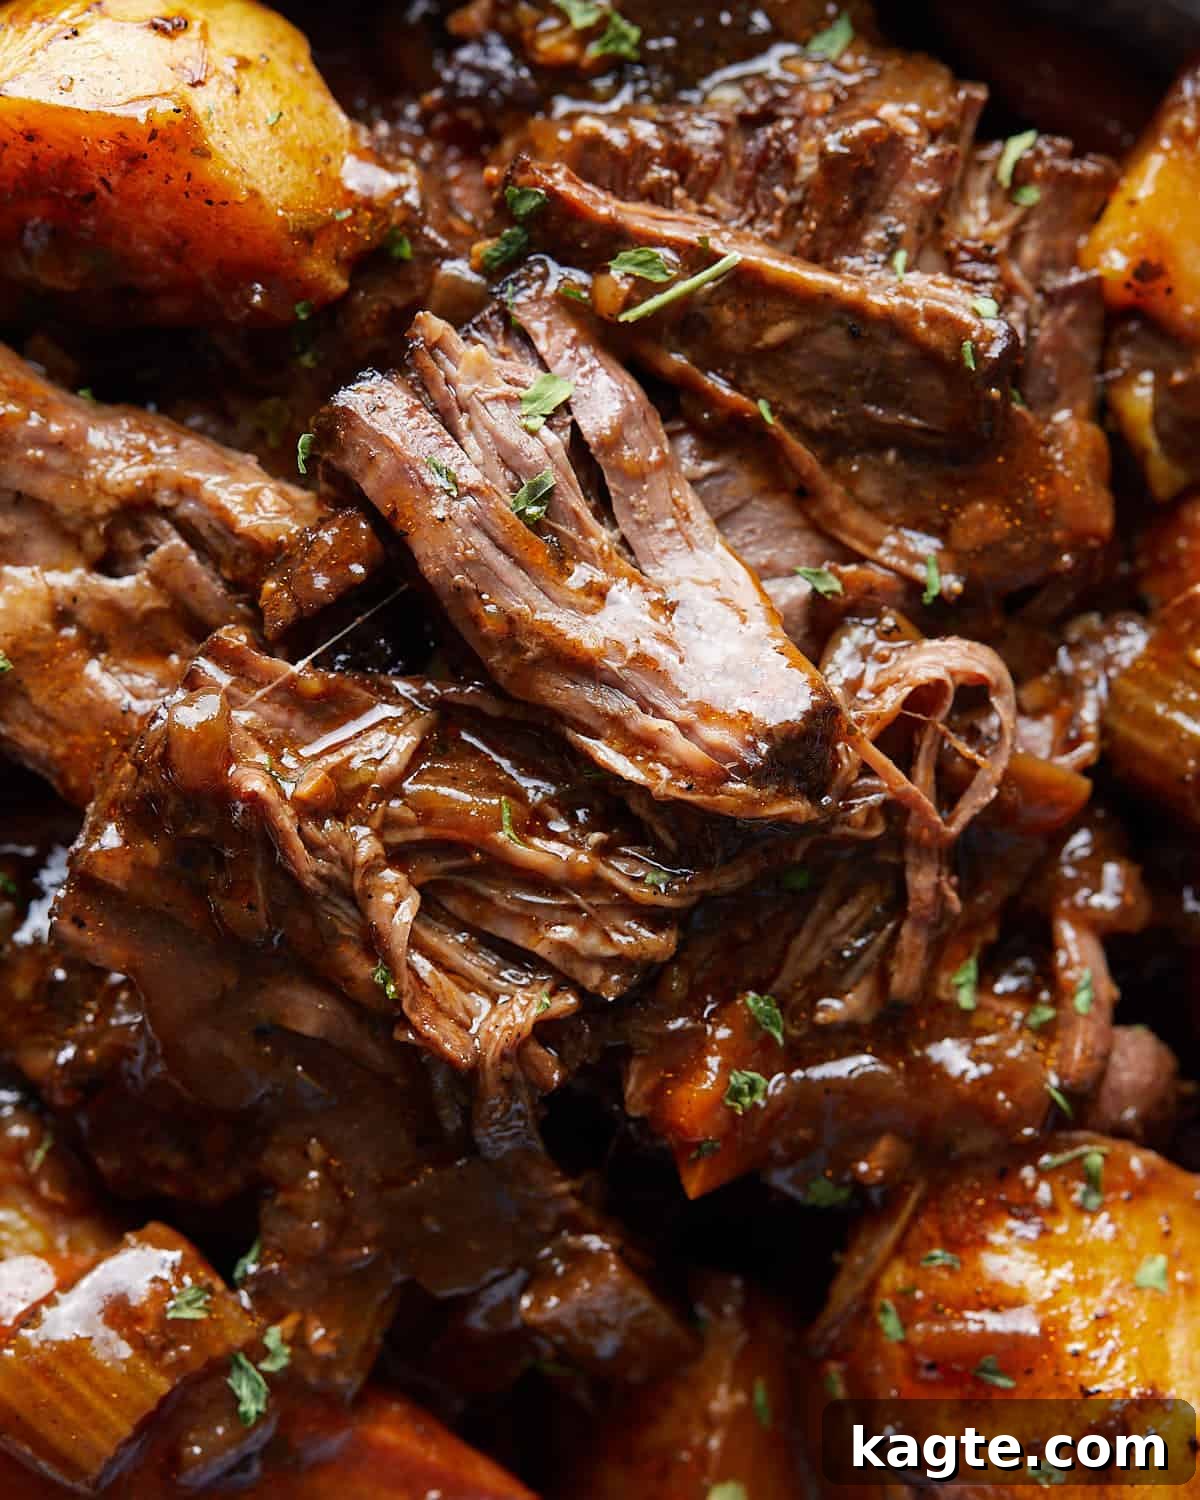
Braise Until It’s Truly Fork-Tender: Cooking times
provided in recipes are always estimates, especially for cuts like chuck
roast. The true indicator of a perfect pot roast is texture. If, after
the suggested cooking time, the roast still feels tough when tested with
a fork, it simply needs more time. Do not despair – it hasn’t overcooked!
Continue baking the pot roast, checking it in 30-minute increments, until
the meat can be easily shredded with a fork without much resistance. This
patience is rewarded with an incredibly tender, melt-in-your-mouth result.
Common Mistakes to Avoid for a Perfect Pot Roast
Even experienced cooks can fall prey to common pitfalls when making pot
roast. Being aware of these errors will help you achieve a flawless and
delicious meal every time.
-
Incomplete Searing of the Roast: One of the most common
mistakes is only searing the top and bottom surfaces of the beef. While
these two sides get a nice crust, the remaining sides remain pale and
lack the depth of flavor that searing provides. To maximize flavor, take
the time to sear all visible sides of the roast until they are deeply
browned and caramelized. This comprehensive searing creates a robust
flavor base for your gravy and contributes significantly to the overall
deliciousness of the dish. -
Adding Vegetables Too Early: It’s tempting to throw
all the ingredients into the pot at once, but adding delicate vegetables
like potatoes and carrots at the very beginning of the long braising
process will lead to overcooked, mushy, and possibly disintegrated
vegetables. They simply can’t withstand the same extended cooking time
as the tough chuck roast. To ensure your potatoes and carrots are tender
yet still hold their shape and offer a pleasant texture, always add them
later in the cooking process, typically during the final 1.5 to 2 hours
of braising. This timing allows them to cook perfectly alongside the meat,
absorbing the rich flavors without becoming soft and mealy.
Swap It Up: Delicious Variations to Try
While this classic Dutch Oven Pot Roast is perfect as is, feel free to get creative and customize
it to your liking with these flavorful variations:
-
Introduce Earthy Mushrooms: For an extra layer of
umami and a delightful textural contrast, sauté 8 ounces of sliced baby
bella or white mushrooms with the onions and celery during the initial
aromatic step. They’ll absorb the rich flavors and add a wonderful
earthiness to the gravy. -
Explore Other Root Vegetables: Don’t limit yourself to
just carrots! Experiment by replacing some or all of the carrots with
other hearty root vegetables like parsnips, turnips, or even chunks of
sweet potato. Each will bring its unique flavor and texture to the dish.
Ensure they are cut to a similar size for even cooking. -
Serve with Creamy Mashed Potatoes: Instead of cooking
the potatoes directly in the pot, you can remove them after braising and
mash them separately with butter, cream, and seasonings. Serve this
velvety mashed potato alongside the tender roast and carrots for an
extra rich and creamy twist, perfect for soaking up every last drop of
gravy. -
Repurpose Delicious Leftovers: A good pot roast often
yields fantastic leftovers. Shred any remaining roast beef and transform
it into mouthwatering French dip sandwiches, flavorful tacos, or mini
sliders. It’s an excellent way to enjoy the flavors of your pot roast
in a completely new and exciting way for lunch or another quick dinner. -
Herbaceous Boost: Add fresh sprigs of rosemary or
thyme to the pot during the braising process for a more pronounced
herbal aroma and flavor. Remove the sprigs before serving. -
Spice it Up: For a touch of heat, add a pinch of red
pepper flakes with the Italian seasoning and smoked paprika.
Stovetop Dutch Oven Cooking Method
No oven? No problem! You can still achieve a tender, flavorful pot
roast using your Dutch oven entirely on the stovetop. This method
offers more control over the simmer and is perfect for those who
prefer not to heat up their kitchen with the oven.
-
Initial Steps Remain the Same: Follow the main
recipe’s instructions precisely through the step where you add all
the liquids and return the roast to the pot (Step 5 of the main
recipe). This includes seasoning the beef, searing it, sautéing
the aromatics, building the gravy base, and deglazing with wine. -
Gentle Stovetop Simmer: Once the beef roast is
back in the pot with all the braising liquid, bring the liquid
to a very gentle simmer over medium heat. As soon as it begins
to bubble lightly, reduce the heat to the lowest setting possible
(or just enough to maintain a very gentle simmer) and cover the
pot tightly. Let it simmer slowly for 3–3½ hours.
Throughout this time, check occasionally to ensure the liquid is
not boiling rapidly; a gentle simmer is key to tenderizing the
meat without drying it out or burning the bottom. -
Introduce the Vegetables: Add the potatoes and
carrots to the pot during the last 1–1½ hours of
the total cooking time. This timing ensures they become perfectly
tender without turning mushy. Continue to simmer gently until
both the beef is fork-tender and the vegetables are soft.
Slow Cooker Method for Convenience
For ultimate convenience and a truly hands-off experience, the slow
cooker is an excellent choice for making pot roast. This method allows
you to set it and forget it, coming home to a house filled with
delicious aromas and a perfectly cooked meal.
-
Prepare the Foundation: Begin by following the main
recipe’s instructions for seasoning and searing the beef, sautéing
the vegetables, and deglazing the pot with wine (Steps 1 through 4
of the main recipe). This initial stovetop work is crucial for
building deep layers of flavor that the slow cooker alone cannot achieve. -
Assemble in the Slow Cooker: Once the deglazing
step is complete, transfer all the contents from the Dutch oven to a
large slow cooker. Add the beef broth, Worcestershire sauce, and soy
sauce. In a small separate bowl, whisk together the cornstarch and
cold water to create a smooth slurry, then stir this into the liquid
in the slow cooker. Finally, add the seared roast and any accumulated
juices from the plate to the slow cooker, nestling it into the liquid. -
Slow Cook to Perfection: Cover the slow cooker with
its lid and cook on LOW for 8–10 hours (this is
the recommended setting for the most tender results) or on HIGH for
4–6 hours. To prevent the potatoes and carrots from
becoming overly soft or mushy, add them during the last
2–3 hours of cooking, allowing them just enough time
to become tender and absorb the rich flavors. Once the beef is
fork-tender and the vegetables are cooked, your slow cooker pot roast
is ready to be enjoyed!
What to Serve with This Hearty Meal
This incredible Dutch Oven Pot Roast is a complete meal on its own,
but a few simple additions can elevate it further, making it perfect
for any occasion. Here are some comforting and complementary serving
suggestions:
-
Homemade French Bread: Nothing beats warm, crusty bread to soak up
every last drop of that rich, savory gravy. Two golden, crusty
loaves with soft, fluffy centers, made from just 4 simple
ingredients, are absolutely perfect. -
Rustic Bread: For a more artisanal touch, serve a
beginner-friendly loaf of rustic bread. Made with just 4 simple
ingredients and no sourdough starter required, it offers a chewy
texture and a hearty crust. -
Cheesy Mashed Potatoes: If you’re looking for an extra indulgent side,
these creamy and buttery mashed potatoes, loaded with two kinds of
cheese, are a dream. Easy enough for weeknights but special enough
for company. -
Yukon Gold Mashed Potatoes: A classic for a reason! Simple, flavorful, and
made with common pantry ingredients, these mashed potatoes are a
perfect, smooth complement to the robust flavors of the pot roast. -
Simple Green Salad: A light, crisp green salad
with a vinaigrette dressing can offer a refreshing contrast to the
richness of the pot roast, adding a touch of freshness. -
Steamed Green Beans or Asparagus: For an easy
vegetable side, quick-steamed green beans or asparagus spears
provide a vibrant color and fresh crunch.
SaveSaved
Dutch Oven Pot Roast
Brianna May
⭐
⭐
⭐
⭐
⭐
30 minutes
4 hours
30 minutes
5 hours
8
Equipment
-
6 Quart Dutch Oven
-
8 inch Chef’s Knife
-
Tongs
Ingredients
-
4
pounds
beef chuck roast -
1
tablespoon
Morton kosher salt -
Freshly cracked black pepper -
2
tablespoons
brown sugar -
2
tablespoons
olive oil -
1
large yellow onion
diced -
4-5
celery stalks
sliced -
10
garlic cloves
minced -
2
tablespoons
tomato paste -
1
tablespoon
Italian seasoning -
1
teaspoon
smoked paprika -
1
cup
dry red wine
(Cabernet Sauvignon or Merlot) -
2
tablespoons
Worcestershire sauce -
1
tablespoon
soy sauce -
2
cups
beef broth or stock -
¼
cup
cornstarch -
¼
cup
cold water -
2
pounds
yellow potatoes
cut into 1½-inch pieces -
1
pound
whole carrots
peeled and cut on a bias into 2–3-inch pieces
Instructions
-
Prep the beef: Preheat the oven to 325°F. Pat the chuck roast dry with paper towels. In a small bowl, mix together the salt and brown sugar. Season the roast generously on all sides with the mixture and plenty of fresh cracked black pepper.
-
Sear the roast: Heat the olive oil in a large 6-quart Dutch oven over medium heat. Once the oil is hot and shimmering, add the roast and sear for 3–4 minutes per side, until deeply browned. Transfer the roast to a plate and set aside.
-
Sauté the vegetables: Reduce the heat to medium. Add the onion and celery to the pot and sauté for 5–6 minutes, until softened and lightly golden. Stir in the garlic, tomato paste, Italian seasoning, and smoked paprika. Cook for 1–2 minutes, until fragrant and the tomato paste darkens slightly.
-
Deglaze the pot: Pour in the red wine, scraping up any browned bits from the bottom of the pot with a wooden spoon. Let it simmer for 3–4 minutes, until slightly reduced.
-
Add the liquids and roast: Stir in the Worcestershire sauce, soy sauce, and beef broth. In a small bowl, whisk together the cornstarch and water, then stir it into the pot. Return the roast and any accumulated juices to the Dutch oven. Bring the liquid just to a simmer, then cover and transfer to the oven. Bake for 2–2½ hours.
-
Add the vegetables: Carefully remove the pot from the oven and add the potatoes and carrots, nestling them around the roast. Cover and return to the oven for 1½–2 hours, or until the beef is fork-tender and the vegetables are soft.
Did you make this recipe?
Leave a comment below!
Notes
- Chuck Roast: Best cut for braising; becomes tender and flavorful. Brisket, shoulder, or bottom round can also be used.
- Morton Kosher Salt: All of my recipes are tested with Morton kosher salt unless noted otherwise. It’s the best salt for everyday cooking because of its size and flavor. If using table salt, reduce the amount. I highly recommend picking up some kosher salt next time you’re at the store!
- Red Wine: Deglazes the pot and adds richness. Sweeter reds, like Pinot Noir or a red blend, also work. Substitute the same amount of beef broth and 1 tablespoon of balsamic vinegar if avoiding alcohol.
- Braise the beef until it’s fork-tender: Cooking times are estimates — if the roast is still tough, it needs more time. Continue baking in 30-minute increments until tender; it hasn’t overcooked.
Nutrition
Calories:
633
kcal
|
Carbohydrates:
39
g
|
Protein:
48
g
|
Fat:
30
g
|
Saturated Fat:
12
g
|
Polyunsaturated Fat:
3
g
|
Monounsaturated Fat:
16
g
|
Trans Fat:
2
g
|
Cholesterol:
156
mg
|
Sodium:
1438
mg
|
Fiber:
5
g
|
Sugar:
9
g
Nutrition information is automatically calculated, so should only be used as an approximation.
Recipe FAQs
For a 4-pound chuck roast, the total cooking time in a Dutch oven is
typically around 4 to 4.5 hours. This includes an initial 2–2.5 hours
of braising, followed by another 1.5–2 hours after adding the
vegetables. Keep in mind that cooking times are estimates and can
vary based on your oven’s calibration and the exact size and thickness
of your roast. Always cook until the beef is fork-tender.
Both Dutch ovens and slow cookers can produce excellent pot roasts,
and the “better” method often comes down to personal preference and
your schedule. A Dutch oven, especially when used in the oven,
requires fewer dishes as all searing and braising happens in one pot,
and generally offers a slightly faster cooking time with more control
over browning. A slow cooker, on the other hand, excels in
convenience, allowing for longer, completely hands-off cooking, which
is perfect for busy days when you need to prepare dinner in advance.
No, your pot roast does not need to be fully submerged in the
braising liquid. For optimal results, the roast should sit partially
in the liquid, roughly halfway or slightly more. This allows the top
of the roast to slowly steam while the bottom simmers, creating a
beautifully tender result without boiling the meat. The steam
circulating within the covered Dutch oven helps cook the exposed
portion.
If your pot roast is tough, it almost always means it hasn’t cooked
long enough. Tough cuts of beef like chuck roast require extended,
slow braising to break down their connective tissues into gelatin,
which is what makes the meat tender. Don’t be afraid to keep cooking!
Test the beef with a fork; if it doesn’t easily shred, simply return
the covered Dutch oven to the oven and continue baking in 30-minute
increments until it reaches that desired fork-tender consistency. It
is incredibly difficult to overcook a pot roast to the point of
dryness when braising in ample liquid.
Absolutely! Pot roast often tastes even better the next day as the
flavors have more time to meld and deepen. You can prepare the entire
dish, allow it to cool, then store it covered in the refrigerator for
up to 3-4 days. Reheat gently on the stovetop or in the oven until
warmed through.
Store any leftover pot roast, along with its gravy and vegetables,
in an airtight container in the refrigerator for 3-4 days. To reheat,
gently warm it on the stovetop over low heat until simmering, or in a
covered oven-safe dish at 300°F (150°C) until heated through. You may
need to add a splash of beef broth or water to thin the gravy if it
has thickened too much.
More Delightful Beef Recipes
Fall
Dutch Oven Pot Roast
Side Dish
What To Serve With Mashed Potatoes (25 Dinner Ideas)
Main
Lebanese Green Bean Stew with Beef (Loubieh Bi Zeit)
Main
Juicy Garlic Butter Steak Bites Recipe
Did you make this recipe?
If you try this recipe, please leave a star rating in the recipe card below and/or comment! I always appreciate your feedback.
Follow me on all of the platforms below.
The 10 Best Worcestershire Sauce Substitutes
Worcestershire sauce, with its unique blend of flavors, adds depth
and richness to many dishes. It enhances everything, from marinades…
Read More