
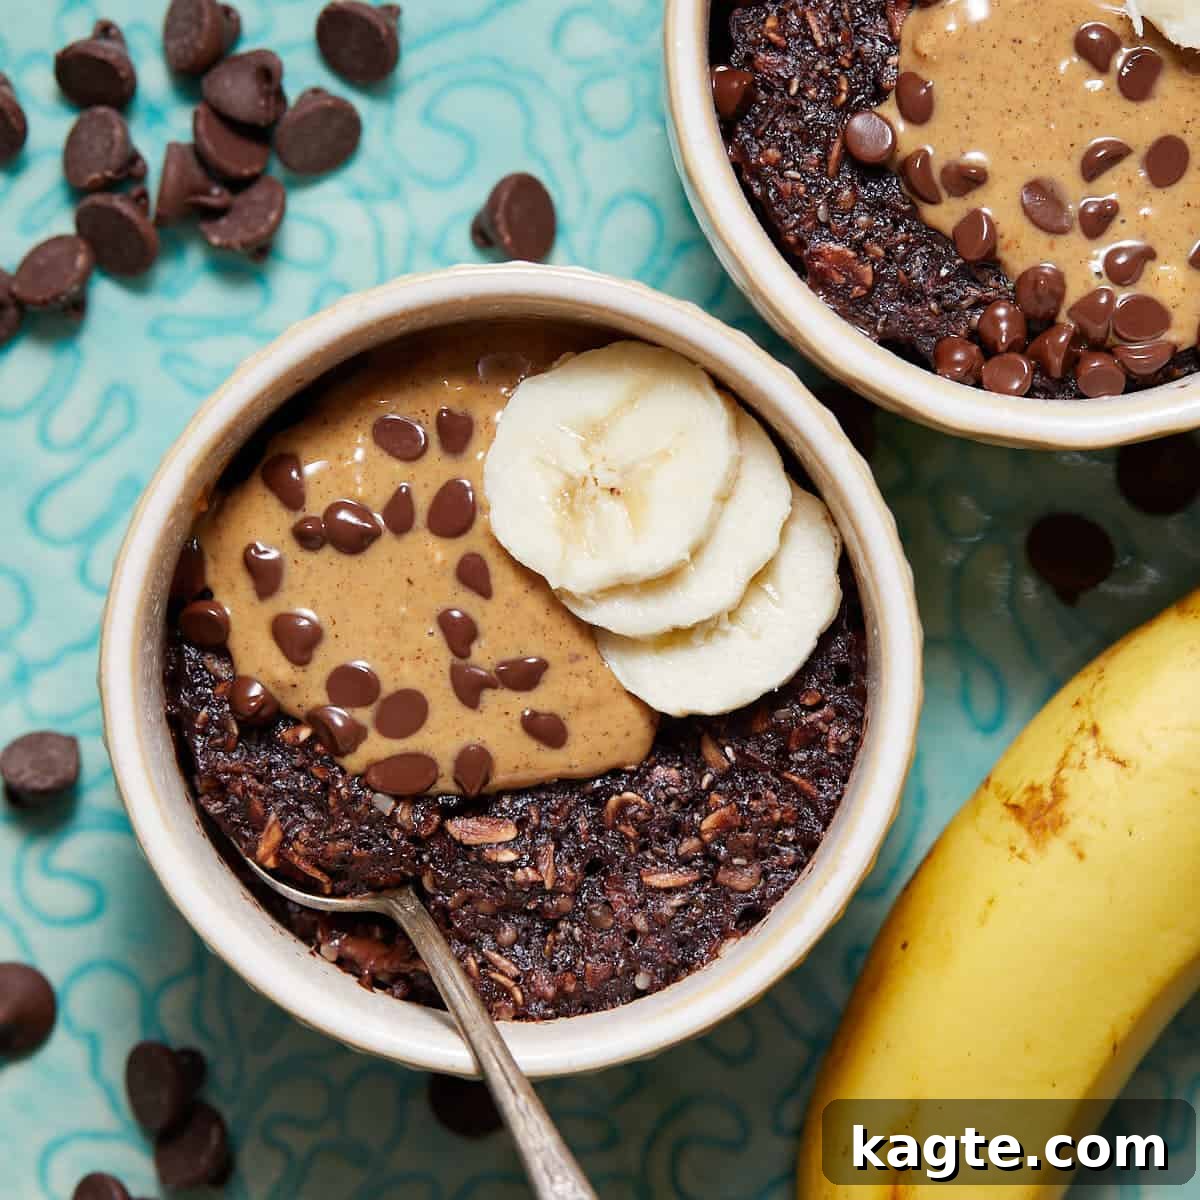
Start your day right with these incredibly simple yet incredibly satisfying Microwave Baked Oats. Perfect for busy mornings, this superfood-packed breakfast can be ready in under ten minutes, offering a healthy and delicious meal without the need for a blender. It’s a convenient, nutritious solution for anyone looking to save time without compromising on flavor or goodness.
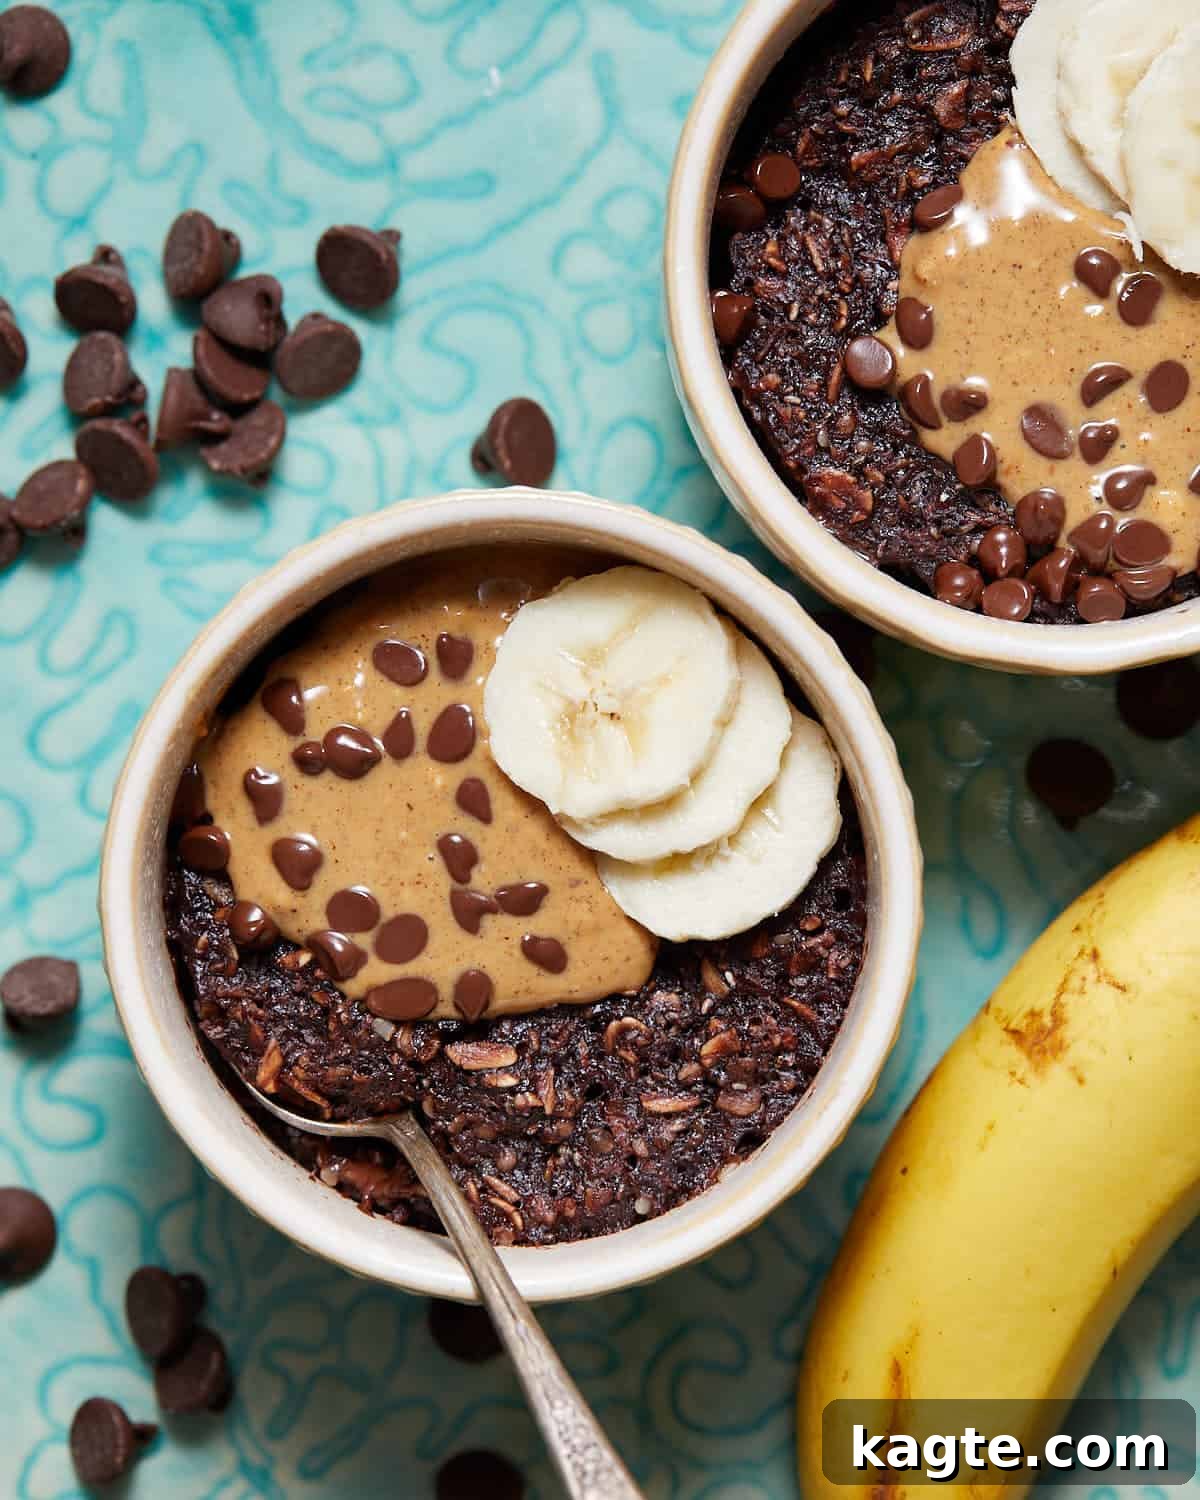
It’s a universally acknowledged truth that breakfast is often hailed as the most important meal of the day. Yet, for many, mornings are a whirlwind of activity, leaving little time to prepare a wholesome meal. The unfortunate reality is that a significant number of people end up skipping breakfast altogether or opting for less nutritious, on-the-go alternatives due to time constraints.
However, prioritizing a healthy breakfast doesn’t have to be a daunting task, even with a packed schedule. With a little planning and the right recipes, you can enjoy a nutritious meal that fuels your day without adding stress to your morning routine. This is where our Microwave Baked Oats come into play – a game-changer for anyone seeking a quick, healthy, and utterly delicious start to their day.
I’m thrilled to finally share my favorite recipe for baked oats prepared in the microwave. This dish is my secret weapon for those mornings when I crave something wholesome, satisfying, and incredibly fast. Baked oats are a fantastic choice, centered around heart-healthy old-fashioned rolled oats, which are known for their fiber content and ability to keep you feeling full and energized. What’s more, these oats are so delightful that I often prepare a double batch, saving any leftovers for a convenient and equally delicious breakfast the next day. This recipe not only simplifies your mornings but also offers a versatile base for countless flavor combinations.
Table of Contents
- Why You’ll Love This Recipe
- Ingredients & Substitutions
- How to Make Microwave Baked Oats
- Recipe Serving Suggestions
- Expert Tips for Perfect Baked Oats
- Additions & Variations
- Recipe FAQs
- More Breakfast Recipes
- Microwave Baked Oats Recipe Card
Why You’ll Love These Microwave Baked Oats
- Quick & Effortless Preparation – Say goodbye to lengthy morning routines! This recipe is incredibly fast and straightforward, making it the ideal choice for your busiest mornings. With minimal prep and cooking time, you can enjoy a warm, homemade breakfast in literally minutes. It’s perfect for students, professionals, or anyone who values efficiency without sacrificing quality.
- A Powerhouse of Nutrition – Beyond its convenience, this baked oats recipe is a nutritional marvel. It’s packed with nutrient-dense ingredients like ripe bananas, wholesome old-fashioned oats, and superfoods such as chia and/or hemp seeds. Coconut oil adds healthy fats, contributing to a balanced meal that keeps you satisfied and energized throughout your morning. It’s a breakfast that truly nourishes your body.
- No Blender or Oven Required – One of the biggest advantages of this recipe is its simplicity. You don’t need any specialized equipment like a blender, nor do you have to preheat an oven. Since this recipe relies solely on a microwave, you can whip up these delicious baked oats just about anywhere you have access to the appliance. This includes your home kitchen, your office cafeteria, or even a college dorm room, making it incredibly versatile and accessible.
Essential Ingredients & Smart Substitutions
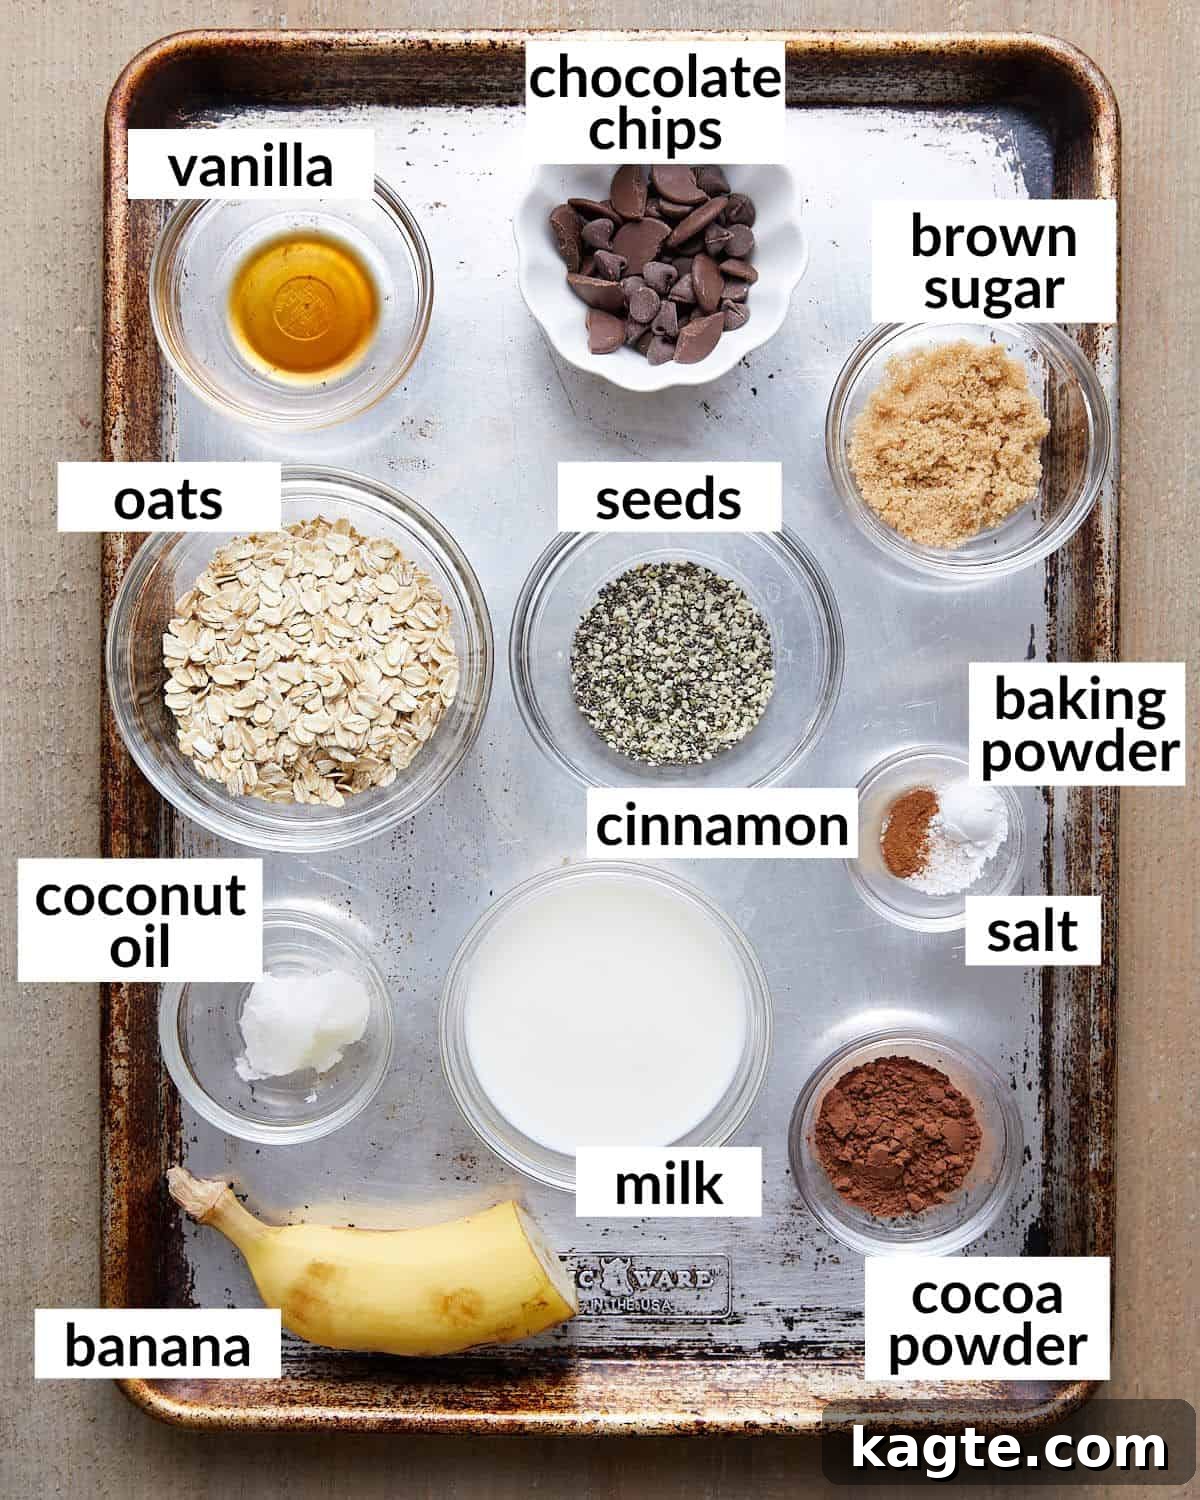
Crafting the perfect batch of microwave baked oats begins with a handful of simple, wholesome ingredients. Here’s a closer look at what you’ll need and how you can tailor them to your preference:
- Old-Fashioned Rolled Oats: These are the foundation of our baked oats. Unlike instant oats, old-fashioned oats provide a chewier texture and hold up better during baking, contributing to that satisfying ‘baked’ consistency. They are rich in fiber, which aids digestion and promotes a feeling of fullness.
- Ripe Banana: A key ingredient that adds natural sweetness, moisture, and a wonderful binding quality. The riper the banana, the sweeter and more easily mashed it will be, imparting a delicious flavor to your oats. If you don’t have a banana, you could try an equivalent amount of unsweetened applesauce or pumpkin puree, though the flavor profile will change.
- Brown Sugar: This adds a deep, molasses-rich sweetness that complements the oats and banana beautifully. For alternative sweeteners, feel free to use granulated sugar, maple syrup, honey, or agave nectar. Adjust the amount to your desired level of sweetness.
- Coconut Oil: Provides moisture and a subtle richness to the oats. It also contributes to a slightly crispier edge if your ramekin allows for it. You can substitute coconut oil with melted butter, olive oil, or any neutral-flavored oil like avocado oil.
- Unsweetened Cocoa Powder: For a delightful chocolatey twist! This gives the baked oats a rich, deep flavor without added sugar. If you prefer a milder chocolate taste, you can reduce the amount or use a pre-sweetened cocoa powder (adjusting brown sugar accordingly).
- Hemp or Chia Seeds: These tiny powerhouses are loaded with omega-3 fatty acids, fiber, and protein. They also help to thicken the oats, creating a lovely texture. You can use either one or a combination of both. Flax seeds are another excellent alternative if you don’t have hemp or chia.
- Vanilla Extract: A splash of vanilla enhances all the other flavors, adding a warm, comforting aroma and taste. Don’t skip this for that extra layer of deliciousness.
- Baking Powder: This is crucial for giving the baked oats a light, fluffy, and slightly cake-like texture, preventing them from becoming too dense.
- Pinch of Salt & Cinnamon: Salt balances the sweetness and brings out the flavors, while cinnamon adds a warm, aromatic spice that pairs wonderfully with banana and oats. Feel free to increase the cinnamon or add other spices like nutmeg or a pinch of cardamom.
- Milk: You have complete flexibility here! Use any milk you prefer – dairy milk (whole, skim, etc.) or your favorite non-dairy alternatives like almond milk, oat milk, soy milk, or coconut milk. Water can also be used in a pinch, though milk will yield a creamier result.
- Chocolate Chips: These are optional but highly recommended for an extra burst of indulgence. All-natural semi-sweet dark chocolate chips work best, melting into gooey pockets of flavor. You can incorporate sweeter or flavored chocolate chips, white chocolate chunks, or even finely chopped chocolate bars as desired.
- Peanut Butter: Primarily used for serving, a dollop of creamy peanut butter on top of your warm baked oats is pure bliss. Feel free to substitute with your favorite nut butter or spread, such as almond butter, cashew butter, or even a decadent swirl of Nutella. If you’re not a fan of nut butters, simply omit this topping.
For a comprehensive list of exact ingredient amounts, please refer to the recipe card below.
Mastering Microwave Baked Oats: A Step-by-Step Guide
Creating these delightful microwave baked oats is remarkably simple. Even if you’re new to cooking, you’ll find this recipe easy to follow and incredibly rewarding. Here’s a quick overview of the process, followed by detailed instructions to ensure your success.
Quick Overview
- Begin by mashing and combining all the dry ingredients, banana, and coconut oil in a bowl, ensuring a uniform mixture.
- Next, stir in your chosen milk and chocolate chips until everything is well incorporated.
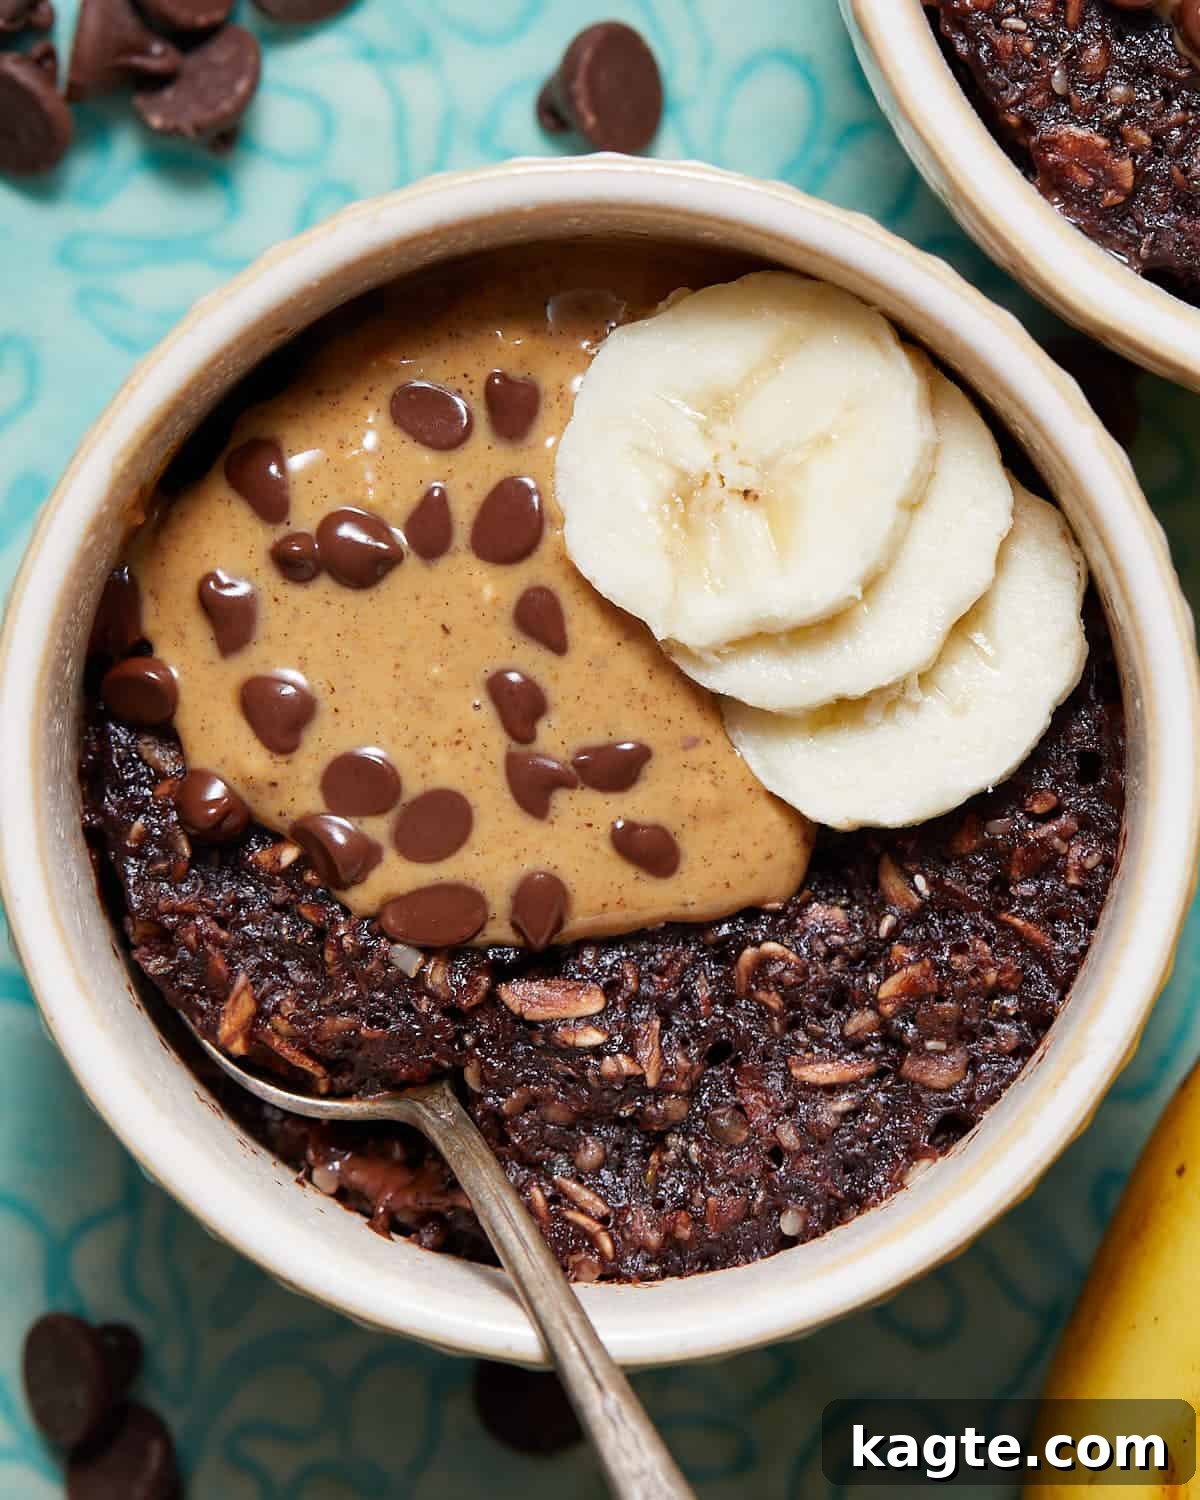
- Pour the prepared oat mixture into greased ramekins or microwave-safe bowls, then microwave briefly until set. Finish with a generous dollop of peanut butter or your preferred topping.
Step-by-Step Instructions for Fluffy Microwave Baked Oats
Pro Tip: Don’t just mix, *mash*! Mashing the oats and banana vigorously is key to achieving that desirable “blended” texture without needing a separate appliance. This extra step makes a big difference in the final consistency.
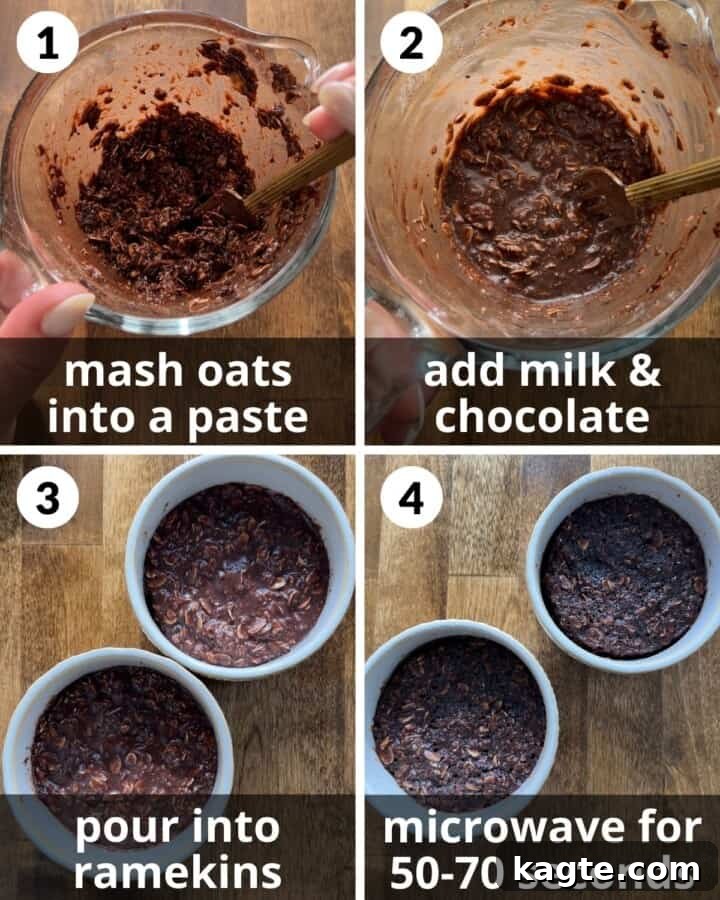
Step 1: Prepare the Base Mixture. In a small mixing bowl or a liquid measuring cup (which offers a convenient spout for pouring), use a fork to thoroughly mash and combine the old-fashioned oats, ripe banana, brown sugar, melted coconut oil, unsweetened cocoa powder, hemp or chia seeds, vanilla extract, baking powder, a pinch of salt, and cinnamon. It’s important to spend a couple of minutes mashing the oats and banana together. This breaks down the integrity of the oats sufficiently to give them a smoother, more ‘blended’ consistency, resembling traditional baked oats without the hassle of a blender.
Step 2: Add Liquids and Chocolate Chips. Once your dry and base ingredients are well mashed and combined, pour in your choice of milk (or water) and add the chocolate chips. Stir the mixture until everything is uniformly incorporated. Ensure the chocolate chips are distributed throughout so you get a delightful burst of chocolate in every bite.
Step 3: Portion into Ramekins. Lightly grease two small ramekins or microwave-safe bowls with cooking oil spray or a dab of butter. This prevents sticking and ensures your baked oats slide out easily. Carefully divide the oat mixture evenly between the two prepared ramekins. Don’t overfill them, as the oats will rise slightly during microwaving.
Step 4: Microwave and Serve. Place one ramekin at a time into the microwave. Cook for approximately 50 to 70 seconds. The exact time will depend significantly on your microwave’s wattage and your desired consistency. You want the oats to be set but still moist and tender in the center. A toothpick inserted should come out mostly clean. Once cooked, carefully remove the hot ramekin and immediately top the warm baked oats with a generous layer of peanut butter. Serve immediately and enjoy!
Elevate Your Oats: Delicious Serving Suggestions
While these microwave baked oats are fantastic on their own, adding toppings can transform them into an even more decadent and personalized breakfast experience. Here are some of my favorite ways to garnish and enhance these “blended” baked oats:
- Fresh Fruit: Brighten up your oats with a burst of freshness. Sliced berries (strawberries, blueberries, raspberries), banana slices, kiwi, or pomegranate seeds add natural sweetness, vitamins, and a lovely texture.
- Nut Butter: A classic pairing! Besides peanut butter, consider almond butter, cashew butter, or hazelnut butter for different flavor profiles and added healthy fats and protein. A drizzle of tahini can also offer a unique, savory-nutty note.
- Whipped Cream or Coconut Cream: For an extra special treat, a dollop of whipped cream (dairy or coconut-based for a vegan option) adds a luxurious, creamy texture and light sweetness.
- Extra Chocolate Chips: Because you can never have too much chocolate! Sprinkle a few more chocolate chips on top just after microwaving so they melt slightly, creating gooey pockets. Shaved chocolate or cocoa nibs also work beautifully.
- Chopped Nuts: Add crunch and healthy fats with a sprinkle of chopped walnuts, pecans, almonds, or even pistachios. Toasting them lightly beforehand can enhance their flavor.
- Flaky Sea Salt: A tiny pinch of flaky sea salt can magically enhance the sweetness and chocolatey notes, creating a sophisticated sweet-and-salty balance.
- Maple Syrup or Honey: If you prefer a sweeter dish or want to add a final touch of indulgence, a drizzle of pure maple syrup, honey, or agave nectar can be delightful.
- Granola: For an added layer of texture and crunch, sprinkle some homemade or store-bought granola on top. Choose a flavor that complements your oats, like cinnamon almond or berry blend.
- Shredded Coconut: Toasted shredded coconut adds a tropical flavor and a lovely chewiness.
Expert Tips for Perfect Microwave Baked Oats Every Time
Achieving the perfect texture and flavor for your microwave baked oats is simple with a few insider tricks. Follow these expert tips to ensure your breakfast is always a delicious success:
- Prioritize Old-Fashioned Rolled Oats: While instant oats are incredibly convenient for a quick bowl of oatmeal, they are not the best choice for baked oats. Instant oats are pre-cooked and finely cut, which can result in a mushy or gummy texture when microwaved in this recipe. Flatter, old-fashioned rolled oats, however, provide the ideal chewiness and structure needed to create a satisfying, cake-like consistency.
- The Art of Mashing: Don’t underestimate the power of a good mash! During Step 1, dedicate a solid couple of minutes to thoroughly mashing the oats and banana together with a fork. This crucial step breaks down the integrity of the oats, allowing them to better absorb liquids and meld with the banana. The result is a wonderfully smooth texture that mimics “blended” baked oats, but without the extra cleanup of a blender.
- Know Your Microwave’s Wattage: Microwave cooking times can vary significantly based on the wattage of your appliance. A higher wattage microwave will cook faster, while a lower wattage one may require a bit more time. Start with the lower end of the recommended cooking time (50 seconds) and add 10-15 second increments until your oats are just set. Overcooking can lead to dry or rubbery oats.
- Choose the Right Ramekin or Bowl: Ensure you use a microwave-safe ramekin or bowl that is large enough to accommodate the oats as they rise slightly during cooking. A 6-ounce to 8-ounce ramekin is typically ideal for a single serving. Greasing it well with cooking spray or butter is essential for easy removal.
- Don’t Overmix Once Liquids Are Added: Once you’ve mashed the oats and banana, and added the milk and chocolate chips, stir just until combined. Excessive mixing at this stage can develop the gluten in the oats, leading to a tougher texture.
- Check for Doneness: The oats are done when the center is mostly set and a toothpick inserted comes out clean or with moist crumbs. They should still be slightly moist and soft. Remember, they will continue to set a bit as they cool.
- Batch Prep for the Week: While this recipe is quick, you can make your mornings even smoother by prepping the dry ingredients in small containers ahead of time. When ready to eat, just add the banana, wet ingredients, mash, and microwave!
- Prevent Runny Oats: If your oats turn out too runny, it’s likely due to too much liquid. You can easily fix this by adding a small amount of extra old-fashioned oats or a teaspoon of protein powder (vanilla or unflavored works well) to the mixture before microwaving. This will help absorb excess moisture and thicken the consistency.
Unleash Your Creativity: Exciting Additions & Variations
The beauty of microwave baked oats lies in their incredible versatility. This base recipe is a canvas for your culinary imagination, allowing you to customize flavors and nutritional profiles to suit your mood or dietary needs. Here are some fantastic ideas to get you started:
- Seasonal Fruit Sensations – Beyond the classic banana, experiment with other fruits. In the fall, try grated apple or pumpkin puree with pumpkin spice. In the summer, fresh berries like blueberries or raspberries are wonderful. For a tropical twist, diced mango or pineapple could be delicious. Dried fruits like raisins, cranberries, or chopped dates can also be incorporated for concentrated sweetness and chewiness.
- Nutty Enhancements – Introduce a variety of nuts for added texture and healthy fats. Chopped walnuts, pecans, almonds, or even pistachios can be folded into the mixture or sprinkled on top. For an extra treat, add a tablespoon of your favorite nut butter directly into the oat mixture before microwaving for a richer flavor.
- Boost with Protein Powder – For those looking to increase their protein intake, adding a scoop of your favorite protein powder is an excellent modification. Vanilla-flavored protein powder is a popular choice as it complements most oat flavors. You can even substitute cocoa powder with chocolate-flavored protein powder for a double dose of chocolate and protein. Protein powder also serves as a brilliant thickening agent if your oats tend to be a bit mushy.
- Spice It Up – Don’t limit yourself to just cinnamon! A pinch of nutmeg, cardamom, ginger, or even a dash of allspice can dramatically alter the flavor profile. For a sophisticated touch, try a tiny bit of lavender or orange zest.
- Citrus Zest – Brighten up your oats with the zest of lemon or orange. It adds a fresh, aromatic lift that can cut through the richness and wake up your palate.
- Coffee or Espresso Powder – For a mocha-flavored treat, add a teaspoon of instant coffee or espresso powder to the mixture. It deepens the chocolate flavor and adds a subtle coffee kick.
- Extract Variety – Swap vanilla extract for almond extract, peppermint extract (especially around holidays), or coconut extract for different aromatic experiences.
- Vegan & Dairy-Free Options – This recipe is naturally very adaptable. By using a plant-based milk (like almond, oat, or soy milk) and ensuring your chocolate chips are dairy-free, this recipe easily becomes a delicious vegan breakfast. The coconut oil already makes it dairy-free.
Frequently Asked Questions About Microwave Baked Oats
Yes, absolutely! The core ingredients for this recipe, such as old-fashioned oats (ensure they are certified gluten-free if you have a severe allergy), coconut oil, brown sugar, and chia/hemp seeds, are naturally gluten-free. For a truly gluten-free meal, just make sure to choose organic peanut butter and chocolate chips that do not contain any hidden additives, preservatives, or cross-contamination warnings. Always check labels to be sure, especially if catering to strict dietary needs.
For best results and to prevent overflow as the oats rise, I recommend using a ramekin that holds approximately 6 to 8 ounces. My personal favorite for this recipe is a 7-ounce white ramekin, which provides ample space for a single serving. If you don’t have ramekins, any microwave-safe bowl of a similar capacity will work perfectly.
Storing leftovers is simple. Since these oats typically contain dairy (if using dairy milk) and banana, they should be stored in the refrigerator. You can keep the baked oats directly in their ramekin; just ensure the top is tightly sealed with plastic wrap or aluminum foil to maintain freshness and prevent them from drying out. They will remain fresh for up to 2-3 days. Reheat gently in the microwave if desired, or enjoy cold.
Absolutely! The cooking method (microwave vs. oven vs. stovetop) has virtually no impact on the nutritional value of the oats or other ingredients. Nutrient-rich oats are consistently among the healthiest, tastiest, and most versatile natural superfoods available. By using the microwave, you achieve nearly the exact same delicious results and health benefits as traditional baking methods, but in a fraction of the time. It’s an equally nutritious and much faster way to enjoy a wholesome breakfast.
No one wants soggy baked oats! If your mixture turns out too wet or gummy, the most common culprit is adding a little too much milk or water. The good news is, it’s an easy fix! To thicken the baked oats mixture, simply stir in an extra tablespoon or two of old-fashioned rolled oats. Alternatively, you can incorporate a scoop of protein powder (unflavored or vanilla works best), which not only helps absorb excess moisture but also boosts the protein content, giving you a more satisfying and firm result.
While the beauty of this recipe is its speed, you can certainly do some prep work in advance. You can mix all the dry ingredients (oats, brown sugar, cocoa powder, seeds, baking powder, salt, cinnamon) in a jar or container. In the morning, simply add the mashed banana, coconut oil, vanilla, milk, and chocolate chips, stir, and microwave. You can also mix the entire batter the night before and store it covered in the refrigerator. Just give it a good stir in the morning before microwaving, and you might need an extra 10-15 seconds of cook time since it will be cold.
This recipe is designed for two servings, but you can easily scale it up! Just double or triple the ingredients. However, remember to microwave one ramekin at a time for even cooking. For larger batches, consider if oven-baked oats might be more efficient for simultaneous cooking, but for convenience, microwaving individual portions still works great.
More Delicious Breakfast Recipes to Try
If you’ve enjoyed these quick and healthy microwave baked oats, you’ll surely love exploring more breakfast options that are both easy to make and incredibly satisfying. Here are some other popular recipes to inspire your morning meals and culinary adventures:
Discover Your Next Favorite Breakfast!
Fall
20 Sweet Pumpkin Recipes for Fall (From Breakfast to Dessert)
Embrace the cozy flavors of autumn with this collection of delightful pumpkin recipes, ranging from hearty breakfast bakes to indulgent desserts.
Breakfast
Blueberry Coffee Cake with Greek Yogurt & Streusel
Indulge in a moist and flavorful blueberry coffee cake, enhanced with the tang of Greek yogurt and a perfectly crumbly streusel topping, ideal for weekend brunches.
Bread
Chocolate Chunk Banana Bread (Easy & Moist)
A guaranteed crowd-pleaser, this easy and incredibly moist chocolate chunk banana bread is loaded with rich chocolate and ripe banana flavor, perfect for any time of day.
Side Dish
What To Serve With Quiche (20 Side Dishes)
Explore a curated list of 20 delectable side dishes that perfectly complement the rich and savory flavors of quiche, making your meal complete.
Shop my Amazon Storefront for kitchen essentials!
If you try this delightful recipe, please consider leaving a star rating in the recipe card below and/or dropping a comment! I genuinely value your feedback. Stay connected and find more culinary inspiration by following me on Pinterest, Facebook & Instagram.
Microwave Baked Oats
These flavorful and superfood-packed Microwave Baked Oats are a busy morning lifesaver and are ready to serve in under ten minutes. This recipe does not require a blender.
Equipment
-
7 ounce White Ramekins
-
Pyrex Liquid Measuring Cups
Ingredients
- 1/2 cup old-fashioned rolled oats
- 1/2 banana, peeled
- 1 1/2 Tablespoons brown sugar*
- 1 Tablespoon coconut oil
- 1 Tablespoon unsweetened cocoa powder
- 2-3 teaspoons hemp or chia seeds
- 1/2 teaspoon vanilla extract
- 1/2 teaspoon baking powder
- pinch of salt & cinnamon
- 3-4 Tablespoons milk or water*
- chocolate chips*
- peanut butter for serving
Instructions
- In a small mixing bowl or liquid measuring cup, using a fork, mash together the oats, banana, brown sugar, coconut oil, cocoa powder, seeds, vanilla, baking powder, salt, and cinnamon.
- Pour in the milk and chocolate chips, stirring until well combined.
- Grease 2 small ramekins with cooking oil spray. Divide the oat mixture evenly between the ramekins.
- Microwave one at a time for 50-70 seconds, depending on your microwave and desired consistency. Top warm oats with a layer of peanut butter.
Notes
- Brown Sugar: Swap out brown sugar with granulated sugar or other natural sweeteners like maple syrup, honey, or agave nectar.
- Milk: Feel free to use water or your preferred type of milk (dairy or non-dairy) when making baked oats.
- Chocolate Chips: All-natural semi-sweet dark chocolate chips work best for this recipe. That said, you can incorporate sweeter or flavored chocolate chips as desired.
- Peanut Butter: Substitute peanut butter with your favorite nut butter or spread, such as almond or hazelnut butter (or maybe even Nutella, yum!). Or, omit topping your oats with nut butter at all.
- Avoid instant oats. While instant oats are easily accessible and an excellent option for making oatmeal when crunched on time, it is best to use flatter old-fashioned oats.
- Mash the oats. Spend a couple of minutes mashing the oats and banana during Step 1. Breaking up the oats gives them a blended consistency without having to go to the trouble of using a blender.
Nutrition
Calories: 238kcal |
Carbohydrates: 34g |
Protein: 5g |
Fat: 11g |
Saturated Fat: 7g |
Polyunsaturated Fat: 2g |
Monounsaturated Fat: 1g |
Trans Fat: 0.01g |
Cholesterol: 3mg |
Sodium: 120mg |
Fiber: 5g |
Sugar: 14g
Nutrition information is automatically calculated, so should only be used as an approximation. For precise dietary needs, consulting a professional is recommended.