
Crispy Cast Iron Corn: A Southern-Inspired Side Dish
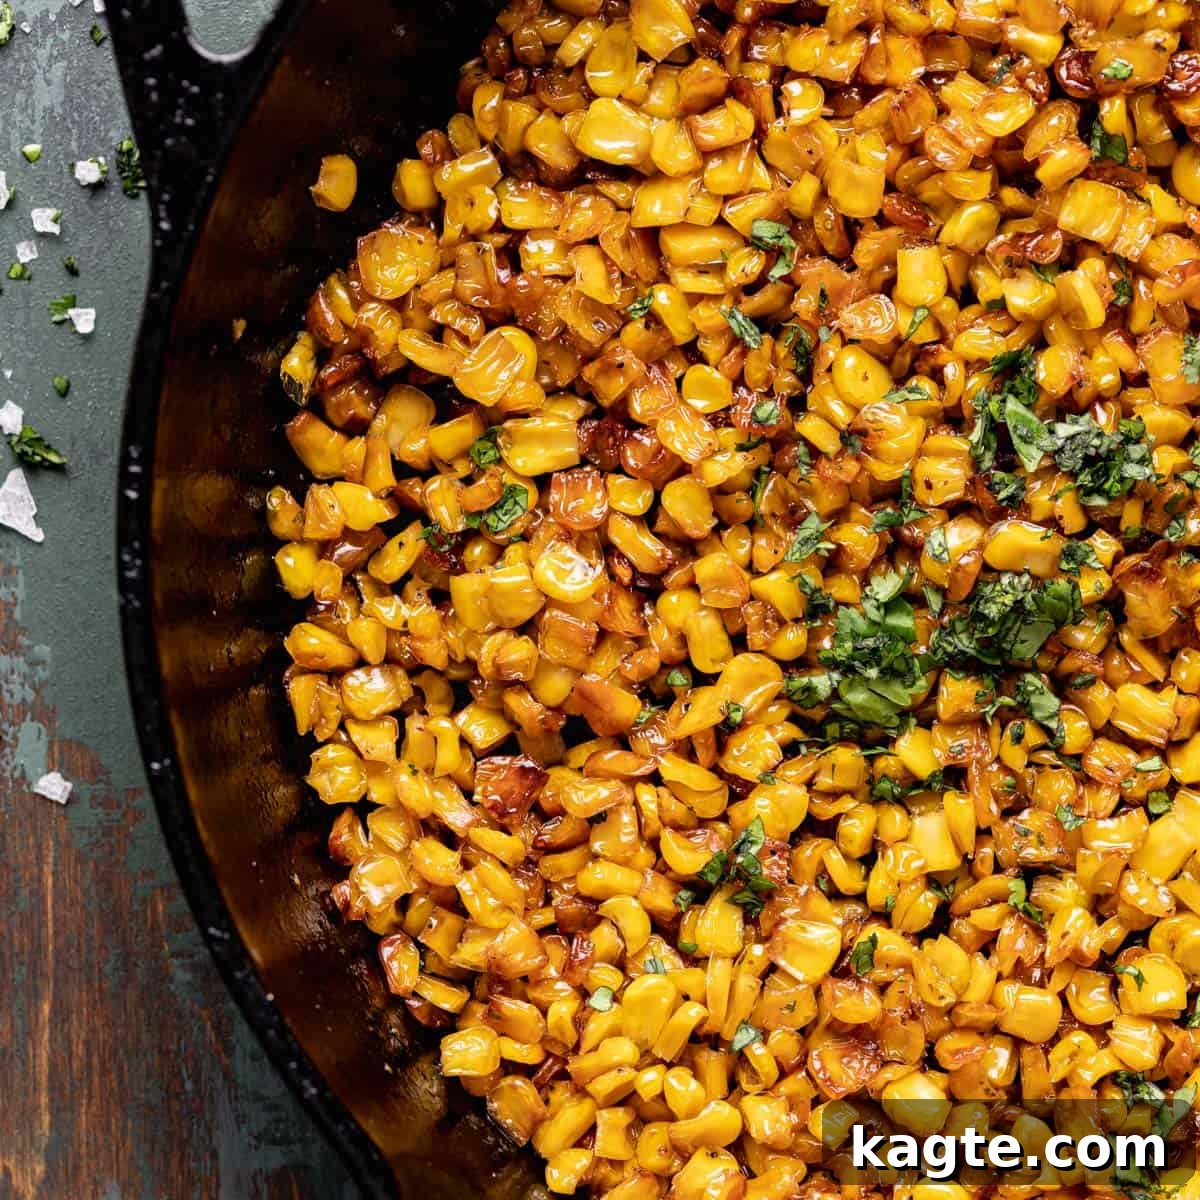
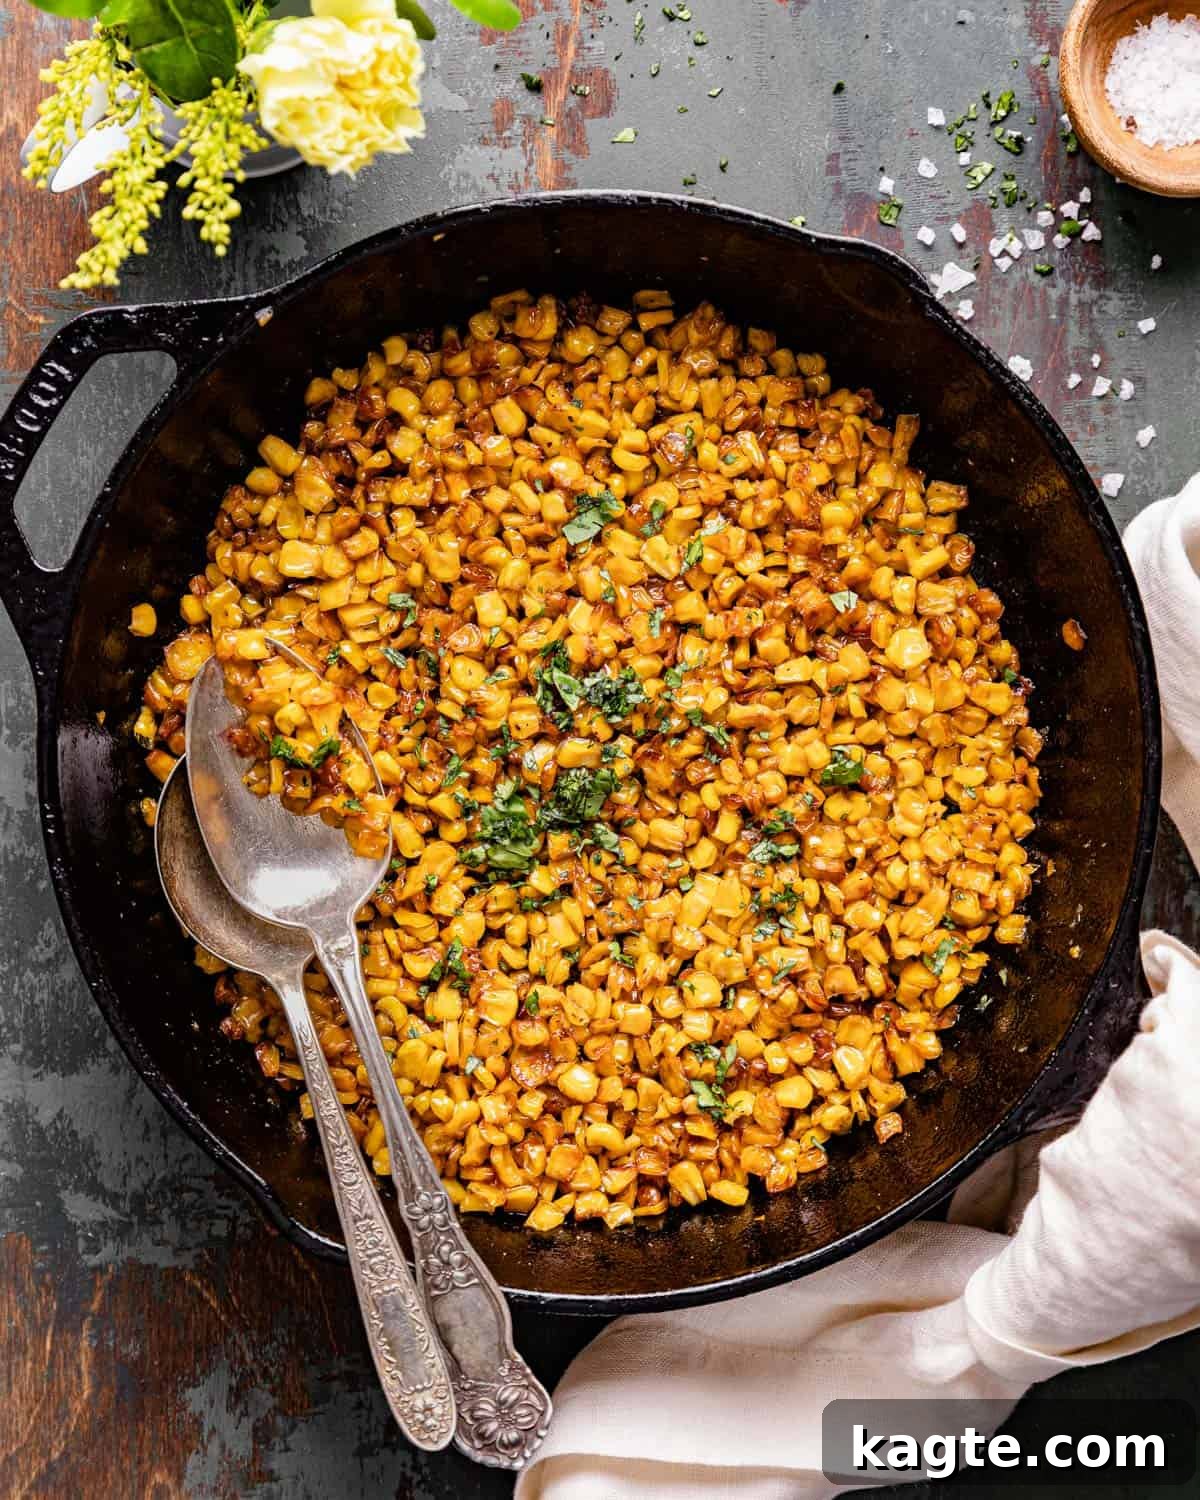
Prepare to fall in love with this incredible Cast Iron Corn recipe, a true southern classic. Slow-cooked to perfection in a generous blend of butter and oil within a cast iron skillet, each kernel transforms into a golden, caramelized bite with irresistible crispy edges. It’s a simple dish, yet its depth of flavor is truly remarkable – a perfect balance of salty and sweet that will leave you craving more. This isn’t just another side dish; it’s a culinary experience that elevates any meal, whether it’s a weeknight dinner or a special holiday gathering. Once you taste the rich, crispy goodness, it’s sure to become a staple in your cooking repertoire.
Looking for more delicious ways to enjoy corn? Explore my Slow Cooker Creamy Chicken & Corn Soup for a comforting meal. And if you’re a fan of cast iron cooking, you won’t want to miss my Cast Iron Lamb Chops.
Table of Contents
- Why You’ll Love This Recipe
- Essential Ingredients
- Step-by-Step Instructions
- Expert Cooking Tips & Notes
- Serving Suggestions
- Variations & Flavor Boosters
- Storage & Make-Ahead Tips
- FAQs About Cast Iron Corn
- Related Recipes
- Crispy Cast Iron Corn Recipe Card
Why You’ll Love This Crispy Cast Iron Corn
This Cast Iron Corn isn’t just good; it’s truly unforgettable. Here’s why this recipe will quickly become a favorite in your kitchen:
- Effortless & Economical: It primarily uses canned corn, making it incredibly easy to prepare and budget-friendly. While fresh corn works, the convenience and similar taste profile of canned corn make it a smart choice, saving you time and effort without compromising flavor.
- Rich, Buttery Goodness: Cooked with generous amounts of butter, this corn delivers an incredibly rich and decadent flavor that’s hard to beat. The butter not only adds an amazing taste but also contributes to the beautiful caramelization.
- Perfect Salty-Sweet Balance: The magic of this dish lies in its exquisite blend of salty and sweet. The natural sweetness of the corn is enhanced by slow cooking and perfectly complemented by a touch of salt, creating a truly addictive flavor profile.
- Unmatched Crispy Texture: The star of the show is undoubtedly the crispy texture. Slow cooking in a cast iron skillet allows the corn to caramelize and develop a satisfyingly crisp exterior, making each bite a delightful crunch.
- Simple & Hands-Off: Despite its gourmet taste, this recipe is surprisingly easy and requires minimal active cooking time. Once the corn is in the skillet, it mostly cooks itself, freeing you up to focus on other parts of your meal.
- Versatile Side Dish: It’s the ultimate no-fuss side that pairs beautifully with virtually any main course. From holiday feasts like Thanksgiving and Christmas to casual summer BBQs and everyday dinners, this corn is always a crowd-pleaser. Its robust flavor stands up well to heartier dishes, while its simplicity makes it adaptable to lighter fare.
- A Taste of Southern Comfort: This dish embodies the warmth and comfort of traditional Southern cooking. It’s the kind of wholesome, flavorful food that evokes memories of family gatherings and home-cooked meals.
Essential Ingredients for Perfect Cast Iron Corn
You’ll be delighted by how few ingredients are needed to create such a flavorful side dish. Each component plays a crucial role in achieving that sought-after crispy, caramelized perfection.
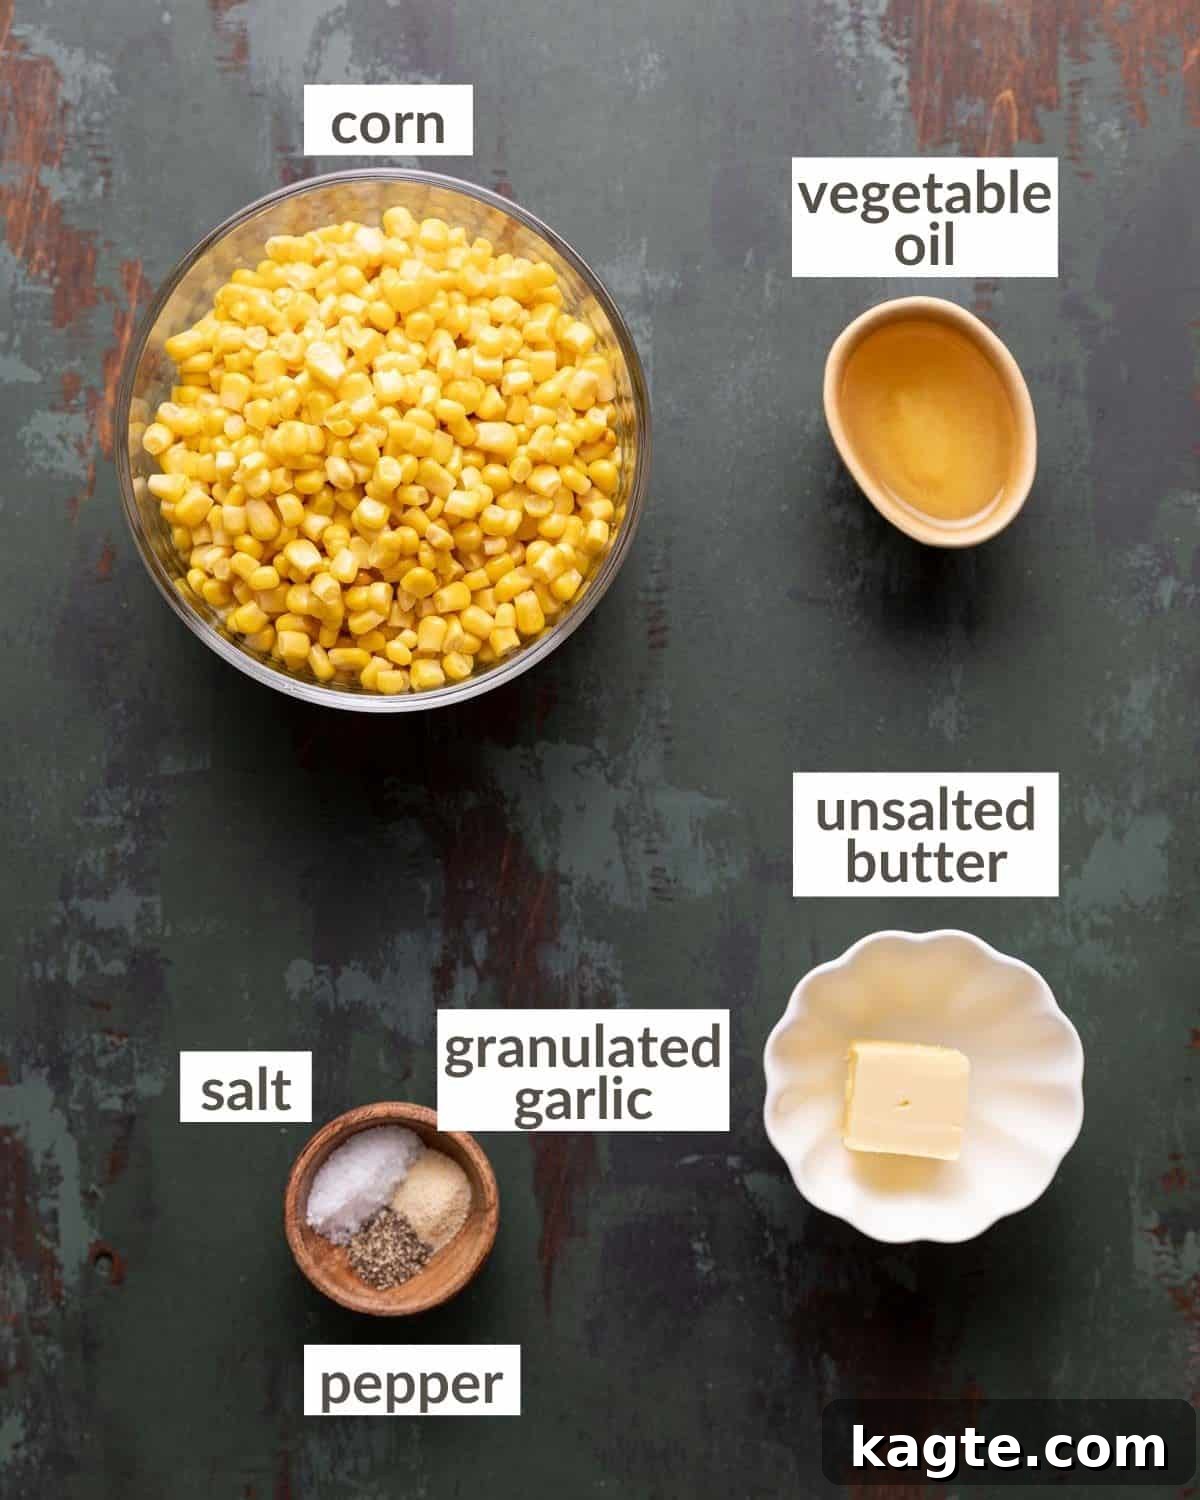
- Canned Corn (Drained): This recipe champions the convenience of canned corn. Using two 15-ounce cans, thoroughly drained, provides about 3 cups of corn. I’ve tested this recipe with fresh corn, and while delicious, the difference in taste is minimal compared to the extra effort involved in shucking and cutting. For simplicity and consistent results, canned corn is highly recommended. Ensure it is very well drained to allow for proper caramelization.
- Unsalted Butter: The secret to that rich, luxurious flavor. Two tablespoons of unsalted butter not only add incredible taste but also contribute significantly to the browning and crisping of the corn. Unsalted butter allows you to control the overall saltiness of the dish more precisely.
- Vegetable Oil: Alongside the butter, vegetable oil is essential for achieving the perfect crispy texture without burning. Two tablespoons of a neutral-tasting oil like vegetable or canola oil provide the high smoke point needed for slow cooking and help the butter not burn. Olive oil can also be used if you enjoy its flavor, but ensure it’s a light-tasting variety that won’t overpower the corn. The combination of butter and oil is key, as oil has a higher smoke point than butter, ensuring ample fat for browning while lending the rich flavor of butter.
- Salt: A teaspoon of salt enhances the natural sweetness of the corn and balances the richness of the butter. Adjust to your taste, but don’t skip it, as it brings out the best in the corn.
- Pepper: Half a teaspoon of black pepper adds a subtle warmth and a gentle aromatic note. Freshly ground black pepper is always preferred for superior flavor.
- Granulated Garlic: Half a teaspoon of granulated garlic provides a foundational layer of savory flavor without the risk of burning that fresh minced garlic might present during the long cooking process. It offers a mellow, aromatic backdrop that complements the sweet corn beautifully.
For precise measurements and a full list of ingredients, please refer to the recipe card below.
Step-by-Step Instructions for Crispy Cast Iron Corn
Achieving perfectly caramelized and crispy cast iron corn is a straightforward process, but patience is key. Follow these steps for the best results:
Before You Begin . . .
- Thoroughly Drain the Corn: This is a crucial first step! Before adding the corn to the skillet, make sure to drain as much liquid as possible from the canned corn. Excess moisture will steam the corn instead of crisping it, hindering the caramelization process. You can even gently press the corn in a sieve to remove more water.
Step 1: In your chosen cast iron skillet or a large, heavy-bottomed pan, melt the butter and vegetable oil together over medium heat. Allow the butter to fully melt and combine with the oil. This fat mixture is essential for achieving the crispy exterior and rich flavor.
Step 2: Once the butter and oil are shimmering, add the well-drained corn to the skillet. Stir in the granulated garlic, salt, and pepper. Cook this mixture on medium heat for approximately 10 minutes, or until you observe all of the visible water evaporating from the pan. It’s important to let this moisture cook off before the browning can truly begin. Stir occasionally to ensure even cooking.
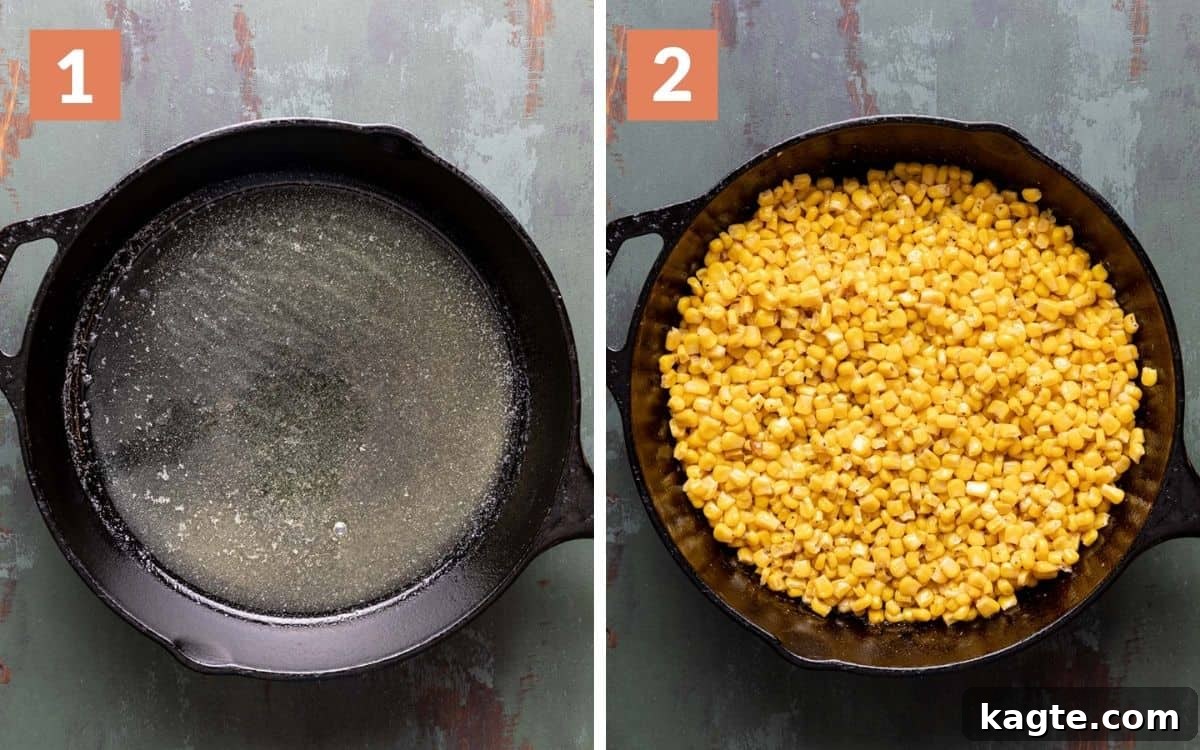
TIP – At this stage, after 10 minutes, the corn will likely not have developed any significant color. Don’t worry, this is normal! Patience is crucial; the real browning comes next.
Step 3: Reduce the heat to medium-low. Continue cooking the corn for another 15 minutes. During this phase, the residual moisture will continue to evaporate, and the corn will begin to subtly dry out and prepare for caramelization.
Step 4: Maintain the medium-low heat and cook the corn for an additional 15-20 minutes, or until the corn kernels achieve a beautiful golden brown color and a delightful crisp texture. The exact timing may vary depending on your stove and skillet, so keep an eye on it during this final stage. The goal is deep golden, almost roasted corn that is slightly crunchy on the outside.
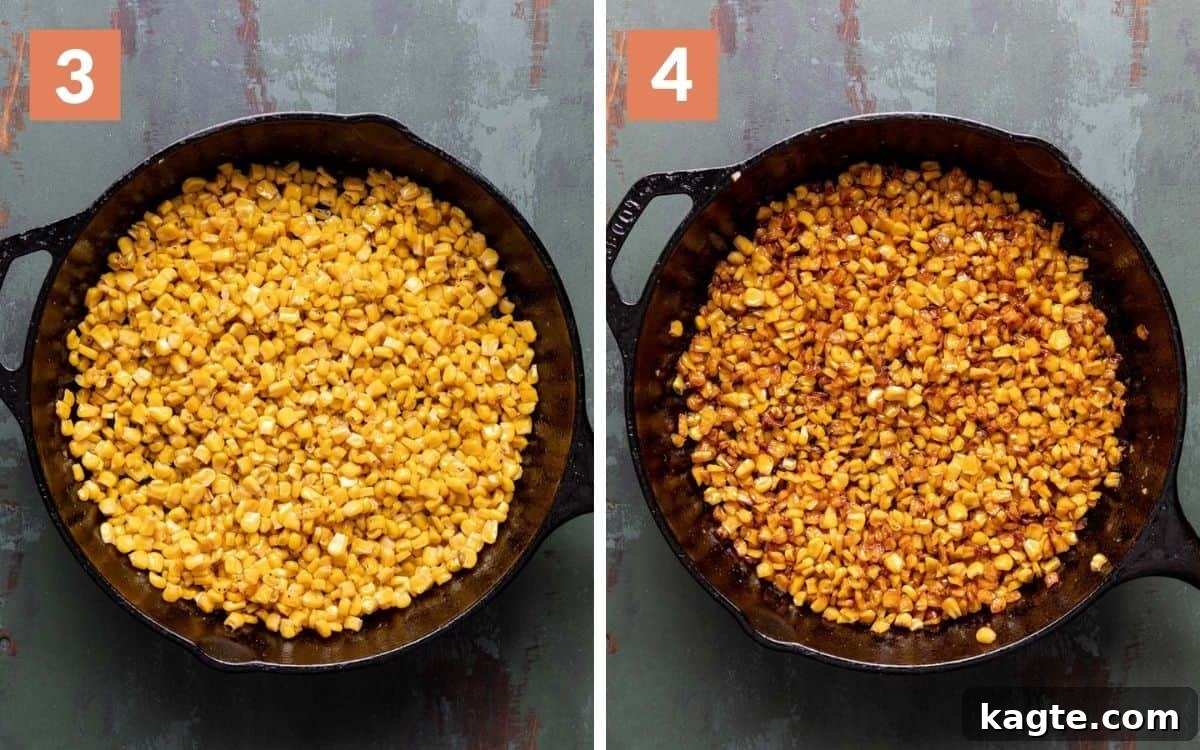
TIP – The corn will slowly but surely begin to develop color. It’s a gradual process, so resist the urge to crank up the heat.
TIP – Stir the corn occasionally, but avoid continuous stirring. Allowing the corn to sit undisturbed for a few minutes at a time is crucial for developing that rich caramelization and crispy crust.
Expert Cooking Tips & Notes for Success
Mastering this crispy cast iron corn is simple with these expert tips and insights. Pay attention to these details for the absolute best results every time:
- Embrace the Cast Iron Skillet: The type of pan you use truly makes a difference. Cast iron skillets are unparalleled for this recipe because of their superior heat retention and even heat distribution. This allows the corn to brown beautifully and develop that signature crispy texture. If you don’t own a cast iron skillet, a heavy-bottomed stainless steel or non-stick pan can be used, but you might need to adjust cooking times slightly and keep a closer eye on the browning.
- The Power Duo: Oil & Butter: Don’t underestimate the importance of using both oil and butter. My grandma always swore by this combination, and for good reason! Butter delivers an incredible depth of flavor and richness, while oil, with its higher smoke point, prevents the butter from burning too quickly and ensures there’s ample fat for optimal browning and crisping. Using only one or the other won’t yield the same delicious results.
- Patience is a Virtue: Slow Cook for Maximum Flavor: This recipe isn’t about speed; it’s about building flavor and texture through slow, gentle cooking. While it may seem a little time-consuming, the beauty is that it’s largely hands-off. Resist the temptation to increase the heat to speed things up, as this can lead to burnt corn or uneven cooking, without achieving the desired caramelization. Low and slow is the way to go for truly crispy, flavorful corn.
- Watch for Gradual Color Development: It’s easy to get impatient, especially in the initial stages. As illustrated in the instruction photos, the corn won’t develop color immediately. The first 10-15 minutes are primarily about evaporating the liquid. The browning and crisping process will begin slowly after that. Trust the process; the golden color will appear gradually.
- Hands-Off Cooking is a Breeze: This recipe is surprisingly forgiving and doesn’t demand constant attention. Once the heat is set to medium-low, you don’t need to hover over the skillet. Stir occasionally to ensure even browning and prevent sticking, but avoid stirring continuously, which disrupts the caramelization process. The corn isn’t prone to burning easily on medium-low heat.
- Drain Corn Thoroughly: Re-emphasizing this point because it’s so critical. Any residual water will steam the corn, preventing it from crisping up. Pat dry if necessary after draining.
- Season to Taste: The amounts for salt and pepper are a guideline. Taste the corn as it cooks, particularly after it has started to brown, and adjust seasonings if needed. A pinch of sugar can also enhance the caramelization and sweetness, particularly if your corn isn’t naturally very sweet.
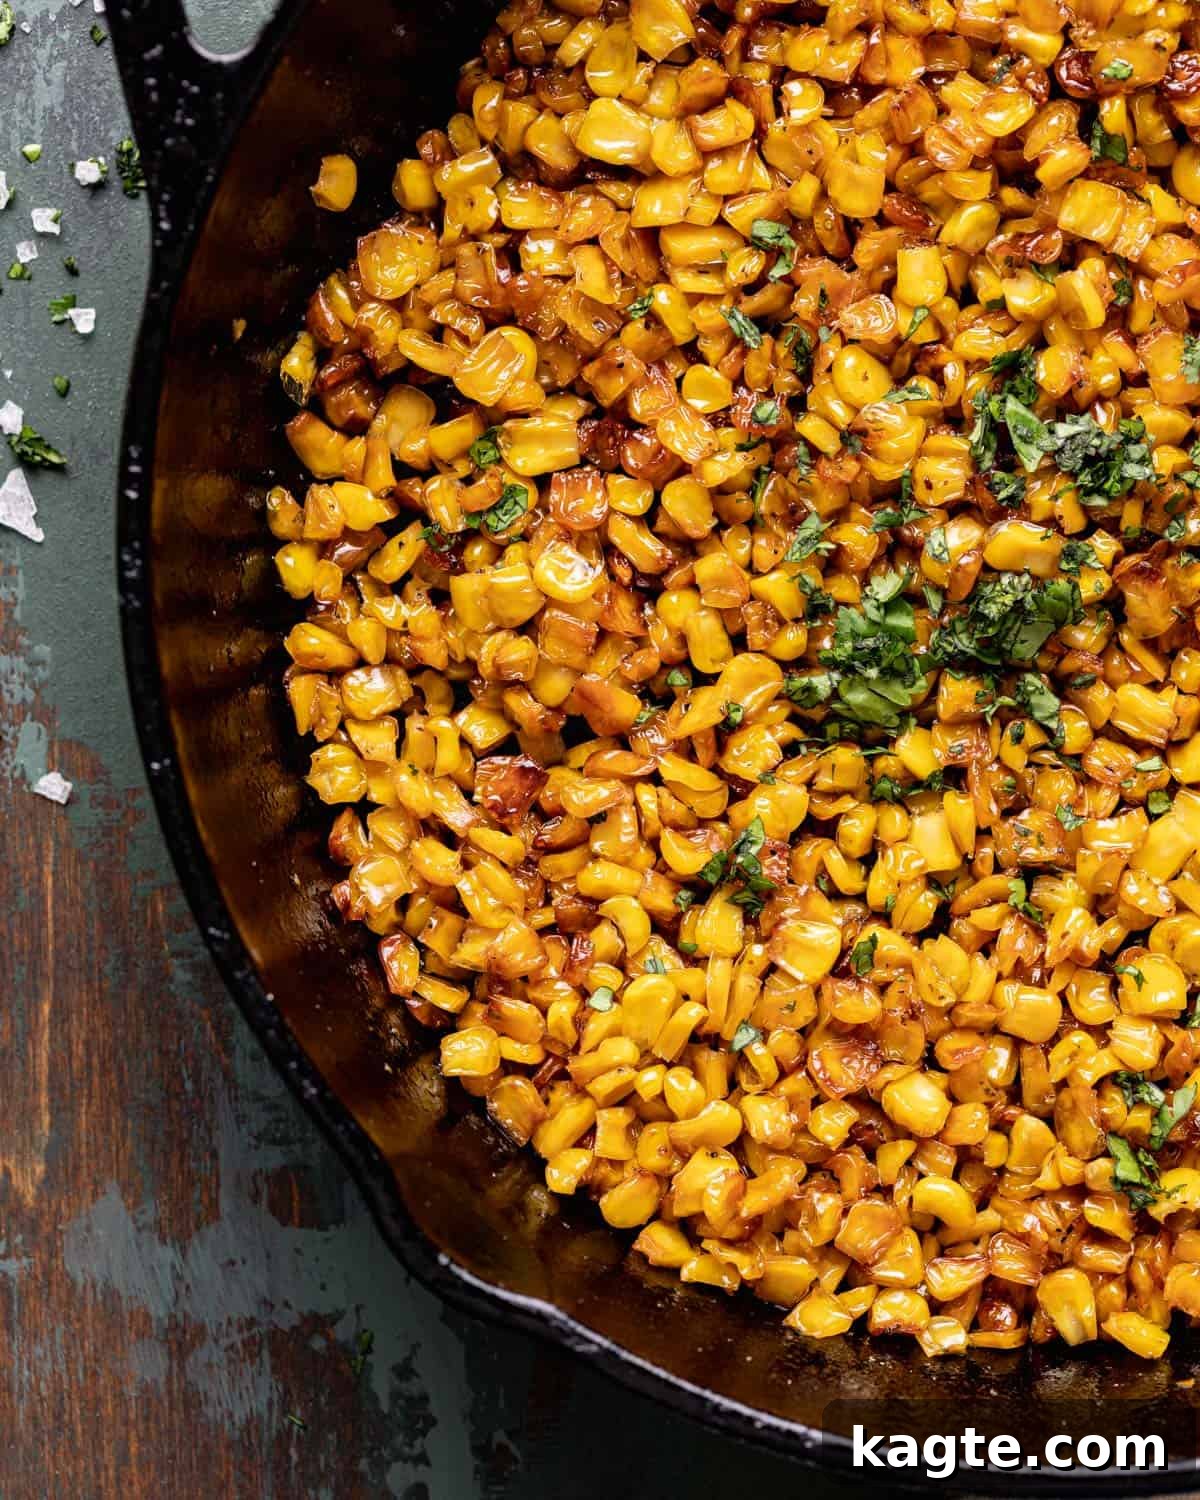
Serving Suggestions for Crispy Cast Iron Corn
This versatile Crispy Cast Iron Corn is the perfect accompaniment to a wide array of main dishes. Its salty-sweet flavor and satisfying crunch make it an excellent pairing for both casual weeknight meals and impressive holiday feasts.
- Southern Comfort Mains: It’s a natural fit for classic Southern fare like fried chicken, BBQ ribs, pulled pork, or a hearty meatloaf.
- Holiday Spreads: A fantastic addition to your Thanksgiving, Christmas, or Easter table. It offers a wonderful textural contrast to softer holiday sides.
- Grilled Favorites: Pairs beautifully with anything hot off the grill – steaks, chicken breasts, pork chops, or even grilled fish.
- Brunch or Breakfast: Don’t limit it to dinner! A small serving can be a surprising and delicious addition to a savory brunch spread alongside eggs and bacon.
- Simple Dinners: Elevates a basic roasted chicken or pan-seared fish into a more exciting meal.
- Taco Night: Use it as a vibrant and crunchy filling or topping for tacos, burritos, or burrito bowls.
Variations & Flavor Boosters
While this Cast Iron Corn recipe is perfect as is, it’s also wonderfully adaptable! Feel free to experiment with these ideas to customize it to your taste:
- Spicy Kick: Add a pinch of red pepper flakes or a dash of your favorite hot sauce during the last few minutes of cooking for a fiery twist.
- Herbs & Aromatics: Fresh chopped chives, parsley, or cilantro stirred in just before serving can add a burst of freshness. A hint of smoked paprika can also introduce a wonderful smoky depth.
- Cheesy Indulgence: Sprinkle some grated Parmesan cheese or crumbled cotija cheese over the corn during the last minute of cooking, allowing it to melt slightly.
- Sweet & Savory: A tiny drizzle of maple syrup or honey can enhance the caramelization and sweetness, especially if you prefer a sweeter profile. Alternatively, a tablespoon of finely diced bacon bits cooked alongside the corn adds irresistible smoky, salty notes.
- Lime & Chili: For a vibrant, zesty variation, finish with a squeeze of fresh lime juice and a sprinkle of chili powder.
- Onion or Shallots: For an extra layer of savory flavor, add a tablespoon of finely minced onion or shallots to the pan along with the corn. Cook them down until softened and slightly caramelized.
Storage & Make-Ahead Tips
Planning ahead or dealing with leftovers? Here’s how to manage your crispy cast iron corn:
- Storing Leftovers: Any leftover crispy corn can be stored in an airtight container in the refrigerator for 3-4 days. While it won’t retain its initial crispiness perfectly upon refrigeration, the flavor will still be excellent.
- Reheating: For best results when reheating, spread the corn out in a single layer on a baking sheet and warm it in an oven or toaster oven at 350°F (175°C) for about 10-15 minutes, or until heated through and slightly re-crisped. You can also reheat it in a skillet over medium heat, stirring occasionally, until warm. Microwaving is an option for quick reheating, but it will soften the corn further.
- Make Ahead: This dish is best enjoyed fresh off the skillet for optimal crispiness. However, you can prep your ingredients (drain corn, measure spices) ahead of time to make the cooking process even quicker when you’re ready to serve.
FAQs About Crispy Cast Iron Corn
Store any leftover crispy cast iron corn in an airtight container in the refrigerator for 3-4 days. For reheating, refer to the storage tips above for best results.
Absolutely! While a cast iron skillet is highly recommended for its excellent heat retention and browning capabilities, you can certainly achieve delicious crispy corn using a large, heavy-bottomed skillet instead. Just ensure your alternative pan is sturdy enough to hold heat evenly.
The best way to cook canned corn for maximum flavor and an incredible texture is by slowly caramelizing it with plenty of fat (like butter and oil) in a heavy skillet. This process allows the natural sugars in the corn to develop, resulting in a sweet, savory, and wonderfully crispy dish without burning or sticking to the pan.
Yes, sautéing corn, especially slowly over medium-low heat as in this recipe, is an excellent method to truly bring out its inherent sweetness. The process of caramelization intensifies the sugars, giving the corn a richer, more profound flavor compared to simply boiling or steaming it.
Several factors could prevent your corn from getting crispy. Ensure the corn is thoroughly drained of all liquid before cooking. Too much moisture will steam the corn rather than crisp it. Also, make sure you’re using enough fat (the butter and oil combination is crucial) and cooking it slowly over medium-low heat. Patience is key; don’t rush the process by turning up the heat too high.
More Delicious Side Dishes You’ll Love
Round out your meal planning with these other fantastic side dish ideas:
Side Dish
What To Serve with Chicken and Dumplings for Dinner (15 Best Sides)
Side Dish
What To Serve With Mashed Potatoes (25 Dinner Ideas)
Side Dish
What To Serve With Taco Soup For Dinner (Toppings & Sides)
Side Dish
Broccoli Mac and Cheese (Easy & Creamy)
SaveSaved
Crispy Cast Iron Corn
Ingredients
- 2 15 ounce cans corn, thoroughly drained
- 2 tablespoons unsalted butter
- 2 tablespoons vegetable oil (or other neutral oil)
- 1 teaspoon salt
- 1/2 teaspoon black pepper
- 1/2 teaspoon granulated garlic
Instructions
-
Review all recipe notes and instructions before beginning for the best results. Ensure corn is thoroughly drained.
-
In a cast iron skillet or large heavy-bottomed pan, melt the butter and oil together over medium heat until shimmering.
-
Add the well-drained corn, granulated garlic, salt, and pepper to the skillet. Cook on medium heat for about 10 minutes, stirring occasionally, until all the visible water has evaporated.
-
Reduce the heat to medium-low. Continue cooking the corn for another 15 minutes, stirring occasionally. The corn will begin to dry out.
-
Continue cooking on medium-low heat for an additional 15-20 minutes, or until the corn achieves a beautiful golden brown color and crispy texture. Stir occasionally but not continuously, allowing it to caramelize.