
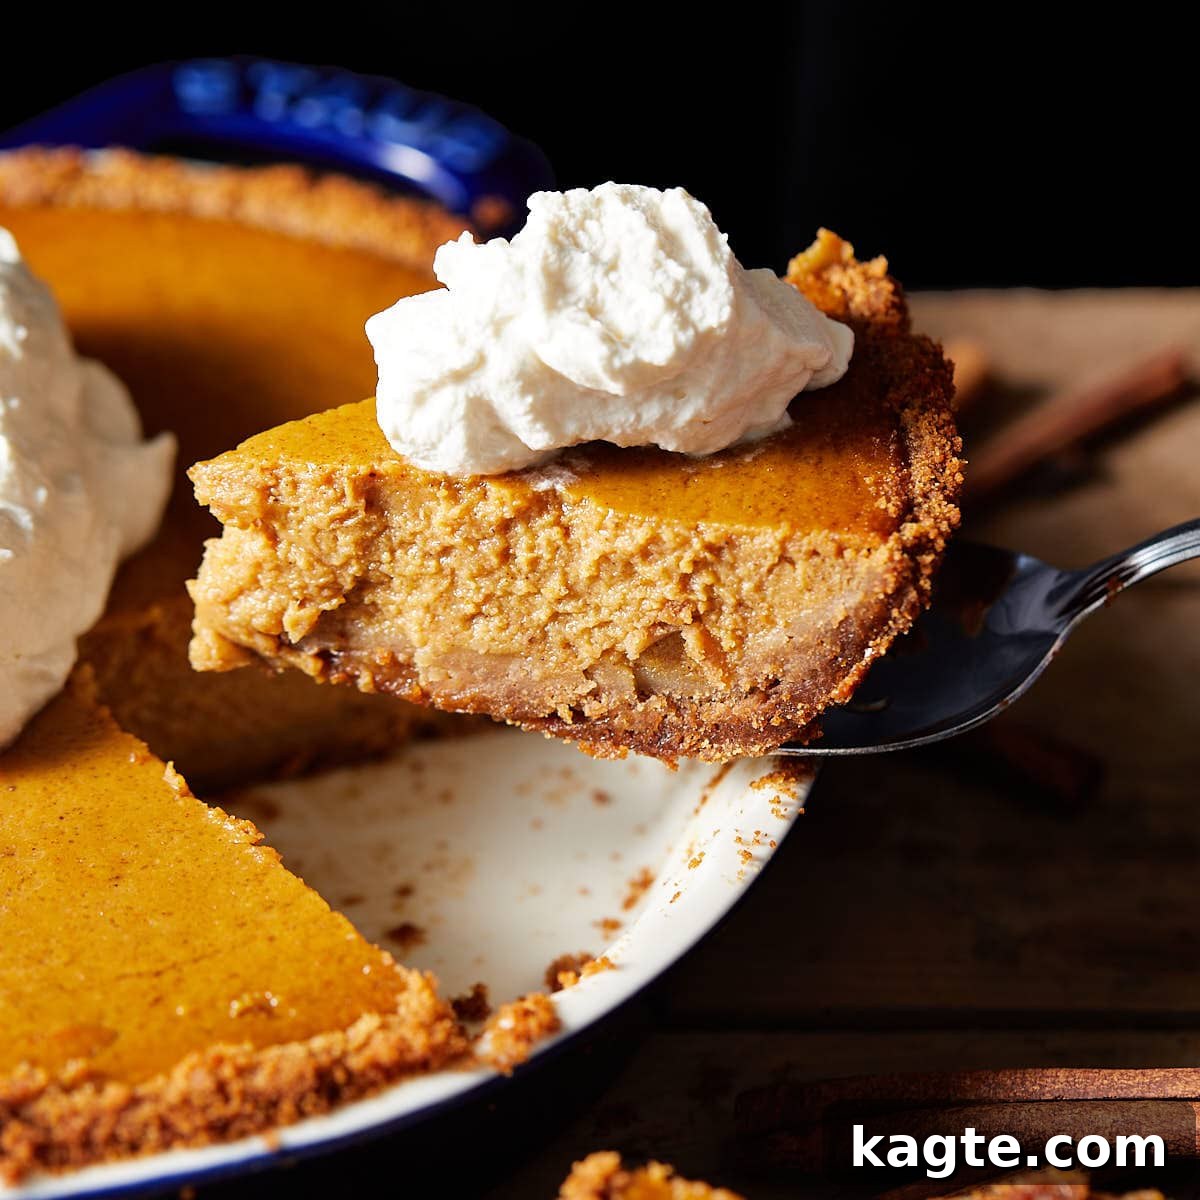
Welcome to the ultimate guide for creating a truly unforgettable dessert: a rich, creamy Pumpkin Pie with a delectable Graham Cracker Crust. This recipe offers everything you adore about classic pumpkin pie but simplifies the baking process by ditching the traditional pie crust hassle. Not only is a homemade graham cracker crust incredibly easy to prepare, but it also introduces a delightful texture and flavor profile that perfectly complements the spiced pumpkin filling. We’ve elevated this pie even further by incorporating buttermilk into the filling, lending it an irresistible tanginess and velvety smoothness that sets it apart from the rest. Prepare to make this your new go-to holiday dessert!
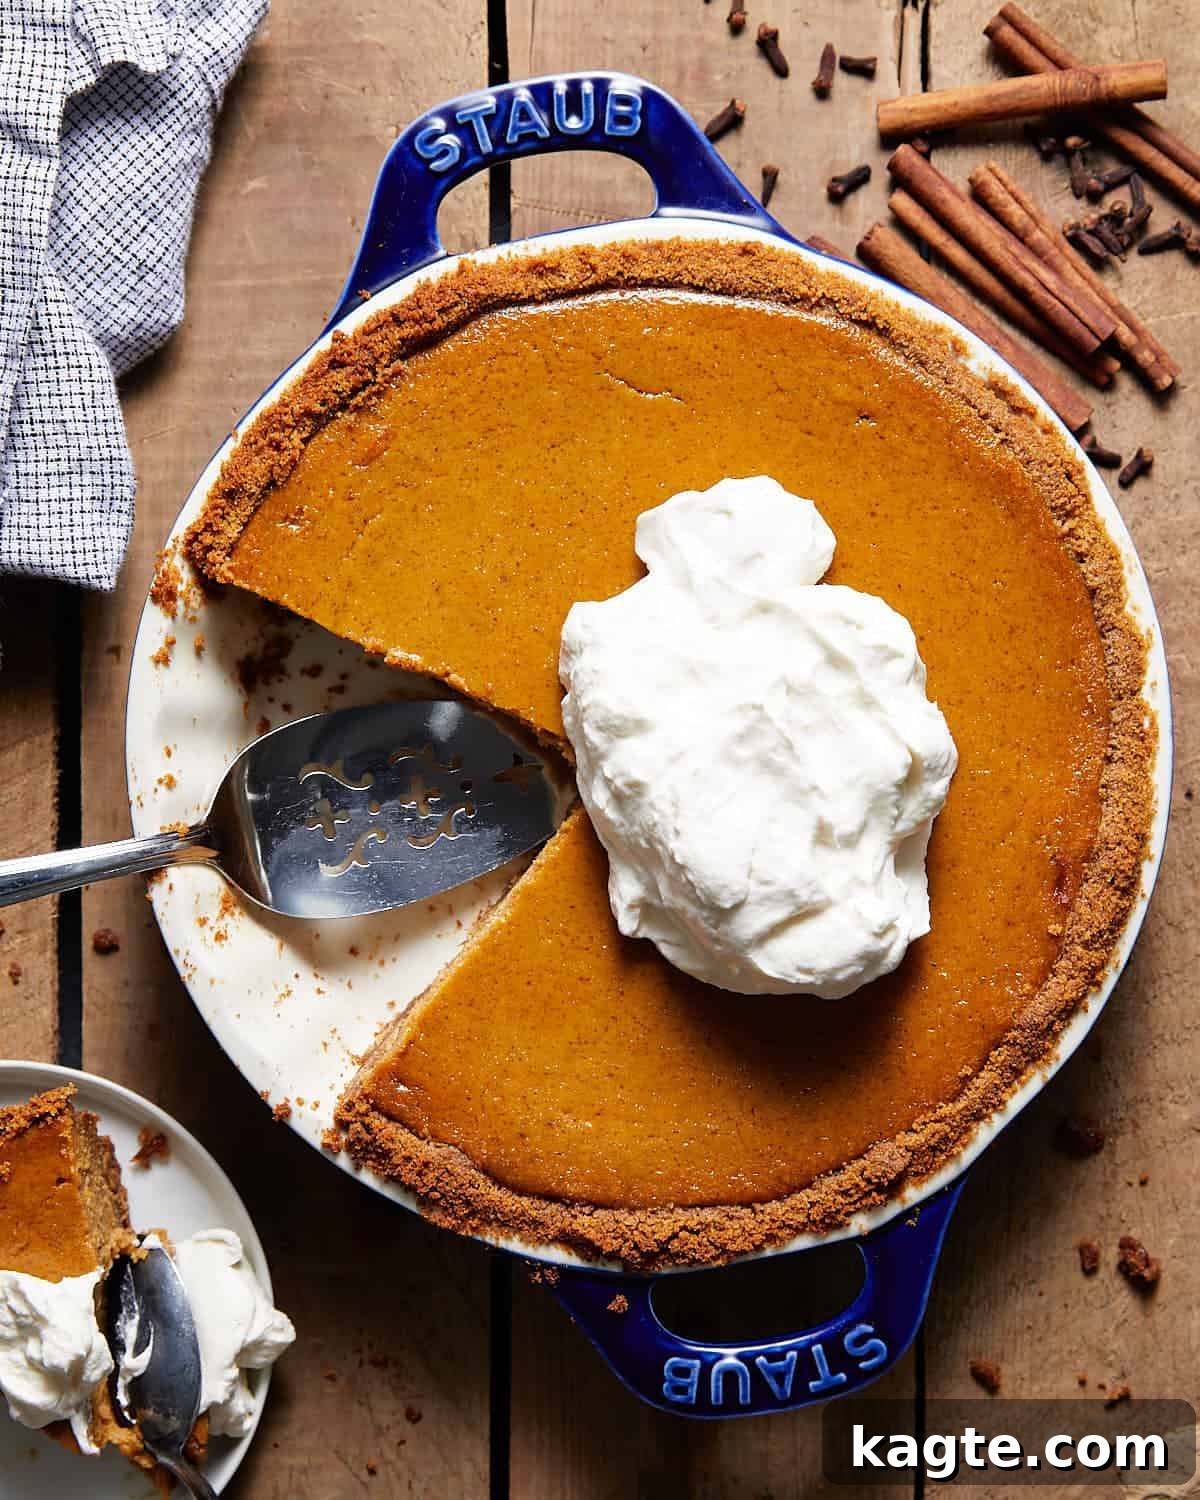
This effortless pumpkin pie recipe featuring an easy graham cracker crust is an absolute must-have for your Thanksgiving, Christmas, or any festive season menu. It perfectly complements other fall favorites like my Easy Pumpkin Pie Recipe without Evaporated Milk or a luxurious Sweetened Condensed Milk Pumpkin Pie. As the first of many delectable pie recipes this season, it promises to be a crowd-pleaser and a staple for years to come. Beyond pies, don’t miss out on my incredible and vibrantly festive Pumpkin Snickerdoodle Bars for another delightful autumn treat.
If your oven is already packed with holiday roasts and casseroles, consider whipping up a fantastic no-bake dessert! My No-Bake Oreo Cheesecake Pie or the decadent Reese’s Peanut Butter Cup Pie Recipe offer equally impressive, yet oven-free, solutions. To complete your cozy holiday experience, pair any of these sweet treats with a warm, comforting mug of Easy Instant Pot Hot Chocolate – it’s the perfect beverage for chilly evenings and festive gatherings.
A key feature of this particular recipe is its innovative approach to traditional pumpkin pie making. Unlike many recipes that rely on evaporated milk, this version champions the use of buttermilk. Buttermilk not only creates a wonderfully rich and creamy texture but also infuses the pie with a subtle tang that beautifully balances the sweetness of the pumpkin and spices. If you’re curious about exploring other dairy options in your baking, delve deeper into the Best Substitutes for Evaporated Milk in Pumpkin Pie to expand your culinary repertoire.
Table of Contents
- Why You’ll Adore This Pumpkin Pie
- Essential Ingredients & Smart Substitutions
- Step-by-Step: How to Make Pumpkin Pie with Graham Cracker Crust
- Expert Tips & Delicious Variations
- Frequently Asked Questions
- More Irresistible Dessert Recipes
- The Full Pumpkin Pie with Graham Cracker Crust Recipe
Why You’ll Adore This Pumpkin Pie
- **Effortless Perfection:** This graham cracker pumpkin pie significantly simplifies the baking process compared to traditional versions. The crust requires no chilling, no complicated rolling, and is made from just three simple ingredients. For even greater convenience, you can opt for a high-quality store-bought graham cracker crust without sacrificing flavor. This makes it an ideal choice for busy holiday bakers or anyone new to pie making.
- **A Symphony of Fall Flavors:** The star of this pie is its rich, velvety filling, generously spiced with a classic blend of cinnamon, ginger, nutmeg, and cloves. These warm, aromatic spices evoke the comforting essence of autumn, making every bite a delightful celebration of the season. While store-bought spice blends are convenient, I highly recommend creating your own fresh blend for a truly superior depth of flavor. Curious about the nuances of spice? Learn more about the subtle yet distinct differences between Apple Pie Spice vs. Pumpkin Pie Spice.
- **Buttermilk – The Game Changer:** What truly sets this recipe apart is the innovative use of buttermilk. By substituting evaporated milk or sweetened condensed milk with buttermilk, we achieve a pumpkin filling that is extraordinarily rich, wonderfully creamy, and boasts a unique, delicate tanginess. This acidity from the buttermilk beautifully cuts through the sweetness, balancing the flavors and preventing the pie from being overly cloying. Trust me, once you experience the depth of flavor buttermilk adds, you’ll understand why it’s a true game-changer.
- **The Quintessential Holiday Dessert:** With its comforting flavors and satisfying texture, this pie is destined to become a centerpiece on your Thanksgiving or Christmas dessert table. It’s universally loved and evokes a sense of warmth and tradition that perfectly complements festive gatherings. Its ease of preparation means less stress for you, allowing more time to enjoy with loved ones.
- **No Special Equipment Needed (Mostly):** Creating the perfect graham cracker crumbs is straightforward. You can achieve a fine, consistent texture using a food processor for speed and efficiency. However, if you don’t own one, a zipped-top bag and a rolling pin (or even your hands) will work just as well to crush the crackers. Unlike traditional pie crusts, there’s no need for specialized pastry blenders, pie weights, or extensive chilling, further simplifying your baking experience.
Essential Ingredients & Smart Substitutions
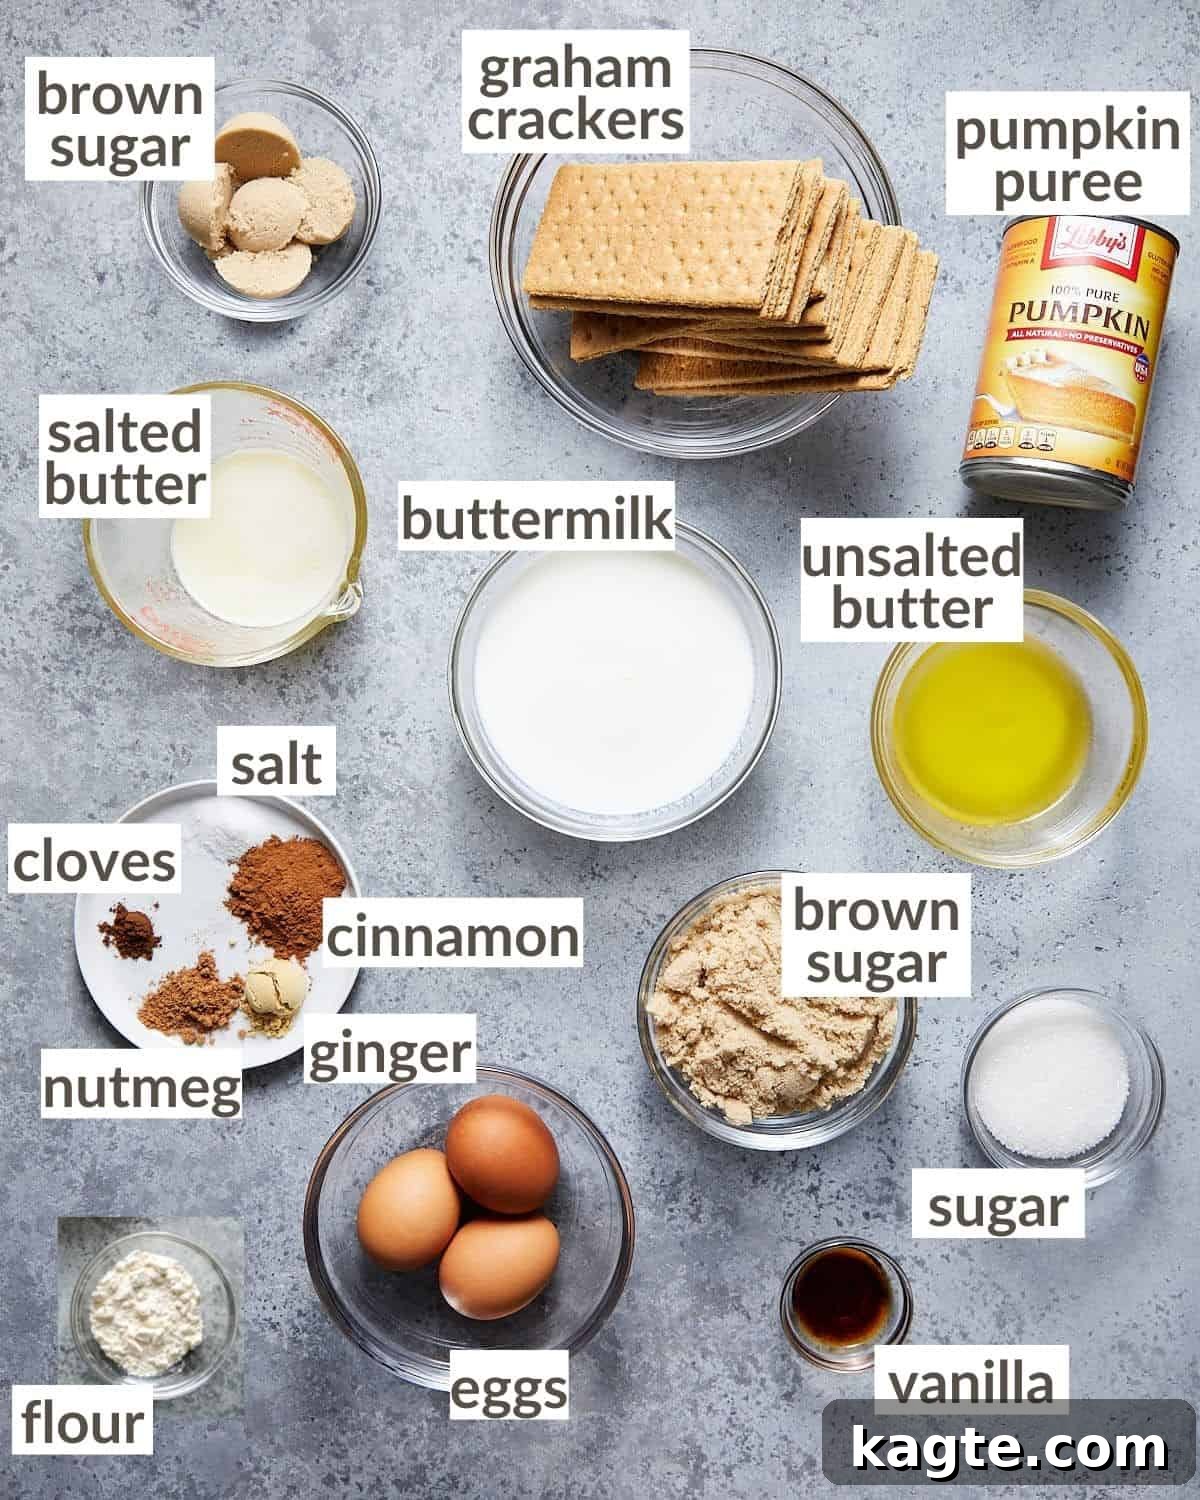
- Graham Cracker Crust: While a homemade graham cracker crust is simple and yields fantastic results, feel free to use a good quality store-bought graham cracker crust, such as one from Keebler, for added convenience. Even with a pre-made crust, I highly recommend pre-baking it as specified in the recipe instructions. This crucial step helps prevent the crust from becoming soggy, ensuring a crisp, golden base that holds up beautifully to the rich filling.
- Pure Pumpkin Purée: For the best flavor and texture, always reach for unsweetened, pure pumpkin purée. It’s vital to check the ingredient label on the back of the can – the only ingredient listed should be “pumpkin.” Avoid canned pumpkin pie filling, as it contains added sugars, spices, and sometimes other ingredients that will alter the flavor and sweetness balance of this recipe. Using pure pumpkin gives you full control over the spice and sugar levels.
- Buttermilk: This is a star ingredient in our recipe, and I cannot emphasize enough how much it contributes to the pie’s exceptional flavor and incredibly creamy texture. Buttermilk introduces a delightful, subtle tang that perfectly complements the warm spices of the pumpkin. If buttermilk is unavailable, or if you prefer a milder flavor, you can substitute it with 1% or 2% milk. For optimal blending and a smoother filling, allow both your buttermilk and eggs to sit at room temperature for approximately 45 minutes to 1 hour before mixing. This helps emulsify the ingredients more effectively.
- Cinnamon & Other Spices: This recipe utilizes a specific blend of individual spices to achieve a balanced and robust fall flavor profile: cinnamon, ginger, nutmeg, and cloves. If you prefer a simpler approach, you can substitute the ginger, nutmeg, and cloves with 1 1/2 teaspoons of a good quality store-bought or homemade pumpkin pie spice blend. However, regardless of whether you use individual spices or a blend, remember that you still need to add the full 2 teaspoons of ground cinnamon. Cinnamon is a foundational flavor in pumpkin pie, and an extra boost ensures that signature warmth.
- Homemade Whipped Cream: No pumpkin pie is complete without a generous dollop of freshly made whipped cream. To prepare, simply use an electric mixer (handheld or stand mixer) to whip 1 cup of cold heavy cream with 2 tablespoons of granulated sugar and 1 teaspoon of pure vanilla extract. Continue whipping until soft, yet stiff peaks form. The fresh, airy cream provides a perfect contrast to the dense, rich pie filling.
For a comprehensive list of all ingredients and their exact amounts, please refer to the complete recipe card below.
Step-by-Step: How to Make Pumpkin Pie with Graham Cracker Crust
Crafting this delightful pumpkin pie is surprisingly straightforward, divided into two main components: the easy graham cracker crust and the luscious pumpkin filling. Follow these simple steps for a truly rewarding baking experience.
Quick Overview
- Prepare the simple three-ingredient graham cracker crust directly in your chosen pie plate or dish.
- Whip up the smooth and spiced pumpkin filling in a large mixing bowl.
- Pour the fragrant filling into the pre-baked crust and bake to perfection.
- Allow to cool completely, then chill before slicing and serving.
Step by Step Instructions
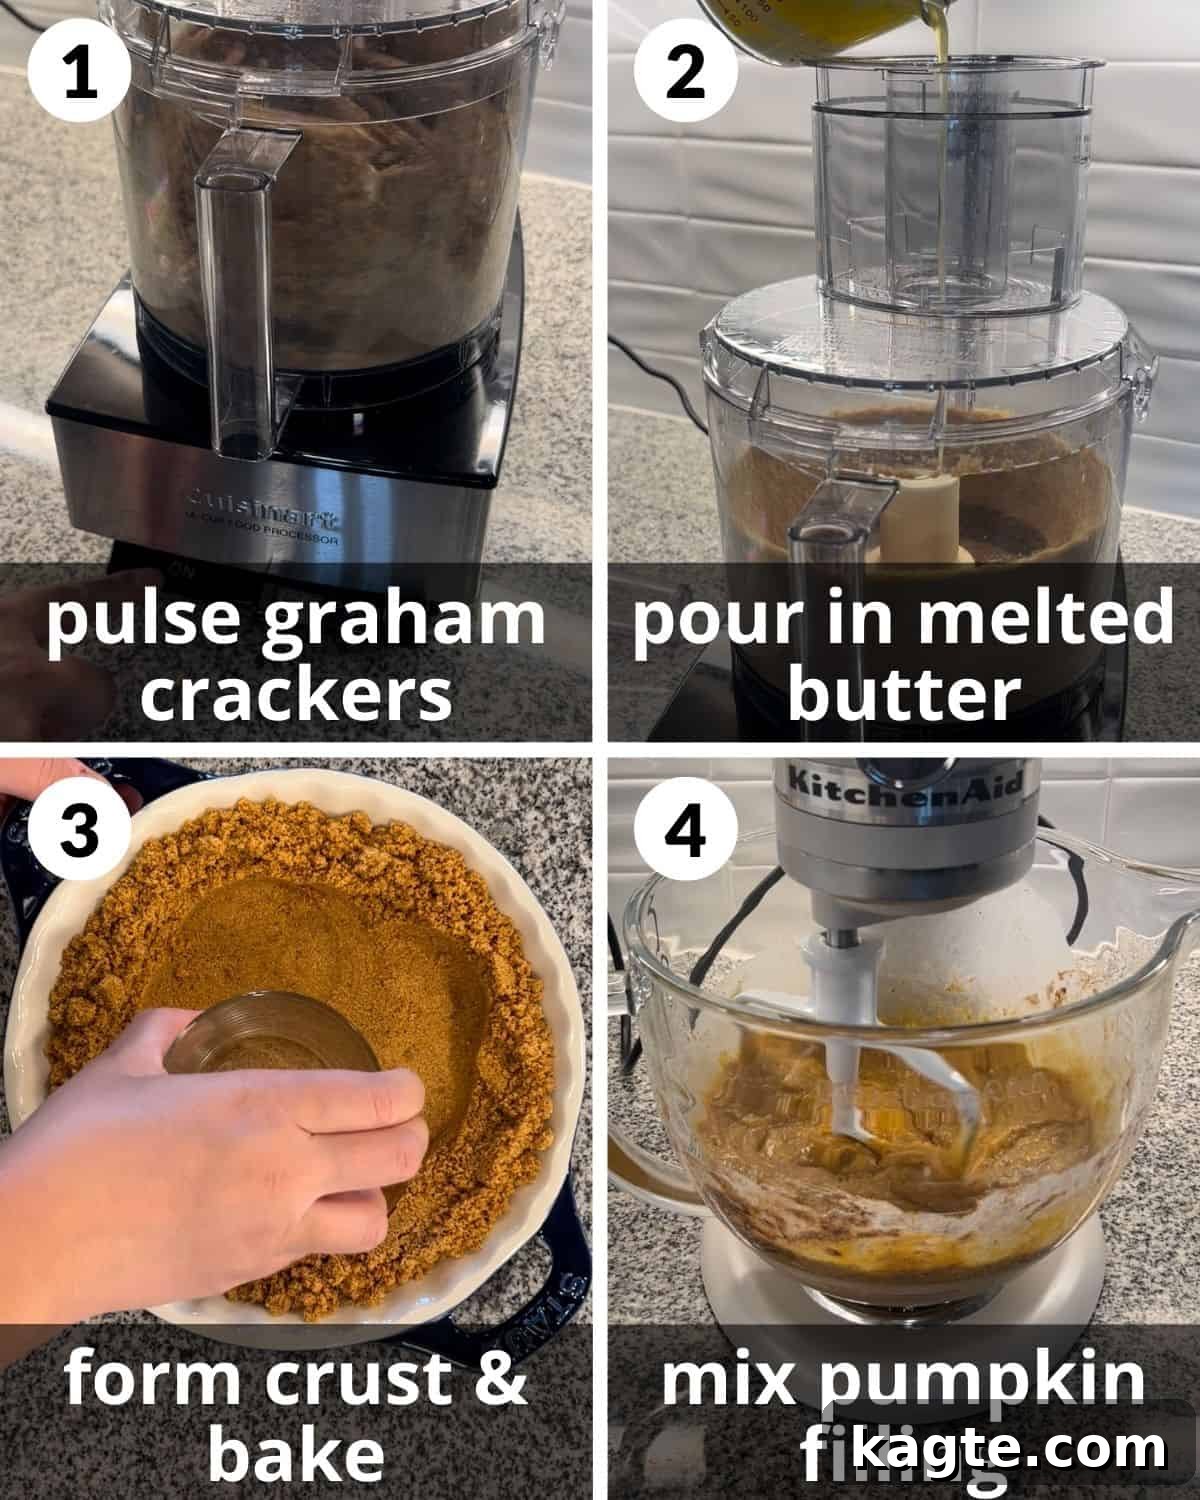
Chef’s Tip: Ensure you apply firm, even pressure when compacting the graham cracker crust. This creates a sturdy base that won’t crumble and helps prevent sogginess.
Step 1: Begin by preheating your oven to 350 degrees Fahrenheit (175°C). In a food processor, combine the whole graham crackers and brown sugar. Pulse them together until you achieve a fine, uniform crumb texture. If you don’t have a food processor, simply place the graham crackers and brown sugar in a large, sturdy zipped-top bag and crush them thoroughly using a rolling pin or even your hands until fine crumbs form.
Step 2: With the food processor running, slowly pour in the melted salted butter through the feed tube. Continue to pulse the graham cracker mixture until the butter is fully incorporated and the crumbs are evenly moistened, resembling wet sand. If mixing by hand, transfer the crumbs to a bowl, add the melted butter, and mix thoroughly with a spatula or your fingertips until well combined.
Step 3: Transfer the moistened graham cracker mixture into a 9 or 10-inch pie dish. Using the bottom of a small, flat-bottomed glass or measuring cup, firmly press the mixture into an even layer across the bottom and up the sides of the pie dish. Ensure the crust is compact and well-formed. Bake the crust in the preheated oven for 7-8 minutes. This brief pre-baking step is crucial for setting the crust, enhancing its flavor, and preventing it from becoming soggy once the filling is added.
Crafting the Irresistible Pumpkin Pie Filling
Step 4: While your graham cracker crust is pre-baking, it’s time to prepare the star of the show – the pumpkin pie filling. In a large mixing bowl, combine the unsweetened pure pumpkin purée, room temperature buttermilk, eggs (also at room temperature for best results), slightly cooled melted unsalted butter, both brown sugar and granulated sugar, vanilla extract, salt, and all the warm spices: ground cinnamon, ground ginger, ground nutmeg, and ground cloves. Using an electric mixer (either a stand mixer with a paddle attachment or a handheld mixer) or a sturdy whisk, mix all these ingredients together until the filling is perfectly smooth, homogeneous, and well combined. Ensure there are no lumps and the mixture is uniform in color and texture.
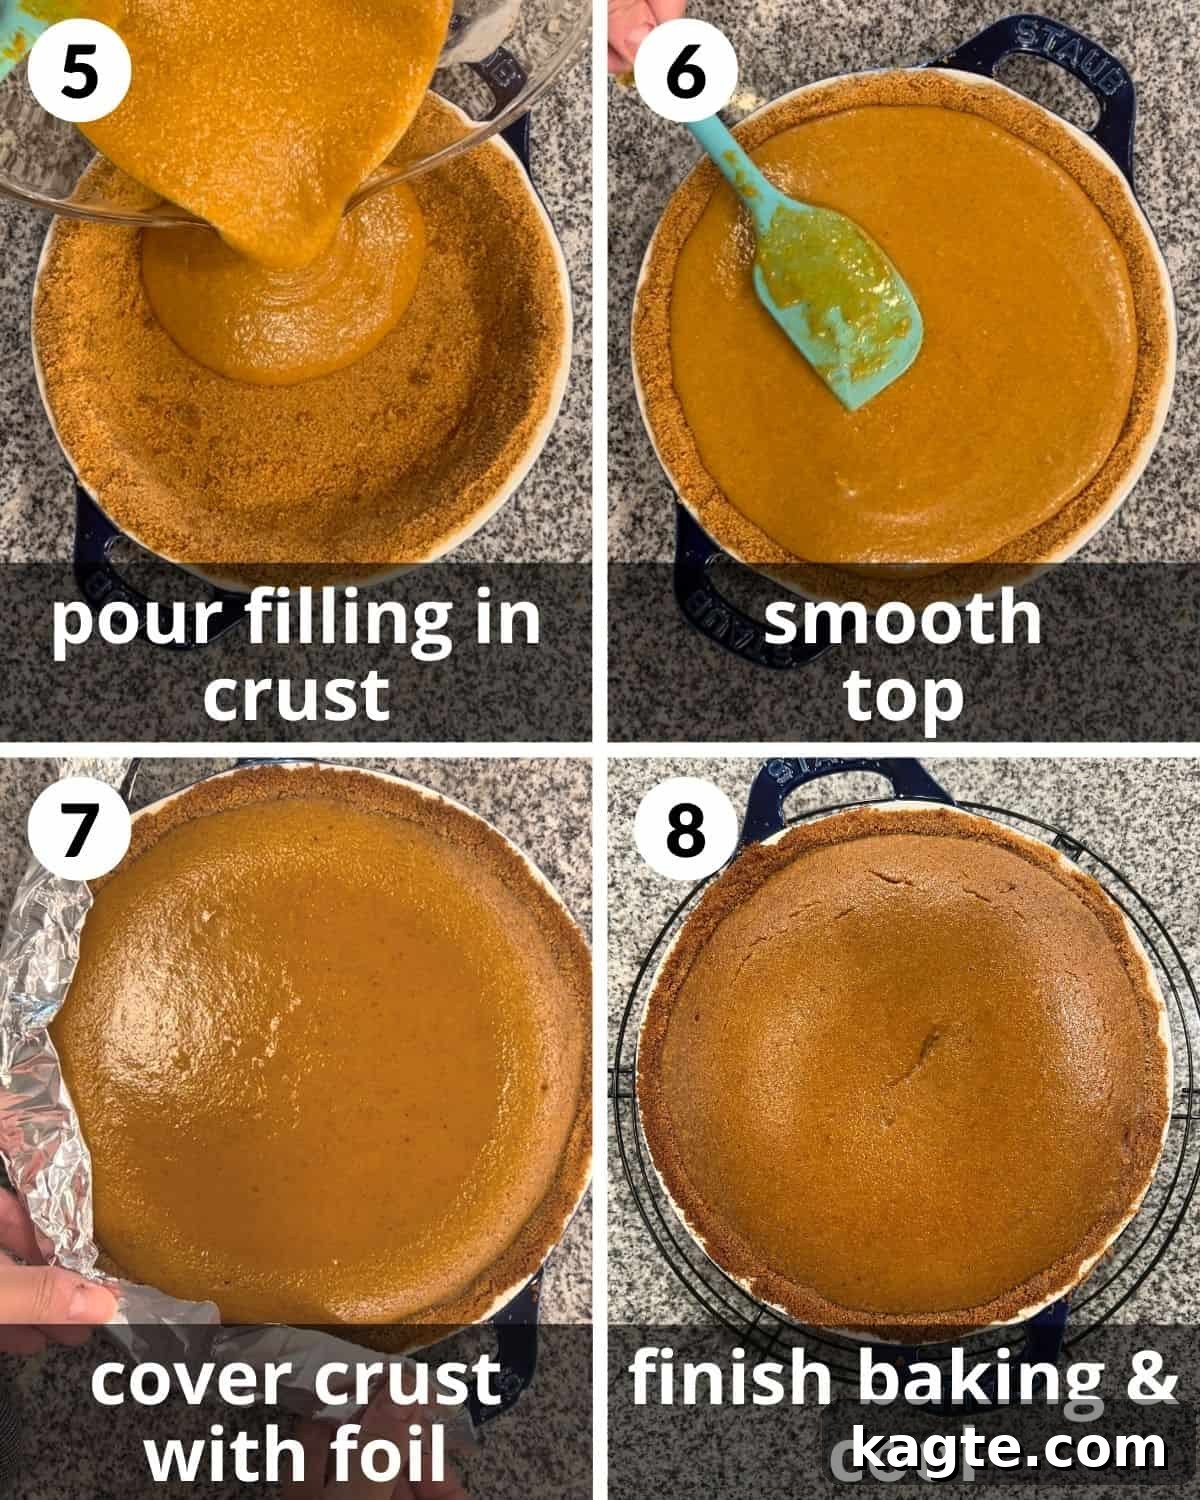
Pro Tip: To prevent the delicate edges of your graham cracker crust from over-browning or burning, remember to cover them with aluminum foil or a reusable pie crust shield during the later stages of baking.
Step 5: Carefully pour the freshly prepared, smooth pumpkin filling into your pre-baked graham cracker crust. Take care to pour slowly to avoid splashing.
Step 6: Gently use a spatula to smooth out the surface of the pumpkin filling. The pie dish will be filled almost to the very top, creating a beautiful, generous pie.
Step 7: Transfer the pie to the preheated oven and bake for approximately 45-55 minutes. The precise baking time may vary slightly depending on the exact size and depth of your pie dish (a 9-inch pie will generally require more baking time than a 10-inch pie). Around the 25-30 minute mark, carefully cover the exposed edges of the pie crust with strips of aluminum foil or a dedicated pie crust shield. This crucial step prevents the graham cracker crust from burning while the filling continues to bake. The pie is fully cooked when its internal temperature, measured with a reliable meat thermometer inserted into the center, reaches between 180-185 degrees Fahrenheit (82-85°C). Don’t be alarmed if the very center still appears slightly wobbly or unset; it will continue to firm up beautifully as it cools.
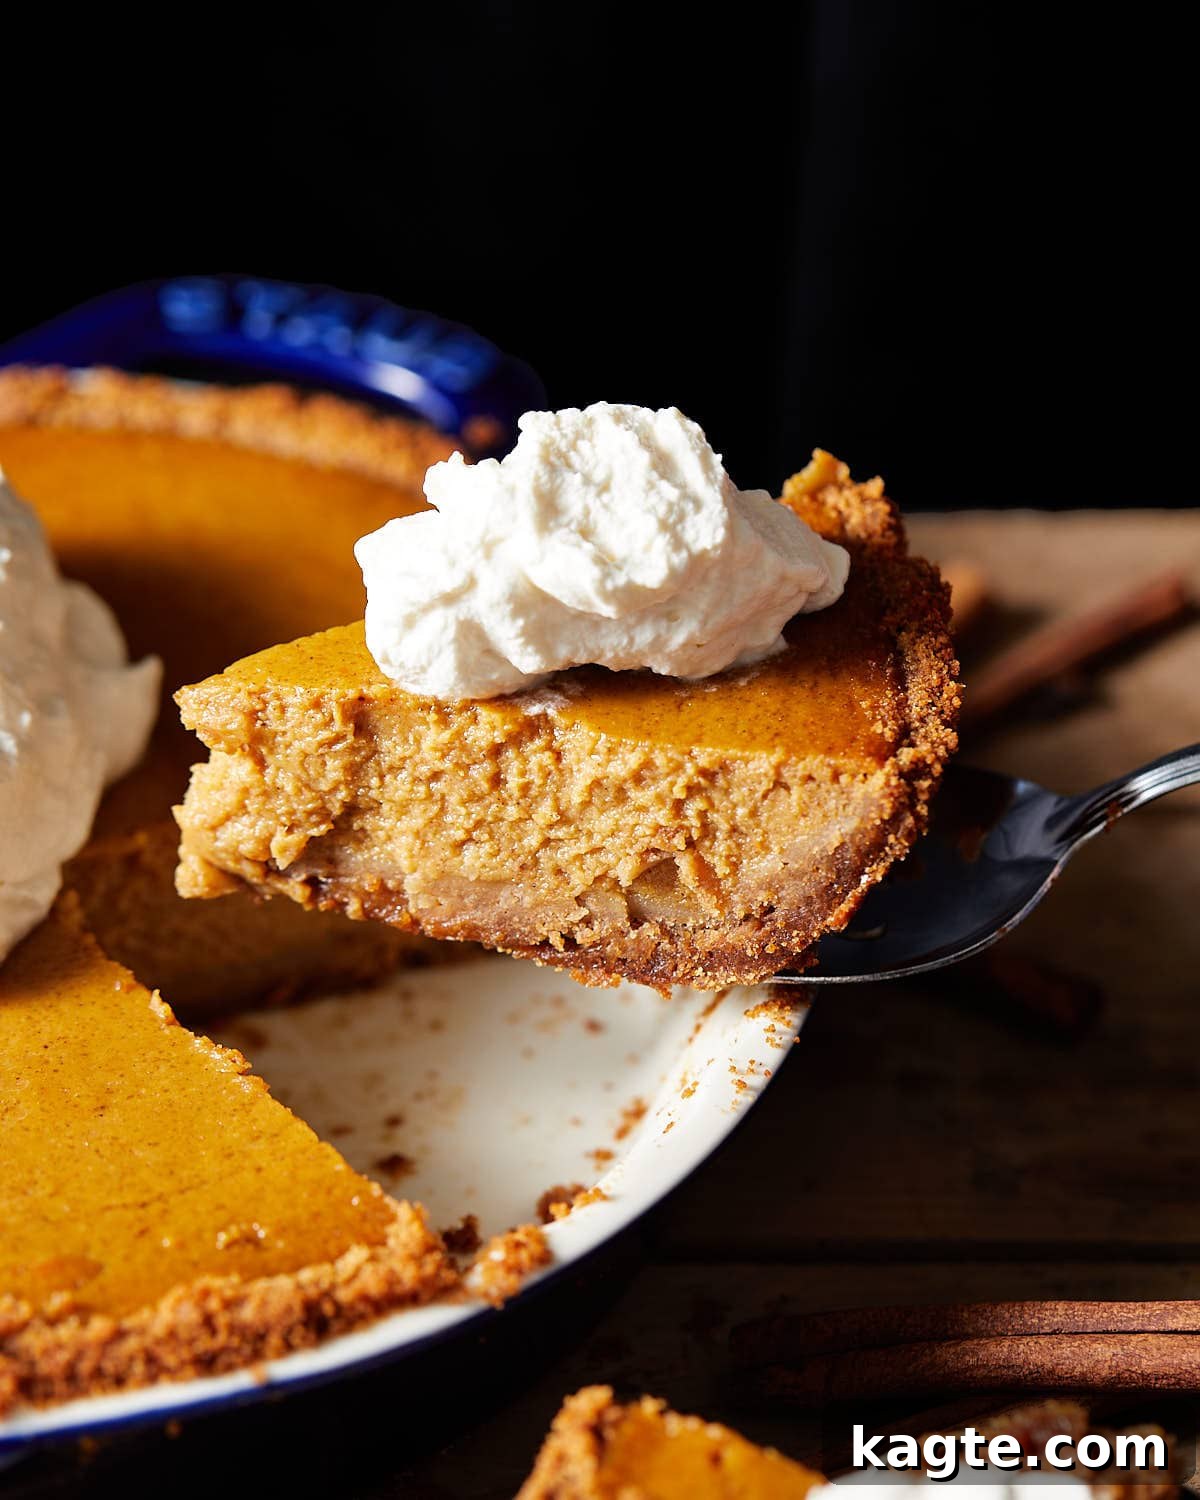
Step 8: Once baked, carefully remove the pumpkin pie from the oven and place it on a wire rack to cool completely at room temperature for 2-3 hours. During this cooling period, you’ll observe the center of the pie gently settling and leveling out, creating that signature smooth top. After it has fully cooled to room temperature, cover the pie tightly with plastic wrap or aluminum foil and transfer it to the refrigerator. Allow it to chill for at least 4 hours (or ideally overnight) before slicing and serving. This chilling time is essential for the pie to fully set and achieve its perfect sliceable consistency. Serve each luscious slice with a dollop of homemade whipped cream for an exquisite finish.
Expert Tips & Delicious Variations
- Embrace Room Temperature Ingredients: For the smoothest, most homogenous filling, it’s crucial to use room temperature ingredients. Allow your buttermilk and eggs to sit out on the counter for about 1 hour before you begin mixing. After melting the unsalted butter, let it cool slightly for 10-15 minutes before adding it to the mixture. Ingredients that are all roughly the same temperature blend together far more seamlessly, preventing lumps and ensuring a perfectly creamy texture.
- The Buttermilk Advantage: Don’t skip the buttermilk! Its subtle tanginess is not merely a flavor note; it adds incredible depth and complexity, creating a beautifully balanced pie that tastes more sophisticated than those made with evaporated milk. It provides a delightful counterpoint to the sweetness of the pumpkin and spices, elevating the overall taste experience.
- Mix the Filling Thoroughly: When preparing the pumpkin filling, take your time and mix it well. Whether you use an electric mixer or a whisk, ensure all ingredients are fully combined and the mixture is perfectly smooth, with no pockets of unmixed spice or sugar. A well-mixed filling ensures consistent flavor and a silky-smooth texture throughout the pie.
- Patience is Key: Cool Completely: As tempting as it might be to slice into your freshly baked pie, resist the urge! The pie will be extremely hot and delicate right out of the oven. Allow it to cool undisturbed on a wire rack at room temperature for a full 2-3 hours. This allows the pie to gradually set and firm up. For the best slicing experience and ultimate flavor, I prefer to serve my pumpkin pie cold. Once cooled to room temperature, transfer the pie to the refrigerator and chill for a minimum of 4 hours, or ideally overnight, before attempting to slice it.
- Serve Whipped Cream Fresh: For optimal presentation and texture, add the homemade whipped cream to each individual slice of pie just before serving. If you’re not planning to eat the entire pie at once, storing the pie and whipped cream separately is highly recommended. This prevents the whipped cream from melting or weeping onto the pie, keeping both components at their best. As an alternative, a scoop of premium vanilla ice cream also makes a fantastic accompaniment.
- Proper Storage for Lasting Enjoyment: This delicious pumpkin pie will stay fresh and flavorful for about 3-4 days when stored properly in the refrigerator. Always ensure it’s tightly covered with plastic wrap or aluminum foil to prevent it from drying out or absorbing other food odors. For longer storage, you can freeze individual slices, well-wrapped, for up to 2 months. Thaw in the refrigerator overnight before serving. For more detailed information, consult my guide on How Long Pumpkin Pie Lasts in the Fridge and optimal storage techniques.
- Consider a No-Bake Graham Cracker Crust: While I highly recommend the brief pre-baking step for a crispier, more flavorful crust, you can skip this step if you’re truly short on time or prefer a softer crust. A no-bake graham cracker crust will still hold the filling, but it will have a slightly less firm texture. This variation is often used for unbaked cheesecake pies.
- Flavor Variations: Elevate your pie further! Consider adding a touch of bourbon or rum to the filling for a sophisticated depth of flavor. For an extra touch of texture and nutty aroma, sprinkle toasted pecans or walnuts over the crust before adding the filling, or on top of the whipped cream when serving. You could also experiment with a hint of black pepper or a pinch of cardamom in the spice blend for a more unique profile.
Frequently Asked Questions
The most effective way to prevent a graham cracker crust from becoming soggy is by pre-baking it. This brief baking step helps to set the crumbs and butter, creating a barrier that prevents the crust from absorbing moisture from the pie filling. A pre-baked crust will be firmer, crisper, and maintain its integrity, ensuring a much more enjoyable texture with every slice. You can truly taste the difference a pre-baked crust makes!
Absolutely, and that’s precisely why this recipe was created! Graham cracker crusts are a fantastic and often preferred alternative to traditional pastry pie crusts. They are significantly easier and quicker to prepare, requiring no intricate rolling or chilling. Many bakers, myself included, find them to be a more flavorful and textural match for creamy fillings like pumpkin, often preferring them even over store-bought pastry crusts. Their inherent sweetness and crispness provide a wonderful contrast to rich fillings.
It largely depends on the specific dessert. For many no-bake desserts, a graham cracker crust does not strictly require pre-baking. However, for pies with moist fillings, like pumpkin pie, I strongly recommend pre-baking the crust. This crucial step deepens the flavor of the graham crackers, gives the crust a delightful crispness, and, most importantly, forms a protective layer that helps prevent it from absorbing moisture and becoming soggy from the filling. It significantly improves the overall texture and stability of your pie.
Yes, whether you’re using a traditional pastry crust or a graham cracker crust, pre-baking (also known as blind baking) is highly recommended for pumpkin pie. This practice creates a barrier against the moisture from the wet filling, preventing the bottom crust from becoming soft or raw. It ensures a beautifully crisp and fully cooked crust that can perfectly support the rich, creamy pumpkin filling.
Certainly! Using a premade, store-bought graham cracker crust is a wonderful time-saver and perfectly acceptable for baking this pumpkin pie. Just as with a homemade crust, I still advise following the recipe notes to pre-bake the premade crust for a few minutes. This step helps to achieve a firmer, crispier base and prevents any potential sogginess, ensuring your pie turns out beautifully every time.
More Irresistible Dessert Recipes
Dessert
No-Chill Chocolate Chip Cookies (Easy)
Christmas
20 Sweet Peppermint Recipes for Christmas
Fall
20 Sweet Pumpkin Recipes for Fall (From Breakfast to Dessert)
Breakfast
Blueberry Coffee Cake with Greek Yogurt & Streusel
If you’ve had the pleasure of trying this exquisite pumpkin pie recipe, I would be incredibly grateful if you could leave a star rating in the recipe card below and/or share your thoughts in a comment! Your feedback is always valued and helps others discover delicious recipes. For more culinary inspiration and updates, be sure to follow me on Pinterest, Facebook & Instagram.
Easy Buttermilk Pumpkin Pie with Graham Cracker Crust
Equipment
-
Meat Thermometer
-
Stand Mixer
-
Hand Mixer
-
Mixing Bowls
Ingredients
Crust*:
- 12 whole graham crackers
- 5 Tablespoons brown sugar
- 5 Tablespoons salted butter melted
Filling:
- 1 15-ounce can unsweetened pure pumpkin puree
- 1 cup buttermilk room temperature*
- 3 eggs room temperature
- 4 Tablespoons unsalted butter melted & cooled slightly
- 3/4 cup brown sugar
- 1/4 cup granulated sugar
- 2 teaspoons vanilla extract
- 1/2 teaspoon salt
- 2 teaspoons ground cinnamon*
- 1 teaspoon ground ginger
- 1/2 teaspoon ground nutmeg
- 1/4 teaspoon ground cloves
- homemade whipped cream for serving*
Instructions
-
Preheat the oven to 350 degrees F (175°C). In a food processor, pulse the whole graham crackers and brown sugar until they form a fine crumb. Alternatively, crush them in a zip-top bag with a rolling pin or by hand.12 whole graham crackers, 5 Tablespoons brown sugar
-
Pour in the melted salted butter and continue to pulse the graham cracker mixture until the butter is fully combined and the crumbs are moistened. If mixing by hand, combine in a bowl with a spatula.5 Tablespoons salted butter
-
Press the graham cracker mixture firmly into the bottom and up the sides of a 9 or 10-inch pie dish. Use the bottom of a small glass or measuring cup and your hands to compact the mixture evenly. Bake for 7-8 minutes.
-
While the pie crust bakes, prepare the filling. In a large bowl, whisk together the pumpkin purée, room temperature buttermilk, eggs, slightly cooled melted unsalted butter, brown sugar, granulated sugar, vanilla extract, salt, ground cinnamon, ground ginger, ground nutmeg, and ground cloves. Mix with an electric/stand mixer or a whisk until the filling is smooth and well combined.1 15-ounce can unsweetened pure pumpkin puree, 1 cup buttermilk, 3 eggs, 4 Tablespoons unsalted butter, 3/4 cup brown sugar, 1/4 cup granulated sugar, 2 teaspoons vanilla extract, 1/2 teaspoon salt, 2 teaspoons ground cinnamon*, 1 teaspoon ground ginger, 1/2 teaspoon ground nutmeg, 1/4 teaspoon ground cloves
-
Carefully pour the pumpkin filling into the pre-baked graham cracker crust.
-
Use a spatula to gently smooth out the surface of the filling. The pie will be filled almost to the very top.
-
Bake for 45-55 minutes, adjusting time based on your pie dish size. At the 25-30 minute mark, cover the edges of the pie with foil or a pie crust shield to prevent burning. A 9-inch pie will typically require more time than a 10-inch pie. Check the center temperature with a thermometer; it’s done when it reaches 180-185 degrees F (82-85°C). The middle will still look slightly wobbly but will set as it cools.
-
Remove the pie from the oven and cool completely on a wire rack for 2-3 hours at room temperature. The center will gently drop and level as it cools. Once completely cooled, cover and transfer to the refrigerator for at least 4 hours to chill and fully set. Serve cold with homemade whipped cream.homemade whipped cream
Notes
- Graham Cracker Crust: You can swap the homemade crust for a store-bought one, like Keebler. You still should pre-bake it as the recipe states.
- Pumpkin: The only ingredient on the back of the can should be pumpkin. Be sure it has no added sugar or spices. It is not the same as canned pumpkin pie filling.
- Buttermilk: I highly recommend buttermilk. It adds a great flavor to the pie. However, you can substitute it for 1% or 2% milk. Let the buttermilk and eggs sit at room temperature for about 45 minutes to 1 hour.
- Cinnamon & Other Spices: Instead of using ginger, nutmeg, and cloves. You can use 1 1/2 teaspoons store-bought or homemade pumpkin pie spice. You still need to add the 2 teaspoons of cinnamon.
- Whipped Cream: Using an electric mixer, whip 1 cup heavy cream, 2 Tablespoons granulated sugar, and 1 teaspoon vanilla extract, until stiff peaks form.
- Use room temperature ingredients. Let the buttermilk and eggs sit out at room temperature for about 1 hour. After the unsalted butter is melted, let it cool for about 10-15 minutes. Using ingredients that are all about the same temperature helps them combine seamlessly.
- Cool completely. The pie will be extremely hot right when it comes out of the oven, be sure to let it cool at room temperature before transferring it to the fridge. I prefer to serve the pie cold so I refrigerate the pie for at least 4 hours before slicing.
- Store in the fridge. This pie will stay good for about 3-4 days in the refrigerator. Be sure to cover it. You can also freeze individually wrapped pieces for 2 months.
Nutrition
Nutrition information is automatically calculated, so should only be used as an approximation.