
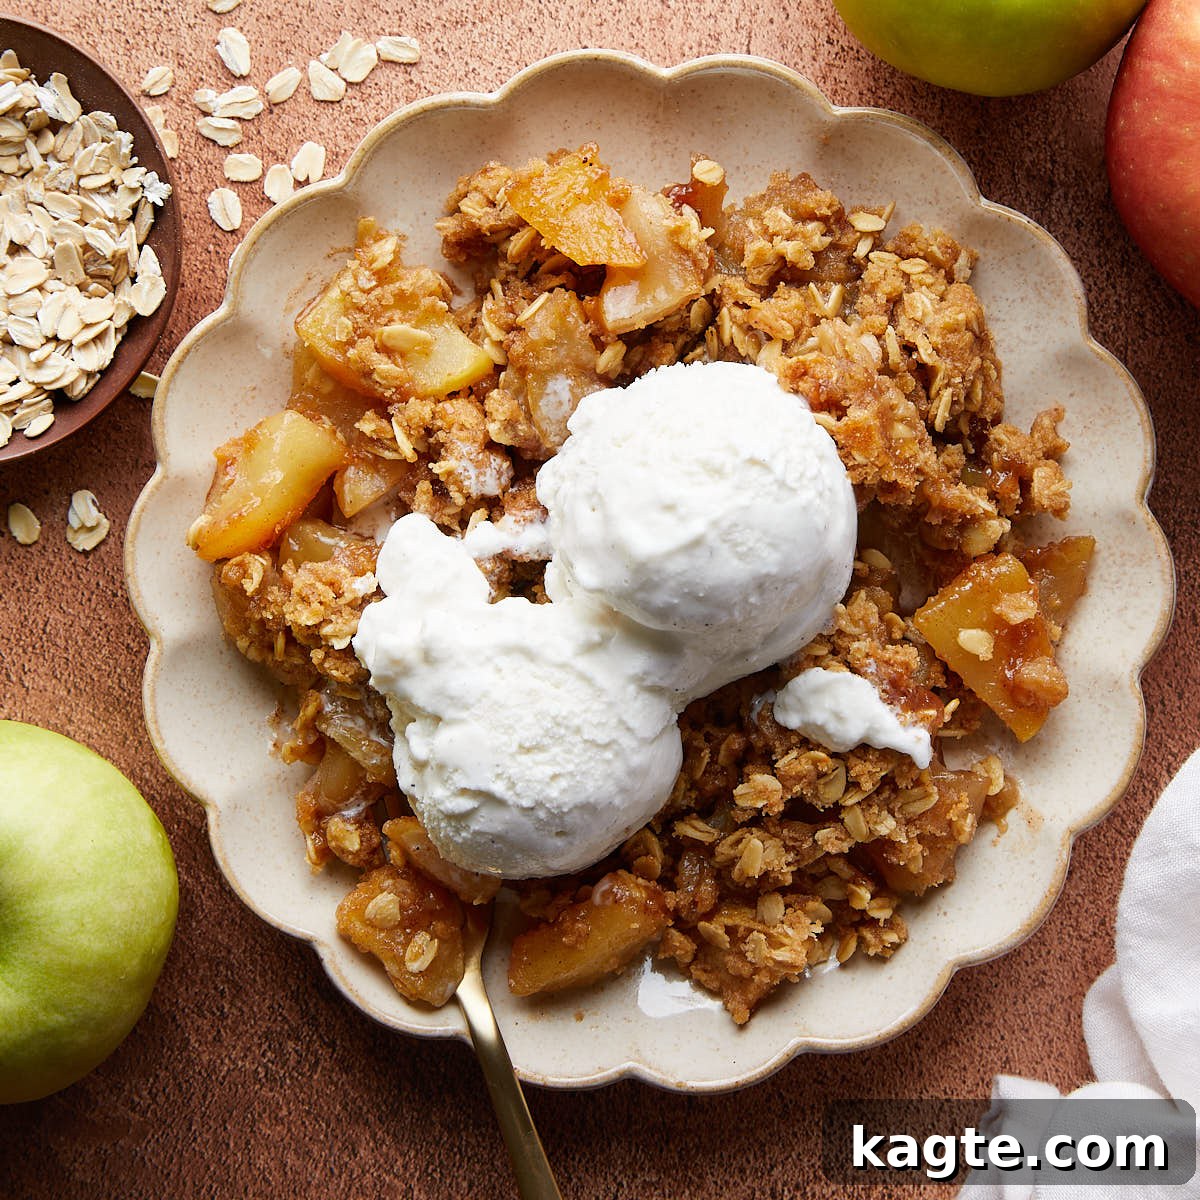
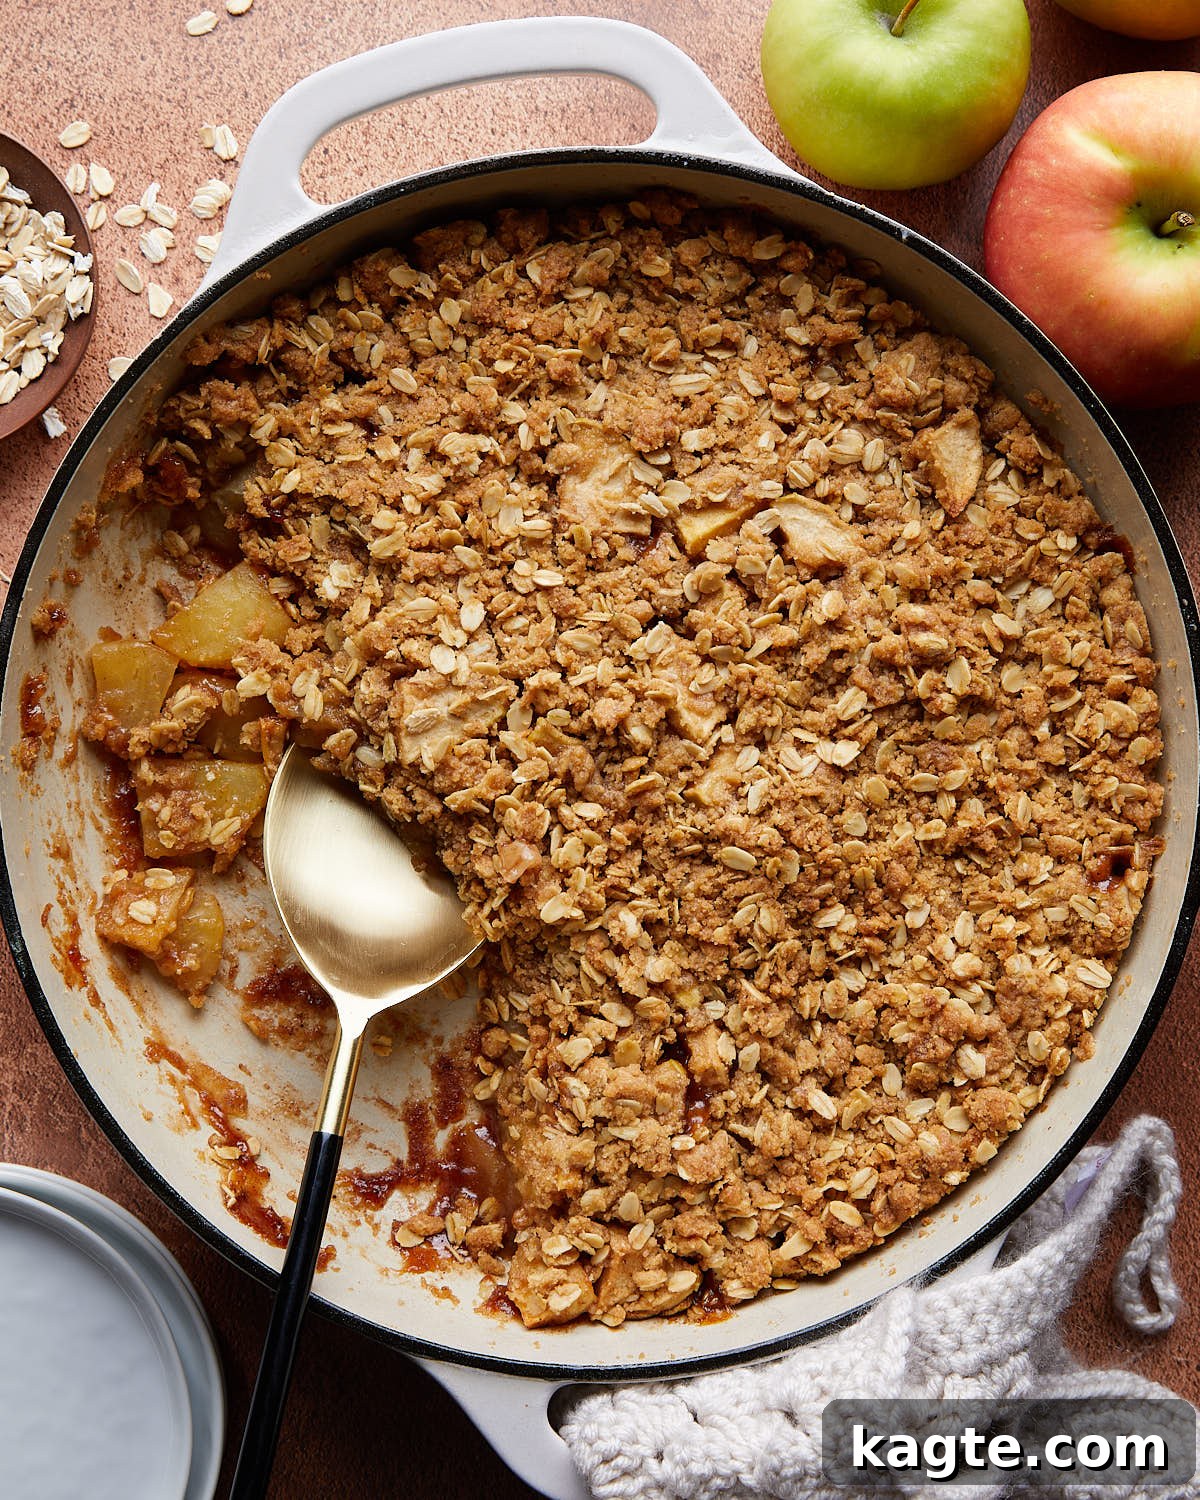
Welcome to the quintessential fall dessert that promises warmth, comfort, and an explosion of flavor: the **Dutch Oven Apple Crisp**. This beloved classic features an irresistible combination of tender, spiced apples nestled beneath a golden, buttery oat topping, all baked to bubbly perfection. Served warm with a generous scoop of creamy vanilla ice cream, it’s not just a dessert; it’s an experience, making every gathering, from cozy family dinners to adventurous camping trips, truly special.
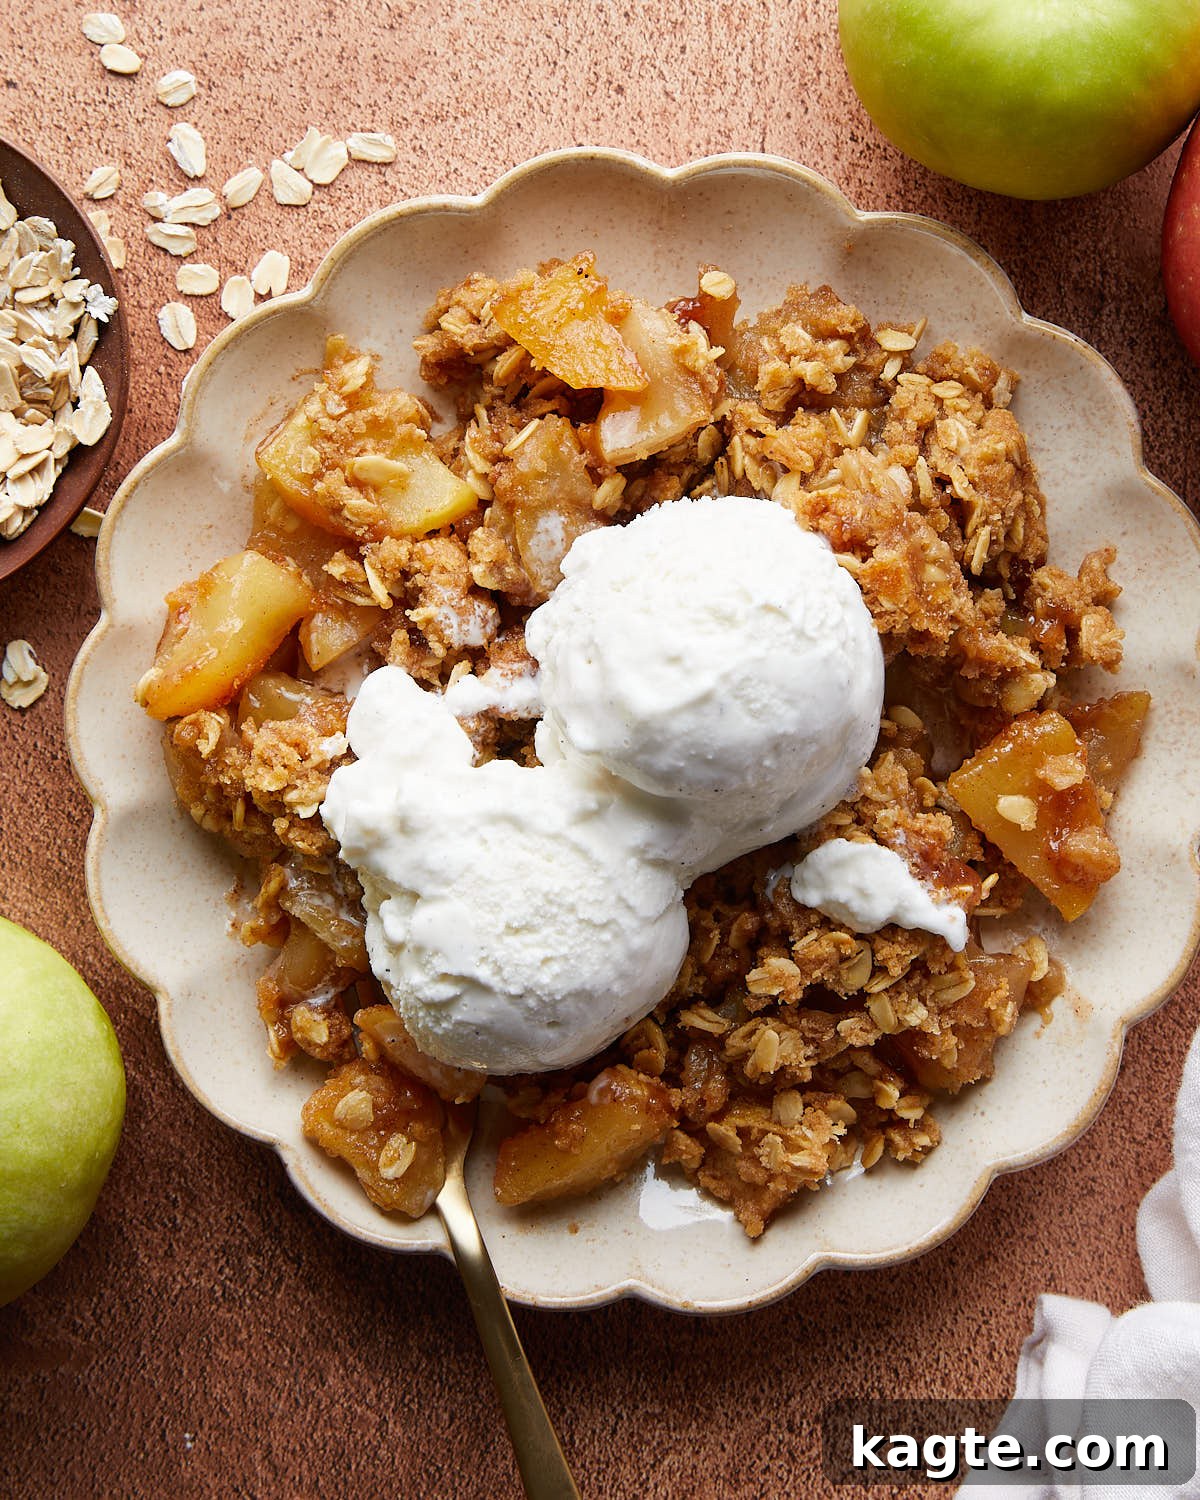
There’s something uniquely comforting about a homemade apple crisp. It offers all the cozy, inviting aromas and flavors of a traditional apple pie but with a fraction of the effort, making it a fantastic go-to for any occasion. Whether you’re seeking a quick dessert after a busy week, a hearty treat for a camping adventure, or simply a delicious way to utilize an abundance of fresh apples from your local orchard or garden, this Dutch oven apple crisp recipe is your perfect solution. It stands out as an easy yet incredibly satisfying alternative to more time-consuming bakes, allowing you to enjoy that comforting apple goodness without the fuss.
Beyond its simplicity, this recipe is a celebration of seasonal bounty. Apples are incredibly versatile, and if you find yourself with more than you know what to do with, an apple crisp is a delicious answer. For other inspired ways to use your apple harvest, consider exploring recipes like a rich Apple Curd or a decadent Apple Bread Pudding, which is always a crowd-pleaser.
For those times when you crave apple-y sweetness with even less prep, our Air Fryer Apples with Oats offer a speedy, equally delicious option.
Table of Contents
- The Allure of Dutch Oven Apple Crisp
- Why You’ll Fall in Love with This Recipe
- Essential Ingredients & Clever Substitutions
- Selecting the Perfect Apples for Your Crisp
- Mastering the Art of Cutting Apples for Crisp
- Step-by-Step Guide to Making Dutch Oven Apple Crisp
- Serving Suggestions for the Ultimate Indulgence
- Expert Tips for a Perfect Apple Crisp Every Time
- Creative Additions & Flavor Variations
- Frequently Asked Questions (FAQ)
- More Delectable Dessert Recipes
- Dutch Oven Apple Crisp Recipe Card
The Allure of Dutch Oven Apple Crisp
While apple crisp is wonderful in any baking dish, preparing it in a Dutch oven elevates the experience to a new level. A Dutch oven’s heavy construction ensures even heat distribution, resulting in perfectly tender apples and a uniformly golden, crunchy topping. Its ability to retain heat also keeps the crisp warm for longer, making it ideal for serving directly from the pot at the table, creating a rustic and inviting presentation. Furthermore, a Dutch oven is incredibly versatile, transitioning seamlessly from your kitchen oven to a campfire, allowing you to enjoy this delightful dessert even when you’re adventuring outdoors. This unique baking vessel ensures a deeply caramelized apple filling and a gloriously crisp topping that truly sets this recipe apart.
Why You’ll Fall in Love with This Recipe
This Dutch Oven Apple Crisp isn’t just another dessert; it’s a testament to simple ingredients yielding extraordinary results. Here’s why this recipe will quickly become a cherished favorite in your repertoire:
- Perfect Balance of Topping to Filling: We believe the topping is the best part, and this recipe delivers! It achieves an ideal equilibrium with an ample, almost equal ratio of crunchy oat topping to the luscious apple filling. No skimping here – every spoonful promises a harmonious blend of textures and tastes.
- Perfectly Tender, Never Mushy Apples: Say goodbye to overcooked or watery fillings. Our method ensures the apples cook down to a delightful tenderness, retaining their structure and natural sweetness without becoming a bland puree. Each bite offers a pleasant chew and bursts with vibrant apple flavor.
- A Symphony of Warm Spices: This crisp isn’t shy on flavor. We’ve carefully selected a blend of classic fall spices—cinnamon, nutmeg, ginger, and cloves—to infuse the apples with incredible depth and an aromatic warmth that evokes the coziness of the season. This generous seasoning transforms simple apples into a truly gourmet experience.
- Effortless Preparation: Despite its gourmet appeal, this recipe is remarkably straightforward. With clear steps and minimal fuss, you can whip up this impressive dessert without spending hours in the kitchen, making it perfect for both novice bakers and seasoned pros.
- Versatile & Crowd-Pleasing: Whether it’s a quiet evening at home or a lively dinner party, this apple crisp is guaranteed to delight. Its comforting nature and rich flavors make it universally appealing, and the Dutch oven makes serving a breeze.
Essential Ingredients & Clever Substitutions
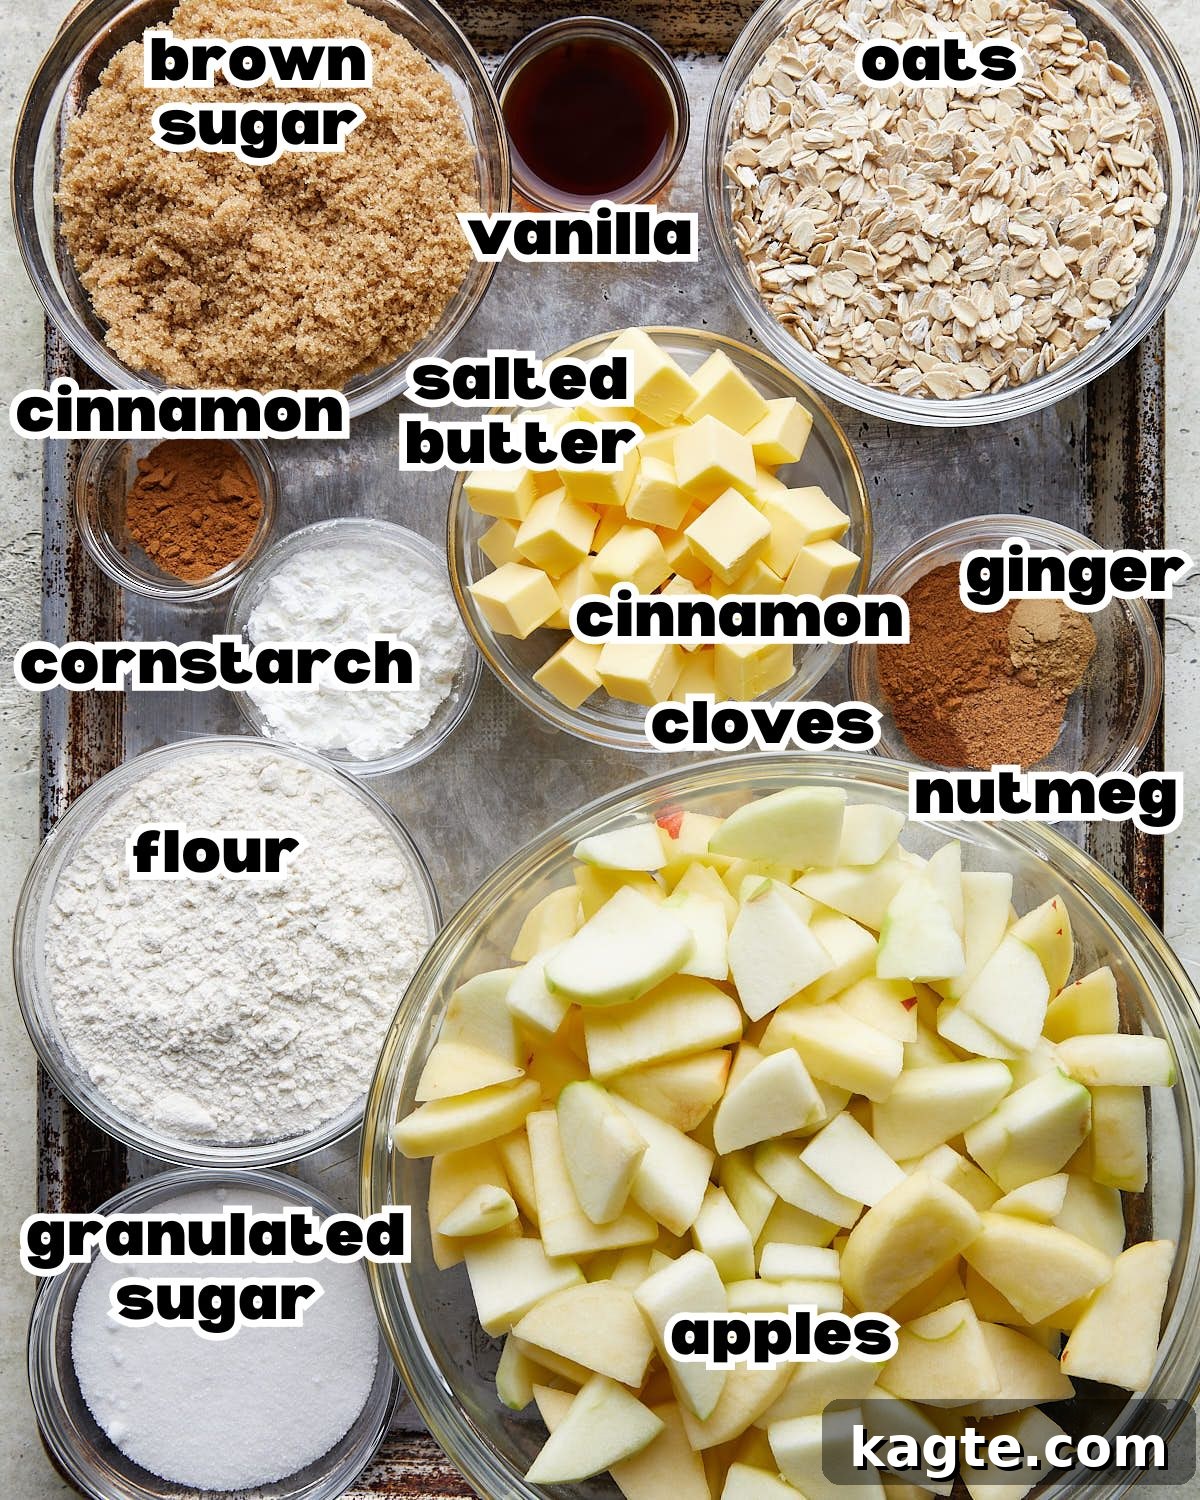
Understanding each ingredient’s role is key to baking success. Here’s a closer look at what you’ll need:
- Apples: The stars of our show! I highly recommend a thoughtful mix of Cosmic Crisp and Granny Smith apples (approximately 1/3 Cosmic Crisp and 2/3 Granny Smith). Granny Smith apples are indispensable for their firm texture and bright tartness, which cuts through the sweetness of the crisp and prevents it from becoming cloying. Cosmic Crisp apples, known for their balanced sweetness and crispness, add another layer of flavor and texture. If Cosmic Crisp isn’t available, excellent alternatives include Honeycrisp, Jazz, or Pink Lady apples. You’ll need about 6-8 whole apples, depending on their size, aiming for roughly 8 cups (950 grams) once peeled and sliced.
- Granulated Sugar: This fine white sugar is crucial for sweetening the apple filling and harmonizing with the apples’ natural tartness. It also aids in creating that wonderfully syrupy, bubbly consistency.
- Cornstarch: A secret weapon for the perfect filling! Cornstarch acts as a thickening agent, preventing the apple mixture from becoming too watery. It ensures a beautifully set, juicy filling that holds its shape.
- Vanilla Extract: A splash of pure vanilla extract elevates the flavor profile of the apple filling, adding a rich, warm, and aromatic dimension that complements the spices beautifully.
- Spices (Cinnamon, Nutmeg, Ginger, Cloves): These are the classic quartet of apple pie spices, working in concert to create that iconic, comforting fall flavor. Cinnamon provides warmth, nutmeg offers a subtle earthiness, ginger adds a hint of zest, and cloves contribute a deep, pungent sweetness. If you prefer a simpler spice blend, feel free to substitute the nutmeg, ginger, and cloves with an additional 1/2 teaspoon of cinnamon.
- All-Purpose Flour: For the topping, flour provides the necessary structure and body, creating that crumbly, cohesive texture that binds the oats and butter together.
- Brown Sugar: This adds a deeper, more complex sweetness to the topping compared to granulated sugar, thanks to its molasses content. It also contributes to the rich, caramelized notes and golden-brown hue of the crisp.
- Salted Butter: Cold, cubed salted butter is essential for a truly crispy topping. The salt enhances all the flavors in the dish, balancing the sweetness. If you only have unsalted butter, simply add a pinch (about 1/4 teaspoon) of fine salt to the topping mixture. Keeping the butter cold helps create those delightful, coarse crumbs rather than a paste.
- Rolled Oats (Old-Fashioned): These are what make this dish a “crisp”! Old-fashioned rolled oats provide a wonderful chewy texture and contribute to the crispy, golden-brown crust. They absorb moisture and toast beautifully during baking, distinguishing a crisp from a crumble (which typically omits oats) or a cobbler (which has a biscuit-like topping).
A complete list of ingredients and precise amounts can be found on the recipe card below.
Selecting the Perfect Apples for Your Crisp
Choosing the right apples is paramount for an exceptional apple crisp. You want varieties that offer a balance of flavor – from tart to sweet – and a firm texture that can withstand baking without turning to mush. Here are some of the best apples for crisp, often best used in combination:
- Granny Smith: A classic and indispensable choice for apple crisp. Their distinct tartness provides a crucial counterpoint to the sweet filling and topping, preventing the dessert from becoming overly sweet. Their firm texture also ensures they hold their shape beautifully during the baking process, offering a satisfying bite.
- Honeycrisp: Renowned for their incredible crispness and juicy sweetness, Honeycrisp apples add a delightful vibrancy and a pleasing texture to the filling. They maintain their structural integrity remarkably well, making them a consistently popular choice for any baked apple dessert.
- Pink Lady (Cripps Pink): These apples strike a wonderful balance between sweet and tart, featuring a firm flesh that holds up excellently under heat. Pink Lady apples contribute a bright, tangy flavor that brightens the overall profile of the crisp.
- Golden Delicious: With a mild, sweet flavor and a relatively soft yet resilient texture, Golden Delicious apples bake down beautifully. They are excellent when paired with more tart varieties, adding a gentle sweetness and enhancing the complexity of the apple blend.
- Jazz: Offering a harmonious blend of sweetness and tartness, Jazz apples boast a firm, dense texture that performs exceptionally well in baking. They add a refreshing zest and robust flavor that makes your crisp more dynamic.
- Fuji: Known for their crispness and sweet, juicy flavor, Fuji apples are another excellent choice for baking. They hold their shape well and add a pleasant depth of flavor without being overwhelmingly tart.
For the most balanced and flavorful crisp, combining a tart apple (like Granny Smith) with one or two sweeter, firmer varieties (like Honeycrisp or Cosmic Crisp) is highly recommended. This ensures a complex flavor profile and varied texture that elevates the entire dish.
Mastering the Art of Cutting Apples for Crisp
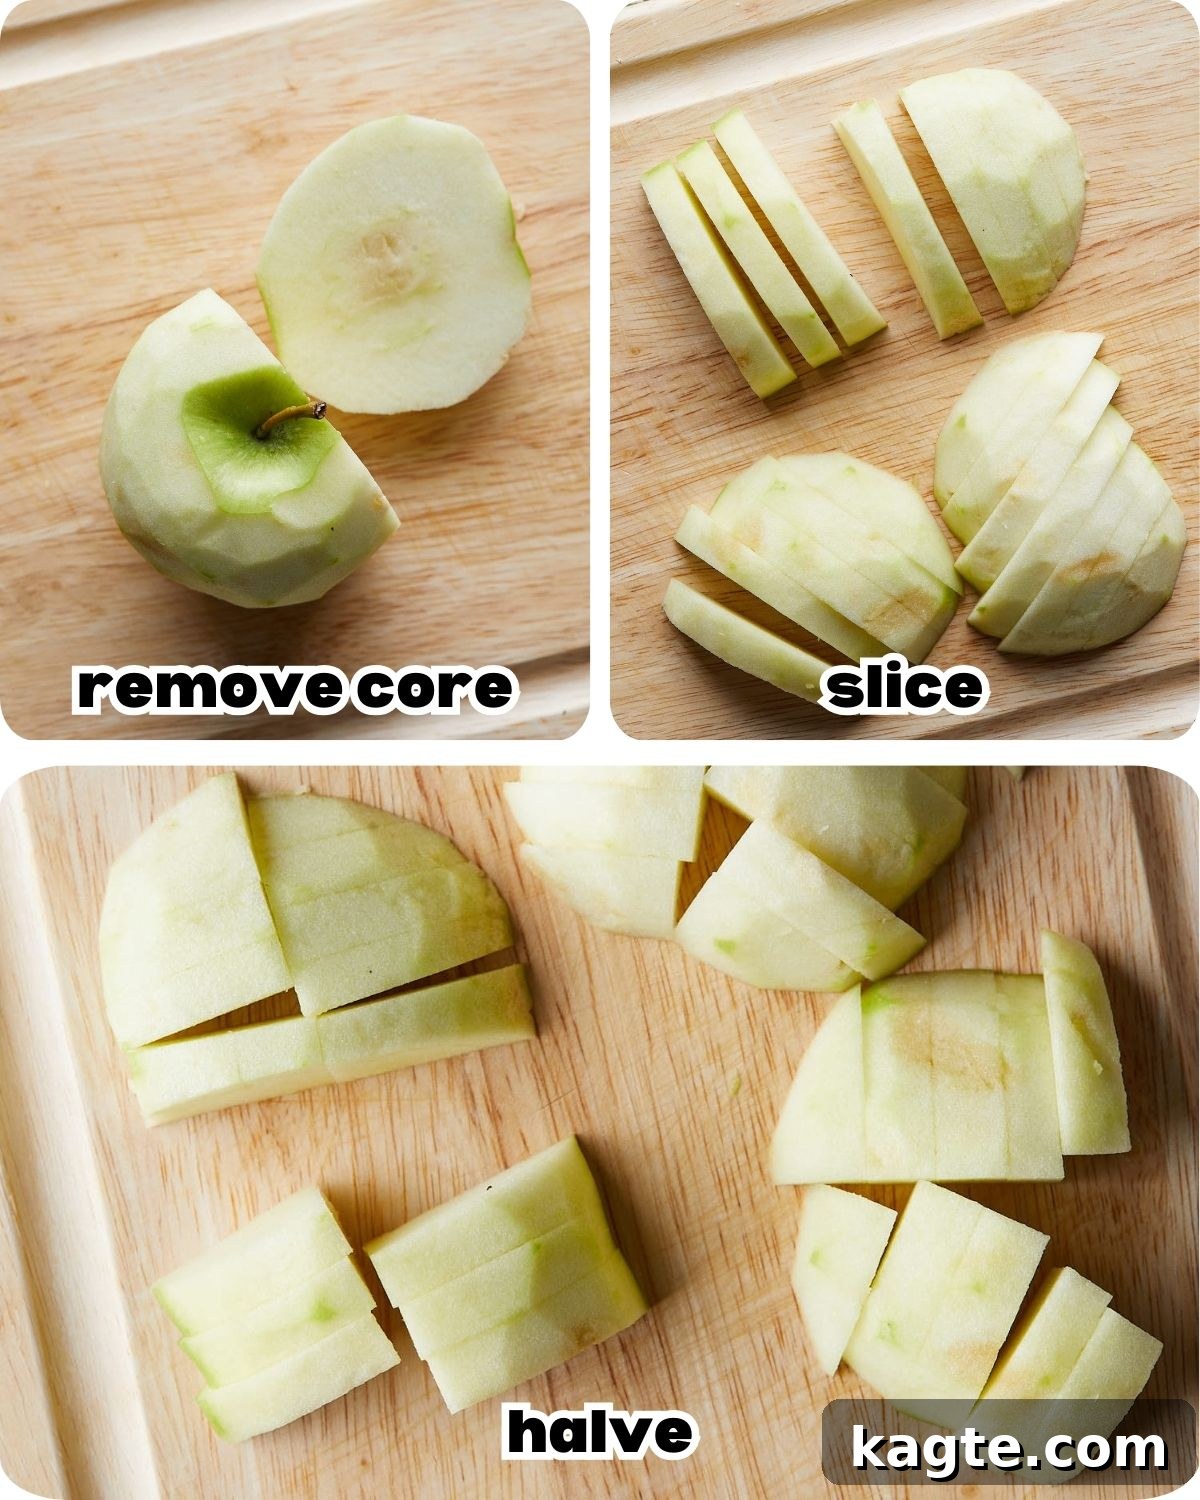
Properly cutting your apples is a small but crucial step that significantly impacts the final texture and cooking consistency of your crisp. Uniformity is key for even baking.
- Peel the Apples: Always begin by thoroughly peeling your apples. While some prefer leaving the skin on for fiber, peeled apples ensure a smoother, more pleasant texture in the cooked crisp, as apple skins can become tough and chewy when baked.
- Core the Apples Efficiently: To remove the core effectively, stand each apple upright on its stem end. Carefully slice down along each of the four sides, cutting around the central core. This method ensures you remove all seeds and tough core material while maximizing the usable apple flesh.
- Slice Evenly: Once cored, take each apple section and slice it into even pieces. Aim for a thickness of about 1/3 to 1/2 inch. This consistency is vital; thinner slices might turn mushy, while thicker ones might remain too firm. Even slices guarantee that all apple pieces cook uniformly, achieving that perfect tender bite throughout the crisp.
- Halve the Slices (Optional, but Recommended): For smaller, more manageable pieces that are easier to eat and distribute evenly within the crisp, cut your 1/3-1/2 inch slices in half crosswise. This creates bite-sized apple chunks that cook beautifully and mingle perfectly with the oat topping.
By following these simple steps, you’ll ensure your apple filling is perfectly cooked and wonderfully textured, ready to be enveloped by the crispy oat topping.
Step-by-Step Guide to Making Dutch Oven Apple Crisp
Crafting this delicious Dutch Oven Apple Crisp is a straightforward process, broken down into a few easy stages. Here’s a quick overview before we dive into the details:
Quick Overview
- Prepare the flavorful apple filling.
- Mix together the irresistible oat topping.
- Assemble the layers in your Dutch oven.
- Bake until golden, bubbly, and fragrant.
Detailed Step-by-Step Instructions
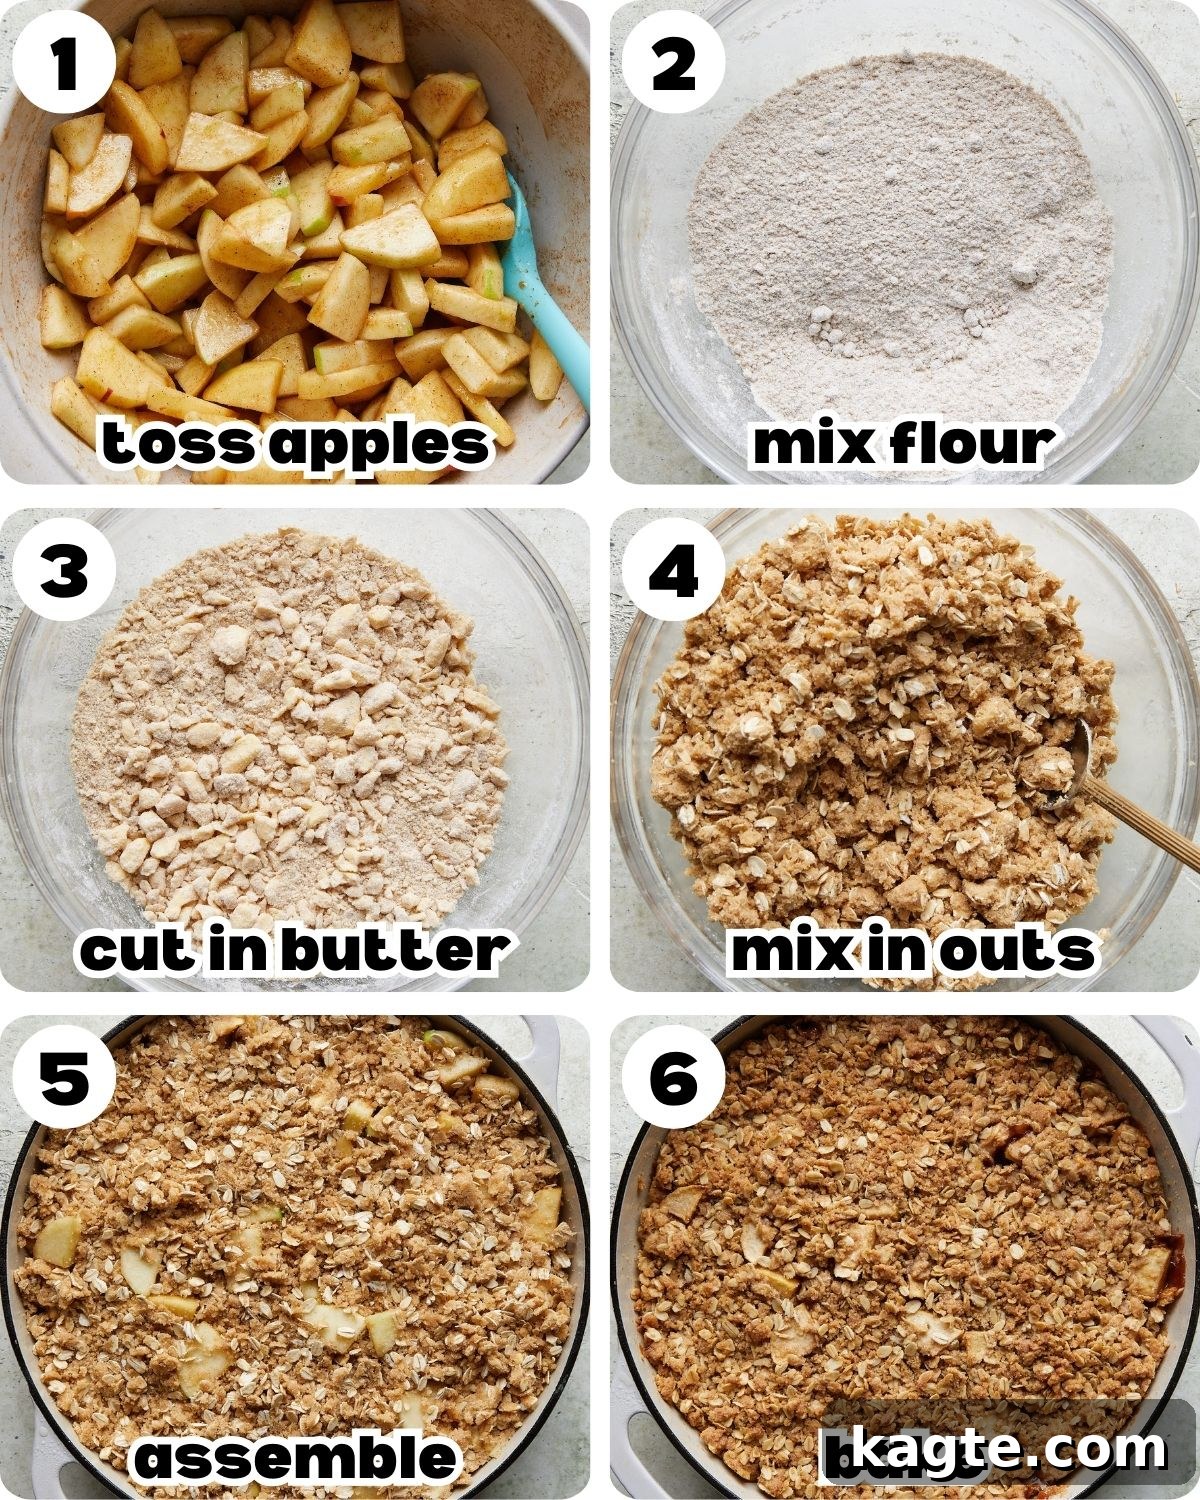
Quick Tip: Achieve the Perfect Apple Filling
When tossing the apples with the sugar and spices, be sure to mix thoroughly for at least a couple of minutes. As you gently toss and combine the ingredients, you’ll notice the apples begin to release their natural juices, creating a delicious, thick, and syrupy coating. This step is crucial for an evenly flavored and moist filling.
Quick Tip: Incorporating Oats for Superior Crispiness
For the crisp topping, add the rolled oats *after* you’ve worked the cold butter into the flour and brown sugar mixture. This ensures that the oats remain distinct and maintain their wonderful texture, contributing to a truly crispy and chewy topping rather than a pasty one.
Step 1: Prepare the Apple Filling. Begin by preheating your oven to 350°F (175°C). In a large mixing bowl, combine the peeled, cored, and evenly sliced apples with granulated sugar, cornstarch, vanilla extract, cinnamon, nutmeg, ginger, and cloves. Toss all the ingredients vigorously and thoroughly until every apple slice is uniformly coated with the spice and sugar mixture. Set this bowl aside while you prepare the topping.
Step 2: Create the Dry Topping Base. In a separate, medium-sized bowl, whisk together the all-purpose flour, brown sugar, and a teaspoon of cinnamon. Ensure there are no lumps and the ingredients are well combined. This forms the flavorful dry base for your crisp topping.
Step 3: Incorporate the Butter. Add the cold, cubed salted butter to the dry flour mixture. Using a pastry cutter, two knives, or even your fingertips, work the butter into the flour mixture until it resembles coarse crumbs. The key is to keep the butter cold and avoid overworking it, which helps achieve a tender, crumbly topping.
Step 4: Add the Oats. Gently stir in the old-fashioned rolled oats into the butter-flour mixture until they are evenly distributed. Be careful not to crush the oats; you want them intact to provide that signature chewy-crispy texture.
Step 5: Assemble the Crisp. Lightly grease the inside of a shallow Dutch oven or a large baking dish with butter or cooking spray. Pour the prepared apple mixture into the greased dish, spreading it out evenly to create a uniform layer. Next, sprinkle the oat topping mixture generously over the apples, ensuring it forms a complete and even blanket across the entire surface. This even distribution is vital for an optimal crispy texture.
Step 6: Bake to Perfection and Serve. Place the Dutch oven or baking dish in your preheated oven and bake for 45-50 minutes. The crisp is ready when the topping is gorgeously golden brown and the apple filling beneath is visibly bubbly and fragrant. Once baked, remove the crisp from the oven and allow it to cool for about 10-15 minutes. This resting period allows the filling to set slightly, making it easier to scoop and ensuring it retains its delightful consistency. Serve your warm Dutch Oven Apple Crisp as is, or elevate it with a generous scoop of creamy vanilla ice cream or a dollop of freshly whipped cream for the ultimate indulgent treat.
Serving Suggestions for the Ultimate Indulgence
While I firmly believe the ultimate way to enjoy apple crisp is warm, straight from the oven, with a melting scoop of vanilla ice cream, there are several delightful additions that can elevate this already incredible dessert. Here are a few options to customize your serving experience:
- Classic Vanilla Ice Cream: The undeniable champion! The cold, creamy vanilla ice cream provides a stunning contrast to the warm, spiced apples and crunchy topping, creating a heavenly symphony of temperatures and textures.
- Homemade Whipped Cream: A dollop of light, airy, and subtly sweet homemade whipped cream is another fantastic accompaniment, adding a touch of elegance and richness without being too heavy.
- Salted Caramel Sauce: Drizzle warm salted caramel sauce over your crisp for an extra layer of sweet, buttery, and slightly salty decadence. The caramel complements the apple and oat flavors beautifully.
- Toasted Nuts: For an added layer of crunch and nutty flavor, sprinkle chopped and lightly toasted pecans or walnuts over the top just before serving. They add a wonderful depth and texture.
- Greek Yogurt or Crème Fraîche: For a slightly tangier and lighter option, a dollop of plain Greek yogurt or crème fraîche can offer a refreshing counterpoint to the sweetness of the crisp.
- Cheddar Cheese: For the adventurous and traditionalists, a thin slice of sharp cheddar cheese melting on top of warm apple crisp offers a surprisingly delicious savory-sweet experience.
Expert Tips for a Perfect Apple Crisp Every Time
Achieving a consistently perfect apple crisp involves a few key techniques. Keep these expert tips in mind for outstanding results:
- Embrace a Mix of Apples: Don’t settle for just one type! Combining tart varieties like Granny Smith with sweeter, firmer apples such as Honeycrisp, Cosmic Crisp, or Pink Lady creates a more complex and balanced flavor profile, while also ensuring a good texture that isn’t overly soft or too firm.
- Peel and Slice for Uniformity: Always peel your apples for a smooth texture. The most important tip for the apple filling is to slice the apples evenly, ideally between 1/3 to 1/2 inch thick. Uniform slices guarantee that all apples cook at the same rate, resulting in consistently tender fruit without any hard spots or mushy bits.
- Ensure Even Coating: When tossing the apples with sugar, cornstarch, and spices, take your time to ensure every single apple slice is thoroughly coated. This step is crucial for a flavorful filling that thickens properly and has that wonderful syrupy texture.
- Keep Butter Cold for Topping: For the best crumbly and crispy topping, make sure your butter is very cold and cut into small cubes. Incorporate it into the dry ingredients quickly using a pastry cutter or your fingertips to avoid melting it. This creates flaky, coarse crumbs that crisp up beautifully in the oven.
- Don’t Overmix the Topping: Once you’ve added the oats, mix just enough to distribute them evenly. Overmixing can develop the gluten in the flour and make your topping tough instead of crumbly.
- Allow it to Rest Before Serving: It’s tempting to dive right in, but letting the apple crisp cool for about 10-15 minutes after baking is essential. This allows the fruit filling to set, preventing it from being too runny and making it much easier to serve neatly.
- Listen and Look for Doneness: The crisp is done when the topping is deeply golden brown and you can see the apple filling bubbling vigorously through the oats. You might even hear the gentle bubbling sound from the oven. These are clear indicators of perfectly cooked fruit.
- Serve Warm for Optimal Enjoyment: While delicious at room temperature, apple crisp truly shines when served warm. The heat enhances the aroma of the spices and the tenderness of the apples, especially when paired with a cold topping.
Creative Additions & Flavor Variations
While this Dutch Oven Apple Crisp recipe is perfect as is, it also serves as a fantastic base for creativity. Feel free to experiment with these additions and variations to customize it to your taste:
- Add Nuts for Extra Crunch: Introduce a delightful textural contrast by mixing in 1/2 to 1 cup of chopped nuts into your oat topping. Pecans, walnuts, or even almonds toast beautifully in the oven, adding a rich, nutty flavor and an extra layer of crunch.
- A Zest of Citrus or Vinegar: For an extra bright and tangy kick that truly makes the apple flavor pop, add 2-3 teaspoons of fresh lemon juice or apple cider vinegar to your apple mixture. This small addition can balance the sweetness and add complexity.
- Different Fruits: Don’t limit yourself to just apples! Consider adding a cup or two of other fall fruits to the filling, such as sliced pears, cranberries (for tartness), or even a handful of blackberries for a mixed fruit crisp.
- Spice it Up (or Down): While our spice blend is classic, you can adjust it. A pinch of cardamom can add an exotic note, or a touch of allspice could deepen the flavor profile. For a simpler approach, stick to just cinnamon.
- Gluten-Free Version: To make this crisp gluten-free, substitute the all-purpose flour in the topping with a 1:1 gluten-free baking flour blend. Ensure your oats are certified gluten-free.
- Vegan Adaptation: For a vegan crisp, swap the dairy butter in the topping for a high-quality plant-based butter alternative. The texture will still be wonderfully crispy and delicious.
- Maple or Honey Sweetness: Replace a portion of the granulated sugar in the filling with a couple of tablespoons of maple syrup or honey for a different nuance of sweetness.
Frequently Asked Questions (FAQ)
Here are some common questions about making Dutch Oven Apple Crisp:
- Can I prepare apple crisp ahead of time?
Yes, you can! You can prepare the apple filling and the topping separately and store them in the refrigerator. Assemble them just before baking. Alternatively, you can assemble the entire crisp (apples and topping) in the Dutch oven, cover it tightly, and refrigerate for up to 24 hours before baking. Add an extra 5-10 minutes to the baking time if baking from cold.
- How do I store leftover apple crisp?
Allow the crisp to cool completely, then cover the Dutch oven or transfer the crisp to an airtight container. It can be stored at room temperature for up to 2 days, or in the refrigerator for up to 4-5 days. For best quality, refrigerate any leftovers, especially if served with ice cream or whipped cream.
- Can I freeze apple crisp?
Yes, apple crisp freezes well. You can freeze it baked or unbaked. To freeze unbaked, assemble the crisp, cover it tightly with plastic wrap and then foil, and freeze for up to 3 months. Bake from frozen (adding about 30-45 minutes to the baking time, covered for the first half) until golden and bubbly. To freeze baked crisp, cool completely, then wrap tightly and freeze. Thaw overnight in the refrigerator and reheat in the oven.
- What if I don’t have a Dutch oven?
No problem! A 9×13 inch baking dish or an oven-safe cast iron skillet of similar size will work perfectly. The Dutch oven simply provides excellent heat retention and a rustic presentation.
- Why is my apple crisp topping not crispy?
Several factors can cause a soggy topping: using warm butter (which makes it too soft and dense), not enough fat in the topping, or the oven temperature being too low. Ensure your butter is cold, don’t overmix the topping, and bake at the correct temperature until golden brown.
- Can I use quick oats instead of old-fashioned rolled oats?
While old-fashioned rolled oats provide the best texture, quick oats can be used in a pinch. However, quick oats are more finely processed and may result in a less chewy, more crumbly topping rather than a distinct crispness.
More Delectable Dessert Recipes
Dessert
No-Chill Chocolate Chip Cookies (Easy)
Christmas
20 Sweet Peppermint Recipes for Christmas
Fall
20 Sweet Pumpkin Recipes for Fall (From Breakfast to Dessert)
Breakfast
Blueberry Coffee Cake with Greek Yogurt & Streusel
Did you make this recipe?
If you try this recipe, please leave a star rating in the recipe card below and/or comment! I always appreciate your feedback.
Follow me on all of the platforms below.
- TikTok
- YouTube
Dutch Oven Apple Crisp
Brianna May
★
★
★
★
15 minutes
45 minutes
1 hour
10
Equipment
-
Shallow Dutch Oven
-
Vegetable Peeler
Ingredients
Filling
-
8 cups peeled & sliced into 1 inch pieces 1/3 – 1/2 inch thick apples (about 8 cups sliced; 950 grams sliced; 6-8 whole apples depending on size)* -
1/2 cup (100 g) granulated sugar -
2 tablespoons cornstarch -
2 teaspoons vanilla extract -
1 teaspoon cinnamon -
1/2 teaspoon ginger* -
1/4 teaspoon nutmeg -
1/8 teaspoon cloves
Topping
-
1 1/4 cup (163 g) all-purpose flour -
1 cup (200 g) brown sugar -
1 teaspoon cinnamon -
3/4 cup (170 grams); 12 Tablespoons salted butter, cold & cubed -
1 1/2 cups (128 g) old-fashioned whole rolled oats -
vanilla ice cream, for serving
Instructions
-
Preheat your oven to 350°F (175°C). In a large bowl, combine the sliced apples, granulated sugar, cornstarch, vanilla extract, cinnamon, nutmeg, ginger, and cloves. Toss well until the apples are evenly coated. Set aside.8 cups peeled & sliced into 1 inch pieces 1/3 – 1/2 inch thick apples (about 8 cups sliced; 950 grams sliced; 6-8 whole apples depending on size)*,
1/2 cup (100 g) granulated sugar,
2 tablespoons cornstarch,
2 teaspoons vanilla extract,
1 teaspoon cinnamon,
1/2 teaspoon ginger*,
1/4 teaspoon nutmeg,
1/8 teaspoon cloves -
In another bowl, mix together the flour, brown sugar, and cinnamon.1 1/4 cup (163 g) all-purpose flour,
1 cup (200 g) brown sugar,
1 teaspoon cinnamon -
Add the cold, cubed butter to the flour mixture. Using a pastry cutter or your hands, work the butter into the mixture until it resembles coarse crumbs.3/4 cup (170 grams); 12 Tablespoons salted butter, cold & cubed
-
Stir in the rolled oats until evenly distributed.1 1/2 cups (128 g) old-fashioned whole rolled oats
-
Grease a shallow dutch oven or a large baking dish. Pour the apple mixture into the baking dish, spreading it out evenly. Sprinkle the topping mixture over the apples, ensuring it covers the entire surface.
-
Bake in the preheated oven for 45-50 minutes, or until the topping is golden brown and the filling is bubbly. Allow the apple crisp to cool for a few minutes before serving. It can be served warm or at room temperature. Serve with a scoop of vanilla ice cream or a dollop of whipped cream.vanilla ice cream, for serving
Did you make this recipe?
Leave a comment below!
Notes
- Apples: I recommend using a mix of Cosmic Crisp and Granny Smith apples (1/3 Cosmic Crisp and 2/3 Granny Smith). Granny Smith apples are essential for their tartness, but Cosmic Crisp apples can be swapped for Honeycrisp, Jazz, or Pink Lady apples. You will need 6-8 whole apples, depending on their size. Measure and weigh them after peeling and slicing.
- Spices: These are classic apple pie spices. If you prefer not to use nutmeg, ginger, or cloves, you can substitute them with an additional 1/2 teaspoon of cinnamon.
Nutrition
Calories:
396kcal
|
Carbohydrates:
64g
|
Protein:
4g
|
Fat:
15g
|
Saturated Fat:
9g
|
Polyunsaturated Fat:
1g
|
Monounsaturated Fat:
4g
|
Trans Fat:
1g
|
Cholesterol:
37mg
|
Sodium:
117mg
|
Fiber:
4g
|
Sugar:
40g
Nutrition information is automatically calculated, so should only be used as an approximation.