
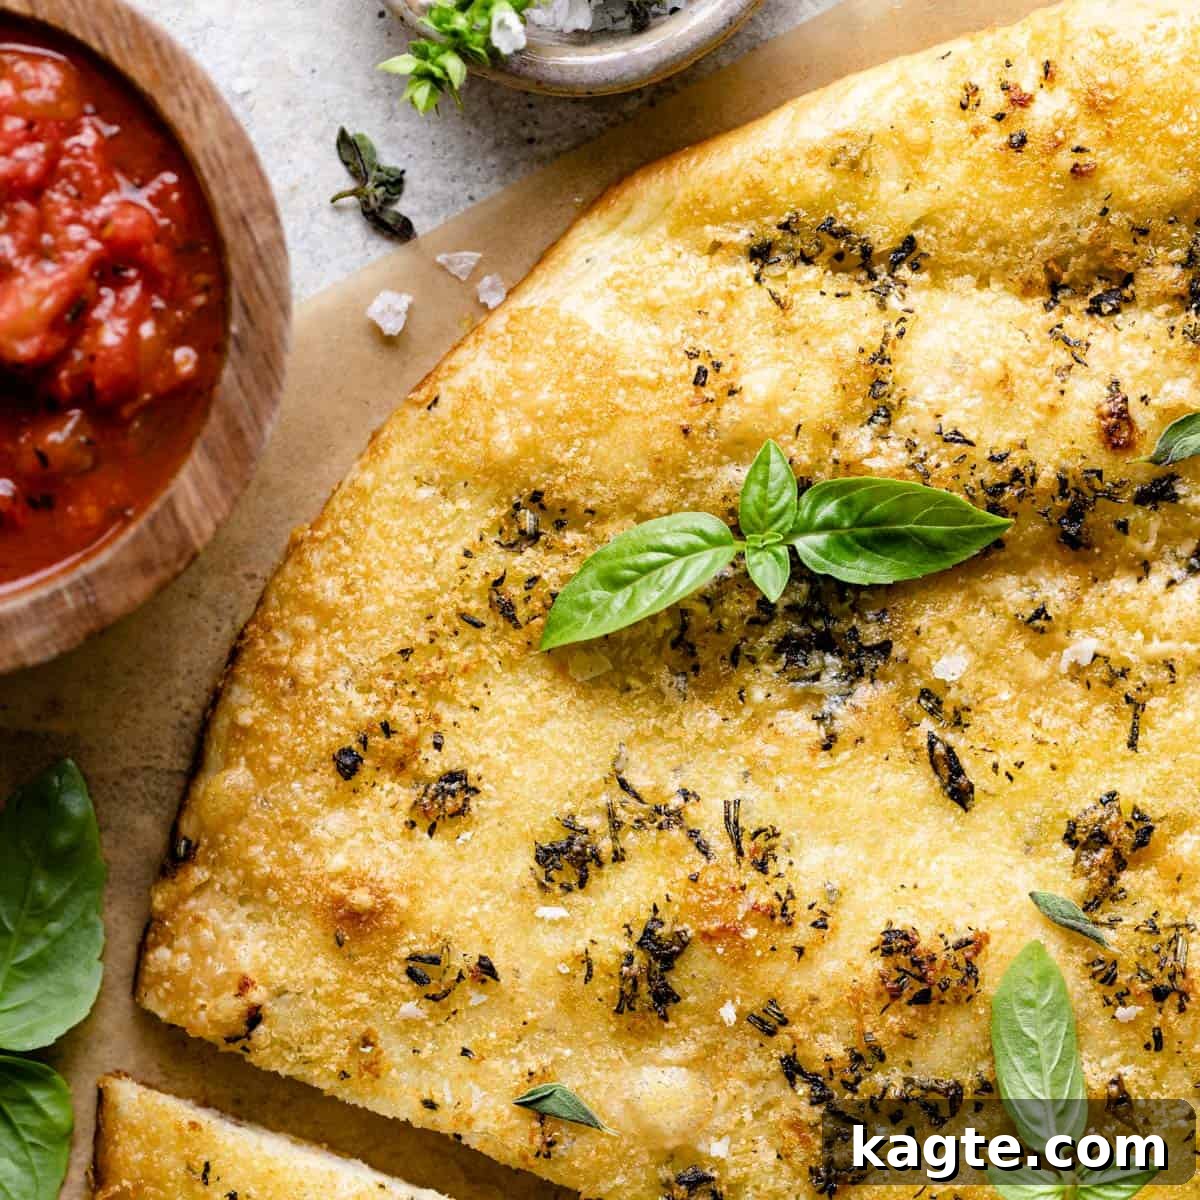
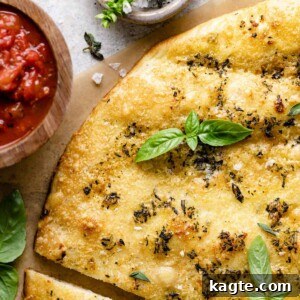
Welcome to the ultimate guide for crafting irresistible Garlic Herb Breadsticks right in your own kitchen! Elevate your weeknight pasta dinners or family gatherings with these incredibly flavorful, homemade breadsticks. Imagine perfectly golden-brown exteriors giving way to a soft, chewy interior, all infused with a delightful blend of fresh herbs, a touch of honey, and a rich, savory garlic butter topping. Forget bland store-bought options; once you experience the aroma and taste of these fresh-baked wonders, you’ll want to incorporate them into your dinner rotation every week. Whether served as a satisfying appetizer or a delicious side dish, especially when dipped in warm marinara sauce, these breadsticks are guaranteed to be a crowd-pleaser and a standout addition to any meal.
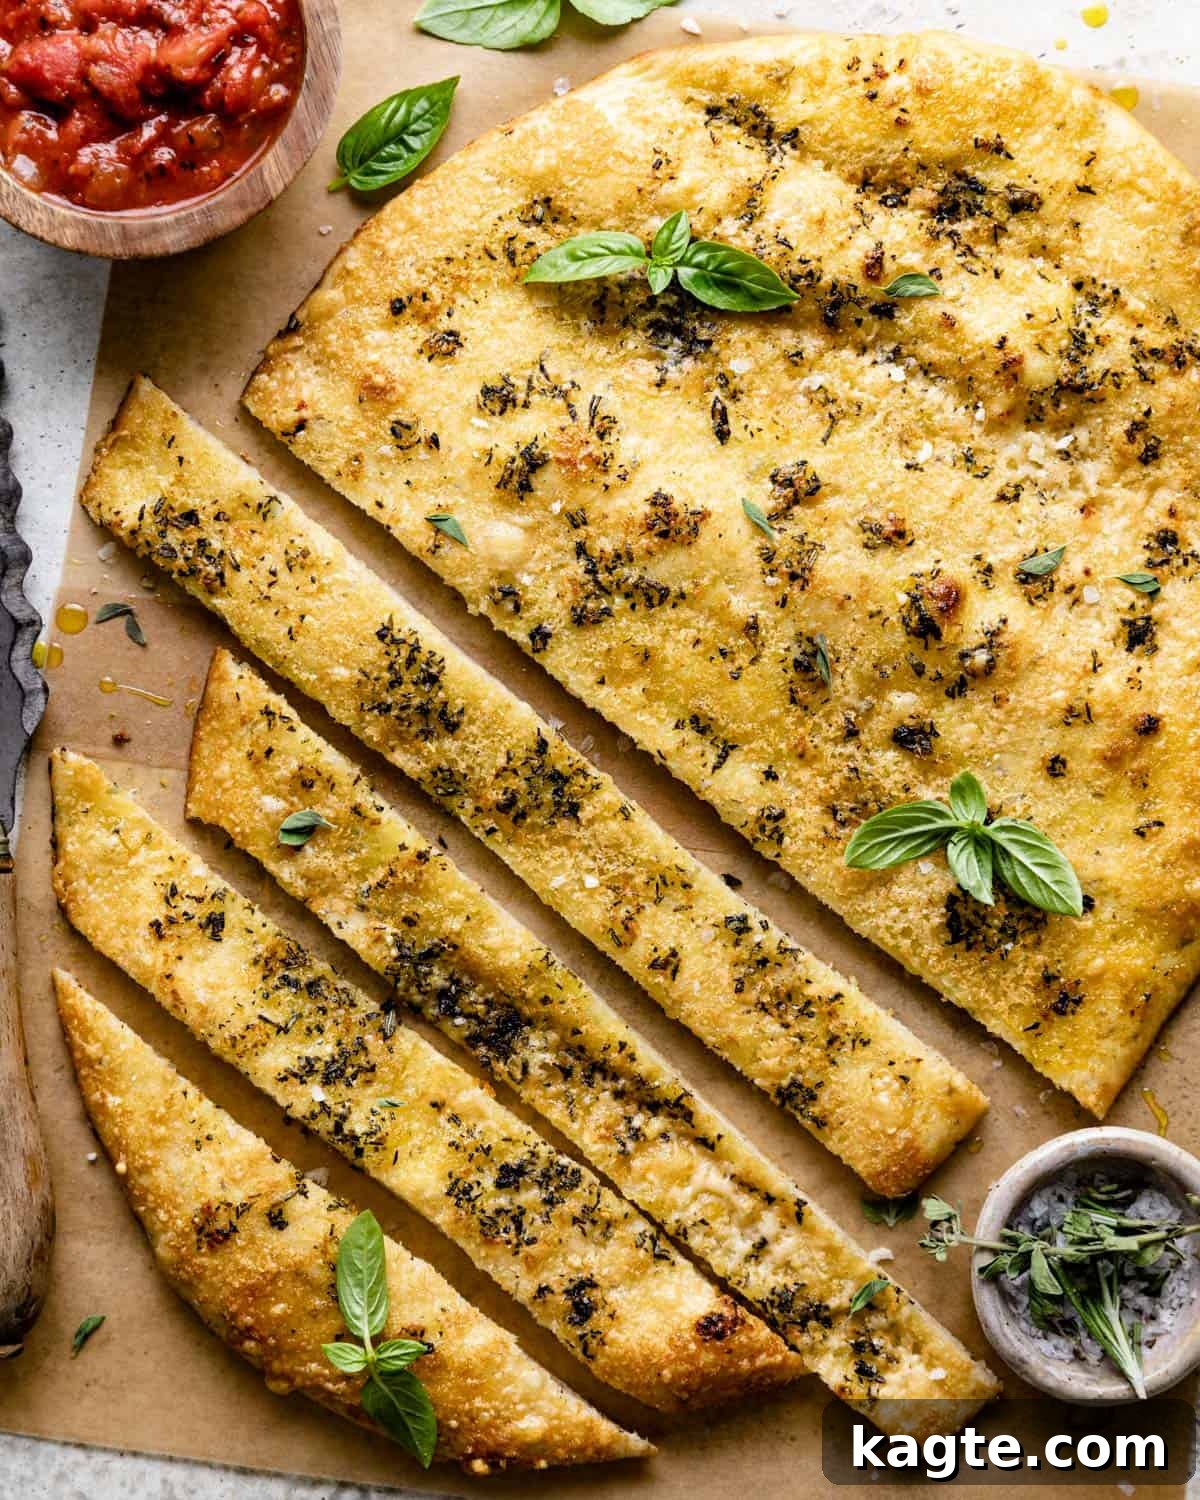
There’s something truly special about baking bread from scratch, and these homemade garlic herb breadsticks, crafted from simple pizza dough, effortlessly transform an ordinary meal into an extraordinary culinary experience. They strike the perfect balance between fragrant herby notes and luscious buttery richness, making every bite a pure delight. The best part? This versatile recipe allows you to easily customize the flavor profile to suit your personal preferences or those of your family. Imagine tailoring the herbs to complement your main course or adjusting the garlic intensity for a bolder kick. These breadsticks aren’t just food; they’re an invitation to savor the moment and bring a touch of Italian-inspired comfort to your table.
If you’re looking to expand your baking repertoire with more delightful bread recipes, consider adding these proven favorites to your weekly menu: Easy Rustic Bread, Garlic Bread in Air Fryer, and Texas Toast Garlic Bread. Each offers a unique texture and flavor profile, perfect for any occasion.
Table of Contents
- Why You’ll Love This Recipe
- Ingredients & Substitutions
- How to Make Garlic Herb Breadsticks with Pizza Dough
- Recipe Serving Suggestions
- Expert Tips for Perfect Breadsticks
- Additions & Variations for Your Breadsticks
- Recipe FAQs
- More Bread Recipes
- Garlic Herb Breadsticks from Pizza Dough Recipe
Why You’ll Love These Homemade Garlic Herb Breadsticks
These garlic herb breadsticks aren’t just another side dish; they’re a culinary experience designed to delight your senses and impress your guests. Here’s why this recipe will quickly become a cherished favorite in your kitchen:
- Bursting with Herby Flavor – Infused with fresh, fragrant herbs, these breadsticks deliver an incredible depth of flavor that tantalizes your taste buds. The aromatic rosemary, basil, and oregano are not merely subtle notes but vibrant contributors that make every bite memorable and intensely satisfying.
- Richly Flavorful – Beyond just herbs, the thoughtful combination of ingredients, including savory garlic and a sprinkle of Parmesan cheese, creates an uber-tasty profile. Each component works in harmony to build layers of deliciousness, ensuring these breadsticks are far from bland.
- Luxuriously Buttery – The homemade herb butter drizzle is the secret to their decadent appeal. This indulgent topping melts into the warm bread, creating a comforting richness and a truly irresistible aroma that will fill your kitchen. It’s pure comfort in breadstick form.
- Surprisingly Quick Cook Time – While the dough requires a few hours to rise, the active cooking time is remarkably fast—approximately 10-13 minutes. This means you can have freshly baked, warm breadsticks on your table in under a quarter of an hour once the dough is ready, making them perfect for last-minute meal enhancements.
- Crafted with Quality Pizza Dough – Utilizing bread flour in the pizza dough base is key to achieving that perfect texture. This choice results in breadsticks that boast a wonderfully crispy exterior coupled with a satisfyingly chewy interior, ensuring a delightful mouthfeel with every bite.
- Family–Friendly Appeal – Even the pickiest eaters at your table will find these garlic herb breadsticks utterly enjoyable. Their universally appealing flavors and comforting texture make them a guaranteed hit with children and adults alike, ensuring there are no leftovers!
Key Ingredients & Thoughtful Substitutions
Achieving perfectly tender and flavorful garlic herb breadsticks starts with understanding your ingredients. Here’s a breakdown of the essential components and helpful substitution tips:
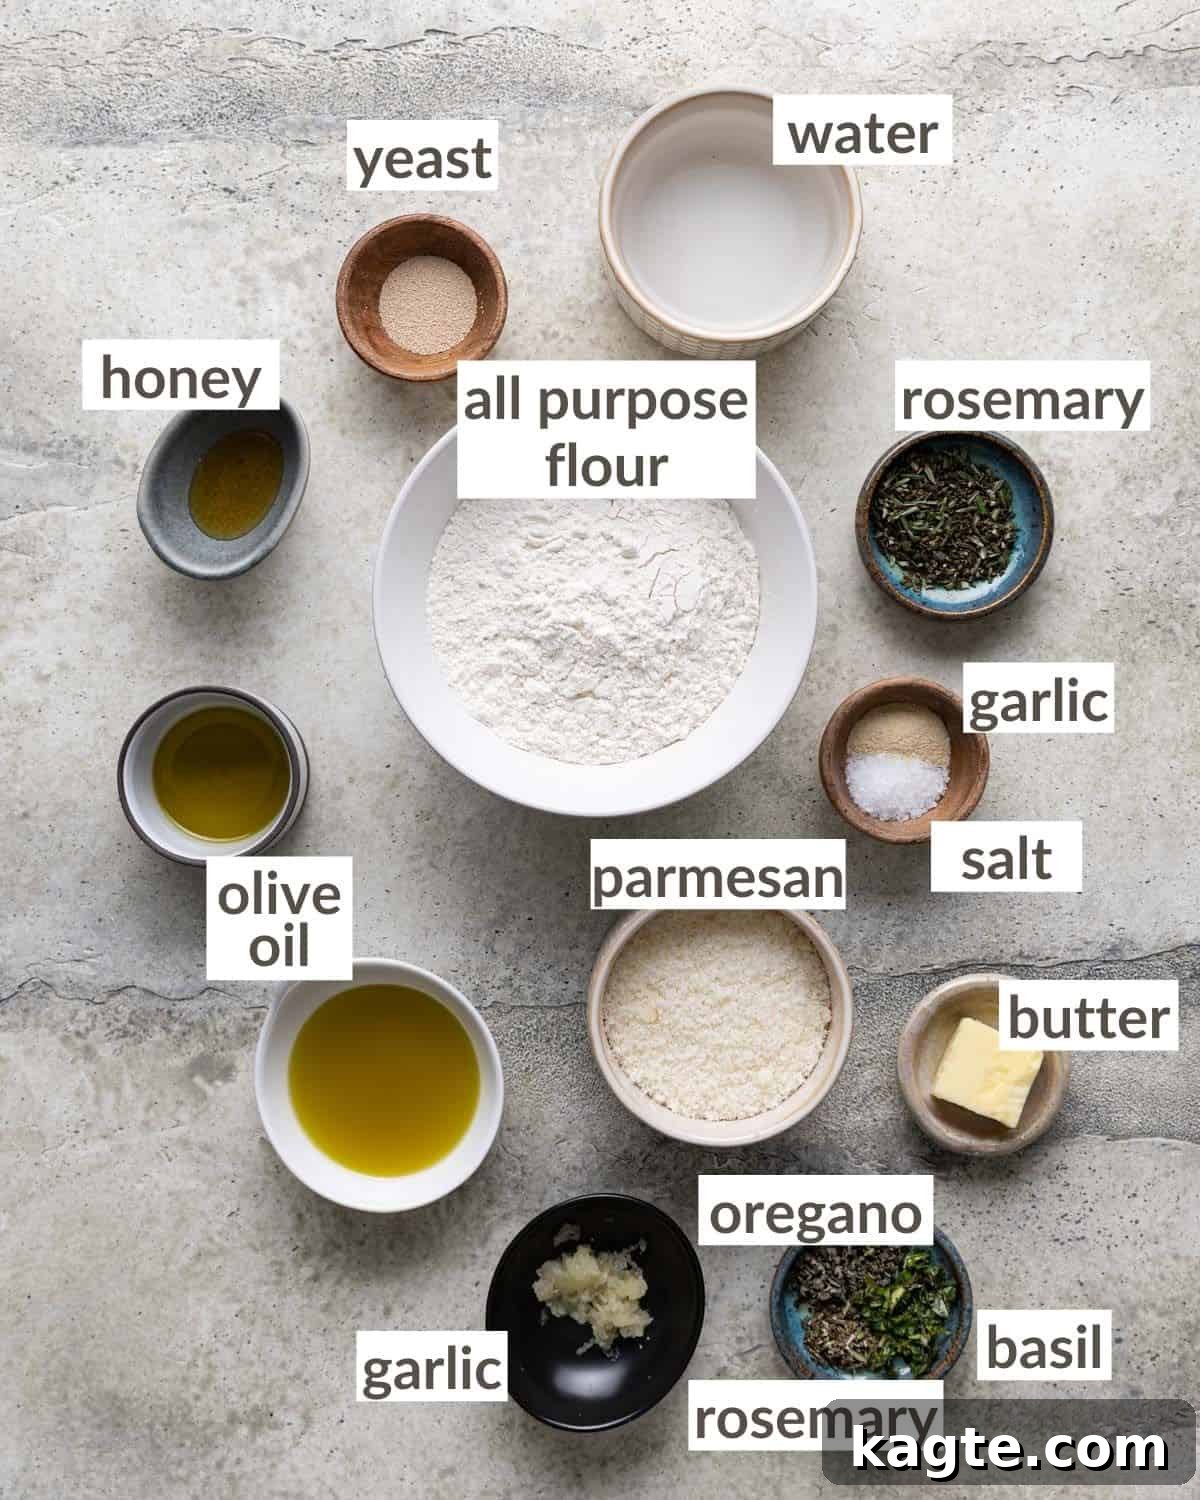
- Instant Yeast: For consistent and reliable results, I highly recommend using Red Star Platinum Superior Baking Yeast. It’s my go-to for ensuring a robust and quick rise every time. If you can’t find it locally, ordering online is a great option. Active dry yeast is a suitable alternative and can be used in a 1:1 ratio. However, be aware that it typically requires about 20 minutes longer for the dough to rise, so plan your baking time accordingly.
- Honey: Honey not only adds a touch of sweetness but also helps activate the yeast and contributes to the breadsticks’ golden hue and tender crumb. If you don’t have honey on hand, granulated sugar can be used as a direct substitute. Since granulated sugar is generally less sweet than honey, you’ll want to use 2 teaspoons to achieve a comparable sweetness level and aid in yeast activation.
- Herbs: The fresh herbs are crucial for the vibrant flavor of these breadsticks. Fresh rosemary, basil, and oregano bring an unparalleled aroma and taste. While fresh is always best, you can use dried herbs if necessary. When substituting dried for fresh, remember to reduce the amount by 1/3, as dried herbs are more concentrated in flavor. For example, if the recipe calls for 1 tablespoon of fresh rosemary, use 1 teaspoon of dried rosemary.
- Bread Flour: This recipe specifically calls for bread flour due to its higher protein content. The increased protein develops more gluten, which in turn gives the breadsticks superior structure and that desirable chewy texture that makes them so satisfying. If bread flour isn’t available, all-purpose flour can be used. However, expect a slightly less chewy and potentially softer texture in your final breadsticks.
- Kosher Salt: All my recipes are meticulously tested with Morton kosher salt unless otherwise specified. Its flakey texture and clean flavor make it ideal for everyday cooking. If you’re using table salt, which is finer and saltier by volume, you’ll need to reduce the amount by about half to avoid over-salting. It’s always a good idea to keep some kosher salt in your pantry for consistent baking and cooking results.
A complete list of ingredients and precise amounts can be found on the recipe card below.
How to Make Delicious Garlic Herb Breadsticks with Pizza Dough
Quick Overview
Crafting these delectable garlic herb breadsticks is a straightforward process that yields impressive results. Here’s a brief look at the steps involved:
- Prepare and combine the dough ingredients.
- Allow the dough to rise until doubled in size.
- Bake to a golden, crispy perfection.
- Cool slightly, then slice and serve.
Detailed Step-by-Step Instructions
Follow these detailed steps to create perfectly baked garlic herb breadsticks that will impress everyone.
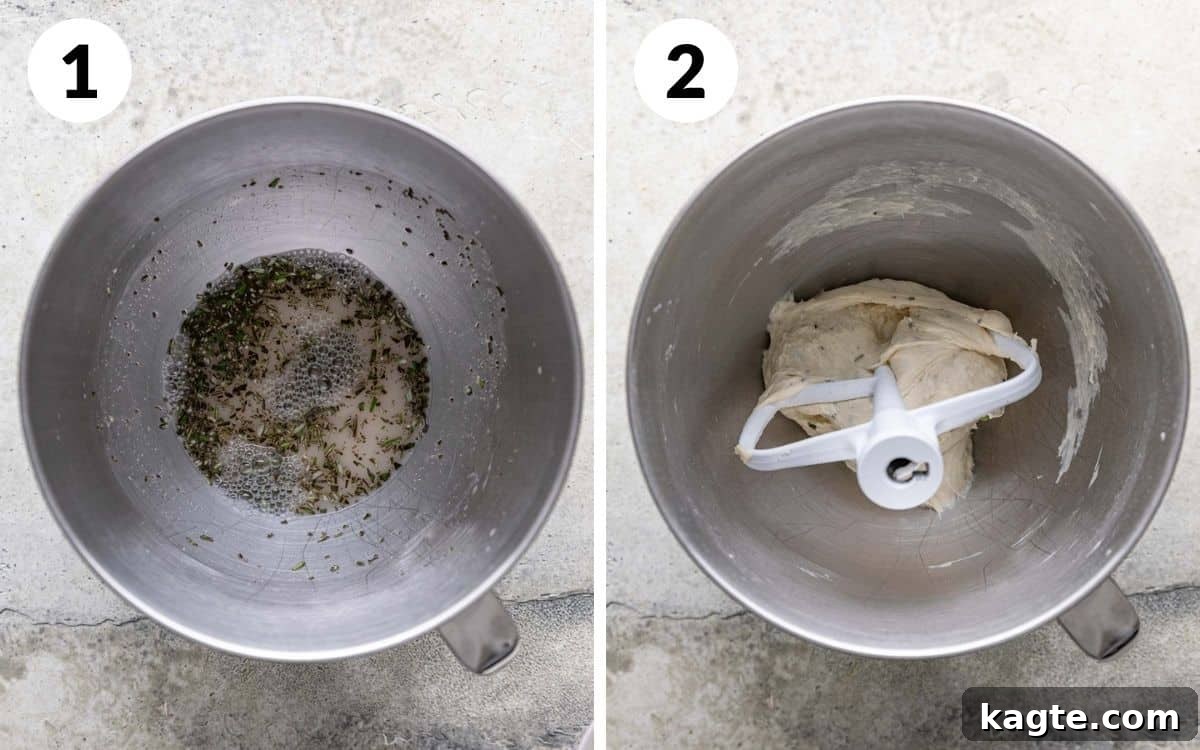
Pro Tip: Allow the yeast mixture to sit for a few minutes until the yeast “blooms” and becomes foamy. This indicates the yeast is active and ready to work its magic.
Step 1: In the bowl of your stand mixer (or a large mixing bowl if kneading by hand), combine the warm water, instant yeast, honey, and fresh chopped rosemary. Whisk these ingredients gently until they are well combined. Let the mixture sit undisturbed for about 5-10 minutes. You’ll notice the yeast starting to bloom, creating a foamy layer on top, which confirms its activity.
Step 2: Now, add the olive oil, the initial 1 ½ cups of bread flour, granulated garlic powder, and Morton kosher salt to the yeast mixture. Using the paddle or dough hook attachment on your stand mixer, mix on low speed until all the ingredients are well combined and a shaggy dough forms. If the dough appears excessively wet and sticks persistently to the sides of the bowl, gradually add an additional ¼ to ½ cup of flour, a tablespoon at a time, until the dough begins to pull away from the sides. Once the dough consistently stays wrapped around the hook, increase the mixer speed to medium and continue mixing for 5 minutes. If you are kneading by hand, turn the dough out onto a lightly floured surface and knead vigorously for 8-10 minutes until it becomes smooth and elastic. The finished dough should feel slightly tacky to the touch but not overly sticky.
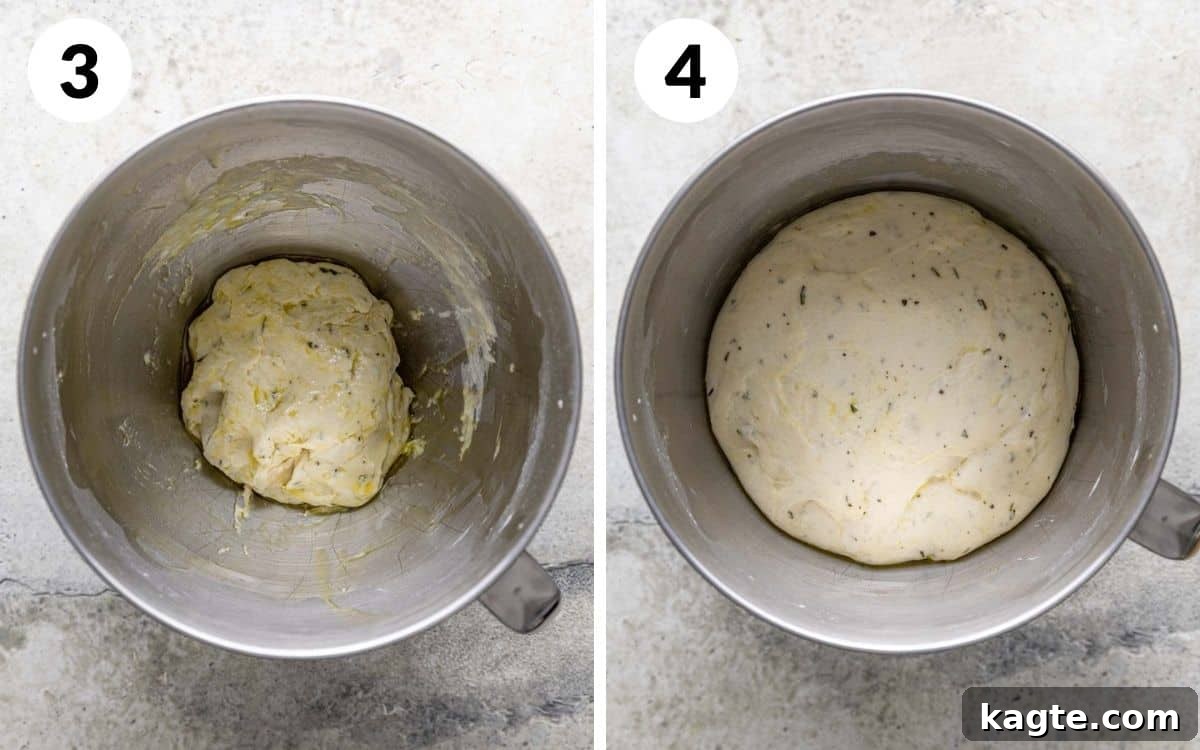
Step 3: Carefully remove the dough from the bowl and gently form it into a smooth ball. Lightly grease the mixing bowl with a little olive oil, then place the dough ball back into the bowl, turning it once to ensure it’s fully coated in oil. This prevents the dough from sticking during the rising process.
Step 4: Cover the bowl tightly with a clean kitchen towel or plastic wrap. Place the covered bowl in a warm, draft-free environment to rise. Allow it to proof for 1-2 hours, or until the dough has visibly doubled in size. A warm oven (turned off, with just the light on) or a sunny spot on your counter works perfectly for this.
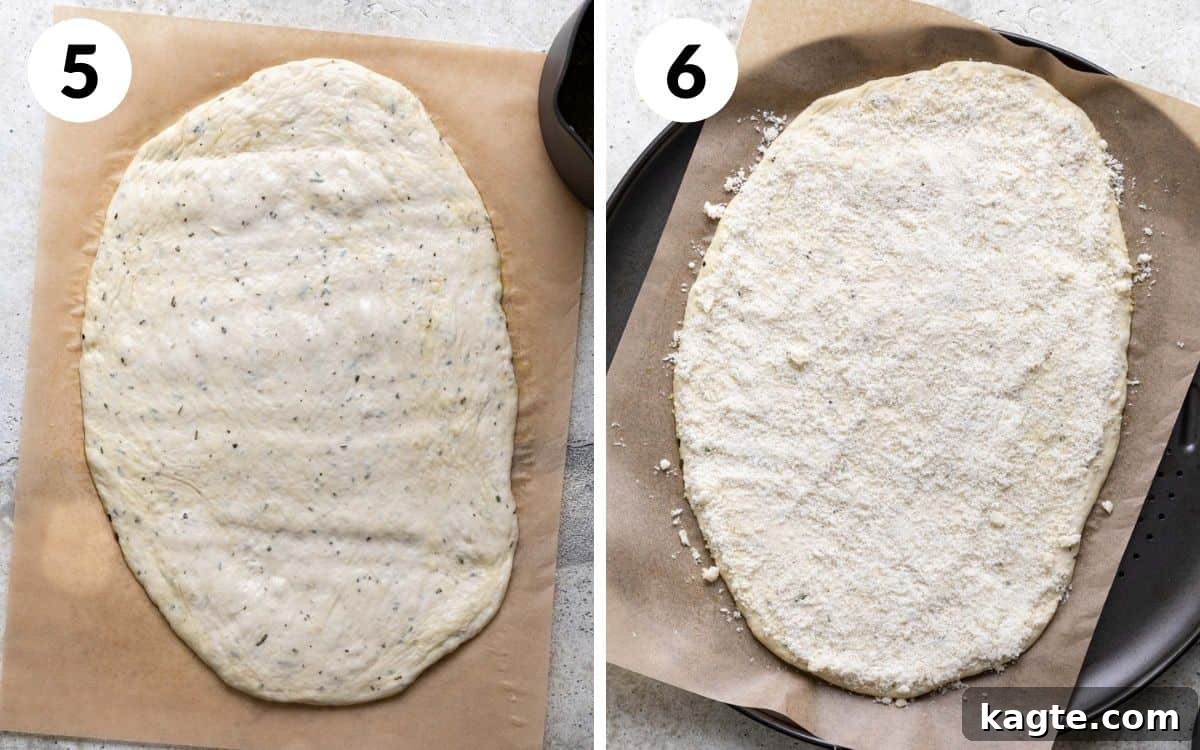
Step 5: Once the dough has proudly doubled in size, preheat your oven to its maximum temperature, ideally 550 degrees Fahrenheit (or as high as your oven allows). Lightly flour a clean work surface. Gently invert the dough bowl, allowing the risen dough to fall out onto the floured surface. The dough will naturally begin to spread. With gentle hands, press and pull the dough outwards into an oval shape, aiming for dimensions of approximately 9 x 13 inches.
Step 6: Let the shaped dough rest on the floured surface for at least 10 minutes. This short rest allows the gluten to relax, making the dough easier to handle and preventing it from shrinking. While the dough is resting, prepare the irresistible herb butter topping. In a small saucepan, combine the olive oil, salted butter, and finely minced garlic. Heat this mixture over medium heat, stirring occasionally, until the butter is completely melted and fragrant. Remove the saucepan from the heat and stir in the remaining fresh herbs (rosemary, basil, and oregano). Set this aromatic butter aside. Carefully transfer the rested dough onto a pizza pan or a large baking sheet lined with parchment paper. Evenly sprinkle the grated Parmesan cheese over the entire surface of the dough.
Safety First: For your safety and to ensure clean cuts, always allow the baked bread to cool sufficiently before slicing it into individual breadsticks. This helps prevent burns and results in neater portions.
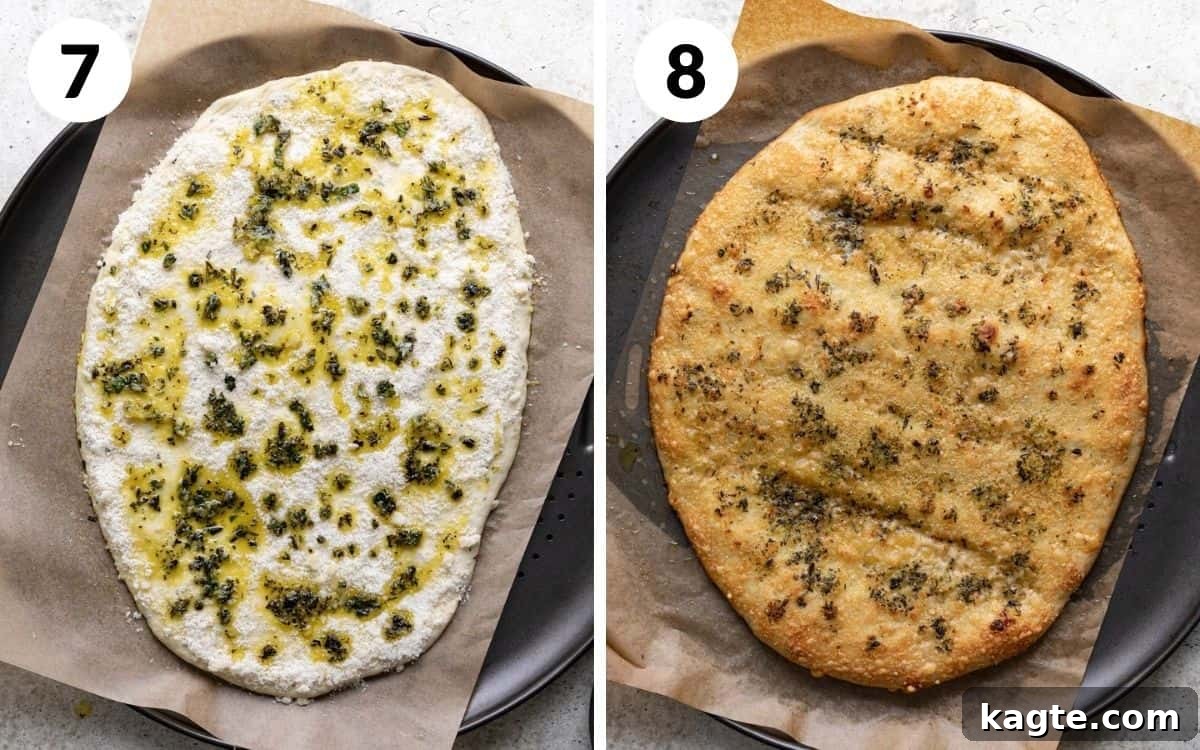
Step 7: Generously drizzle the prepared herb butter mixture evenly over the entire surface of the cheese-topped dough. Ensure every part gets a luscious coating for maximum flavor.
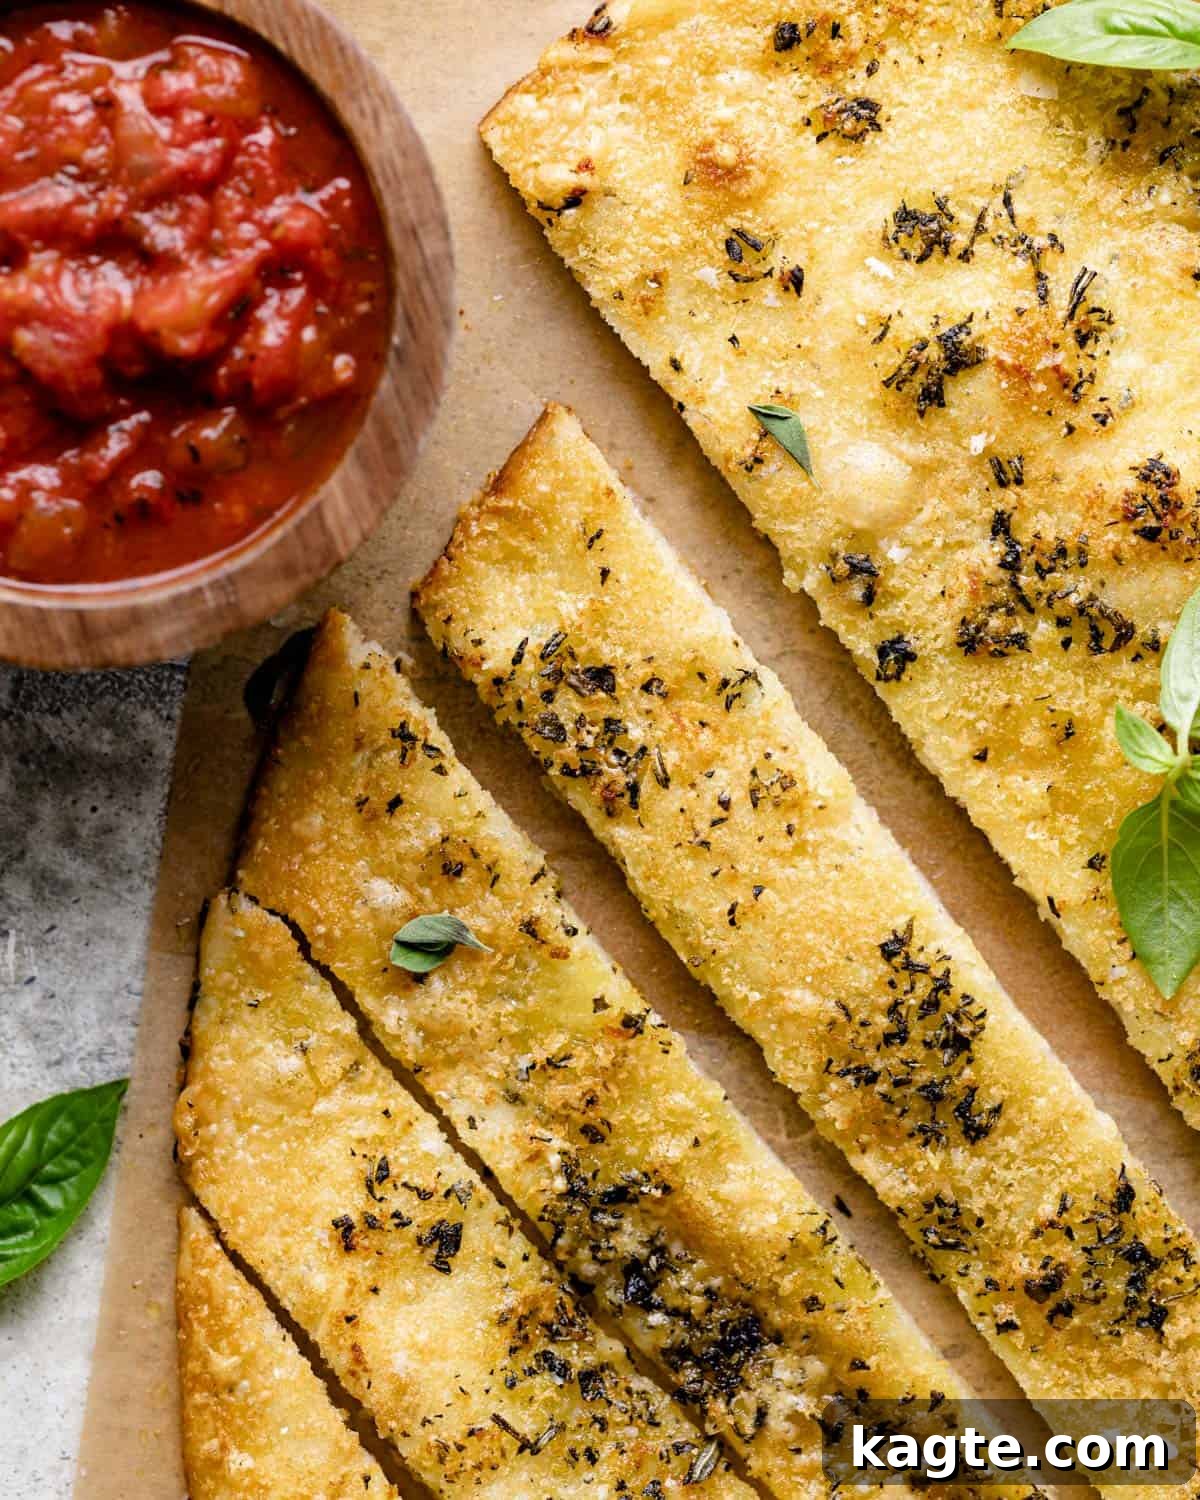
Step 8: Carefully transfer the pizza pan or baking sheet to the preheated oven. Bake for 10-13 minutes, or until the breadsticks are beautifully golden brown and crispy around the edges. For even baking, rotate the pan halfway through the cooking time. Once baked, remove from the oven and allow the bread to cool on the pan for a few minutes before transferring it to a cutting board. Once slightly cooled, slice the large piece of bread into individual breadsticks. Serve warm and enjoy!
Creative Recipe Serving Suggestions
These garlic herb breadsticks are incredibly versatile and can complement a wide array of dishes. To elevate their presentation and flavor, consider garnishing them with a little extra herb butter brushed on top, a sprinkle of freshly chopped parsley for a pop of color, or a dusting of finely grated hard cheese like mozzarella or pecorino romano. The possibilities for pairing are endless, but they truly shine alongside Italian-inspired entrees, enhancing the meal with their savory, aromatic presence. Here are a few delectable ideas:
- Italian Baked Zucchini: Serve them with a comforting dish like Italian Baked Zucchini with Tomato Sauce & Cheese. The rich tomato sauce and melted cheese are perfect for dipping.
- Cheesy Meatball Pasta Bake: Pair these savory breadsticks with a hearty Cheesy Meatball Pasta Bake. The breadsticks will be ideal for soaking up any leftover sauce.
- Easy Tomato Basil Chicken: Complement a lighter, yet flavorful, main course such as Easy Tomato Basil Chicken. The fresh flavors will harmonize beautifully.
- Classic Pasta Dishes: Any pasta with marinara, pesto, or Alfredo sauce will be wonderfully enhanced by these breadsticks.
- Soups and Salads: Serve them alongside a robust minestrone, a creamy tomato soup, or a fresh Caesar salad for a complete and satisfying meal.
- As an Appetizer: Offer them with a side of warm marinara sauce, a cheesy spinach dip, or even a simple balsamic and olive oil for a delightful starter.
Expert Tips for Crafting Perfect Garlic Herb Breadsticks
Achieving bakery-quality breadsticks at home is within reach with a few key techniques. These expert tips will help ensure your garlic herb breadsticks turn out perfectly every time: crispy on the outside, soft on the inside, and bursting with flavor.
- Precision is Key: Use a Kitchen Scale to Measure Flour. Baking is a science, and accuracy in measurements, particularly for flour, is crucial. Scooping flour directly from the bag can result in too much flour, leading to dry, dense breadsticks. Using a kitchen scale to measure flour by weight (grams) ensures consistent results, preventing your dough from being too sticky or too dry. Aim for the specified gram measurements for the best possible texture and rise.
- Handle with Care: Do Not Overwork the Dough During Shaping. Once your dough has properly risen, resist the urge to over-handle or aggressively knead it when shaping your bread. Overworking the dough at this stage can develop too much gluten, resulting in breadsticks that are tough, overly chewy, and potentially dry. Gently press and stretch the dough into your desired shape. The dough should feel soft, slightly sticky, and stretch easily without immediately tearing. This gentle touch maintains the airy structure developed during the rising process.
- Embrace the Heat: Bake on High Temperature. Baking these delicious breadsticks at a high oven temperature is fundamental to achieving their signature texture. The intense heat creates a beautiful, crispy golden-brown crust on the outside while ensuring the interior remains wonderfully soft, fluffy, and pillowy. A higher temperature also promotes a rapid rise (oven spring) in the initial stages of baking, contributing to a lighter texture and preventing them from becoming dense. Ensure your oven is fully preheated to the recommended high temperature before introducing the bread.
Exciting Additions & Creative Variations for Your Breadsticks
While the classic garlic herb breadsticks are absolutely divine, this recipe provides a fantastic canvas for culinary creativity. Don’t be afraid to experiment and customize them to suit your taste or occasion. Here are some delightful additions and variations to inspire you:
- Indulge with Extra Cheese: For an even more decadent and cheesy version of these garlic herb breadsticks, consider adding 1-2 cups of shredded mozzarella, provolone, or a blend of Italian cheeses to the top of the dough before baking. The cheese will melt into a gooey, savory layer, making each bite incredibly rich and satisfying. You can also sprinkle a little extra Parmesan after baking for a sharper finish.
- Explore Different Herb Combinations: The beauty of this recipe lies in its adaptability to different herb profiles. Feel free to adjust the herbs to your preference or to better complement the main dish you plan to serve. For instance, if you’re preparing a Mediterranean-inspired meal, try incorporating thyme and oregano. If serving with lemon chicken, a mix of rosemary and a hint of lemon zest in the butter topping would be exquisite. Think about what flavors marry well with your entree for a cohesive meal.
- Transform into Sweet Dessert Breadsticks: Believe it or not, these savory breadsticks can be easily reimagined as a delightful dessert! To make them sweet, simply omit the garlic powder and any savory herbs from the dough, as well as the Parmesan cheese. For the topping, replace the savory herbs in the melted butter mixture with warming spices like cinnamon, nutmeg, and a generous sprinkle of granulated sugar. You can even add a touch of brown sugar or vanilla extract to the topping. Serve these sweet breadsticks as-is for a simple treat, or elevate them further by enjoying them with a rich cream cheese frosting or a sweet fruit dip for a truly indulgent dessert experience.
Frequently Asked Questions About Garlic Herb Breadsticks
Traditionally, breadsticks are often served as an accompaniment to Italian-inspired lunches or dinners, making them a perfect addition to pasta dishes, pizzas, or hearty stews. However, their versatility means they can be enjoyed at almost any meal. By adjusting the herbs and seasonings, you can easily tailor these garlic herb breadsticks to fit the flavor profile of various cuisines, making them suitable for many different entrees, from Mediterranean to American comfort food.
Garlic breadsticks are wonderfully adaptable and complement a wide variety of dishes beyond just Italian cuisine. They are, of course, a natural fit for pasta, pizza, and rich cheese dips. But don’t stop there! Consider pairing them with French onion soup for dipping, a flavorful hummus, or even a spicy shakshouka to scoop up the delicious sauce. While they are a staple with many Italian recipes, the beauty of these homemade breadsticks is that you can adjust the herbs you use to make them suitable for almost any meal you desire to enhance.
Breadsticks, or “grissini” as they are known in Italy, have a fascinating history originating in Turin, Italy, in the 17th century. While various stories exist regarding their invention, a popular account credits a baker named Antonio Brunero with creating them in 1679 for the Duke of Savoy, Victor Amadeus II. The Duke reportedly suffered from a declining appetite and digestive issues, and the thin, crispy breadsticks were thought to be easier to digest than traditional bread. Initially, grissini were an exclusive delicacy enjoyed primarily by the nobility. However, their popularity soon spread throughout the general population in Italy and eventually gained international recognition, becoming a beloved staple in Italian cuisine worldwide.
More Delicious Bread Recipes to Explore
Breakfast
Blueberry Coffee Cake with Greek Yogurt & Streusel
Bread
Savory Pumpkin Muffins with Parmesan & Herbs
Bread
Easy Cheddar Drop Biscuits
Bread
Savory Zucchini Muffins with Cheddar Cheese
Shop my Amazon Storefront for recommended kitchen tools and ingredients!
If you tried this delightful recipe for homemade garlic herb breadsticks, please share your experience! We’d love for you to leave a star rating in the recipe card below and/or drop a comment. Your feedback is invaluable and always appreciated. For more delicious inspiration and daily cooking tips, be sure to follow me on Pinterest, Facebook & Instagram. Happy baking!
Print Recipe
Save Recipe
Garlic Herb Breadsticks from Pizza Dough
Equipment
-
Stand Mixer
-
Pizza Pan
-
Garlic Press
Ingredients
Dough
- 2/3 cup warm water, around 110 degrees F (43 C)
- 1 heaping teaspoon instant yeast (about half of a standard packet)*
- 1 teaspoon honey*
- 1 Tablespoon chopped fresh rosemary*
- 1 Tablespoon olive oil, plus more for greasing
- 1 1/2 cups (195 g) bread flour, plus an extra 1/2 cup (65 g) if needed*
- 1/2 teaspoon granulated garlic powder
- 1 teaspoon Morton kosher salt
Topping
- 2 Tablespoons olive oil
- 1 Tablespoon salted butter
- 2 cloves garlic, minced finely
- 1 heaping teaspoon EACH chopped fresh rosemary, basil, & oregano*
- 1.5 ounces (1/2 cup) Parmigiano Reggiano, grated
Instructions
-
In the bowl of your stand mixer (or a large bowl), whisk together the water, yeast, honey, and rosemary. Let stand for a few minutes until the yeast blooms.
-
Add the olive oil, 1 ½ cups of the flour, garlic, and salt. Mix on low with the paddle or dough hook attachment until well combined. If the dough is still too wet and sticky, add another ¼ – ½ cup of flour gradually. Once the dough gathers around the hook, mix on medium speed for 5 minutes (or knead by hand for 8-10 minutes). The dough should be slightly sticky.
-
Form the dough into a ball. Grease the mixing bowl and the dough ball well with olive oil, ensuring the entire surface is coated.
-
Cover the bowl with a towel or plastic wrap and let it rise in a warm environment for 1-2 hours, or until it has doubled in size.
-
Once the dough has doubled, preheat the oven to 550 degrees F (or as hot as your oven goes). Lightly flour a clean surface. Gently tilt the bowl to release the dough. Press and pull it gently into an oval shape, approximately 9 x 13 inches.
-
Let the dough rest for at least 10 minutes. Meanwhile, combine 2 Tablespoons olive oil, butter, and minced garlic in a small saucepan. Heat over medium until the butter is melted, then remove from heat and stir in the remaining fresh herbs. Transfer the dough onto a pizza pan or baking sheet. Sprinkle with the grated Parmesan cheese.
-
Generously drizzle the prepared herb butter over the cheese-topped dough.
-
Bake for 10-13 minutes, rotating the bread halfway through cooking for even browning. Let cool slightly before slicing into individual breadsticks. Serve warm.
Did you make this recipe?
Leave a comment below!
Notes
- Instant Yeast: The only yeast I use is the Red Star Platinum Superior Baking Yeast. It never fails to give my dough a good rise and works quickly. I highly recommend ordering it online if you can’t find it at your local grocery store. Active dry yeast will also work, though it will take about 20 minutes longer for your dough to rise. You can use it in a 1:1 ratio to replace instant yeast.
- Honey: If you don’t have honey, use granulated sugar. Granulated sugar is less sweet than honey, so you’ll want to use 2 teaspoons with this substitution.
- Herbs: You can use dried herbs for this garlic herb breadsticks recipe, but you’ll need to reduce the amount by 1/3.
- Bread Flour: You can swap this flour for all purpose flour if needed. However, I prefer the texture created in these garlic herb breadsticks with bread flour. Bread flour has more protein, which produces more gluten in the bread. Because of this, it gives the breadsticks more structure and a chewier texture.
- Kosher Salt: All of my recipes are tested with Morton kosher salt unless noted otherwise. It is the best salt for everyday cooking because of its size and flavor. If using table salt, the amount should be reduced. I highly recommend picking up some kosher next time you are at the store!
- Use akitchen scale to measure the flour. When baking breadsticks, it’s necessary to keep the measurements accurate. Otherwise, you may have breadstick dough that is too sticky or too dry. For the best results, measure your ingredients (especially the flour) with a kitchen scale.
- Do not overwork the dough when shaping the bread. Overworking the dough can lead to tough-to-eat, overly chewy, and dry garlic herb breadsticks. The dough should be soft, slightly sticky, and stretch without tearing right away when it’s ready.
- Bake on high heat. Baking these yummy breadsticks on high heat helps create a crispier outside and a soft, pillowy inside. A higher temperature also allows the breadsticks to turn a beautiful golden-brown color.
Nutrition
Nutrition information is automatically calculated, so should only be used as an approximation.