

Crispy Salt and Pepper Chicken: Your Ultimate Guide to Authentic Takeout at Home
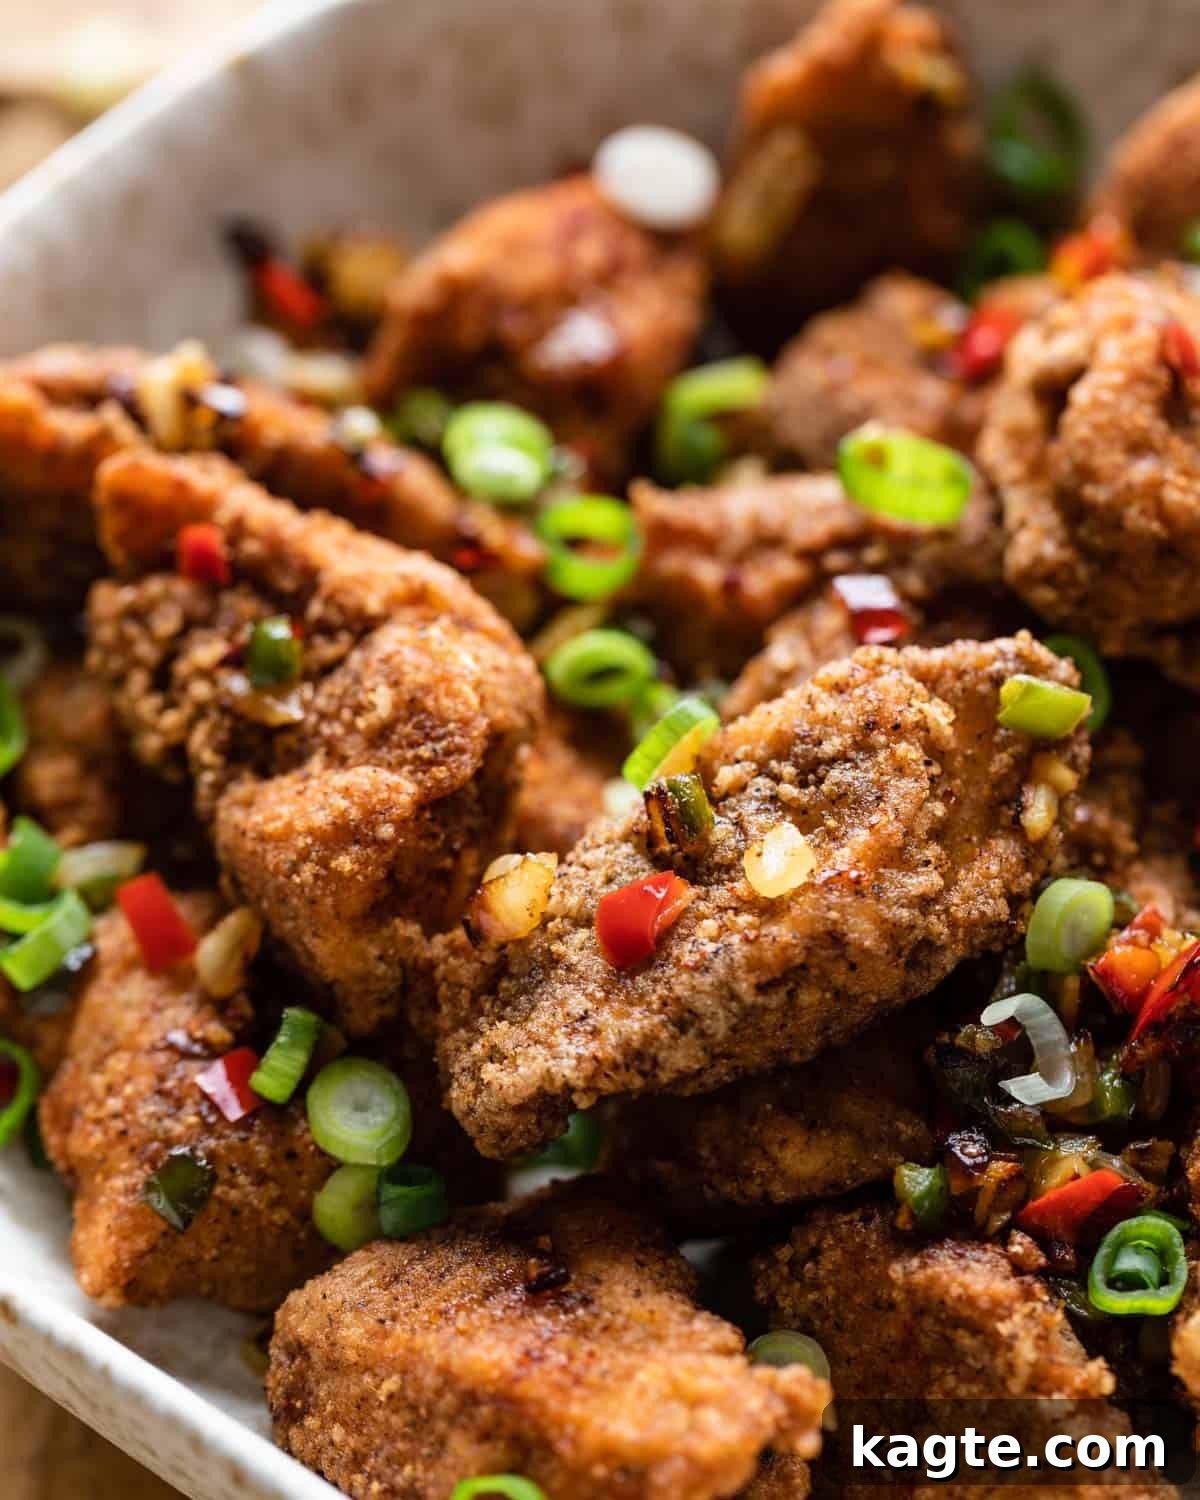
Craving the irresistible crunch and savory spice of your favorite Chinese takeout? Look no further! This Salt and Pepper Chicken recipe delivers an incredibly crispy exterior, a burst of aromatic spices, and a tender, juicy interior that’s shockingly easy to achieve right in your own kitchen. While it involves a simple shallow frying method, we’ve designed the process for minimal fuss, utilizing a large baggie for quick and easy coating and cleanup. The golden-fried chicken pieces are then perfectly complemented with a vibrant finish of sautéed fresh chilis, fragrant scallions, and pungent garlic, elevating every bite with layers of flavor. Get ready to impress your taste buds and your guests with this homemade masterpiece!
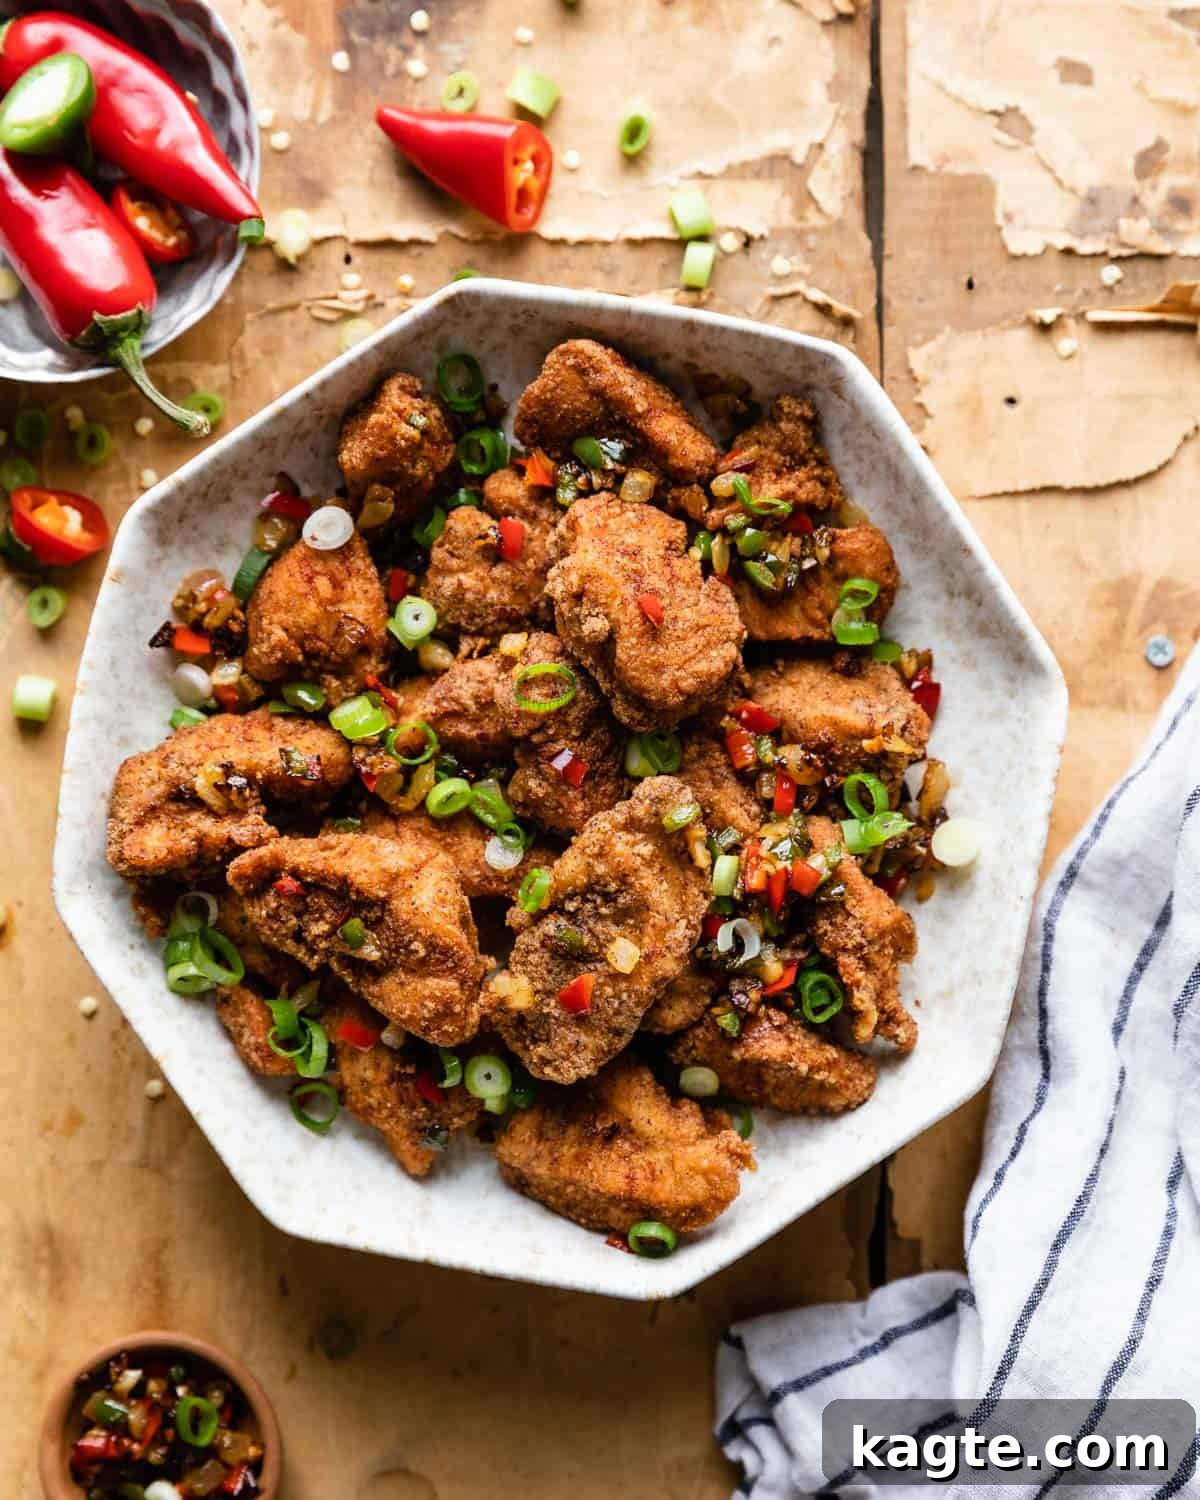
Not only is this Salt and Pepper Chicken a fantastic standalone dish or appetizer, but it also offers incredible versatility. If you find yourself with any delicious leftovers, don’t let them go to waste! Cooked chicken is a meal prep superstar, easily repurposed into new and exciting dishes throughout the week. You can transform it into a quick Marinated Chicken Stir Fry, incorporate it into an Easy Air Fryer Frozen Chicken meal (if using pre-cooked chicken), or even integrate it into a Cast Iron Chicken Breast recipe for added texture and flavor. The possibilities are endless when you have perfectly seasoned chicken on hand.
Table of Contents
- Why You’ll Love This Salt and Pepper Chicken
- Key Ingredients for Flavorful Salt and Pepper Chicken
- Essential Kitchen Tools for Frying Success
- Crafting Your Crispy Salt and Pepper Chicken: Step-by-Step Guide
- Make Ahead, Storage & Reheating Instructions
- Chef’s Secrets for Success
- Important Recipe Notes & Customization
- Exciting Variations to Try
- Frequently Asked Questions
- Explore More Delicious Recipes
- Watch the How-To Video
- Salt and Pepper Chicken Recipe Card
Why You’ll Love This Salt and Pepper Chicken Recipe
This isn’t just another fried chicken recipe; it’s a culinary experience designed for maximum flavor and minimum hassle. Here are the standout reasons why this Salt and Pepper Chicken will become a new favorite in your cooking repertoire:
- Perfect for Any Occasion: Whether you’re planning a festive Super Bowl party appetizer spread, preparing for holiday gatherings, or simply looking for an exciting weeknight meal, this chicken fits the bill perfectly. Its crowd-pleasing flavors and satisfying crunch make it ideal for any event.
- Effortlessly Crispy Coating: Achieve that coveted, golden-brown crispness without the complexity of traditional batter. Our simple cornstarch coating ensures a light, delicate crunch that holds up beautifully, eliminating the need for eggs and simplifying the prep process.
- Minimal, Accessible Ingredients: You won’t need to hunt for obscure items. This recipe relies on readily available ingredients found in most grocery stores, making it a convenient choice for spontaneous cooking or well-planned meals.
- The Magic of Chinese Five Spice: This unique spice blend is the secret weapon behind the dish’s distinctive and deeply aromatic flavor. Comprising a harmonious mix of cinnamon, fennel, star anise, and white pepper, it infuses the chicken with an authentic, complex taste that sets it apart.
- Shallow Frying Advantage: Forget the intimidating vats of oil required for deep frying. This recipe utilizes shallow frying, which uses significantly less oil and is much easier to manage, yet still delivers exceptional crispiness.
- Aromatic Finishing Touches: The pan-sautéed chilis, garlic, and scallions aren’t just a garnish; they’re a flavor powerhouse. This final step adds a fresh, spicy, and fragrant layer that brightens the entire dish and provides an extra textural dimension.
- Stress-Free Cleanup: We understand that delicious food shouldn’t come at the cost of a messy kitchen. By coating the chicken in a large bag, you minimize flour dust and sticky bowls, making cleanup a breeze.
Key Ingredients for Flavorful Salt and Pepper Chicken
The success of any great recipe lies in its ingredients. While the list for this Salt and Pepper Chicken is straightforward, understanding the role of each component can elevate your cooking and ensure the best possible results.
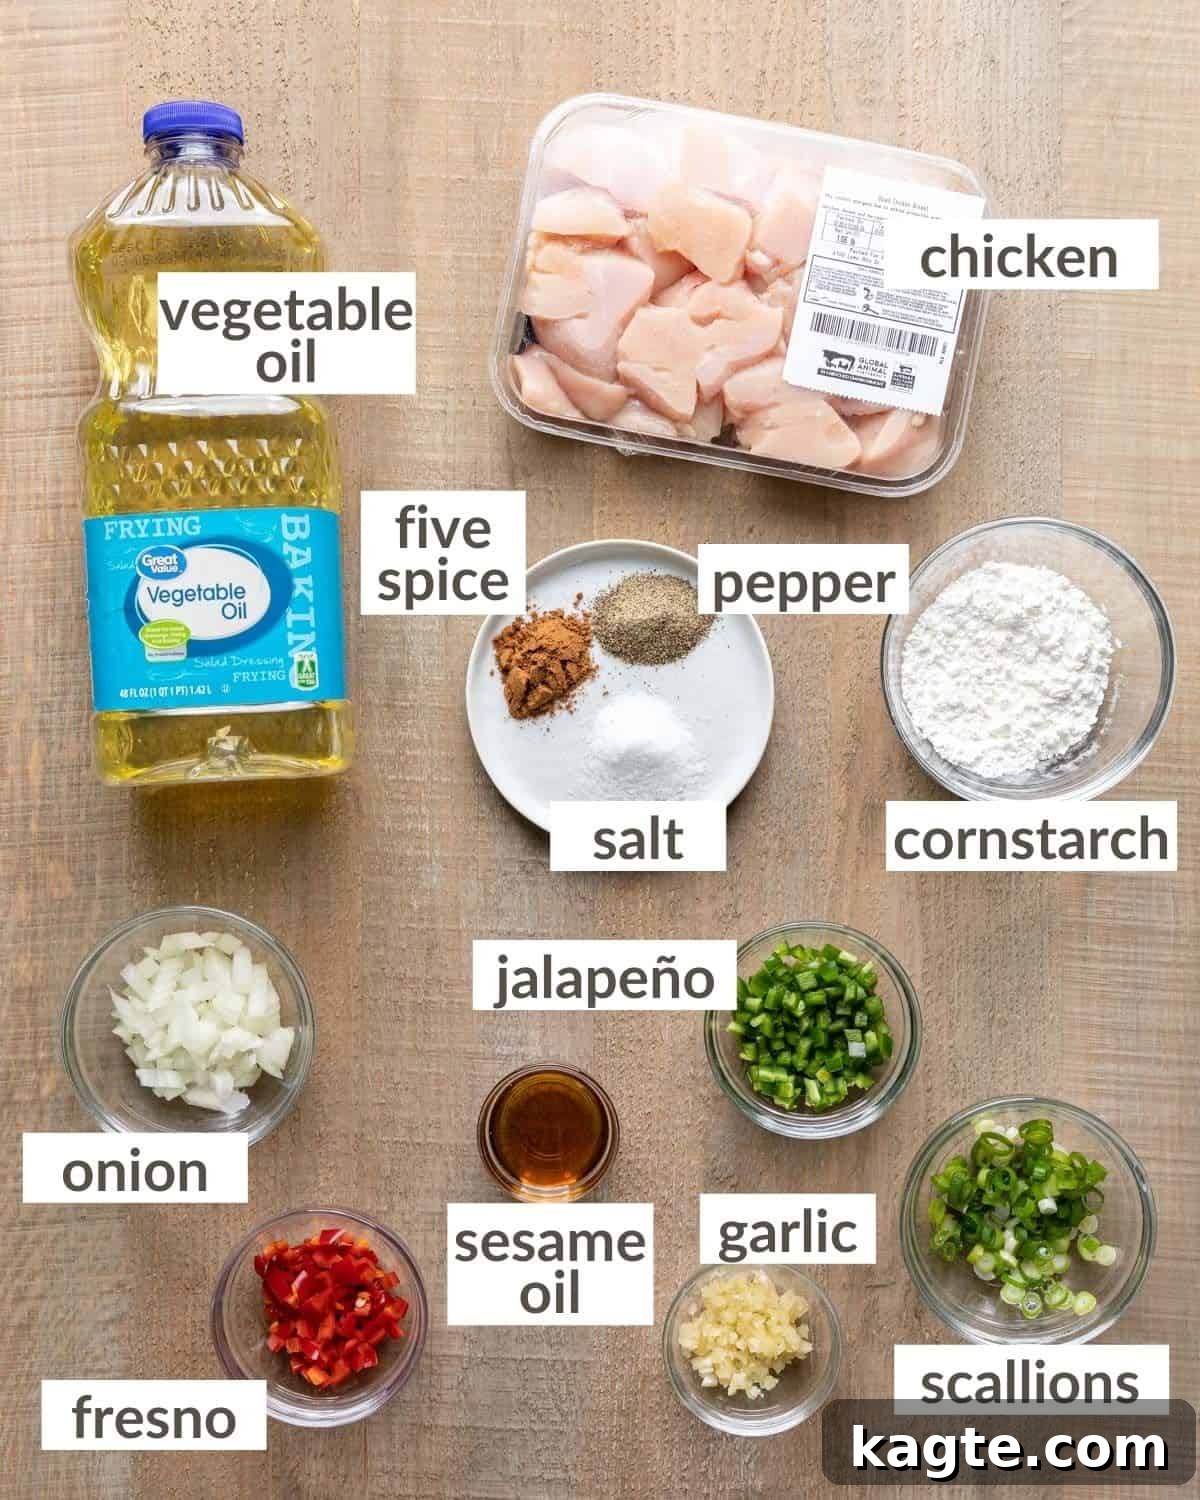
The Essentials:
Vegetable Oil for Frying: Choosing the right oil is paramount for shallow frying. You’ll need a neutral-flavored oil with a high smoke point to ensure the chicken fries evenly and achieves a beautiful golden crust without burning. Excellent options include safflower oil, peanut oil, corn oil, or grapeseed oil. Avoid oils with low smoke points like extra virgin olive oil, as they can burn and impart an unpleasant flavor to your chicken.
Boneless, Skinless Chicken Breast or Thighs: For the best texture and flavor, cut your chicken into uniform 1-inch pieces. This ensures even cooking and allows each piece to get perfectly crispy. Chicken thighs tend to be more forgiving and stay juicier, while breast meat offers a leaner option. Feel free to choose based on your preference.
The Coating:
Cornstarch: This is the secret to that extra-crispy exterior. Cornstarch, when fried, creates a delicate, crunchy crust that locks in the chicken’s moisture. It’s lighter than a flour-based coating and contributes to the signature texture of salt and pepper chicken.
Salt & Pepper: As the name suggests, these are fundamental. The salt not only seasons the chicken but also helps draw out moisture, contributing to crispiness. Freshly ground black pepper adds a pungent kick. Don’t be shy with the seasoning; this dish is meant to be bold.
Chinese Five Spice: This ingredient is non-negotiable for authentic flavor. Found in most grocery stores’ spice aisles, it’s typically a blend of cinnamon, fennel seeds, star anise, cloves, and white pepper (though variations exist). It imparts a warm, sweet, savory, and slightly pungent aroma that defines the dish. Skipping it would mean missing out on a unique and essential flavor profile.
The Aromatic Vegetables:
Toasted Sesame Oil: This isn’t just any sesame oil! Ensure you use *toasted* or *dark* sesame oil. It has a significantly deeper, nuttier, and more intense flavor compared to regular, lighter sesame oil, which is processed differently. It’s used as a finishing oil here, adding a rich, aromatic layer to the sautéed vegetables.
Finely Diced White Onion: Provides a subtle sweetness and aromatic base when sautéed, complementing the other bold flavors.
Fresno or Thai Chilis: These peppers bring a vibrant heat and fresh, slightly fruity note. Removing the seeds will temper the spice level slightly, allowing more of their flavor to shine through. Adjust the quantity based on your desired level of heat.
Jalapeño: Similar to the other chilis, jalapeños add a fresh, green heat. Removing the seeds reduces their intensity. Their crisp texture also adds a nice contrast to the soft chicken.
Minced Garlic: Fresh garlic is indispensable in Chinese cuisine. When quickly sautéed, it releases a potent, aromatic flavor that permeates the dish, creating a fragrant foundation for the chicken and chilis.
Sliced Scallions: Used as a final garnish, scallions add a fresh, mild oniony flavor and a pop of green color, providing a delightful visual and aromatic finish.
Essential Kitchen Tools for Frying Success
While this recipe aims for simplicity, having the right tools on hand can make the cooking process smoother, safer, and more successful. These recommended pieces of equipment will help you achieve perfectly crispy and deliciously cooked Salt and Pepper Chicken every time.
Recommended Equipment:
- Taylor Precision Products Stainless Steel Candy Deep Fry Food Cooking Kitchen Thermometer: Accurate oil temperature is the key to perfectly fried chicken – golden and crispy on the outside, juicy on the inside. This inexpensive thermometer conveniently clips to the side of your pot, providing continuous temperature readings. This allows you to maintain the ideal oil temperature (360-375°F or 180-190°C), preventing the chicken from becoming greasy (if too cool) or burnt and dry (if too hot).
- ThermoPro TP03 Digital Instant Read Meat Thermometer: This is a must-have for any home cook. An instant-read thermometer ensures your chicken reaches a safe internal temperature of 165°F (74°C) without overcooking it. It eliminates guesswork, guaranteeing tender, safe chicken every time. I personally use mine almost daily for various proteins!
- Fullstar Vegetable Chopper: If you frequently chop vegetables, this tool is a game-changer. It comes with different sized blades, and the smaller blade is perfect for quickly and uniformly dicing the chilis, jalapeños, and onions required for this recipe. Uniform pieces not only look better but also cook more evenly, enhancing the overall presentation and flavor.
- Large Heavy-Duty Pot or Skillet: A sturdy, heavy-bottomed pot (like a Dutch oven or cast iron skillet) is crucial for even heat distribution during shallow frying. This prevents hot spots and ensures your oil maintains a consistent temperature for optimal crisping.
- Large Resealable Bag or Bowl: For the coating process, a large resealable bag offers the easiest cleanup and most even coating. Alternatively, a spacious bowl works well for tossing the chicken with the cornstarch and spices.
- Slotted Spoon or Spider Strainer: These tools are essential for safely transferring the hot chicken from the oil to the paper towel-lined plate. They allow excess oil to drain off quickly, ensuring your chicken stays crispy.
- Paper Towel-Lined Plate or Wire Rack: After frying, it’s vital to place the cooked chicken on a surface that allows excess oil to drain. A plate lined with several layers of paper towels or a wire rack set over a baking sheet works perfectly to keep the chicken crisp and prevent it from becoming soggy.
Crafting Your Crispy Salt and Pepper Chicken: Step-by-Step Guide
Follow these detailed instructions to create the ultimate crispy and flavorful Salt and Pepper Chicken. Remember, preparation is key for a smooth frying process!
Quick Overview:
- Heat the oil to the correct temperature.
- Coat the chicken evenly with the spice blend.
- Shallow fry the chicken in batches until golden and cooked through.
- Sauté the peppers, onions, and garlic.
- Combine and serve immediately!
Detailed Instructions:
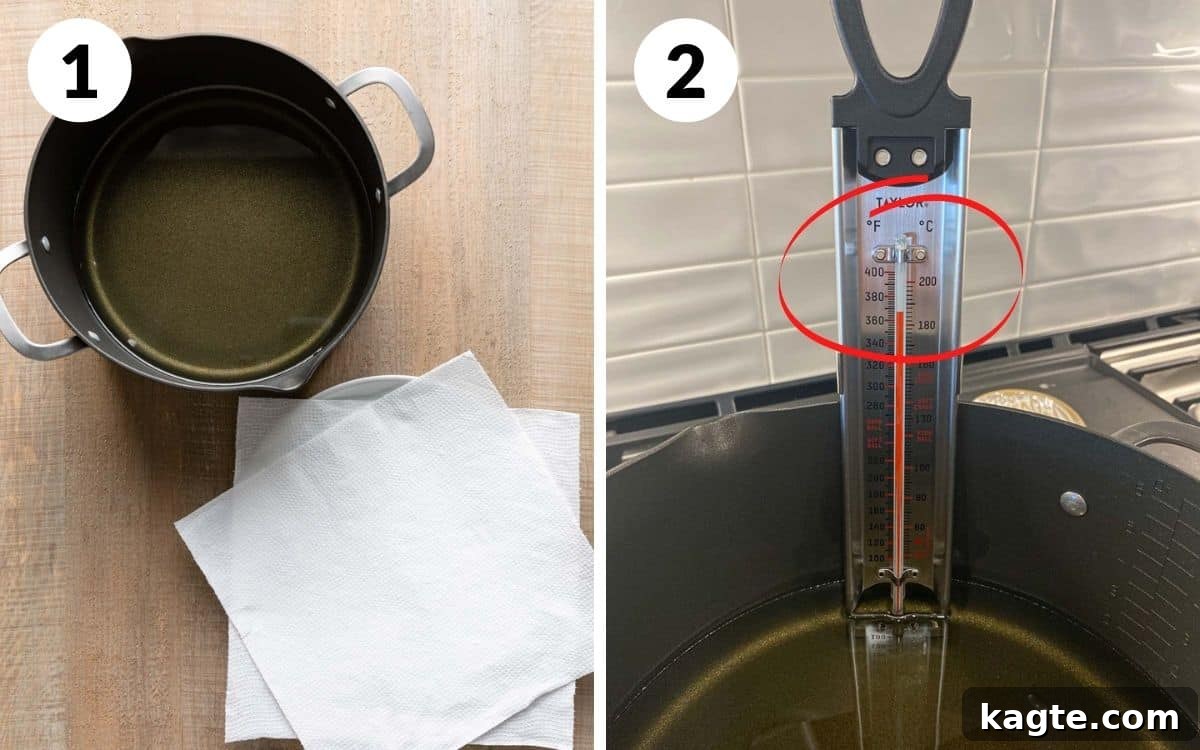
Step 1: Begin by preparing your landing zone for the fried chicken. Line a large plate with several layers of paper towels, or set up a wire rack over a baking sheet. This will absorb excess oil and help keep your chicken wonderfully crispy. Next, select a large, heavy-duty pot or deep skillet and fill it with about 1.5 inches of your chosen vegetable oil. This depth is perfect for shallow frying, allowing the chicken to cook evenly without requiring a large volume of oil.
Step 2: Place the pot of oil over medium to medium-high heat. Attach your deep-fry thermometer to the side of the pot and allow the oil to heat gradually until it reaches a temperature between 360-375°F (180-190°C). Maintaining this temperature is crucial for crispy, non-greasy chicken. Be aware that the oil temperature will naturally drop slightly when the cold chicken is added, so a slightly higher starting temperature helps. Always exercise caution when working with hot oil.
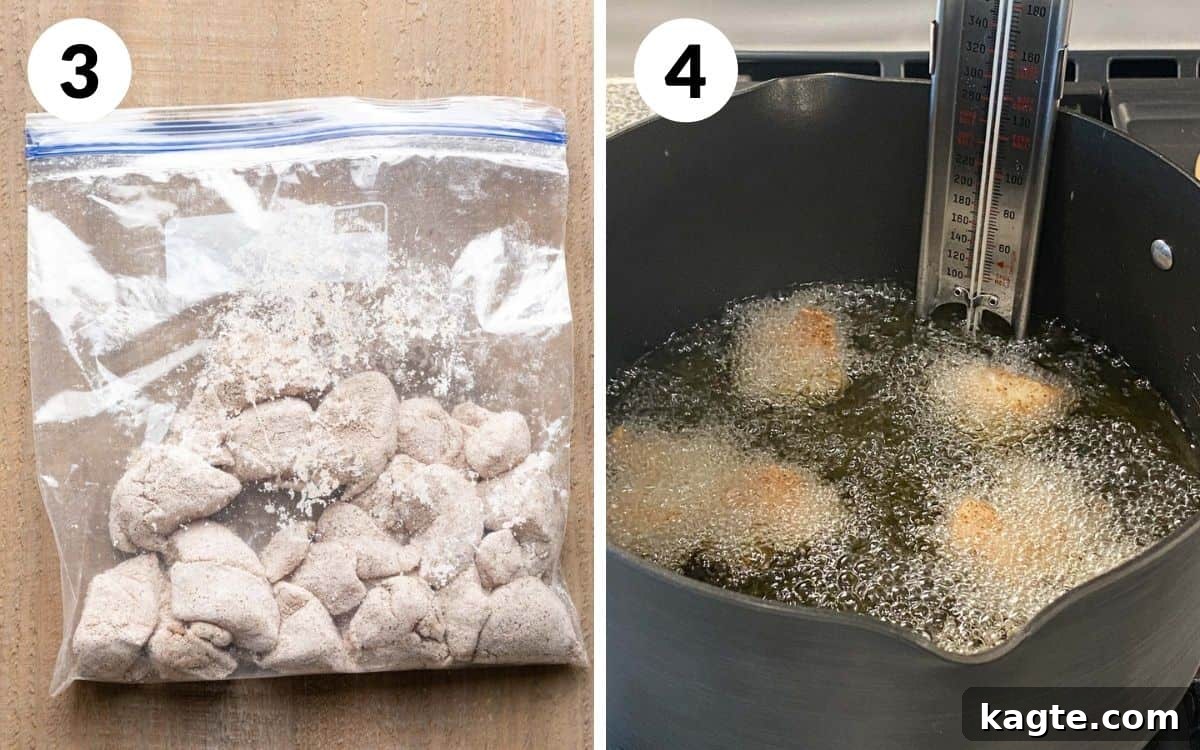
Step 3: While the oil is heating, prepare the chicken. In a large resealable bag (or a spacious bowl), combine the diced chicken pieces with the cornstarch, salt, black pepper, and Chinese five spice. Seal the bag securely, ensuring there’s plenty of air inside, and shake vigorously for about a minute. This method ensures that every piece of chicken is evenly coated with the flavorful spice mixture, creating that desirable crispy crust. If using a bowl, toss the chicken thoroughly until uniformly coated.
Step 4: Once the oil is at the correct temperature, carefully add about half of the coated chicken pieces to the hot oil. It’s essential not to overcrowd the pot; ensure that none of the chicken pieces are touching. Overcrowding will significantly drop the oil temperature, leading to soggy, rather than crispy, chicken. Fry the chicken for 3-5 minutes, or until it turns a beautiful golden brown and reaches an internal temperature of 165°F (74°C) as measured by your instant-read thermometer. The chicken cooks surprisingly fast, so keep a close eye on it.
PRO TIP: Using a large resealable bag for coating the chicken minimizes mess and ensures an even distribution of spices, making cleanup significantly easier.
PRO TIP: Always use a reliable thermometer to check both your oil’s temperature and the chicken’s internal temperature. This guarantees safe, perfectly cooked results every time.
PRO TIP: Resist the urge to overload your frying pot. Frying in smaller batches is crucial for maintaining consistent oil temperature and achieving evenly cooked, delightfully crispy chicken.
Step 5: Using a slotted spoon or spider strainer, carefully remove the cooked chicken from the hot oil. Transfer the chicken immediately to your prepared plate lined with paper towels (or the wire rack). This allows any excess oil to drain off, keeping the chicken crisp and delicious.
Step 6: Adjust the oil temperature if necessary, allowing it to come back up to 360-375°F (180-190°C). Repeat the frying process with the remaining coated chicken pieces, following the same guidelines for batch size and cooking time. Ensure all chicken is golden brown and cooked through before proceeding.
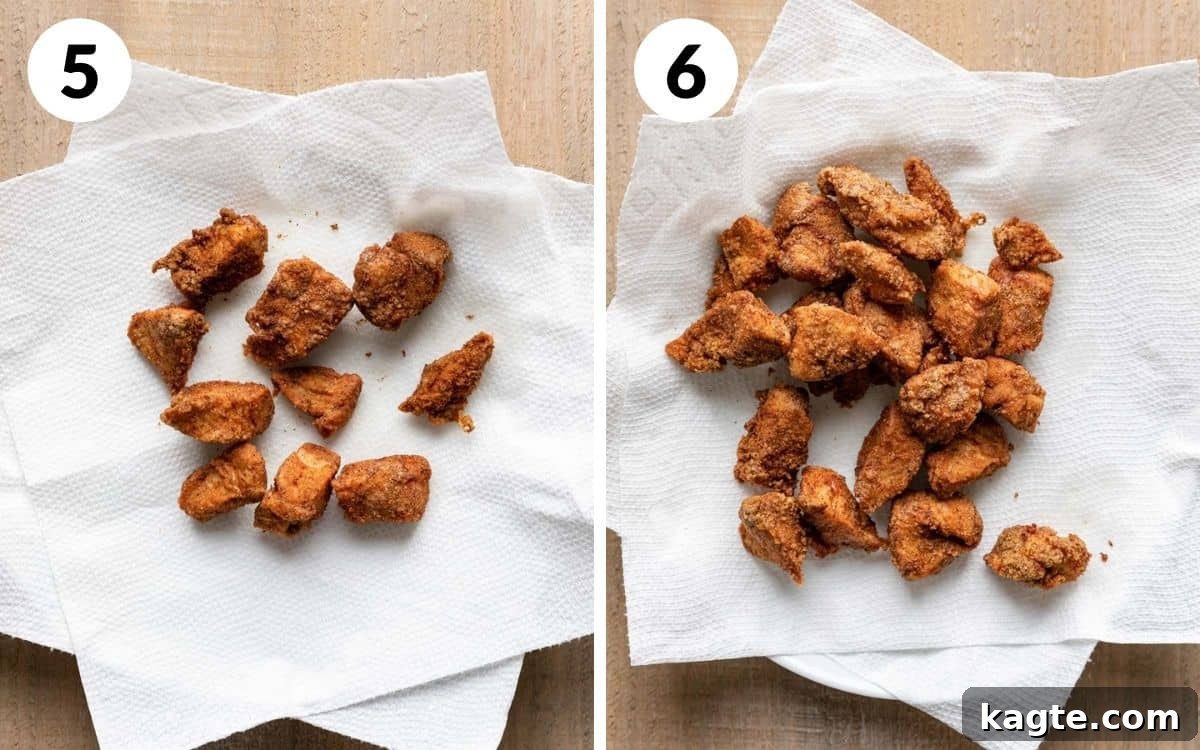
PRO TIP: Placing your freshly fried chicken on a paper towel-lined plate or a wire rack immediately after cooking is essential. This crucial step allows excess oil to drain away, preventing the chicken from becoming soggy and ensuring maximum crispiness.
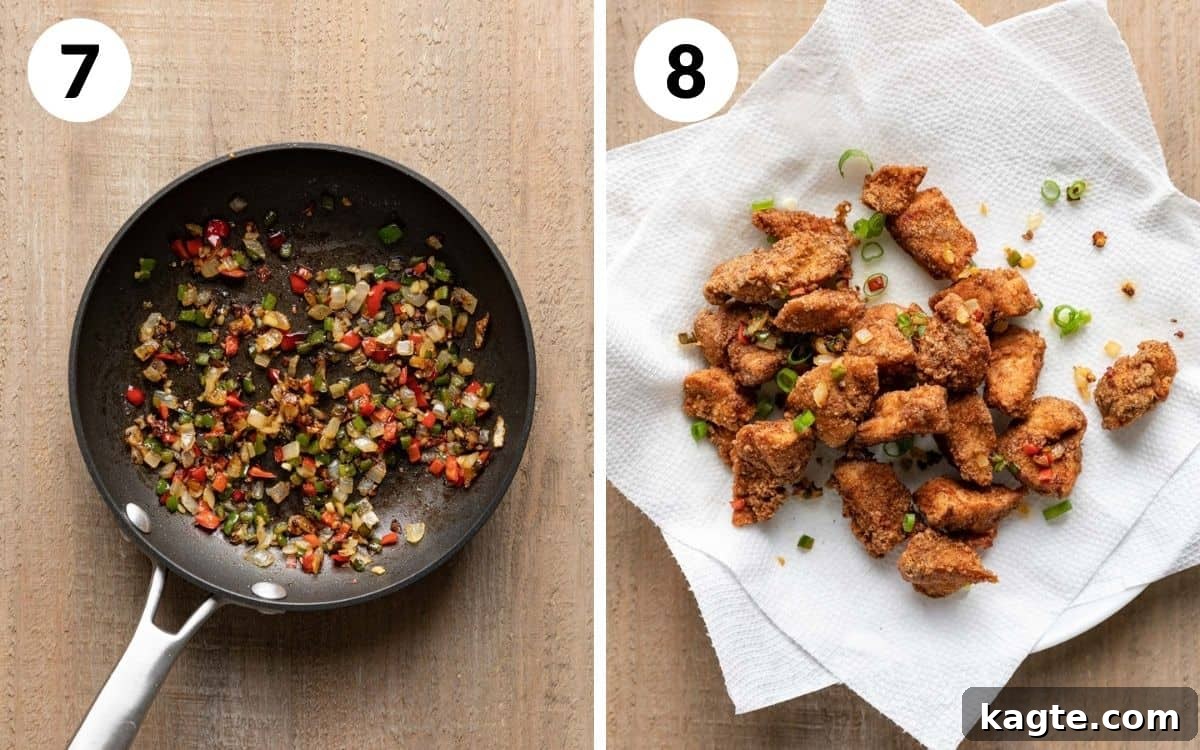
Step 7: While the last batch of chicken fries (or immediately after all chicken is fried), heat the toasted sesame oil in a separate skillet over medium heat. Add the finely diced white onion, chilis (Fresno or Thai), jalapeño, and minced garlic to the skillet. Sauté for just a few minutes, stirring frequently, until the aromatics become fragrant and slightly softened. Be careful not to burn the garlic.
Step 8: Once the aromatic vegetables are perfectly fragrant, transfer them directly over the crispy Salt and Pepper Chicken. Garnish generously with the sliced scallions. Serve your homemade Salt and Pepper Chicken immediately while it’s still hot and wonderfully crispy, perhaps with a side of steamed rice or noodles for a complete meal.
Make Ahead, Storage & Reheating Instructions
While this Salt and Pepper Chicken is absolutely at its best when enjoyed fresh and hot, there are strategies for storing and reheating leftovers to preserve as much of its deliciousness as possible.
Best Served Fresh:
For optimal crispiness and flavor, this salt and pepper chicken is undeniably best served immediately after it’s cooked. The fresh-from-the-fryer crunch is unparalleled. We do not recommend making this dish entirely in advance if you want to experience its peak quality.
Refrigerator Storage:
If you have any leftovers, allow the chicken to cool completely to room temperature before storing. Transfer the cooled salt and pepper chicken to an airtight container and store it in the refrigerator for up to 3-4 days. Prompt cooling and proper sealing are key to maintaining freshness and preventing bacterial growth.
- Reheating from the Fridge: The microwave is generally not recommended for reheating fried chicken, as it tends to make it soggy. For best results, reheat the chicken in an air fryer at 360°F (180°C) for 3-4 minutes, or until thoroughly heated and re-crisped. Alternatively, you can use a conventional oven or toaster oven at 375°F (190°C) for 8-10 minutes, flipping halfway, until crispy and hot.
Freezer Storage:
To freeze cooked salt and pepper chicken, first allow it to cool completely in the refrigerator overnight. Once thoroughly chilled, arrange the chicken pieces in a single layer on a baking sheet or plate lined with parchment paper, ensuring they don’t touch. Freeze for 4-6 hours, or until solid. This prevents the pieces from sticking together. Once frozen, transfer the chicken to a heavy-duty airtight freezer bag or container. It can be stored frozen for 2-3 months.
- Reheating from the Freezer: Again, avoid the microwave for frozen fried chicken. For the crispiest outcome, reheat the frozen chicken directly in an air fryer at 400°F (200°C) for 9-11 minutes, making sure to shake the basket halfway through to ensure even heating and crisping. For oven reheating, place frozen chicken on a baking sheet and bake at 400°F (200°C) for 15-20 minutes, flipping once, until hot and crispy.
Chef’s Secrets for Success
Achieving restaurant-quality Salt and Pepper Chicken at home is entirely possible with a few insider tips. These expert suggestions will guide you to a crispy, flavorful, and perfectly cooked dish every time.
- Be Prepared (Mise en Place): The frying process moves quickly, so having everything ready before you start is crucial. Lay out your paper towel-lined plate or wire rack, have your slotted spoon or tongs ready, and ensure all your chicken is coated. This “mise en place” approach prevents frantic scrambling and ensures a smooth, safe cooking experience from start to finish.
- Utilize Thermometers Religiously: Guesswork is the enemy of perfect frying. An oil thermometer is essential to maintain the optimal frying temperature (around 360-375°F or 180-190°C), which ensures the chicken crisps beautifully without absorbing too much oil or burning. Simultaneously, an instant-read meat thermometer is your best friend for verifying that the chicken reaches a safe internal temperature of 165°F (74°C) without becoming dry and tough. These tools are invaluable for consistency and food safety.
- Embrace the Bag Shake Method for Coating: While a bowl can work, a large resealable bag is truly superior for coating the chicken. Place the chicken pieces and all dry coating ingredients into the bag, seal it with some air inside, and shake vigorously. This method ensures every nook and cranny of the chicken is uniformly covered, leading to a more consistent and wonderfully crispy crust on every piece. Plus, it significantly reduces cleanup!
- Never Overload the Frying Pot: This is perhaps one of the most critical rules of frying. Adding too much chicken at once will drastically lower the oil’s temperature. A lower oil temperature means the chicken will take longer to cook, absorb more oil, and ultimately turn out soggy and greasy instead of crisp. Depending on the size of your pot, cooking in two or even three batches is usually ideal to maintain consistent heat and achieve perfectly golden, crispy results.
- Serve the Salt and Pepper Chicken Hot and Fresh: This dish truly shines when served immediately. The crispness of the chicken is at its peak right out of the fryer, and the aromas of the sautéed chilis and garlic are most potent. While leftovers can be reheated, the fresh experience is unmatched, so try to time your cooking to coincide with serving.
- Practice Oil Safety: Frying involves hot oil, so safety is paramount. Always add food to oil gently to avoid splattering. Never leave hot oil unattended. Have a lid nearby to smother any potential oil fires (never use water). Once you’re done frying, allow the oil to cool completely before carefully disposing of it in a non-recyclable container, never down the drain.
Important Recipe Notes & Customization
A few key considerations will help you master this Salt and Pepper Chicken and tailor it to your personal preferences, ensuring a truly enjoyable culinary experience.
- The Chicken is Intentionally Salty: The name “Salt and Pepper Chicken” is a direct indicator of its bold flavor profile. Expect the chicken itself to have a pronounced salty taste, which is a hallmark of the dish. This saltiness is designed to be balanced by the fresh aromatics, the subtle sweetness of the onion, and often by accompanying side dishes like plain rice or noodles, which help to mellow the intensity. Don’t worry, it’s meant to be robust!
- The Peppers Bring the Heat: The inclusion of Fresno or Thai chilis and jalapeños means this dish has a noticeable spicy kick. If you or your guests are particularly sensitive to heat, you have a few options: reduce the number of chilis, ensure all seeds and membranes are removed (as this is where much of the capsaicin resides), or omit the peppers entirely for a milder version. You can always add a pinch of red pepper flakes to individual servings if some prefer more heat.
- This Recipe Can Be Easily Doubled: Planning for a larger gathering or simply want more leftovers? This recipe scales up beautifully. Simply double all the ingredient quantities. When frying, remember the crucial rule of not overcrowding the pot, so you will likely need to cook the chicken in more batches. If preparing for a crowd, you can keep the cooked chicken warm in a low oven (around 200°F or 90°C) on a wire rack over a baking sheet. However, be mindful that holding it for extended periods might slightly dry it out, so try to serve as soon as possible.
Exciting Variations to Try
While the classic Salt and Pepper Chicken recipe is perfect as is, it also serves as a fantastic base for culinary experimentation. Don’t be afraid to get creative and adapt the flavors to your liking!
- For an Extra Spicy Kick: If you’re a true heat seeker, elevate the spice level by adding about 1/4 to 1/2 teaspoon of cayenne pepper to the chicken coating mixture. Cayenne is quite potent, so start with a smaller amount and adjust to your preference. You can also leave some seeds in your fresh chilis for a more intense fiery punch.
- Lemon Pepper Twist: For a zesty variation, consider adding 1 teaspoon of fresh lemon zest to the chicken coating along with an extra half teaspoon of freshly cracked black pepper. This provides a bright, citrusy aroma that pairs wonderfully with the fried chicken and balances the richness.
- Sweet & Spicy Glaze: After frying, quickly toss the chicken in a light homemade glaze. A simple mix of honey or maple syrup, a touch of soy sauce, rice vinegar, and a pinch of red pepper flakes can add an irresistible sweet and tangy coating that complements the crispy texture.
- Vegetarian/Vegan Alternative: This concept isn’t just for chicken! For a plant-based option, try coating firm tofu cubes or thick slices of king oyster mushrooms in the same cornstarch and spice mixture. Shallow fry until golden and crispy, then finish with the sautéed aromatics. It makes for a delicious and satisfying alternative.
- Different Proteins: The “salt and pepper” treatment can be applied to other proteins as well. Experiment with shrimp for a quicker-cooking option, or even thin slices of pork. Adjust frying times accordingly to ensure safe and proper cooking.
- Add a Splash of Soy Sauce: For a deeper umami flavor in the finish, add a quick splash (about 1 tablespoon) of light soy sauce to the sautéed chilis and garlic right before you combine them with the chicken. This adds another layer of classic Asian flavor.
Frequently Asked Questions
Common Questions About Salt and Pepper Chicken:
Cornstarch plays a crucial role in achieving that signature crispy texture in fried chicken, especially in many Asian-style preparations. Unlike flour, cornstarch fries up to create a lighter, crispier, and more delicate crust. It also helps to absorb moisture from the chicken’s surface, which prevents steaming and promotes maximum crunch. Additionally, it helps the chicken achieve a beautiful deep golden-brown color during frying, making the dish visually appealing.
The precise origin of “Salt and Pepper Chicken” is a topic with some historical ambiguity, but it is widely recognized as a staple in Cantonese cuisine, particularly found in Hong Kong and Southern China. Many sources point to its deep roots in the rich culinary traditions of this region. However, there are also claims that similar dishes, using a salt and pepper seasoning, may have evolved or are popular in Taiwanese cuisine. Regardless of the exact pinpointed origin, it’s a beloved dish that has become a popular item in Chinese restaurants and takeaways globally, cherished for its simple yet incredibly satisfying flavor profile.
While this recipe specifically calls for shallow frying to make it more accessible and reduce oil usage, you can certainly deep fry the chicken. If deep frying, use enough oil to fully submerge the chicken pieces. Maintain the same oil temperature (360-375°F or 180-190°C) and cooking temperature (165°F or 74°C internal). Deep frying might result in an even crispier and more uniform crust, but remember to follow all deep-frying safety precautions, including using a deep, heavy-bottomed pot and never overcrowding.
Salt and Pepper Chicken is incredibly versatile and pairs well with a variety of sides. For a classic takeout experience, serve it with steamed white rice or egg fried rice. Vegetable sides like stir-fried broccoli, sautéed bok choy, or a simple cucumber salad offer a refreshing contrast. Noodles, such as lo mein or chow mein, also make an excellent accompaniment. For a lighter meal, consider a fresh green salad with a light vinaigrette to balance the rich flavors of the chicken.
Yes, this recipe can easily be made gluten-free! Cornstarch is naturally gluten-free, which is great for the coating. The main ingredients to check are the Chinese five-spice blend (ensure it doesn’t contain hidden gluten fillers, though most are pure spice) and any seasoned salt or pepper blends you might use. As long as all your spices are certified gluten-free, this recipe is a fantastic choice for those with gluten sensitivities or celiac disease.
Explore More Delicious Recipes
If you loved this Salt and Pepper Chicken, you’re in for a treat! Discover more exciting recipes that complement this dish or offer new culinary adventures. From comforting pumpkin dishes to delightful baked goods, there’s something for everyone to enjoy.
You Might Also Love These:
Fall
20 Sweet Pumpkin Recipes for Fall (From Breakfast to Dessert)
Fall
25 Savory Pumpkin Recipes for Fall
Bread
Savory Zucchini Muffins with Cheddar Cheese
Bread
Chocolate Chunk Banana Bread (Easy & Moist)
Watch the How-To Video
A detailed video guide for making this crispy Salt and Pepper Chicken will be embedded here soon! It will walk you through each step, ensuring you achieve perfect results and confidentially master this delicious recipe.

Salt and Pepper Chicken
By Brianna May
This Salt and Pepper Chicken recipe creates incredibly crispy, spice-packed chicken that’s super easy to prepare. Featuring a simple shallow-fry and coated in a bag for easy cleanup, it’s finished with fresh chilis, scallions, and garlic for an explosion of flavor.
Prep Time: 10 minutes
Cook Time: 10 minutes
Total Time: 20 minutes
Servings: 4 people
Ingredients
- Vegetable oil for frying (enough for 1.5 inches deep in your pot)
- 1 pound boneless, skinless chicken breast or thighs, diced into 1-inch pieces
Coating
- 1/4 cup cornstarch
- 1 1/2 teaspoon salt
- 1 teaspoon pepper
- 1 teaspoon Chinese five spice
Vegetables & Aromatics
- 2 teaspoons toasted sesame oil
- 1/4 cup finely diced white onion
- 1-2 Fresno or Thai chilis, seeds removed & diced (adjust to spice preference)
- 1 jalapeño, seeds removed & diced (adjust to spice preference)
- 3-4 cloves garlic, minced
- 1/4 cup sliced scallions, for garnish
Instructions
- Review all recipe notes and instructions thoroughly before beginning to ensure a smooth cooking process.
- Line a large plate with several layers of paper towels, or set a wire rack over a baking sheet to prepare for draining the fried chicken. Fill a large, heavy-bottomed pot or deep skillet with approximately 1.5 inches of neutral-flavored vegetable oil.
- Heat the oil over medium to medium-high heat until your deep-fry thermometer reads between 360-375°F (180-190°C). Monitor the temperature carefully, as it will fluctuate.
- While the oil heats, combine the diced chicken, cornstarch, salt, pepper, and Chinese five spice in a large resealable bag. Seal the bag and shake vigorously for about 1 minute, ensuring the chicken is thoroughly and evenly coated with the spice mixture.
- Once the oil is at the target temperature, carefully add about half of the coated chicken pieces to the hot oil. Ensure there’s enough space between pieces to prevent overcrowding, which can lower oil temperature and result in soggy chicken. Fry for 3-5 minutes, or until the chicken is golden brown and an instant-read thermometer inserted into the thickest part reads 165°F (74°C).
- Using a slotted spoon or spider strainer, remove the cooked chicken from the oil and immediately transfer it to your prepared paper towel-lined plate or wire rack to drain any excess oil.
- Allow the oil to return to the proper temperature if it has dropped, then repeat the frying process with the remaining chicken pieces, following the same guidelines for batch size and cooking time.
- In a separate skillet, heat the toasted sesame oil over medium heat. Add the finely diced white onion, chilis (Fresno or Thai), jalapeño, and minced garlic. Sauté for 2-3 minutes, stirring occasionally, until the vegetables are fragrant and slightly softened. Be careful not to burn the garlic.
- Once the aromatics are cooked, spoon them directly over the hot, crispy salt and pepper chicken. Garnish generously with the sliced scallions. Serve immediately while hot for the best flavor and texture.
Notes
- Vegetable Oil: You can swap vegetable oil for any neutral-flavored oil with a high smoke point, such as safflower, peanut, corn, or grapeseed oil.
- Chinese Five Spice: This essential spice blend, typically consisting of cinnamon, fennel, star anise, cloves, and white pepper, is crucial for the unique flavor. Do not skip it!
- Toasted Sesame Oil: Always use toasted or dark sesame oil, which has a distinctively richer, nuttier flavor compared to regular light sesame oil.
- Refrigerator Storage: Store leftover salt and pepper chicken in an airtight container in the fridge for 3-4 days. Reheat in an air fryer or oven for best crispiness.
- Be Prepared: Have all your tools (lined plate, tongs, thermometers) ready before you start frying, as the chicken cooks very quickly.
- Use Thermometers: Essential for accurate oil temperature (360-375°F) and chicken internal temperature (165°F) to ensure perfect results and food safety.
- Shake the Chicken in a Bag: This method ensures an even coating and significantly reduces mess during preparation.
- Do Not Overload the Frying Pot: Fry in batches to maintain consistent oil temperature and achieve crispy, evenly cooked chicken.
- The Peppers are Spicy: Adjust the quantity of chilis and jalapeños, or remove seeds, to suit your desired spice level.
Nutrition Information
Serving: 1 serving | Calories: 193kcal | Carbohydrates: 11g | Protein: 25g | Fat: 5g | Saturated Fat: 1g | Polyunsaturated Fat: 1g | Monounsaturated Fat: 2g | Trans Fat: 1g | Cholesterol: 73mg | Sodium: 1007mg | Fiber: 1g | Sugar: 1g
Nutrition information is automatically calculated and should only be used as an approximation.